
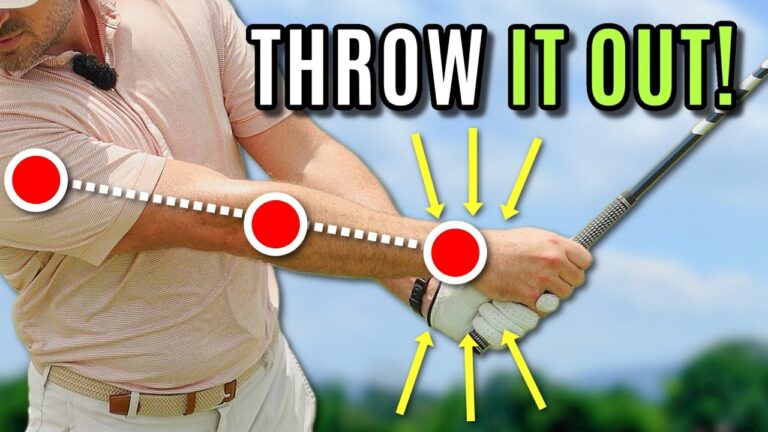

If you are trying to stop slicing your driver, add distance, and find more fairways, swinging harder is rarely the answer. A common problem is what happens just after the downswing starts: your arms, hands, and club get pulled inward toward your body rather than being sent outward through the ball.
That inward pull can create a familiar combination of misses: pulls, weak fades, high slices, and a held-off finish that feels like a chicken wing. It also makes it difficult to release the driver naturally, limiting speed and robbing you of the solid, powerful strike you are chasing.
The solution is built around three simple swing ideas: away, farther, and freely released. You will begin with a no-ball motion, bring that feel gradually down toward the ground, then apply it to full driver swings.
Table of Contents
- Step 1: Identify Why You Cannot Stop Slicing Your Driver
- Step 2: Use the Tabletop Drill to Stop Slicing Your Driver
- Step 3: Bring the Out-and-Away Feel Down in Stages
- Step 4: Let the Clubhead Work Farther From Your Body
- Step 5: Add a Natural Free Release for Driver Distance
- Step 6: Hit Driver Shots With One Simple Swing Thought
- Step 7: Adjust the Driver Swing if You Start Pushing or Hooking
- Step 8: Make Away, Farther, and Freely Released Your Driver Checklist
Step 1: Identify Why You Cannot Stop Slicing Your Driver
Before changing your motion, recognize the pattern you want to eliminate. If your driver tends to pull left, fade weakly to the right, or slice dramatically, you may be pulling the handle and clubhead inward as you approach and move past impact.
When the club gets pulled close to your body, three related issues often appear:
- Hands and club move toward you: The clubhead does not travel outward enough through impact.
- The club stays too close: Both the grip end and clubhead remain crowded near your body rather than extending away.
- The release is restricted: Your arms may look cramped, your lead arm may fold awkwardly, and the clubface can remain open.
These pieces tend to travel together. Pulling inward makes it harder to rotate and release the club freely. Instead of creating a powerful, athletic motion through the hitting area, you may feel as if you are trying to drag the handle around your body.
The better alternative is equally simple:
- Send the clubhead out and away, not inward.
- Allow the clubhead and arms to work farther from your body, not closer.
- Allow a natural free release, not a held-off finish.
This is not an instruction to force your hands far forward or shove the club toward the target indefinitely. It is a feel that changes the way the clubhead works through the ball. Your body rotation will naturally bring the club around after it has moved outward.
Step 2: Use the Tabletop Drill to Stop Slicing Your Driver
The tabletop drill gives you a clear, simple way to feel the correct outward motion before you hit a ball. You can do it at home with a club or any safe object that is easy to hold.
Stand upright and hold the club in front of you, roughly level with the ground, as though the club were resting on a tabletop. Keep your arms extended comfortably, not rigidly.
From there, rehearse these movements:
- Move your hands and club back behind your trail shoulder while keeping the club roughly level.
- Imagine a ball positioned in front of you at that same height.
- From the backswing position, throw the clubhead out and away toward that imaginary ball.
- Allow the clubhead to arrive about even with the ball, rather than dragging the handle forward while the clubhead lags far behind.
This drill works because the correct direction becomes obvious. If a ball were level with the ground in front of you, you would not pull the club inward toward your chest to reach it. You would send the clubhead outward toward it.
Make several slow repetitions. Your goal is not speed. Build a vivid feel that the clubhead is being tossed away from you instead of yanked inward.
Step 3: Bring the Out-and-Away Feel Down in Stages
Once the tabletop version feels clear, keep the same motion but gradually lower it toward a normal driver swing. This progression turns an easy visual drill into a practical way to stop slicing your driver.
Start halfway to the ground
Lower your hands and club until they are roughly halfway between the tabletop position and the ground. Move the hands, arms, and club back behind your trail shoulder. Then repeat the same feel: throw the clubhead out and away from you.
Move to just above the ball
Next, rehearse from a position just above the ball. Bring the club back behind your trail shoulder, then feel the clubhead travel outward toward the ball. Do not stop the motion at impact. Feel the club continue outward for a few feet past the ball.
A target line placed on the ground can make this easier to visualize. From your perspective, feel as though the clubhead is tossing outward along that ball-to-target line. For many golfers who pull and slice, it may even feel as though the clubhead is initially working slightly to the right of that line.
That is a feel, not necessarily the literal path of the club. The purpose is to offset the inward pull that has been producing an excessively out-to-in motion.
Step 4: Let the Clubhead Work Farther From Your Body
The second key to more driver distance is closely connected to the first. When you throw the clubhead outward, the entire club naturally works farther from you through impact and early follow-through.
Notice what happens when the club is pulled inward. The butt end of the club is close to your body, and the clubhead is close as well. The space between your body and the club collapses. It becomes difficult to create a full release or maintain athletic extension.
When you send the clubhead out and away, the grip end and clubhead both work farther from your body. You are not trying to stretch your arms as far as physically possible. Instead, you are allowing the club to move outward rather than crowding it inward.
This is a useful checkpoint after impact:
- Does the clubhead look as though it is moving out from your body?
- Do your hands and the grip end have room rather than being trapped against your torso?
- Does the motion look extended and athletic instead of narrow and cramped?
Strong drivers of the ball show this outward clubhead movement. The club eventually works back around because your body continues to rotate, not because you forcibly pull the club into your body immediately after impact.
For a golfer fighting pulls and slices, the priority is clear: feel out and away. That feel can create a more playable draw and often unlock speed without an effort to swing harder.
Step 5: Add a Natural Free Release for Driver Distance
The third part of the drill is the free release. If you pull the club inward and hold the face off, you make it difficult for the club to release naturally. You may see a lead arm that remains tense, a clubface that stays open, and a ball that peels weakly right.
A natural release has a more athletic look. After impact, the club rehinges, your lead arm folds and rotates, and the clubhead is allowed to pass through instead of being held back.
Use these simple feels to encourage the release:
- Allow the club to rehinge after impact.
- Let your lead arm fold and rotate naturally.
- Feel your lead elbow moving slightly down rather than pointing up toward the sky.
- Feel the glove logo and knuckles turn slightly down through the release.
- Allow the toe of the clubhead to feel as if it passes the heel.
These are moderate feels. You do not need to aggressively roll the clubface shut. If you are used to hitting a large slice, however, you should not fear a temporary overdraw. A few shots that curve left can be a useful sign that you are finally allowing the club to release.
Trying to hold the clubface open is not a reliable way to control your driver. A free release gives you a more functional motion, and it is easier to refine a small draw or occasional hook than it is to build distance and consistency around a weak slice.
Step 6: Hit Driver Shots With One Simple Swing Thought
After the rehearsals, begin hitting balls. Avoid stacking several technical thoughts at once. Your main cue should be:
Throw the clubhead out and away, let it get farther from you, then allow it to release.
Start at reduced speed if necessary. Make a rehearsal first, then step in and recreate the same sensation with the ball present. You want the motion to feel continuous through impact, not like you are trying to steer the clubhead to the ball and stop it there.
A productive practice sequence looks like this:
- Make two tabletop drill rehearsals.
- Make two halfway-down rehearsals.
- Make two rehearsals just above the ball, extending the clubhead past it.
- Hit one driver at comfortable speed using the out-and-away cue.
- Repeat the sequence, gradually increasing speed only when contact and start direction improve.
This approach is especially useful if you feel that your driver should travel farther but your swing appears effortful. Better sequencing, outward extension, and release can improve your strike and speed without needing to force the issue.
Step 7: Adjust the Driver Swing if You Start Pushing or Hooking
The out-and-away feel is primarily designed for golfers who pull and slice. If you overdo the movement and begin hitting pushes or hooks, do not abandon the drill entirely. You simply need to change the direction of the feel slightly.
Continue to feel the clubhead move out from you and continue to release it. But rather than feeling as if you throw the clubhead straight out or slightly right of the target line, feel your body turn the club more around you.
That adjustment helps remove the push and hook while preserving the valuable parts of the motion: outward clubhead travel, space between your body and the club, and a natural release.
Use the ball flight to guide your priority:
- Pulls and slices: Focus strongly on throwing the clubhead out and away from your body.
- Pushes and hooks: Keep the outward throw, but feel more body rotation so the club travels around you sooner.
The push-and-hook pattern is generally a later refinement. If you are still fighting a large slice, solve the inward pull and held-off release first.
Step 8: Make Away, Farther, and Freely Released Your Driver Checklist
The best way to make this driver lesson stick is to use a short checklist before each practice shot. You do not need to chase a perfect-looking swing. You need a clear task that addresses the movement causing your miss.
- Away, not toward: Throw the clubhead outward rather than pulling it into your body.
- Farther, not closer: Let the arms, hands, and clubhead have room through impact.
- Freely released, not held on: Let the club rehinge as your arm folds and rotates.
For golfers trying to stop slicing a driver, this sequence offers a more useful alternative to simply aiming farther left or swinging with more effort. First train the motion at tabletop height. Then lower it halfway. Then bring it just above the ball, feeling the clubhead travel past the hitting area. Finally, take that same outward, athletic release into your full swing.
A driver that launches higher, starts closer to target, and turns over into a slight draw is built from a better motion through impact. Give yourself enough repetitions to replace the habit of pulling inward with the more powerful feel of tossing the clubhead out and away.
Frequently Asked Questions
Why do I pull and slice my driver at the same time?
Pulls and slices can occur when you pull your arms, hands, and club inward toward your body through impact. That inward action can create a cutting motion across the ball while preventing a natural release of the clubface.
What is the best drill to stop slicing your driver?
The tabletop drill is a simple starting point. Hold a club level in front of you, move it behind your trail shoulder, then throw the clubhead out and away toward an imaginary ball. Gradually lower the same feel until you can use it just above the ball.
Should I try to release the driver more to fix a slice?
Yes, but aim for a natural release rather than a forced hand flip. Let the club rehinge, allow your lead arm to fold and rotate, and feel the glove logo, knuckles, and elbow move slightly down through the follow-through.
What if the out-and-away driver feel causes hooks?
Keep the outward feel and free release, but feel your body turning the club more around you. This adjustment can reduce a push or hook without returning to the inward pull that causes slices.
0 Comments