
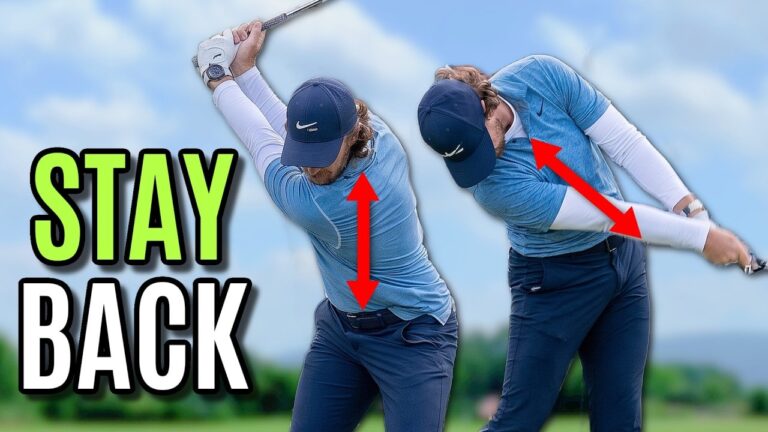

If you regularly pull the ball left, hit fat iron shots, or feel as if your swing gets steep and rushed on the way down, the answer may not be more effort or a bigger weight shift. The key is improving your golf downswing sequence.
A productive downswing lets your lower body move toward the target while your upper body stays back long enough for the club to approach from the inside. Add a later release of the club, and you can improve both your starting line and your strike. This three-part sequence is built around one simple order: head back, hips forward, club from inside, release later.
Table of Contents
- Step 1: Identify Why Your Golf Downswing Sequence Produces Pulls and Fat Shots
- Step 2: Keep Your Head Back While Your Hips Move Forward
- Step 3: Deliver the Club From Low and Inside in the Golf Downswing Sequence
- Step 4: Delay the Release to Stop Fat Shots
- Step 5: Blend the Three-Part Golf Downswing Sequence With Ball Flight Feedback
- Step 6: Create a Practice Plan That Makes the Move Stick
Step 1: Identify Why Your Golf Downswing Sequence Produces Pulls and Fat Shots
A ball that starts well left of target is commonly connected to a club path that travels too far out to in through impact. In simple terms, the club is working across the ball toward the left instead of approaching from a more neutral or inside direction.
One major cause is moving your upper body, head, and spine toward the target too early in the downswing. When your head and chest drift forward together, the club is often pushed high and outward in transition. From there, it has little room to do anything except cut across the ball.
This pattern can produce the familiar pull, pull draw, or low shot that starts left. It can also pair with an early release, where the shaft loses its angle relative to your arms too soon. Early release tends to move the low point of the swing behind the ball, making fat shots more likely.
The important distinction is that you do need pressure and weight moving toward your lead side. The issue is how you do it. Rather than sending your entire body forward as one unit, create separation:
- Your hips and lower body move forward.
- Your pressure shifts toward the lead foot.
- Your head and upper body remain back over the ball line.
- Your club can then approach from lower and more inside.
That separation is the foundation of this golf downswing sequence. It helps you avoid the common over-the-top pattern while still allowing you to strike the ball first.
Step 2: Keep Your Head Back While Your Hips Move Forward
The first priority is learning the feel of your lower body moving forward without your upper body chasing the target. At impact, your belt buckle should move toward or slightly beyond your lead ankle, while your head remains back around the original ball position.
For many golfers who pull the ball, this will feel dramatically different. You may feel as though your upper body is staying far behind the ball, even though your hips and weight are clearly moving forward. That exaggerated sensation is useful because your normal motion may feel centered even when your head is actually moving too far toward the target.
Use an object as head-position feedback
Start without a ball. Set up normally, then place an alignment rod, club, range basket, or another safe object just outside your trail-side head position. The object should give you a reference, not interfere with your swing.
Make a small backswing, then rehearse moving into impact. Push your hips forward while keeping your head from drifting into the object. Your arms, hands, and club should still extend toward the target, but your upper body should not lunge forward with them.
You can also use your shadow when practicing outdoors. Set up so your shadow gives you a visible head reference, then make slow follow-through rehearsals. Check that your head stays close to its original line while your hips continue forward and your trail foot begins to rotate.
Use the chest-up, shoulder-down feel
If simply thinking “head back” is not enough, use a more athletic body cue: chest up, trail shoulder down. Imagine placing a club across your sternum. As you move through impact, feel the handle of that imaginary club pointing more toward the sky, not down toward the ground.
Chest down tends to send the head and upper body forward. Chest up creates more extension through the ball and helps preserve the head-back position. At the same time, feel your trail shoulder working down rather than rising high and out. This adds the side bend that supports an inside club delivery.
Your checkpoint is not to hang back on your trail foot. Your pressure should still shift forward. The target is upper body back with lower body forward, not all of your weight staying behind the ball.
Step 3: Deliver the Club From Low and Inside in the Golf Downswing Sequence
Once you can maintain the head-back, hips-forward relationship, train the club path. For a golfer who tends to pull the ball, the club usually feels as if it is coming too high and too far out in the downswing. The corrective feel is low and inside.
Use your toe line as a visual guide. Place an alignment rod or club on the ground along the line of your toes. In a neutral delivery, the clubhead should work roughly down that line or slightly inside it. A pulled shot pattern often has the clubhead moving well outside that reference before it cuts across the ball.
A helpful visual is a clock face around the ball:
- The ball is at 12 o’clock.
- An over-the-top delivery may feel like the club is approaching around 2:30.
- A more functional delivery should travel closer to 3 o’clock.
- To create that real change, you may need to feel as though the club is coming from 4 o’clock.
This is not an instruction to force the club radically behind you. It is a practice feel designed to counter a path that is too steep and too far out. The club should arrive lower, underneath your shoulder line from a down-the-line view, rather than descending on or above that line.
Build the movement with half swings
Make a backswing to about left-arm-parallel or halfway back. From there, rehearse these two actions together:
- Bring the arms and club down from low and inside.
- Keep your head back while pushing your hips forward.
Then swing through at a slow pace. Keep your grip pressure relaxed. Tight hands often make it harder to sense the club falling into a shallower delivery.
Do not expect the new golf downswing sequence to feel normal immediately. If your normal motion is high and out with the head moving forward, a better motion may initially feel too shallow, too far inside, or too far back. That is often the gap between feel and reality.
Step 4: Delay the Release to Stop Fat Shots
Correcting your path and upper-body motion can greatly reduce pulls, but fat shots may continue if you release the club too early. An early release happens when the shaft moves farther away from your shoulder too soon in the downswing and your wrist angles disappear before the club reaches the ball.
To improve this, you need a later release pattern. Keep your hands moving forward toward the ball and target, but retain the shaft angle longer as you start down. In practice, you may need to feel the shaft and thumbs working more toward your body instead of immediately throwing the clubhead away from you.
This creates a narrower, more loaded sensation in transition. Your wrists may feel more set or bent back compared with your usual motion. The goal is not to hold the angle forever. You still release the club, but later, nearer to and through impact.
Practice the lag feel without a ball first
Begin with no ball and make a half backswing. As you transition down, feel the shaft staying closer to your shoulder rather than moving outward. Let your hands continue forward, then turn through.
This is a critical detail: do not keep your hands behind the ball in an attempt to preserve lag. Your hands still travel forward. The improvement comes from transporting the wrist angles later, not from freezing your hands.
For a golfer who hits fat shots from an early release, exaggeration is useful. Feel as though the shaft is very close to you and the wrist angles are retained far longer than normal. Once a ball enters the picture, much of that exaggerated feeling tends to disappear.
There is one important caution. Some golfers release early because the clubface is excessively open, the shaft is badly out of position, or the body is out of position. If your clubface is very open, address that underlying issue before trying to force a later release.
Step 5: Blend the Three-Part Golf Downswing Sequence With Ball Flight Feedback
Once you have rehearsed each part separately, begin blending them in this order:
- Head back. Keep your upper body from moving toward the target too soon.
- Hips forward. Shift pressure and move your lower body toward the lead side.
- Club from inside. Feel the club approach low and inside, around the 3 to 4 o’clock window.
- Release later. Retain the shaft angle longer while your hands move forward.
Start with a short iron, a half swing, and a reduced distance target. One or two rehearsals before each shot can help you carry the right movement from practice swing to ball strike. For example, rehearse “club inside, head back, hips forward,” then hit one controlled shot.
Use a target-line reference on the ground, such as an alignment rod placed several yards to the right of your target line if you are working to eliminate pulls. Your objective is not necessarily to hit a large curve. You want the ball to begin slightly right of the intended target, then draw back gently.
A small push draw is strong evidence that your club path and release are improving. It tells you that the ball is no longer launching sharply left and that the clubface is not being thrown closed too early. A pull draw, by comparison, still starts left and indicates that part of the old pattern remains.
Trust contact and start line
Video, coaching, or swing-analysis tools can provide useful measurements, but ball flight remains valuable feedback. When you maintain your head position, deliver the club from the inside, and delay the release effectively, you should not expect the same severe pull draw that defined your old motion.
A solid strike that starts just right and curves slightly back toward target is a useful sign. Better contact, a more neutral start line, and reduced turf contact before the ball all point toward a stronger golf downswing sequence.
Step 6: Create a Practice Plan That Makes the Move Stick
Do not attempt to fix every part of your swing in a single bucket of balls. The best approach is to organize your practice around one main priority, repeat it often, and use enough exaggeration to create a meaningful change.
For the first several weeks, focus primarily on the first two pieces: head back and club from inside. Those moves directly address the out-to-in path that causes pulls. You may still hit an occasional fat shot while working on them, but your overall direction can improve quickly.
After the movement becomes more familiar, add delayed release work. You can split a practice session into two halves:
- First half: Half-swing rehearsals and shots emphasizing head back, hips forward, and an inside delivery.
- Second half: No-ball release rehearsals followed by controlled shots that retain the shaft angle longer.
Keep the swings slow at first. Increase speed only when you can repeat the move with control. Faster swings tend to reveal your old tendencies, so a half swing that looks and feels right is more valuable than a full-speed swing that returns to steep, leftward motion.
Expect to overcorrect during practice. If you move your head a little too far back or make the club feel too far inside during a rehearsal, that can be productive. Under real speed and on the course, golfers often drift back toward their old pattern. Feeling a mile to achieve an inch can be the right strategy.
Most importantly, stay with the same core feels for months rather than changing your swing thought after every shot. Repetition gives you a dependable motion. With a cleaner path, a later release, and better body separation, the swing can begin to look and perform much more like the efficient motion you want.
Step 7: Golf Downswing Sequence FAQ
Why do I pull the golf ball left?
Pulls commonly occur when your upper body moves forward early, sending the club out and across the ball on an out-to-in path. Keeping your head back while moving your hips forward helps the club approach from a more inside direction.
How can I shift my weight forward without moving my head forward?
Feel your lower body and belt buckle moving toward the lead ankle while your head stays near its original position over the ball line. Use an object beside your head or your shadow as feedback during slow rehearsals.
Will an inside club path fix fat shots?
An inside delivery can help reduce pulls, but fat shots often require a later release as well. Retaining the shaft angle longer in the downswing helps prevent the club from releasing too early and striking the turf behind the ball.
What ball flight should I expect when the golf downswing sequence improves?
A controlled push draw is a useful sign. The ball should start slightly right of target and curve back gently, rather than launching sharply left in a pull or pull draw.
0 Comments