
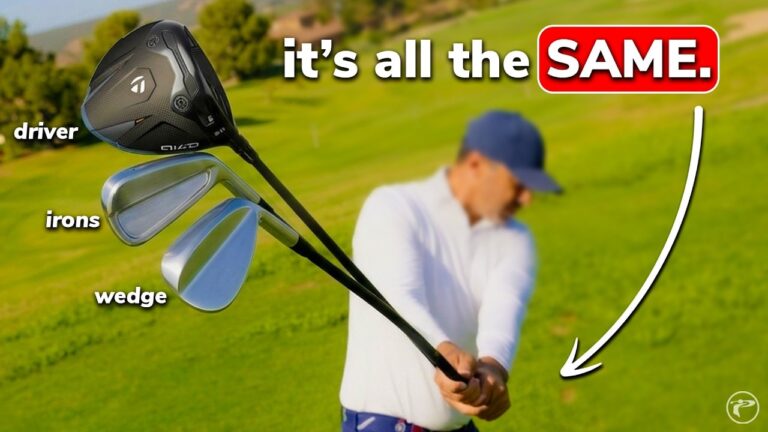

Your golf wrist hinge does not need to become a completely different movement every time you switch from a wedge to an iron or driver. The direction of the hinge and the position you build toward can remain consistent throughout the bag.
What changes is when the hinge develops. A wedge has a narrower stance and a more centered ball position, so the club reaches its set position sooner. A driver has a wider stance and the ball farther forward, so the same hinge appears later in the takeaway.
Understanding this timing difference can make your takeaway feel far less complicated and help you build a more repeatable golf swing with every club.
Table of Contents
- Step 1: Understand What Should Stay the Same in Your Golf Wrist Hinge
- Step 2: Build Your Takeaway Around Turn and Hinge Together
- Step 3: Set Up Correctly Before Adjusting Golf Wrist Hinge Timing
- Step 4: Learn Why Wedge Wrist Hinge Feels Earlier
- Step 5: Let Mid-Iron Wrist Hinge Develop Naturally
- Step 6: Delay Driver Wrist Hinge Without Holding It Off
- Step 7: Check the Set Position Instead of Chasing a Perfect Feel
- Step 8: Avoid the Two Golf Wrist Hinge Mistakes That Break Connection
- Step 9: Use a Simple Practice Drill for Consistent Wrist Hinge
- Step 10: Make the Golf Wrist Hinge a Repeatable Part of Your Swing
Step 1: Understand What Should Stay the Same in Your Golf Wrist Hinge
The central idea is simple: use the same basic wrist-hinge direction and amount with wedges, irons, and woods.
Rather than trying to manufacture a special wrist action for every club, allow the club to move back as your body turns and your wrists gradually set. The goal is a connected movement, not a sudden hand-only motion.
By the time you reach the set position, the club should arrive in a familiar place regardless of the club in your hands. This gives you a repeatable reference point instead of a collection of unrelated swing feels.
A useful checkpoint is when the hands are roughly pocket-high and moving along the line of your feet. At that point, the club is set and points generally toward the inside of the ball.
What “same hinge” does not mean
Using the same golf wrist hinge does not mean every takeaway looks identical from address. Different clubs require different setups. A driver is longer, the ball is played farther forward, and the stance is wider than with a wedge.
Those setup changes alter the distance your hands must travel before the club reaches the same set position. The movement is consistent, but the timing is not.
Step 2: Build Your Takeaway Around Turn and Hinge Together
A reliable golf wrist hinge happens as part of the takeaway, not as a separate move that you force before turning. Your lead shoulder, torso turn, hand path, and wrist hinge should work at a similar pace.
Think of your lead shoulder as helping move the handle away from the ball while the wrists gradually respond. This creates a blended takeaway in which the club, arms, and body stay connected.
The key feeling is not “snap the club up.” It is closer to this:
- Start your turn.
- Move the hands back along the line of your feet.
- Allow the wrists to hinge in the same direction as the club travels.
- Keep turning until the club reaches its set position.
When turn and hinge match each other, the club can travel back in a more organized way. When they do not match, the club often gets pulled too far inside or dragged too far outside.
Step 3: Set Up Correctly Before Adjusting Golf Wrist Hinge Timing
Your setup determines how quickly the golf wrist hinge will appear. Before trying to change your hand action, make sure your stance width and ball position fit the club.
Wedge setup
For a standard wedge shot, the ball is near the middle of the stance, and the outside edges of your feet are approximately in line with the outside edges of your shoulders. Because the ball is relatively centered and the stance is narrow, your hands do not have far to travel before the club begins to set.
Mid-iron setup
With a mid-iron such as a 7-iron, the stance becomes somewhat wider and the ball shifts slightly forward. The same direction of hinge still applies, but it develops over a slightly longer hand path.
Driver setup
With driver, the stance is at its widest and the ball is positioned forward, near the lead shoulder. This naturally makes the set position feel farther away from the starting point. Do not respond by immediately rolling or over-hinging the club behind you.
Instead, allow the turn and hinge to develop gradually as your hands travel farther back.
Step 4: Learn Why Wedge Wrist Hinge Feels Earlier
Golfers often assume that wedges need a more abrupt golf wrist hinge because the club seems to set quickly. In reality, the hinge does not need to be rushed. It simply reaches the same set position sooner because the setup is more compact.
With the ball closer to the center of the stance and the feet closer together, the hands have less distance to travel. If you try to make the wrist action overly sharp, the club may get disconnected from your body turn.
For wedges, focus on a compact but blended takeaway:
- Begin with a smooth turn.
- Let the handle move away naturally.
- Allow the wrists to hinge as the club moves back.
- Continue turning until the club sets.
The club may look set sooner than it does with a driver, but that is a result of the shorter hand path, not a need for a different wrist action.
Step 5: Let Mid-Iron Wrist Hinge Develop Naturally
Mid-irons sit between the compact wedge swing and the wider driver swing. This makes them useful for learning the correct golf wrist hinge rhythm.
With a 7-iron, the stance is slightly wider and the ball is modestly forward of center. Your hands therefore travel farther before the club reaches its set position. The movement should still be the same connected blend of turn and hinge.
A common mistake is trying to copy the apparent speed of a wedge takeaway with an iron. That can make the club disappear behind you too early. Give the club enough time and space to set as you turn.
Use this simple thought: same hinge, slightly longer travel.
Step 6: Delay Driver Wrist Hinge Without Holding It Off
The driver is where many golfers overcorrect. Because the ball is forward and the stance is wide, the club takes longer to arrive at the set position. Some players react by aggressively hinging the wrists right away and pulling the club behind their body.
That is not the goal. With a driver, you still want the same golf wrist hinge direction and the same eventual set position. You simply need to give it more time to develop.
At address, the ball is positioned near the lead shoulder. From there, make a smooth turn and let your hands travel back along the intended path. The wrist set will emerge later than it does with a wedge because the geometry of the setup has changed.
A helpful driver cue is: turn first, hinge with the turn, do not roll the club inside.
This preserves width and connection without trying to keep the wrists rigid. Delaying the hinge is different from eliminating it.
Step 7: Check the Set Position Instead of Chasing a Perfect Feel
Feel can be misleading, especially when you move between clubs. A wedge hinge may feel quick, while a driver hinge may feel gradual, even when both are working correctly.
Use a visible checkpoint instead. At the set position, look for these broad characteristics:
- Your hands are about pocket-high.
- Your hands have traveled along the line of your feet.
- The club has hinged upward in a consistent direction rather than being rolled sharply behind you.
- The clubface is organized relative to your body angle.
- Your body turn and wrist hinge look connected, not like separate phases.
The precise appearance will vary with camera angle, body type, and club length. The more important goal is that the club reaches a stable, repeatable position while your body and arms remain coordinated.
Step 8: Avoid the Two Golf Wrist Hinge Mistakes That Break Connection
Mistake 1: Hinging faster than you turn
If the wrists hinge much faster than your body turns, the club can quickly move behind you and too far inside. This often feels like you are creating width or an easy backswing, but it can disconnect the club from your torso rotation.
To correct it, slow the hand action down and allow the lead shoulder to move the handle away as the hinge develops.
Mistake 2: Turning without allowing any hinge
The opposite issue is turning the body while keeping the wrists overly rigid. This can drag the club too far outside during the takeaway. It is less common, but it can create an awkward path and make the club difficult to set.
To correct it, keep turning but let the wrists respond naturally. You are not trying to lock them in place.
Mistake 3: Making the driver takeaway excessively inside
Because the driver needs more time to set, golfers sometimes force the club inward immediately. This is an over-hinge, not proper timing.
Keep the club moving back in the same general hinge direction you use with a wedge and iron. Let the wider setup create the later timing for you.
Mistake 4: Changing your swing thought for every club
Too many club-specific swing thoughts create confusion. Keep one simple framework throughout the bag: blend your turn and your golf wrist hinge, then allow setup to determine timing.
Step 9: Use a Simple Practice Drill for Consistent Wrist Hinge
You can rehearse this movement with alignment sticks or clubs placed on the ground. Create a line that represents the direction of your feet and a second guide that helps you recognize the intended hinge direction.
Then work through this progression without hitting a ball at first:
- Choose a wedge and take your normal setup.
- Move the club back slowly while turning your chest.
- Allow the club to set as your hands travel back along your foot line.
- Pause at pocket height and note the position.
- Repeat with a mid-iron, accepting that it takes longer to reach the same checkpoint.
- Repeat with driver, allowing the widest setup and forward ball position to delay the set naturally.
Do not measure success by whether the hinge feels identical. Measure it by whether you arrive at a similar set position with a connected takeaway.
Once the rehearsal feels comfortable, hit shots at a controlled pace. Start with wedges, move to irons, and then finish with driver. This progression helps you recognize how stance width and ball position change timing without changing the basic movement.
Step 10: Make the Golf Wrist Hinge a Repeatable Part of Your Swing
The most useful takeaway is that you do not need three different wrist-hinge patterns for wedges, irons, and woods. Build one dependable motion and let the club-specific setup determine how quickly it develops.
For every club, aim to:
- Set up with an appropriate stance width and ball position.
- Blend the body turn and wrist hinge at the same pace.
- Keep the hands traveling back in an organized direction.
- Reach a familiar set position without forcing the club inside.
That approach reduces unnecessary adjustments and gives you a clearer way to practice your takeaway across the entire bag.
Step 11: Golf Wrist Hinge FAQ
Should golf wrist hinge be the same with every club?
The basic direction and eventual amount of golf wrist hinge can remain the same with wedges, irons, and woods. What changes is the timing because ball position and stance width change from club to club.
Why does wrist hinge feel quicker with a wedge?
A wedge is generally played from a narrower stance with the ball nearer the middle of the feet. Your hands travel a shorter distance before the club reaches its set position, so the hinge appears earlier.
Should I hinge my wrists early with driver?
Do not force an early hinge with driver. A wider stance and forward ball position mean the same hinge should develop more gradually as you turn. Forcing it early can pull the club too far inside.
What causes the club to go too far inside on the takeaway?
A common cause is hinging the wrists faster than the body turns. Keep the hinge connected to your torso rotation and allow the handle to move away as the lead shoulder turns.
Should I keep my wrists rigid in the takeaway?
No. Overly rigid wrists can make the club drag outside. Allow a natural hinge to develop with your turn rather than actively locking the wrists or abruptly snapping them into position.
0 Comments