
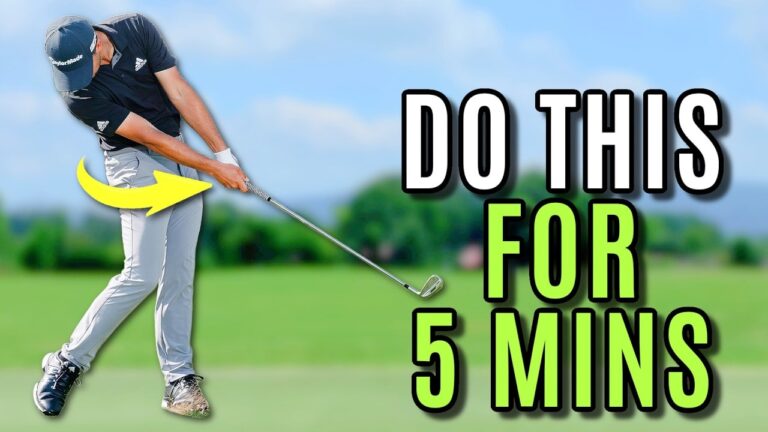

If you are trying to learn how to stop pulling golf shots, especially with your irons, do not look only at your backswing. Many golfers who fight weak pulls, fades, and inconsistent contact share a delivery problem: the club works too far outside in the downswing, while the arms fold back toward the body through impact.
That combination makes it difficult to strike irons solidly. It can produce pulls, pull-fades, glancing contact, and shots that fly shorter than expected. The solution is not simply to force the club more from the inside. You must pair a better delivery path with a wider follow-through and enough forearm rotation to square the clubface.
This step-by-step guide explains the wide-arc follow-through drill, how arm extension affects swing path, and how to use ball flight to know whether your changes are working.
Table of Contents
- Step 1: Identify the Pull and Fade Pattern in Your Iron Swing
- Step 2: Understand Why Arm Extension Changes Your Golf Swing Path
- Step 3: Use the Wide Arc Follow-Through Drill to Stop Pulling Golf Shots
- Step 4: Keep Your Head Back While Your Hips Move Forward
- Step 5: Add Forearm Rotation to Square the Clubface
- Step 6: Build the New Motion Without a Backswing First
- Step 7: Start With Half Swings Before Going Full Speed
- Step 8: Use Ball Flight to Fine-Tune Path and Face
- Step 9: Add a Delivery Reference With the 4 O’Clock Drill
- Step 10: Confirm Your Progress With Video or Swing Feedback
- Step 11: Make the Wide Arc Your On-Course Priority
Step 1: Identify the Pull and Fade Pattern in Your Iron Swing
A pull or fade pattern often starts with the clubhead getting too far outside the hands during the downswing. A useful checkpoint is when the shaft is roughly parallel to the ground on the way down, often called the delivery position.
For a strong iron striker, the clubhead is generally in line with the toe line, level with the hands, or slightly inside the hands at delivery. When the clubhead sits high and outside that line, it tends to attack the ball from an out-to-in direction.
For a right-handed golfer, an out-to-in path commonly pairs with arms that fold inward and travel too far left through impact. For a left-handed golfer, the directions are reversed, but the underlying issue is the same: the club works toward the body instead of extending away from it.
This pattern can lead to several frustrating results:
- Pulled iron shots that start left of target.
- Weak fades or pull-fades that lose distance.
- Inconsistent low-point control and poor contact.
- Several clubs traveling nearly the same distance because of excess side spin and inefficient strike.
Learning how to stop pulling golf shots begins with recognizing that your follow-through shape can reveal a great deal about what happened before impact.
Step 2: Understand Why Arm Extension Changes Your Golf Swing Path
Your arms have a direct relationship with the direction the club travels. When the arms bend and fold rapidly through the strike, the club naturally works back toward your body. That movement supports an out-to-in pattern.
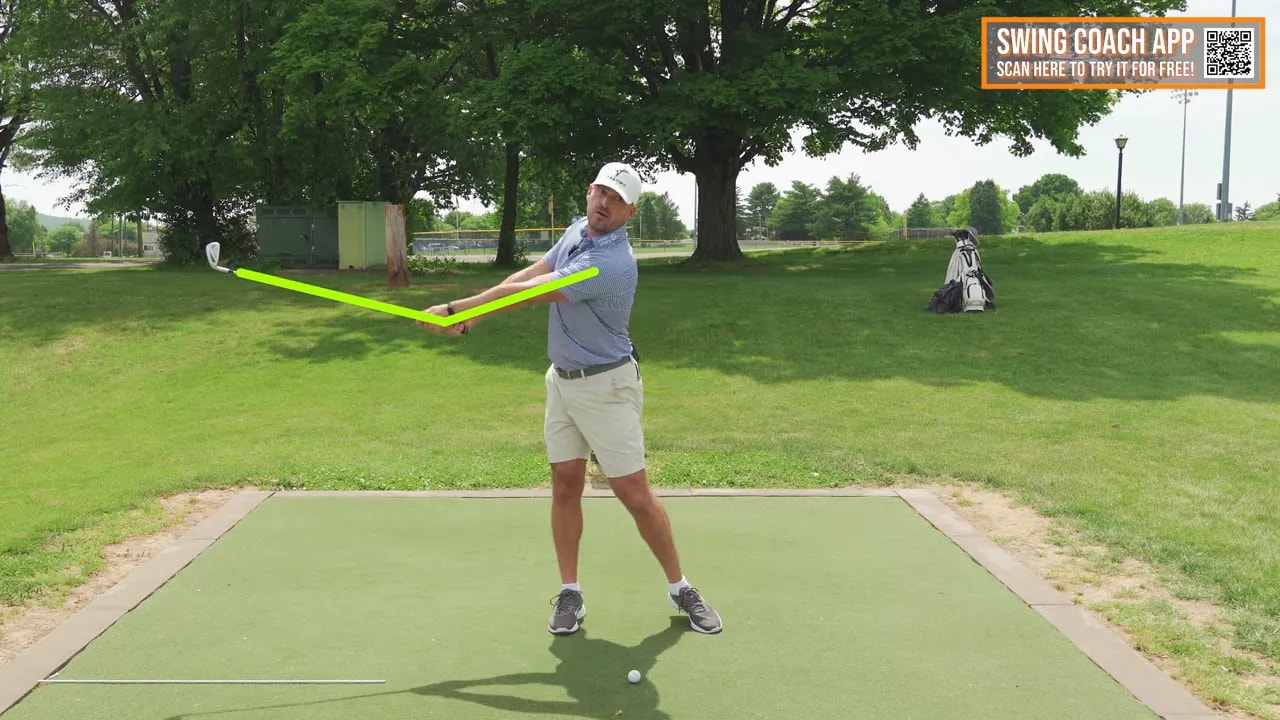
When the arms extend and straighten through the strike, the club works farther away from you. This produces a wider arc and encourages the club to approach from a more inside delivery position.
Think of the difference this way:
- Narrow arc: Bent arms, club handle close to the body, club working inward too soon.
- Wide arc: Extended arms, club handle pushed farther away, club continuing outward before it wraps around.
This does not mean you should lock your elbows or try to hold the club straight forever. Your arms will fold naturally as the swing finishes. The goal is to delay that folding long enough to create extension through the ball and a wider arc in the early follow-through.
For golfers fighting pulls and fades, this is an important shift. Instead of trying to manipulate the downswing from the top, you can train a better follow-through position and allow it to influence the path that created it.
Step 3: Use the Wide Arc Follow-Through Drill to Stop Pulling Golf Shots
The central feel is simple: push the butt end of the club farther away from your body through the follow-through. If the handle normally stays close to your stomach, create the sensation that it moves much farther away.
For a right-handed golfer, imagine the club and arms extending out toward roughly 10 o’clock in the follow-through. For a left-handed golfer, the comparable sensation is toward roughly 2 o’clock. The exact clock reference is less important than the intention: extend outward, widen the arc, and avoid immediately pulling the handle back in toward your body.
Use these checkpoints:
- Set up normally to the ball.
- Move through impact without allowing your arms to collapse inward.
- Push the club handle away from your torso.
- Extend your arms as the club travels into the early follow-through.
- Allow your body to rotate, rather than trying to steer the club with your hands.
At first, the movement may feel extreme. That is normal. Golfers commonly need to exaggerate a new motion significantly in practice before it appears neutral at speed with a ball in front of them.
If your usual move is narrow and out to in, a practice swing that feels dramatically in to out may only become neutral when you make a real swing. Do not judge the value of the rehearsal by how exaggerated it feels. Judge it by the delivery position, strike quality, and ball flight it produces.
Step 4: Keep Your Head Back While Your Hips Move Forward
A common mistake during the wide-arc drill is to move your head excessively forward while trying to push the club away. That can create a different set of contact problems.
The better pattern is for the lower body to move through while your head stays relatively stable. Your hips can shift and rotate toward the target, but your head should not lunge forward in an effort to manufacture extension.
A useful professional reference is Tommy Fleetwood. Through impact, his arms and club extend well, while his hips move forward and his head stays back relative to that movement. This allows room for the arms to work outward and around without crowding the strike.
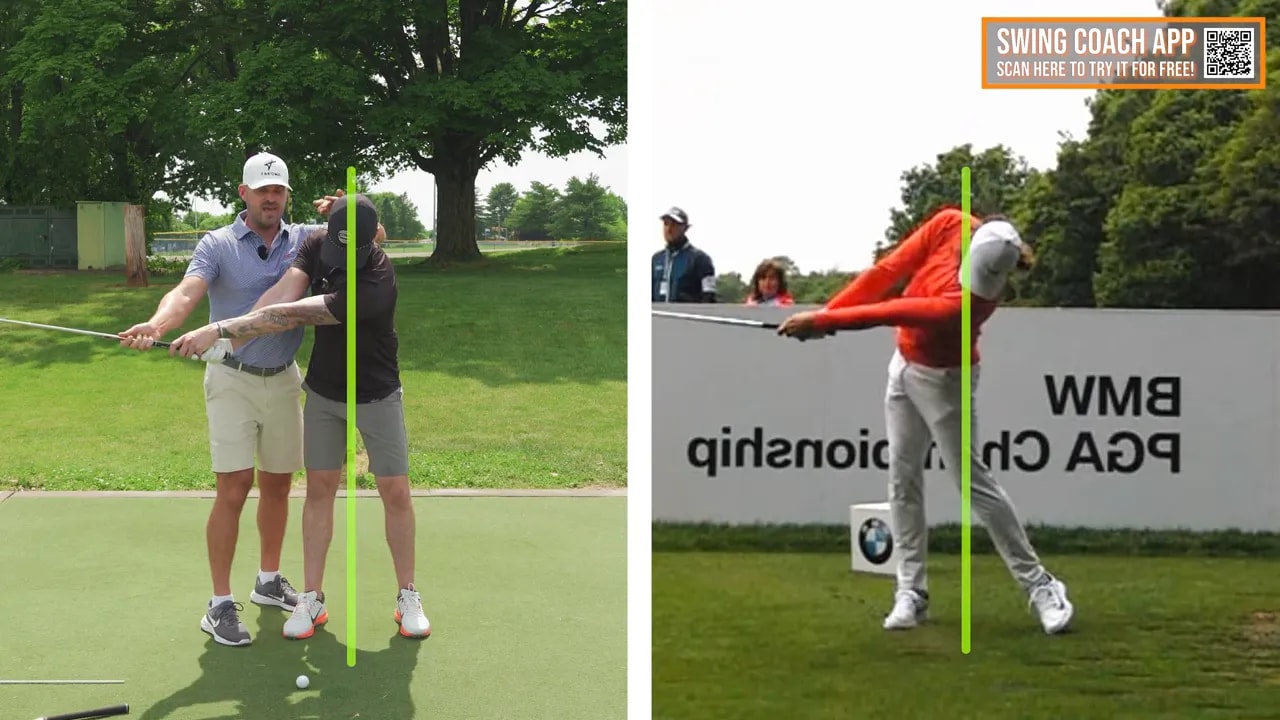
As you rehearse, use this feel: hips through, arms out, head steady. It is a simpler and more productive focus than attempting to micromanage multiple swing positions at once.
Step 5: Add Forearm Rotation to Square the Clubface
Improving your swing path is only half the job. When you move the club more from the inside, you must also make sure the clubface is not left open.
An open face can work with an out-to-in path because it helps prevent an immediate pull. But once you improve the path, that same open-face habit can cause shots to start straight and curve left, or create inconsistent face control.
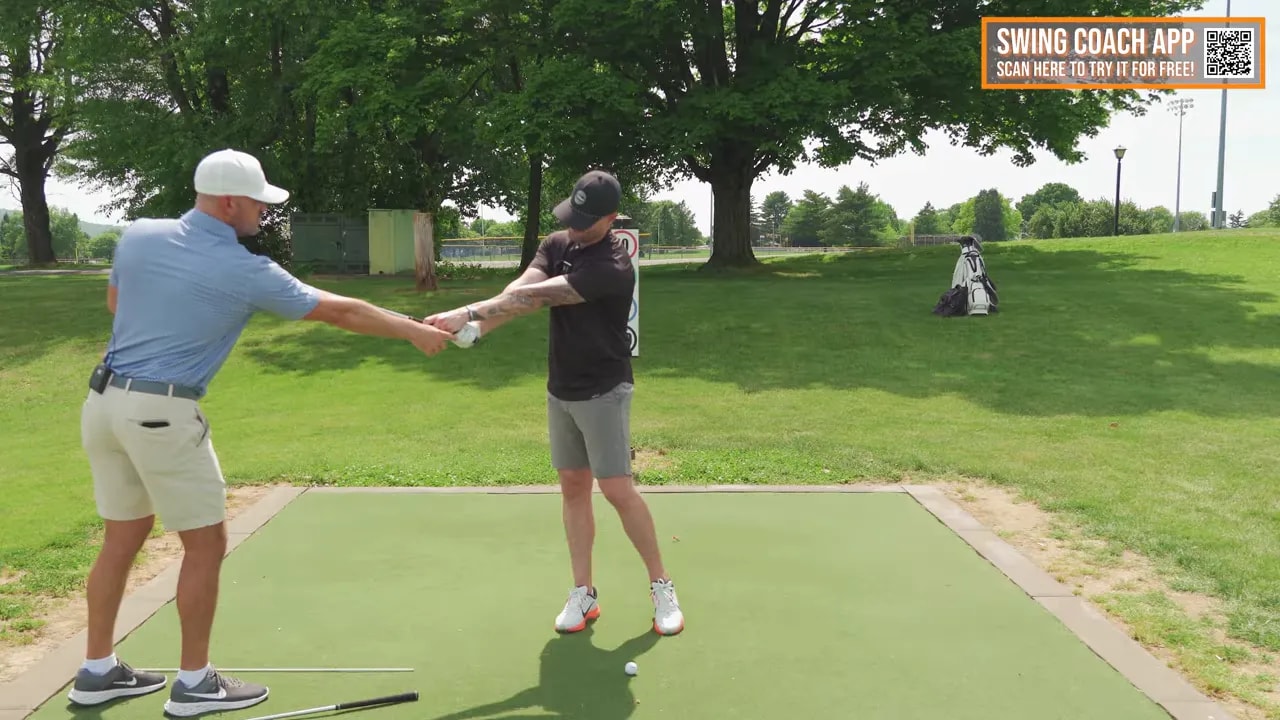
The answer is to add normal, active arm rotation through impact. For a right-handed golfer, a useful checkpoint is seeing the fingers of your lead hand rotate underneath your trail hand in the follow-through. For a left-handed golfer, reverse the sides.
Another visual checkpoint is the clubhead. As you exaggerate the drill, allow the toe of the club to rotate in front of the heel through the early follow-through. You are not trying to hook every shot. You are creating enough rotational freedom to square the face while the club travels on a more inside path.
The path and face must work together:
- More inside path with an open face: Ball can curve left or feel weak and unstable.
- More inside path with adequate rotation: Straighter shots, a controlled draw, and more solid contact become possible.
- Too much rotation: The ball can overdraw or hook.
This is why a better swing path alone is not always the complete fix for pulled irons. You need both the wide arc and the clubface rotation.
Step 6: Build the New Motion Without a Backswing First
Trying to change a full swing immediately can make a simple concept feel complicated. Start from address with no backswing and rehearse only the movement through impact.
Make short, controlled motions where you focus on the finish shape:
- Push the butt end of the club away from your body.
- Extend the arms through the early follow-through.
- Rotate the forearms so the face can square.
- Keep your head from drifting forward.
- Let your hips move and rotate toward the target.
This isolates the important section of the swing. You are training the part that directly affects your strike, club path, and clubface relationship.
After you can repeatedly reach the desired follow-through position, add the backswing gradually. First move the club back a short distance, then pause and rehearse the delivery and extension. Progress to a half backswing, then eventually to a full swing.
Step 7: Start With Half Swings Before Going Full Speed
Half swings are an ideal bridge between a rehearsal and a full iron shot. Use a pitching wedge or 9-iron and swing from arms-parallel in the backswing to arms-parallel in the follow-through.
Keep the rhythm smooth. The objective is not distance. It is to produce a repeatable delivery with the club working less outside, the arms extending outward, and the face rotating enough to match the improved path.
Use this progression:
- Make several no-ball rehearsals from address through the follow-through.
- Make arms-parallel to arms-parallel swings without a ball.
- Hit short half shots with the same feel.
- Increase the length of the swing only when the half shots become predictable.
- Move to full swings while keeping the same exaggerated follow-through intention.
When you add a ball, expect your old pattern to reappear somewhat. The ball creates pressure and can cause you to return to folding the arms and leaving the face open. Continue using a larger rehearsal feel than you think you need.
Step 8: Use Ball Flight to Fine-Tune Path and Face
Ball flight gives you immediate information when you are practicing how to stop pulling golf shots. Once your path is closer to neutral, the amount of curve becomes especially useful.
- Ball curves noticeably left: Your path may be better, but the clubface likely remains too open relative to the new path. Feel more forearm rotation earlier through impact.
- Ball flies straight: Your path and face are likely matching well.
- Ball overdraws or hooks: You may have over-rotated the face. Reduce the closing action slightly.
- Pulls and fades continue: Return to the wide-arc rehearsal. Your arms may still be folding too soon and pulling the club inward.
In the demonstrated progression, the golfer moved from an out-to-in delivery to neutral and then to a shallow delivery while producing a draw. The key was not one magic thought. It was the combination of exaggerated inside delivery, arm extension, and earlier face rotation.
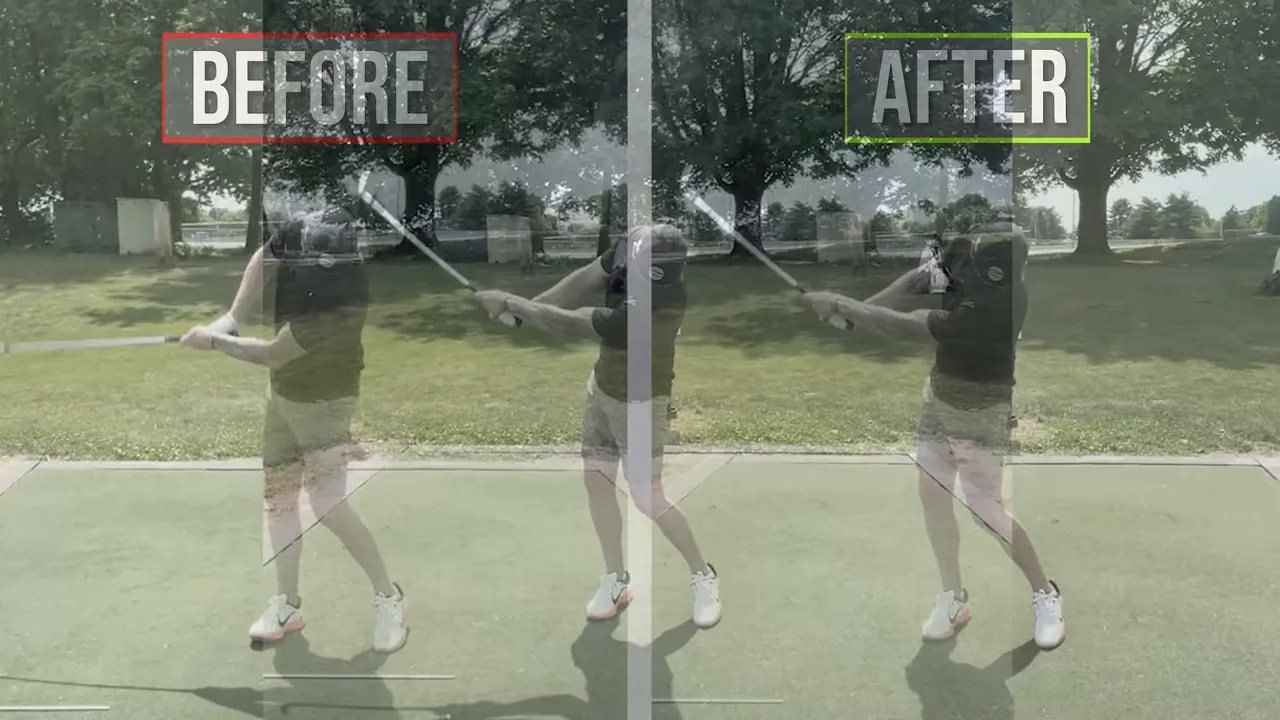
Step 9: Add a Delivery Reference With the 4 O’Clock Drill
The wide follow-through helps you reverse engineer a better path, but you can also add a delivery reference during practice. For a right-handed golfer, picture the club approaching from a 4 o’clock position relative to the ball and target line. For a left-handed golfer, the comparable reference is around 8 o’clock.
The point is not to place the club literally behind you during the actual swing. It is to create a sufficiently strong practice feel that counters the tendency to deliver the club too far outside.
From the top of the backswing, slowly rehearse the club down to a position that feels well inside your normal delivery. Then extend the arms outward through the follow-through while rotating the forearms.
For golfers with a persistent over-the-top move, the club may need to feel dramatically behind the toe line in rehearsal. A sensation that feels excessive can be exactly what is needed to produce an on-plane delivery at normal speed.
Step 10: Confirm Your Progress With Video or Swing Feedback
Feel and reality are not always the same in a golf swing. A motion that feels extremely shallow may only be slightly inside on video. Likewise, a finish that feels highly rotated may look completely normal.
Use down-the-line video to check the club at delivery. Look for the clubhead moving closer to the toe line and no longer sitting high and outside the hands. Then review the early follow-through to make sure your arms are extending rather than collapsing inward.
Technology can also provide a useful path reference. The Swing Coach app used in the lesson measures the club at delivery, identifies whether it is steep or shallow relative to neutral, and gives feedback after each swing. Whatever feedback method you use, its value is the same: it helps you trust an exaggerated feel when the measured motion is improving.
A productive practice goal is not necessarily to make every rehearsal neutral. Instead, make the rehearsals exaggerated enough that your real swings settle closer to neutral. If your normal swing is out to in, a rehearsal that registers significantly shallow may be the feel that produces an on-plane shot with a ball.
Step 11: Make the Wide Arc Your On-Course Priority
When you take this change from the range to the course, avoid a long checklist. Choose one clear cue that captures the fix.
For most golfers, the best cue is: push the handle away and rotate through.
That single thought covers the essential pieces. The handle moves away to create arm extension and a wider arc. The rotation helps square the face so the improved path does not leave the clubface open.
If your irons have been plagued by pulls, fades, and thin or weak contact, commit to a gradual progression. Start small, exaggerate the new shape, and allow the ball flight to guide your adjustments. A wider follow-through may be the missing downswing move that turns an unreliable iron pattern into more solid, higher, straighter shots with a controlled draw.
0 Comments