
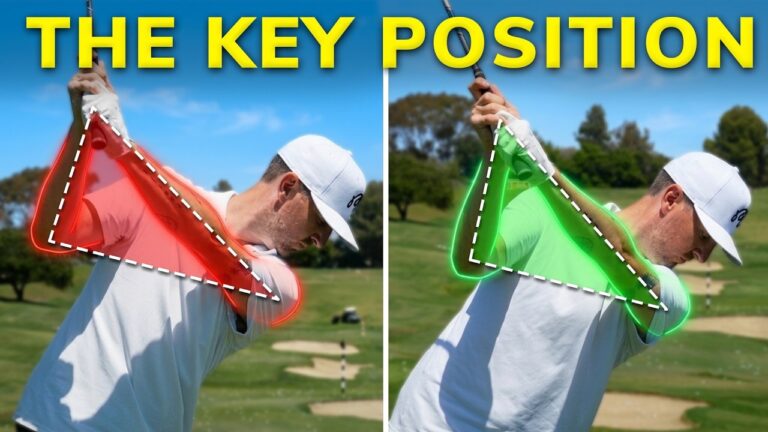

A long golf backswing is not automatically a problem. Plenty of golfers create a full turn and play excellent golf. The issue starts when your arms keep moving after your body has completed its useful turn. That extra movement can make the club harder to control, cause the trail elbow to fly away from your side, and force you to make compensations on the way down.
Learning how to shorten your golf backswing is not about making a weak, restricted motion. It is about building a compact backswing with better lower-body support, better arm structure, and less wasted motion. Done correctly, a shorter backswing can help you strike the ball more consistently while preserving the speed you already have.
Table of Contents
- Step 1: Identify whether your golf backswing is actually too long
- Step 2: Keep your turn, but stop the arms from running off
- Step 3: Build a stable trail-leg brace for a shorter golf backswing
- Step 4: Use the pillow drill to improve lower-body structure
- Step 5: Create trail-arm structure instead of a flying elbow
- Step 6: Feel your hands working out, not excessively behind you
- Step 7: Practice the compact backswing with a clear priority order
- Step 8: Avoid the mistakes that make a short backswing worse
- Step 9: Use ball flight and contact to confirm the change
- Step 10: Make the compact backswing your on-course cue
Step 1: Identify whether your golf backswing is actually too long
Do not judge your backswing length only by where the club points at the top. A longer-looking swing can still be functional if your body and arms stay connected. Instead, look for the signs that your arms are running on after your turn has finished.
Your backswing may be too long if you regularly experience:
- An open or unstable clubface at the top, followed by a last-second attempt to square it.
- A flying trail elbow that moves wide of your torso instead of remaining structured.
- The club crossing the target line at the top of the swing.
- Heavy or inconsistent contact because the club has to drop excessively before impact.
- Different misses with different clubs, such as shots drifting right with short irons and a left miss or flip with longer clubs.
- A feeling that your arms are doing all the work, rather than turning your chest and body.
The common pattern is simple: the torso slows down, the arms continue lifting, and the club gets out of sync. From there, your downswing becomes a recovery move. You are no longer simply rotating through the ball.
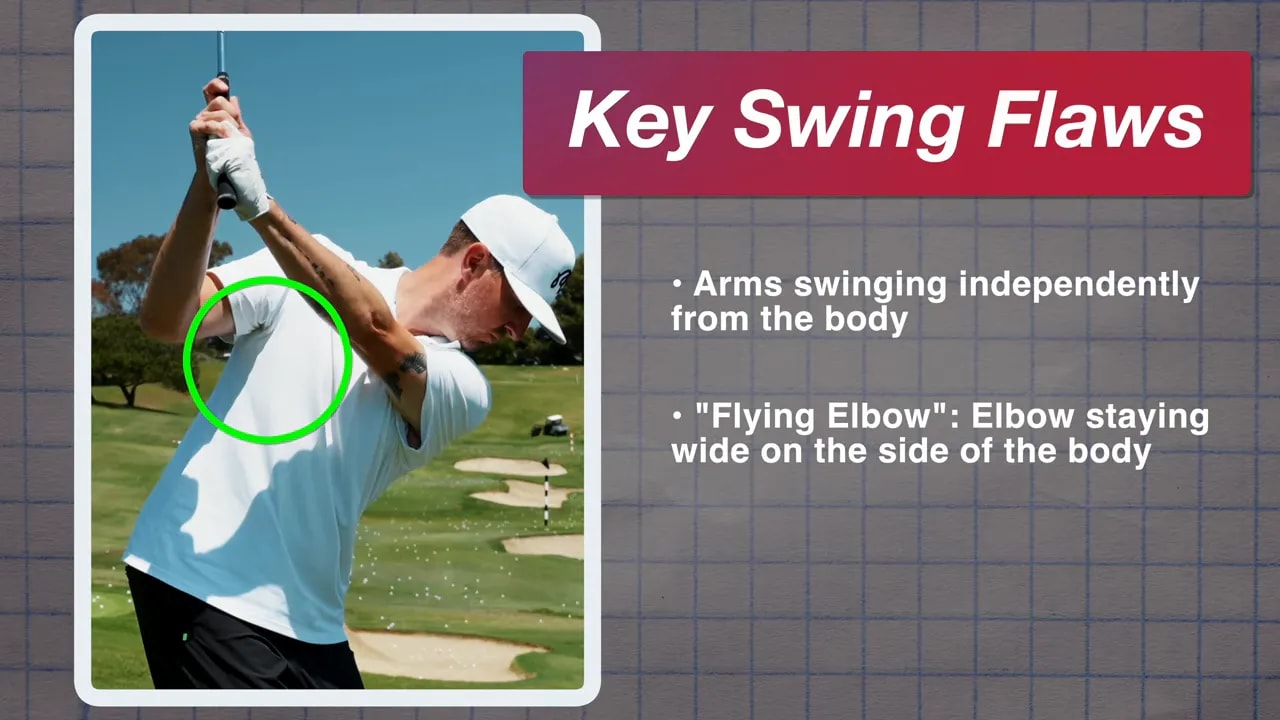
Step 2: Keep your turn, but stop the arms from running off
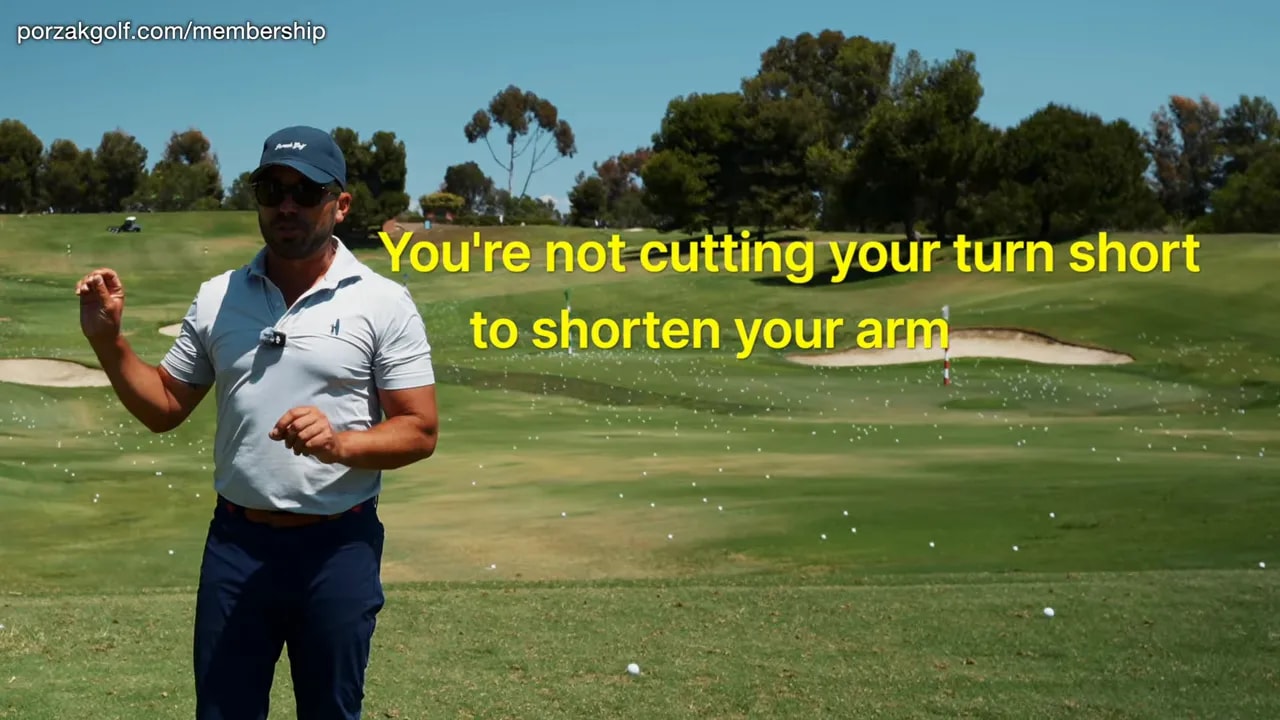
The most important point when learning how to shorten your golf backswing is this: do not shorten your body turn just to make your arm swing shorter. You still want to turn to the amount that your mobility and balance allow.
Instead of thinking, “I need a three-quarter turn,” use this sequence:
- Make your normal takeaway.
- Turn your chest and shoulders away from the target.
- Allow the arms to travel with that turn, not independently beyond it.
- Stop the arm swing at a controlled set position.
For some golfers, that stopping point may feel like chest-high arms. For others, it may feel closer to shoulder height. The precise visual position varies with body type, flexibility, posture, and grip. The useful checkpoint is whether your chest is still facing your arms rather than leaving them behind.
A compact backswing should feel like you are fully coiled, not artificially cut off. The goal is to reduce the extra arm lift after the turn, not to eliminate rotation.
Step 3: Build a stable trail-leg brace for a shorter golf backswing
Your lower body strongly influences how far your arms travel. When the trail knee drifts outward, straightens excessively, or loses its flex, you can lose the pressure and structure that support your turn. The arms then tend to lift on their own to complete the backswing.
For a right-handed golfer, focus on the right knee staying flexed and inside the right foot during the backswing. Left-handed golfers can reverse these directions.
This does not mean freezing your lower body. It means retaining a braced, athletic base while you turn. A stable trail leg helps you create a supported coil instead of swaying away from the ball.
Trail-knee checkpoint
At the top of your backswing, ask yourself:
- Is my trail knee still flexed?
- Has it remained inside the trail foot rather than kicked outward?
- Do I feel pressure and support in my trail side?
- Can I begin the downswing without first having to move back toward the ball?
If your trail knee moves too far outside your foot, your lower body may feel loose or disconnected. That loss of structure encourages a longer, arm-driven backswing.
Step 4: Use the pillow drill to improve lower-body structure
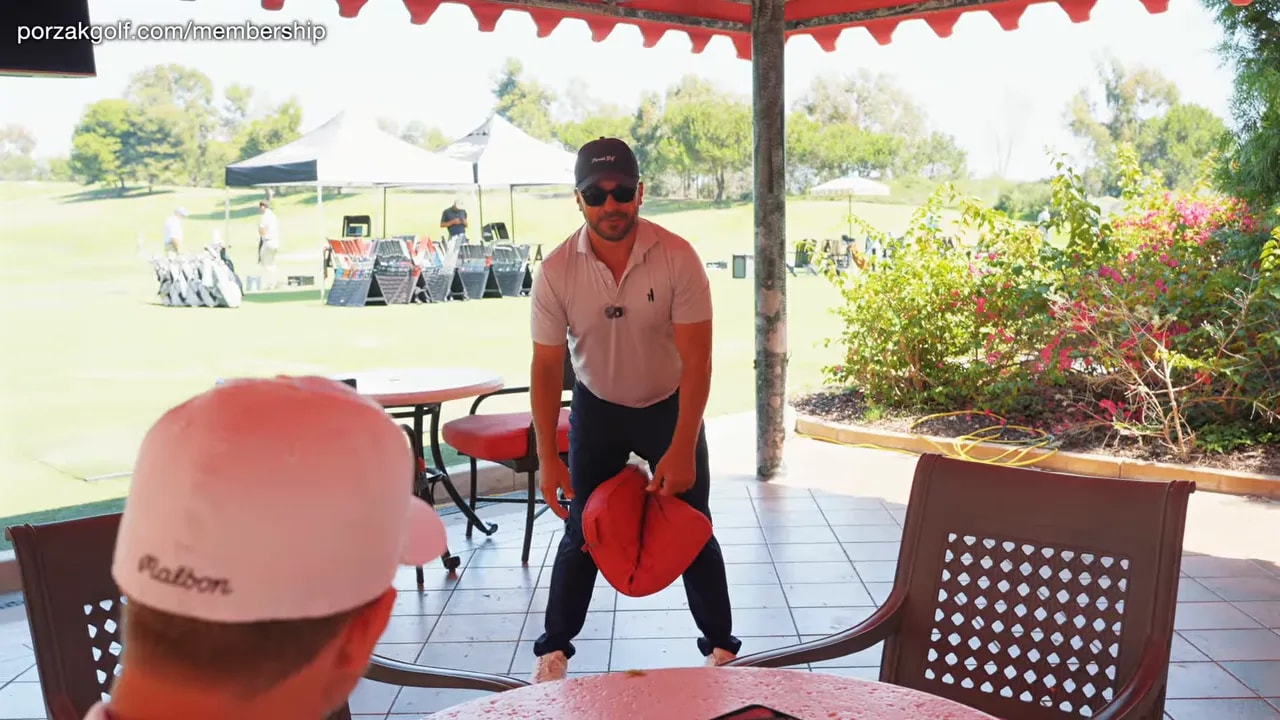
A simple at-home drill can give you immediate feedback on leg movement. Place a small pillow, folded cushion, or lightly deflated ball between your knees. Set up in your normal golf posture and make slow practice backswings.
The object should not be squeezed hard. It is there to help you sense whether one knee is diving inward or the other is moving too far outward.
As you rehearse:
- Maintain gentle contact with the object.
- Keep your trail knee flexed and supported.
- Turn your torso without allowing the knees to collapse or drift excessively.
- Make slow motion swings first, then graduate to short shots.
This drill is especially useful if you tend to sway, lose balance, or feel that your arms lift independently at the top. It helps organize the lower body so the upper body has a stable platform to turn against.
Step 5: Create trail-arm structure instead of a flying elbow
Once your trail leg is more stable, focus on the trail arm. A flying trail elbow often appears when the arms become disconnected from the body. It can make the club too vertical, across the line, and difficult to return consistently to the ball.
The better feel is not to jam your trail elbow tightly against your rib cage. Instead, create enough width and structure that the trail elbow remains more underneath your hands as you complete the turn.
For a right-handed golfer, your right elbow should feel more organized and less like it is flaring behind you. This helps preserve the relationship between your arms, chest, and club.
A useful concept is the set-and-turn drill:
- Rehearse your hands and arms into a controlled halfway-back or set position.
- Check that your trail elbow is structured rather than flared wide.
- From that position, continue to the top by turning your body.
- Do not add another independent arm lift.
The feeling is that your arms become set, then your body completes the motion. This is a practical way to prevent the extra run-off that makes the backswing too long.
Step 6: Feel your hands working out, not excessively behind you
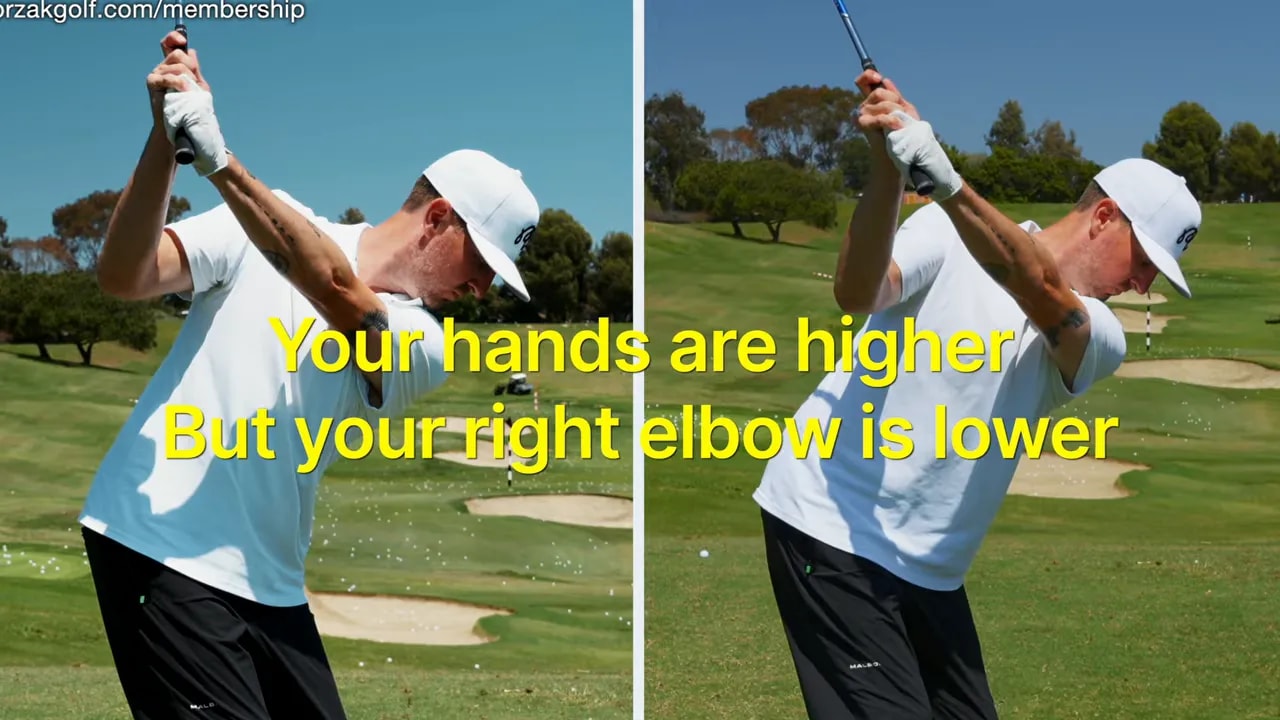
This can feel counterintuitive for golfers who take the club too far inside. When you try to keep your hands very deep behind you, you may actually create a narrower arm structure and encourage the trail elbow to fly. Your hands can look low while the elbow has moved into a poor position.
Instead, feel your hands travel more down the line of your feet early in the backswing. This creates width, allowing the lead arm to stretch away from your chest as you turn. From there, your body rotation brings the club into a better top-of-swing position.
Use this image: imagine reaching toward an object on a shelf that is above and in front of your shoulder. You are not reaching behind your head or pulling your hands deep behind your back.
This wider structure can produce a surprising result: your hands may be higher, while your trail elbow is lower and more organized. That is generally a much stronger structure than trying to force the hands low.
Step 7: Practice the compact backswing with a clear priority order
Trying to fix your legs, arms, clubface, swing plane, and tempo all at once can create confusion. Use a simple practice order so the changes stick.
Phase 1: Rehearse without a ball
Make five to ten slow-motion rehearsals. Your only priorities are a flexed trail knee inside the trail foot and arms that stay connected to your turn. Pause at the top and check your balance.
Phase 2: Hit short shots
Start with a wedge or short iron. Make smooth swings at reduced effort. The goal is centered contact and a predictable starting line, not maximum distance.
Phase 3: Add speed gradually
When the new motion feels stable, increase speed without increasing arm travel. A compact swing often feels shorter than it looks. Trust the ball flight and strike quality more than the sensation of length.
Phase 4: Move through the bag
The same structure applies from irons to driver, even though setup details change. Your stance width, ball position, and distance from the ball may differ with a longer club, but the central goal remains the same: keep your base structured and your arms synchronized with your turn.
Step 8: Avoid the mistakes that make a short backswing worse
A shorter golf backswing only works if it is efficient. Avoid these common overcorrections.
Cutting off your shoulder turn
If you simply stop turning, you may lose rhythm and create a steep, rushed downswing. Keep turning within your available range of motion. Shorten the extra arm swing, not the body rotation.
Forcing the hands low at the top
Low hands are not automatically better. For many golfers, forcing the hands down makes the trail elbow rise and flare. Prioritize width and elbow structure instead.
Pinching the trail elbow too tightly
You need connection, not tension. Trying to glue the elbow to your side can restrict your turn and make the motion robotic. Aim for a supported elbow position that still allows a natural turn.
Trying to swing slowly through impact
A compact backswing is not a slow swing. The purpose is to remove unnecessary motion so you can deliver the club with more freedom and less timing pressure.
Chasing a perfect top-of-swing picture
Your ideal backswing length depends on your physical capabilities. The best position is one you can repeat while staying balanced, structured, and in sync.
Step 9: Use ball flight and contact to confirm the change
Your backswing change is moving in the right direction when the transition feels simpler. You should need fewer last-second hand actions to find the ball. Look for:
- More centered contact.
- A tighter dispersion pattern.
- Less need to flip the club through impact.
- A more predictable launch window.
- Better balance at the finish.
Do not expect every shot to be perfect immediately. A new backswing can initially feel extremely short or wide even when it is visually much more efficient. Give yourself enough repetitions to replace feel with evidence from your strike pattern.
Step 10: Make the compact backswing your on-course cue
On the course, keep your swing thought simple. A useful two-part cue for a right-handed golfer is:
“Trail knee braced. Lead arm wide.”
The trail-knee cue helps stabilize the base. The lead-arm cue helps your hands travel with width rather than disappearing behind you. Together, these thoughts can improve trail-arm structure without making you consciously control every moving part.
The takeaway is straightforward: a powerful backswing is not necessarily a long backswing. If your arms keep moving after your turn has finished, you are likely adding complexity rather than speed. Learn how to shorten your golf backswing by maintaining your turn, bracing the trail leg, and creating width through your arms. You can make the swing more compact, more repeatable, and much easier to deliver through impact.
Frequently Asked Questions About How to Shorten Your Golf Backswing
Does a shorter golf backswing reduce distance?
Not necessarily. If your long backswing causes your arms to disconnect or forces you to make compensations, shortening it can improve strike quality and help you deliver the club more efficiently. The goal is not less turn. It is less unnecessary arm movement.
How far back should my golf backswing go?
Your ideal length depends on your mobility, balance, and ability to keep your arms synchronized with your body turn. Stop when your arms are set and your torso has completed a useful turn, rather than letting the arms continue beyond that point.
Why does my trail elbow fly in my backswing?
A flying trail elbow often occurs when the arms lift independently after the body turn has slowed or finished. Improving trail-leg stability and creating more width with the lead arm can help the trail elbow stay in a more structured position.
Can I practice a shorter backswing at home?
Yes. Make slow rehearsals in front of a mirror or use a pillow between your knees to improve lower-body structure. Practice the feeling of keeping the trail knee flexed and inside the trail foot while your arms move with your turn.
Should I use the same compact backswing with driver and irons?
Yes. Your driver setup will differ from your iron setup, but the central structure remains useful throughout the bag. Keep the trail leg supported and avoid allowing the arms to continue long after your body turn is complete.
0 Comments