
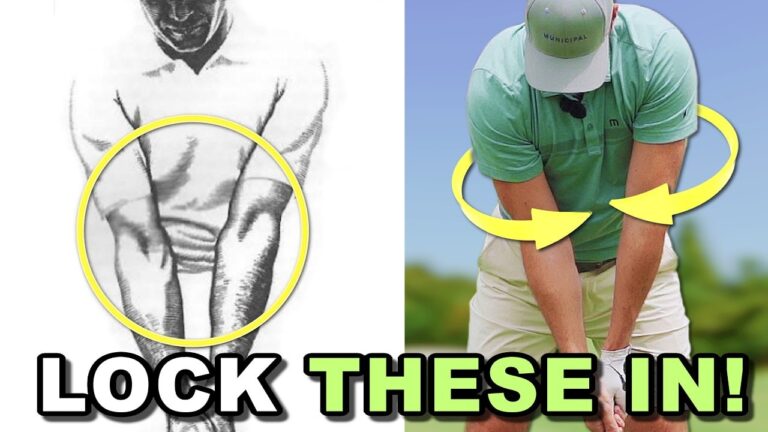

If you are trying to learn how to stop standing up in the golf swing, your trail shoulder and trail hip offer a simple checkpoint. Through impact and into the early follow-through, strong iron players tend to keep their trail side lower than their lead side. Golfers who top the ball, lose contact, push shots, or cut across the ball often do the opposite: the trail shoulder and trail hip rise too early.
The solution is not to force your upper body downward. Productive side tilt starts from the ground up. When your lower body moves forward and your trail hip works under your lead hip, your torso can remain tilted, your club can return to the turf more predictably, and your swing path can stay from the inside.
This guide breaks down the key movement, explains why it improves iron contact, and gives you practical drills to build it into your swing.
Table of Contents
- Step 1: Identify the Trail Shoulder Pattern That Affects Iron Contact
- Step 2: Understand Why Hips Moving Forward Create Side Tilt
- Step 3: Keep Your Inclination to the Ground Through the Ball
- Step 4: Use the Alignment Stick Belt Loop Drill to Feel the Motion
- Step 5: Preset Your Impact Position Before You Hit a Ball
- Step 6: Hit Short Punch Shots to Make the Feel Functional
- Step 7: Coordinate the Trail Knee, Trail Hip, and Trail Shoulder
- Step 8: Recognize the Connection Between Hip Slide and Lead-Hip Depth
- Step 9: Build the New Iron Swing Pattern Into Your Practice Routine
Step 1: Identify the Trail Shoulder Pattern That Affects Iron Contact
For a right-handed golfer, the trail side is the right side. For a left-handed golfer, reverse every direction in this article.
At impact, effective ball strikers typically have their trail shoulder below their lead shoulder and their trail hip below their lead hip. This is called side tilt. It means your body has retained its inclination toward the ball rather than standing upright through the strike.
Compare that with the common standing-up pattern. As the downswing reaches the ball, the hips move back away from the target line, the trail hip rises, and the shoulders become level. The club now has a harder time reaching the bottom of the swing consistently. A golfer may respond by throwing the clubhead early, but that compensation tends to produce inconsistent contact and poor face-to-path control.
Signs that you may be losing your side tilt include:
- Topped iron shots or thin strikes.
- Shots that start right of the target and lack solid compression.
- A pull or slice created by an over-the-top club path.
- A feeling that your chest lifts through impact.
- Difficulty taking a predictable divot after the ball.
The goal is not to create an exaggerated lean just for appearance. Your goal is to preserve a reliable relationship to the ground while your body rotates through the ball.
Step 2: Understand Why Hips Moving Forward Create Side Tilt
The key to how to stop standing up in the golf swing is the relationship between your lower and upper body. Your lower body needs to be forward of your upper body as you approach impact. When that happens, your trail hip can work underneath the lead hip and your upper body naturally tilts slightly away from the target.
From a face-on view, this produces a lead-side bias. From a down-the-line view, it helps you keep your hip depth and maintain your original posture. These are not separate actions. They are two views of the same movement.
Think of the movement in this order:
- Move your pelvis toward the target.
- Allow your trail hip to become lower than your lead hip.
- Keep turning while the trail side stays under the lead side.
As your hips move forward, your belt buckle begins to work toward your lead ankle. Your trail leg may straighten somewhat while your lead leg stays relatively more flexed. This creates the lower-body tilt that allows the torso to stay tilted back instead of rising toward the ball.
This matters because your posture controls where the club meets the ground. If your torso rises away from the ball, the club’s natural low point also tends to rise. Keeping your inclination helps you return the clubhead to the turf and strike the ball before the ground with irons.
Step 3: Keep Your Inclination to the Ground Through the Ball
Side tilt is valuable because it maintains your inclination to the ground. At address, your torso is tilted toward the ball. Through impact, you want to rotate while preserving enough of that inclination to keep the club reaching the ground.
When your trail shoulder stays below your lead shoulder, you are less likely to pop up. That gives you a better chance of producing solid, repeatable contact. It also reduces the need for an emergency hand release to make the club reach the ball.
Side tilt can also support a more in-to-out delivery. When the hips move backward and the trail shoulder rises, the club often works out and across the ball. Conversely, keeping the trail hip and shoulder under the lead side helps the club approach more from the inside.
This does not mean you should try to swing dramatically to the right. The main point is that a forward lower body and maintained tilt create a more functional route for the club. The improved path is a benefit of better body movement, not a forced steering action.
Step 4: Use the Alignment Stick Belt Loop Drill to Feel the Motion
An alignment stick makes the hip movement easy to see and feel. Put an alignment stick through your belt loops so it extends beyond both sides of your hips. You can perform this drill without hitting a ball first.
Set the starting position
Stand tall at first, without bending into golf posture. Slide your hips toward the target until your lead-side weight is clearly forward. A useful feel is approximately 80 percent of your weight on the lead foot and 20 percent on the trail foot.
As you do this, notice that your trail hip sits under your lead hip. From the front, your body now has side tilt. Your lower body has moved forward, and your upper body has tilted slightly back in response.
Add the turn without losing the tilt
Now move into golf posture and rotate through toward the target while keeping the trail hip under the lead hip. The alignment stick should help you sense that your pelvis is not backing away from the target line.
Your checkpoint is simple: rotate, but do not level out. The trail side should remain lower as you turn through.
Practice slowly enough that you can feel the sequence. If the alignment stick quickly becomes level during the turn, reset and make the motion smaller. The quality of the movement matters more than how far you rotate.
Step 5: Preset Your Impact Position Before You Hit a Ball
Presetting impact is one of the quickest ways to learn how to stop standing up in the golf swing. You are not trying to play an entire swing with all your weight forward from the start. Instead, you are rehearsing the position your body needs to reach by impact.
Begin in your normal address position. Then make these adjustments:
- Move most of your lower-body pressure toward your lead foot.
- Slide your hips slightly toward the target.
- Feel your trail hip under your lead hip.
- Allow the trail leg to straighten slightly.
- Keep the lead leg more flexed by comparison.
- Feel your belt buckle working toward your lead ankle.
- Allow your torso to tilt back naturally.
At this point, you have created a practical impact rehearsal. Your trail shoulder should be lower, your weight should be forward, and your hips should be forward of your upper body. The setup may feel unfamiliar if you usually hang back or stand up, but it is simply a way to organize the correct impact geometry.
Once you have the pose, make a small turn through the finish while keeping that tilt. Avoid trying to add a powerful backswing or a full-speed strike immediately. You are first teaching your body where it needs to arrive.
Step 6: Hit Short Punch Shots to Make the Feel Functional
After rehearsing the preset impact position, add a ball and make short punch swings. Use an 8-iron or another mid-iron and make controlled swings at roughly half your normal distance. If your full 8-iron travels around 160 yards, a productive drill shot may travel roughly 80 to 100 yards.
Start with the lower body preset forward, then make a compact swing that turns through the tilted position. Your priority is not speed. Look for a low, controlled strike and a predictable interaction with the turf.
Use this practice sequence:
- Make two or three slow impact rehearsals without a ball.
- Set your lower body forward with trail hip under lead hip.
- Hit one short punch shot.
- Hold your finish and check whether your trail shoulder is still lower.
- Repeat until the strike becomes more predictable.
Do not rush to full swings. Short shots reduce the timing demands and make it easier to retain your tilt. Once contact improves, lengthen the motion gradually while keeping the same lower-body intention.
Step 7: Coordinate the Trail Knee, Trail Hip, and Trail Shoulder
To make the movement more athletic, connect three parts of your trail side: the trail knee, trail hip, and trail shoulder. Through impact and early follow-through, each should work around and under the lead side.
Start with the trail knee. As you rotate through, feel the trail kneecap turning toward the target. This helps the trail hip rotate around without jumping upward or drifting backward.
Then sense the trail hip continuing under the lead hip. Finally, maintain the feeling of the trail shoulder working under the lead shoulder. These three sensations work together to preserve side tilt through the strike.
A useful finish checkpoint is visual. If your body is level, your eyes and ears feel level to the horizon. When you maintain correct side tilt, your trail ear and trail eye will be lower. The horizon may appear slightly tilted from your perspective. That is normal and often a sign that you are no longer lifting out of posture.
Step 8: Recognize the Connection Between Hip Slide and Lead-Hip Depth
Golfers sometimes hear two different pieces of advice: slide the hips forward and keep the lead hip deep. These ideas can seem contradictory, but they are compatible.
From face-on, a proper hip slide shows the pelvis moving toward the target. From down the line, the same movement can create the appearance of the lead hip staying deep as the pelvis rotates. The lead hip does not need to move toward the ball to rotate. Instead, it can work back and around while the pelvis has moved forward overall.
Tommy Fleetwood provides a useful reference for this pattern. His lower body moves forward while he maintains side tilt and turns through the shot. The result is a deep-looking lead hip from down the line, a lowered trail side, and a stable relationship to the ground.
If you struggle with your hips moving toward the ball, do not merely try to “keep your butt on the wall.” Instead, focus on the combination of moving forward and rotating. That gives you a more complete movement goal and helps prevent the trail side from rising too early.
Step 9: Build the New Iron Swing Pattern Into Your Practice Routine
Consistency comes from progressing from simple rehearsals to golf shots. Use the drills in a structured order rather than searching for a new feel on every swing.
At home
- Use the alignment stick belt loop drill for slow rehearsals.
- Practice sliding the hips forward and feeling the trail hip under the lead hip.
- Turn into a balanced finish without leveling your shoulders.
On the range
- Begin with impact poses and short punch shots.
- Hold your finish after every shot.
- Gradually make longer swings only when contact stays solid.
- Alternate between a rehearsal and a shot to reinforce the pattern.
On the course
Keep one simple thought: hips forward, trail side under. Trying to manage multiple mechanical ideas over the ball can create tension. A compact rehearsal before the shot is often enough to remind your body of the intended impact position.
The payoff is straightforward. By keeping your lower body forward and maintaining side tilt, you give yourself a better chance to strike the turf reliably, approach from a functional inside path, and produce the solid iron contact that makes golf far more enjoyable.
Frequently Asked Questions About How to Stop Standing Up in the Golf Swing
Why do I stand up through impact with my irons?
A common cause is the hips moving back instead of forward during the downswing. When the pelvis retreats, the trail hip and trail shoulder rise, your body loses side tilt, and the club has a harder time reaching the ground consistently.
Should I keep my weight 80 percent forward during my entire golf swing?
No. The 80/20 forward-weight setup is a drill that presets the impact position. It helps you feel where your body needs to be by impact before you blend that position into your normal swing.
What should my trail leg do when I move into impact?
Your trail leg may straighten somewhat as your lower body moves forward, while your lead leg remains comparatively more flexed. This can help place the trail hip underneath the lead hip and create side tilt.
Can side tilt help fix an over-the-top golf swing?
It can help. When you maintain a forward lower body and keep the trail hip and shoulder under the lead side, the club is less likely to work across the ball. This supports a more inside approach to impact.
What is the best drill for solid iron contact?
Start with the preset impact drill. Set your hips and lower-body weight forward, feel the trail hip under the lead hip, then hit short punch shots while turning through without losing side tilt.
0 Comments