
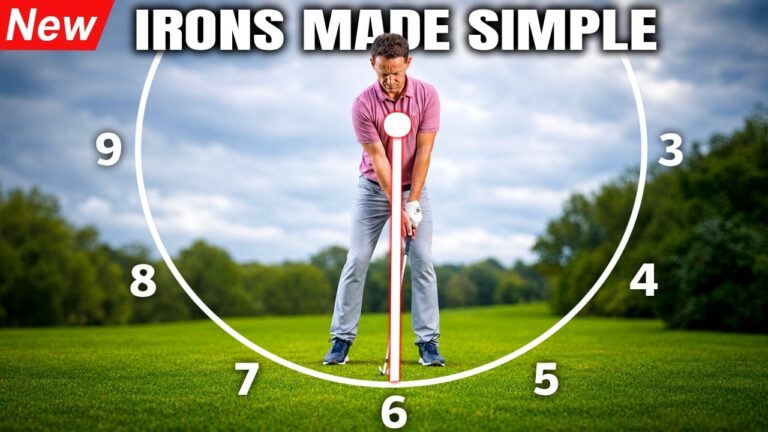

To strike your irons consistently, you do not need a complicated swing rebuild. You need one dependable contact rule: hit the golf ball first, then let the club strike the ground ahead of it.
That simple sequence is the foundation of crisp iron shots. When the club reaches the ground behind the ball, it can produce a heavy strike, a thin shot, or a topped shot that runs along the turf. These misses may feel different, but they often come from the same issue: the low point of your swing arc is in the wrong place.
Your goal is to control that low point with two practical checkpoints:
- Keep your weight and chest forward relative to the ball.
- Release your trail arm around your body, rather than throwing the club straight down.
Use the steps below to build more reliable ball first contact with wedges, mid irons, and longer irons.
Table of Contents
- Step 1: Commit to the Ball First, Ground Second Contact Rule
- Step 2: Understand Where the Bottom of Your Swing Arc Is
- Step 3: Move Your Weight Forward to Strike Your Irons Consistently
- Step 4: Keep Your Chest Forward Relative to the Ball
- Step 5: Prevent an Early Trail-Arm Release
- Step 6: Use the Stone-Skimming Feel to Release Around the Corner
- Step 7: Combine the Two Checkpoints in a Practice Routine
- Step 8: Use a Reliable Ball Position for Cleaner Iron Contact
- Step 9: Take the Same Principle to the Course
- Frequently Asked Questions
Step 1: Commit to the Ball First, Ground Second Contact Rule
The most important rule for clean iron striking is straightforward: the clubhead should meet the ball before it reaches the turf. After impact, the club continues down into the ground and creates a divot ahead of where the ball was sitting.
This is different from the action needed with a driver, where the club can travel upward through impact. With an iron shot played from the ground, your club is traveling on the descending portion of its arc at impact. The bottom of that arc must be ahead of the ball.
A useful way to judge your contact is to inspect the turf after a shot. If you take a divot, its deepest point should be in front of the original ball position, not behind it. A shallow divot ahead of the ball is a strong sign that you are beginning to strike your irons consistently.
Why fat, thin, and topped shots are closely related
A fat shot happens when the club reaches the ground too early, slowing the club before it gets to the ball. A thin shot can happen when the club bottoms out behind the ball, then begins traveling upward before impact. A topped shot is another possible result when the club rises too soon and catches the upper half of the ball.
Rather than treating these as three unrelated problems, focus on one solution: move the swing’s low point ahead of the ball.
Step 2: Understand Where the Bottom of Your Swing Arc Is
Your golf swing follows an arc, not a straight up and down motion. Imagine a clock drawn around your lead arm and club. As the club travels down, it reaches its lowest point at six o’clock, then begins moving upward again.
For a solid iron shot, six o’clock needs to occur ahead of the ball. This gives you the descending strike that compresses the ball and allows the club to brush or cut the turf afterwards.
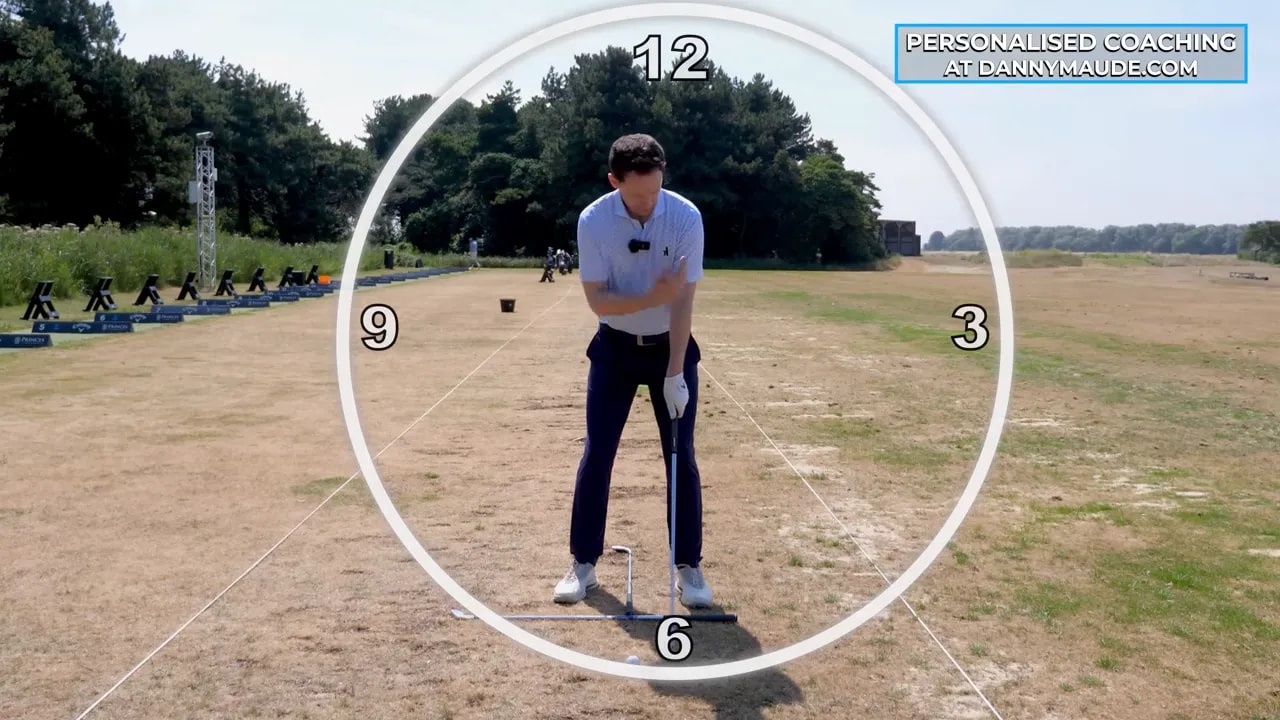
The location of that low point changes with your body position. When your body mass stays too far back, the lowest point tends to shift behind the ball. When your chest and pressure move forward, you make it much easier for the club to reach the ground after impact.
It is important to recognize that the trail hand can also change the low point. Adding your trail hand to the club can encourage an early throwing action, which can shift the bottom of the arc backward even if your setup looks reasonable.
Step 3: Move Your Weight Forward to Strike Your Irons Consistently
Your first checkpoint is your pressure location. At impact, you want the majority of your weight moving into your lead side. A useful practice feel is to have roughly 70 percent of your weight on your lead foot.
This forward pressure encourages the club to reach the ground in front of the ball. It also gives you a more stable base for delivering the club down and through, rather than trying to scoop the ball into the air.
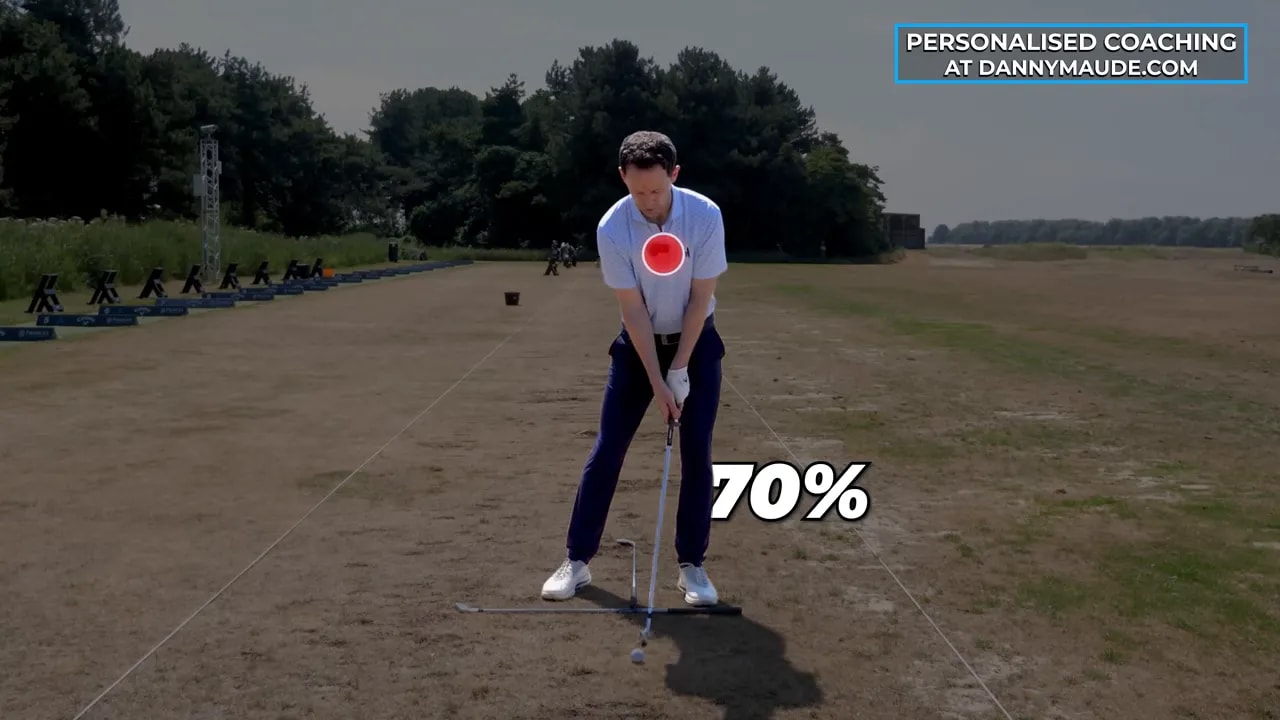
You do not need to force your entire body aggressively toward the target. The key is simply to avoid leaving your pressure on the trail foot as you approach impact. If your weight remains back, the club is much more likely to strike the ground early.
A simple forward-pressure rehearsal
Set up to an iron shot without a ball. Shift enough pressure into your lead foot that you can feel it clearly supporting you. From there, make several small swings while keeping that lead-side pressure stable.
As you rehearse, notice where the club brushes the turf. Your aim is to hear the club contact the ground slightly ahead of the point where the ball would be. Build the feeling with short swings before increasing the length of your motion.
Step 4: Keep Your Chest Forward Relative to the Ball
Weight forward is helpful, but your chest position is equally important. Your chest should remain forward relative to the ball as you move through impact. This helps preserve the correct bottom of the swing arc.
A common error is hanging back through the strike. You may feel as though you are trying to help the ball into the air, but moving your chest backward shifts the low point behind the ball. That can lead immediately to heavy contact, thin contact, or an inconsistent strike pattern.
The loft on your iron is designed to launch the ball. You do not need to lift it. Your job is to deliver the club with a forward body position and allow the club’s loft to do its work.
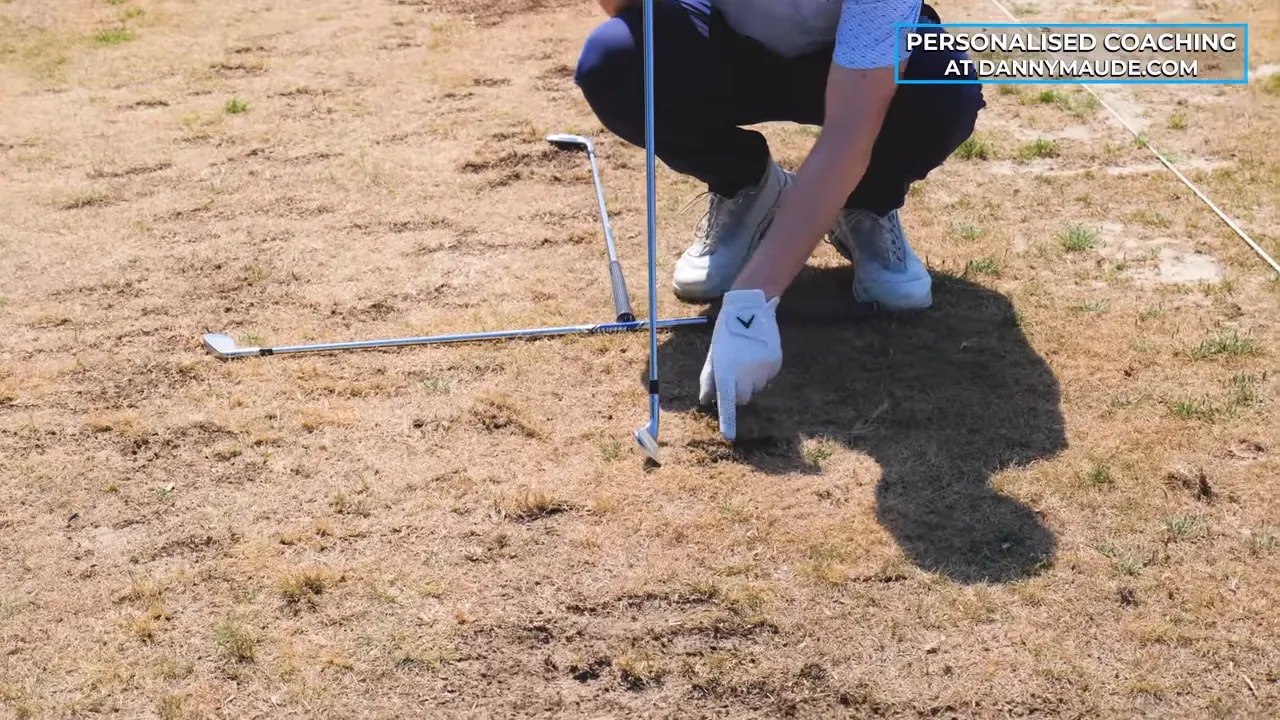
Use the turf as feedback. When the chest stays forward, the divot should appear ahead of the ball position. When the chest falls backward, the divot commonly appears behind the ball.
Check your position without guessing
Many golfers feel that their chest is forward when it is actually behind the ball. A swing recording from face on can help you check this. Pause the footage around impact and compare the center of your chest with the ball position.
If you use a swing analysis tool, look specifically for chest and weight position through impact. The point is not to chase perfect positions. It is to identify whether hanging back is causing your low point to move behind the ball.
For a guided session, use the free iron-striking practice plan to structure these drills into a repeatable routine.
Step 5: Prevent an Early Trail-Arm Release
Moving weight and chest forward will improve your chances of clean contact, but it is not enough on its own. You must also control how your trail arm releases through the downswing.
Many golfers straighten the trail arm too early. The trail shoulder stays high, the arm extends prematurely, and the club is thrown down toward the ground. This early release brings the low point too far back, often causing the club to hit the turf behind the ball.
Think of the difference between throwing a ball directly into the ground and skimming a stone across a pond. Throwing down is too vertical for an iron strike. Skimming a stone sends your arm and hand around on an arc.
That sidearm, around-the-corner feeling is the action you want. Your trail shoulder stays lower for longer, your trail arm does not straighten too soon, and the club approaches the ball on a more natural arc.
Step 6: Use the Stone-Skimming Feel to Release Around the Corner
The stone-skimming image gives you a simple athletic feel for a better release. Rather than trying to throw the clubhead at the ground in front of the ball, imagine skimming a stone low across water toward the target.
This feel encourages several useful movements at once:
- Your trail shoulder stays lower as you come into impact.
- Your trail arm remains bent for longer instead of straightening early.
- Your body can continue pivoting through the shot.
- The club releases around your body after impact.
- The clubhead stays behind you longer before it is propelled around the corner.
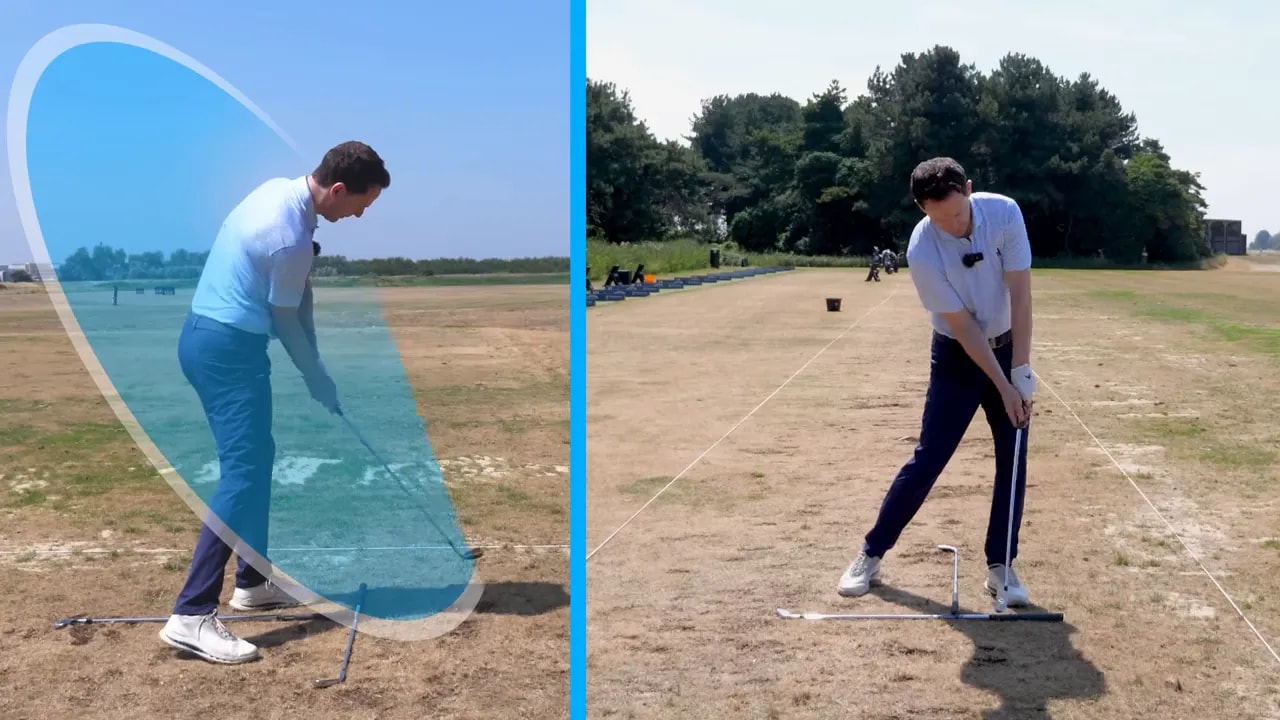
Do not mistake this for holding the club off or stopping the release. You still release the club. The difference is where you release it. The club should release around the corner as your body rotates, not downward in front of you as though you are trying to hit the ground.
Practise the feel with no ball first
Start with a club held in both hands and make a slow, waist-high rehearsal. Shift your pressure forward, keep your chest forward, and feel your trail shoulder staying lower as the club moves through.
Now imagine skimming a stone toward the target. Let the club travel around your body after the impact area. Finish with your body turning through, rather than finishing with the club dumped into the ground in front of you.
Once the movement feels natural, add a ball and use a small swing. Build speed only after the contact pattern improves.
Step 7: Combine the Two Checkpoints in a Practice Routine
To strike your irons consistently, simplify your practice to two clear checkpoints. Avoid filling your mind with technical thoughts over the ball.
- Checkpoint one: Set up with your weight and chest forward relative to the ball.
- Checkpoint two: Feel as though you are skimming a stone around the corner, not throwing the club down.
Make a few rehearsal swings before each ball. On each rehearsal, brush the ground ahead of the ball position. Then step in, keep the same two feels, and make your shot.
After impact, check the turf. The ideal pattern is ball first, then ground, with the divot ahead of the original ball location. This immediate feedback is more useful than trying to judge contact only by how the shot feels.
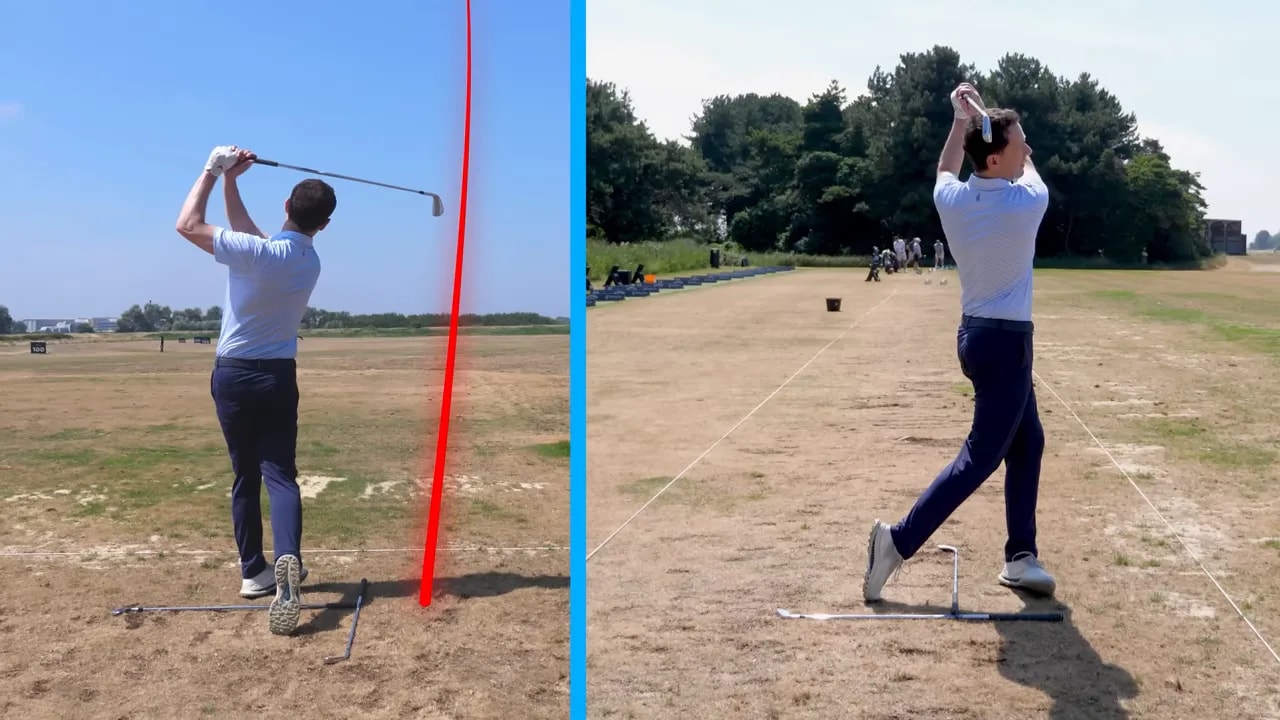
Do not expect every divot to be identical, particularly on firm or uneven ground. The key is the direction of your low point. Consistently striking the ground ahead of the ball means you are creating the correct impact conditions.
Step 8: Use a Reliable Ball Position for Cleaner Iron Contact
Ball position influences how easy it is to deliver the club with a descending strike. For most iron shots, place the ball around the center of your stance and keep it back of your lead shoulder.
This central ball position supports a ball first strike because it does not force you to reach too far forward for the ball. Moving the ball farther back can make it easier to strike the ball before the ground, but it should not become a substitute for better body position and release.
Use a consistent starting point for your iron practice:
- Set the ball near the center of your stance.
- Keep it behind your lead shoulder.
- Move pressure toward your lead side.
- Keep your chest forward through impact.
- Release around the corner with the stone-skimming feel.
With this setup, you can focus on improving low-point control instead of constantly changing your ball position to rescue inconsistent contact.
Step 9: Take the Same Principle to the Course
On the course, simplify your swing thought to one phrase: ball, then ground. Use it as a reminder of the desired strike, not as an instruction to force the club downward.
Before an iron shot, make one slow rehearsal that brushes the turf ahead of the ball. Feel the pressure in your lead foot, keep your chest over that side, and sense the club releasing around your body.
That is enough. You do not need to manufacture a steep hit or try to dig a deep divot. Your aim is a naturally descending strike produced by correct low-point control, a forward chest position, and a properly timed trail-arm release.
For continued work on related clubs, explore more golf lessons and practice plans that cover the wider game, including fairway woods, driver, short game, and overall ball striking.
Frequently Asked Questions
Why do I hit fat and thin iron shots in the same round?
Fat and thin shots can come from the same low-point issue. If the club reaches the ground behind the ball, it may hit the turf heavily before impact or begin rising before impact. Focus on moving the low point ahead of the ball by keeping your weight and chest forward and avoiding an early trail-arm release.
Should I keep all of my weight on my lead foot when hitting irons?
You do not need all of your weight on the lead foot. A useful feel is roughly 70 percent of your pressure on the lead side through impact. This supports ball first contact while allowing you to remain balanced and athletic.
What does the stone-skimming feeling do in the iron swing?
The stone-skimming feeling encourages you to release the club around your body on an arc. It helps keep the trail shoulder lower and delays premature trail-arm straightening, reducing the tendency to throw the club into the ground too early.
Where should the ball be positioned to strike irons consistently?
For most iron shots, start with the ball around the center of your stance and back of your lead shoulder. This gives you a practical position for producing a descending blow and taking a divot ahead of the ball.
Should I try to hit down harder on my irons?
No. Forcing the club straight down can encourage an early release and poor contact. Instead, keep your chest and weight forward, then allow the club to travel on its natural arc and release around the corner. The descending strike will follow.
0 Comments