
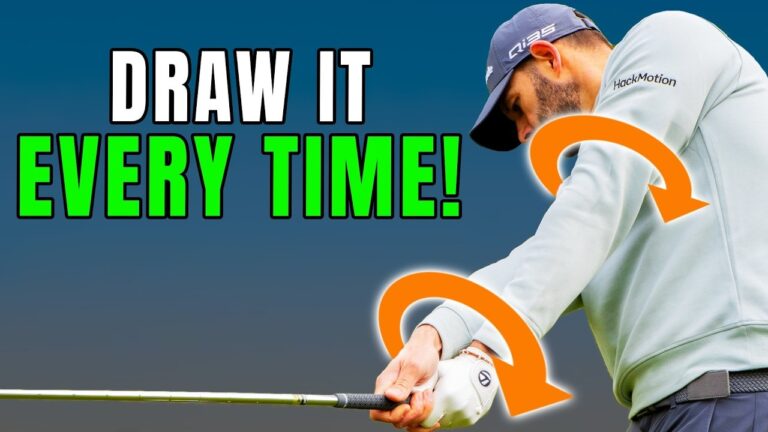

A reliable golf draw can make iron shots feel more predictable, especially if you tend to fade or slice the ball. A draw for a right-handed golfer begins slightly to the right of the target and curves back toward it. The goal is not to force a dramatic hook. It is to build a series of simple setup and swing conditions that encourage the club to travel from inside to out while the clubface is slightly closed relative to that path.
This golf method is designed as a layered process. Each adjustment adds a small advantage. When you combine ball position, forward pressure, lateral movement, arm delivery, and clubface control, you give yourself a much better chance of producing a controlled right-to-left iron shot.
Table of Contents
- Step 1: Understand the golf draw ball flight
- Step 2: Move the golf ball slightly back and add shaft lean
- Step 3: Set more golf pressure into your lead side
- Step 4: Shift your hips toward the target in the downswing
- Step 5: Deliver the arms down and keep the club behind your hands
- Step 6: Close the golf clubface relative to the path
- Step 7: Blend the golf draw ingredients into a full shot
- Step 8: Use a focused golf practice routine
- Step 9: Troubleshoot your golf draw pattern
Step 1: Understand the golf draw ball flight
Before changing your golf swing, get clear on the two impact conditions that create a draw:
- The club path must travel to the right of the target for a right-handed golfer.
- The clubface must be slightly closed relative to that path.
Those two factors have different jobs. The face direction has a major influence on where the ball starts. The relationship between face and path creates the curve. If your path is to the right but the face is also pointed too far right, the ball can simply push right without drawing. If the face is too open relative to the path, you will likely keep producing a fade or slice.
This is why simply aiming your body right is not a complete answer. You can remain aligned toward your intended target and create the draw through the way the club is delivered.
If you currently slice your irons, this is particularly useful golf information. A slice commonly combines an out-to-in path with an open face. The steps below are built to change both tendencies in a practical order.
Step 2: Move the golf ball slightly back and add shaft lean
Start with a 7-iron. A normal 7-iron ball position is usually just forward of center. To encourage a draw, move the ball back a small amount, closer to the center of your heels. Do not make a drastic change. You are looking for a subtle shift, not a ball position near your back foot.
Keep the grip end of the club in its normal relationship to your lead thigh. Because the ball has moved back while the hands remain forward, you will naturally create more forward shaft lean at address.
This setup change helps you contact the ball earlier in the clubhead’s arc. Since the club travels on a curved arc, an earlier strike makes it more likely that the clubhead is moving to the right of the target line through impact. That is the first ingredient in building an in-to-out golf path.
Use these address checkpoints:
- Place the ball only slightly back from your standard 7-iron position.
- Keep your hands ahead of the ball rather than moving them back with it.
- Feel the handle leaning toward your lead thigh.
- Retain your usual alignment toward the target.
For left-handed golfers, reverse the directional language throughout this guide.
Step 3: Set more golf pressure into your lead side
Once the ball moves back, avoid shifting your whole body back with it. That would effectively return the ball to a forward position relative to your body and remove the benefit of the adjustment.
Instead, place slightly more pressure into your lead side at address. A useful reference is approximately 60 percent of your pressure on the lead foot, though the exact number matters less than the sensation. Use your thighs and hips to settle subtly toward the lead side.
Your belt buckle should feel a little ahead of the ball. This lead-side starting point supports the forward shaft lean and prepares you to move through the strike rather than hang back.
In practical golf terms, this is not a rigid lean or an extreme slide. You should still feel athletic, balanced, and capable of turning. The adjustment is simply enough to position your body and low point more favorably for a draw-biased iron strike.
Step 4: Shift your hips toward the target in the downswing
The next layer is a lateral movement in the downswing. Good iron swings include some movement of the hips toward the target. It is not a fault to move laterally. In fact, high-level players commonly shift their hips several inches toward the target by impact.
To make your golf draw more likely, focus on moving your hips forward in transition instead of immediately spinning them open or falling back away from the target. Keep your head relatively centered while your belt buckle works toward a point above the inside of your lead heel.
That distinction is important:
- Centered head: Avoid a large lunge toward the target.
- Hips moving forward: Allow your pelvis and pressure to shift toward the lead side.
- Arms lowering: Let the arms work down as your lower body moves forward.
A simple practice station can make this easier to learn. Place an alignment stick in the ground just over a hand’s width outside your lead heel. Make slow rehearsal swings and feel your hips working toward that stick as you begin the downswing. You are creating awareness of the proper direction, not trying to collide with the stick.
This forward shift is valuable for golfers who fade or slice because many of them rotate their hips without moving them toward the target, or drift backward through impact. The forward shift helps create the space and delivery direction needed for the club to approach from inside the target line.
Step 5: Deliver the arms down and keep the club behind your hands
Now combine the hip shift with the arm action. From the top of your swing, move your hips toward the lead-side reference point while allowing your arms to work down in front of your torso.
Your key checkpoint occurs when the shaft is roughly parallel to the ground in the downswing. At this point, the clubhead should be slightly behind your hands when compared with the target line. In other words, the shaft should appear a little inside the alignment stick or ball-to-target line rather than parallel to it or outside it.
This position is a powerful draw-biased checkpoint because it combines several components:
- Your hips have shifted toward the target.
- Your arms have moved down instead of being thrown outward.
- The clubhead is behind your hands.
- The resulting path is positioned to travel out to the right.
A clubhead parallel to the target line at this stage is closer to neutral. A clubhead outside the hands is more likely to create an out-to-in path, which is a common contributor to a fade or slice. For this golf drill, rehearse the clubhead slightly inside the line so you have a clear visual target.
Do not rush directly from the top into a full-speed swing. Make several slow-motion rehearsals where you stop at the shaft-parallel position, check the clubhead location, then reset. This trains the movement before speed makes it harder to feel.
Step 6: Close the golf clubface relative to the path
An inside-to-out path alone does not guarantee a draw. It can produce a straight push if the clubface points too far right. To curve the ball back, you need the face slightly closed relative to the path.
Use the same shaft-parallel downswing checkpoint. As your arms work down and the clubhead sits behind your hands, the clubface should point more toward the ground. This is the draw clubface condition.
If the toe of the club is behind the heel and the face appears to lean skyward, the clubface is open. That face is unlikely to curve the ball back toward the target, even if you have created a favorable path.
Try this awareness drill:
- Make a slow backswing and close your eyes.
- Begin the downswing by shifting your hips toward the lead-side reference.
- Let your arms lower into the shaft-parallel position.
- Open your eyes and inspect the clubface.
- Repeat until the face points more downward while the clubhead remains behind your hands.
For many golfers, a sound grip and functional wrist conditions will produce this clubface position naturally. If it does not happen, this drill makes the difference visible. You do not need to flip the hands aggressively. You need a face that is appropriately closed relative to your in-to-out path.
Step 7: Blend the golf draw ingredients into a full shot
Once every individual piece feels familiar, combine them in the same order every time. A consistent routine makes the golf draw easier to repeat under normal playing conditions.
Your full sequence is:
- Set the ball slightly back of your usual 7-iron position.
- Keep the grip end forward to create added shaft lean.
- Place a little more pressure into your lead side.
- Make a normal backswing.
- Shift your hips toward the target as the arms lower.
- Deliver the clubhead slightly behind your hands at shaft parallel.
- Keep the clubface pointing down relative to that path.
- Accelerate through to a complete, balanced finish.
Initially, a shot may start right of the target. That can be useful feedback. It suggests you have likely created the rightward club path. The final adjustment is the face. If the ball keeps starting too far right and does not curve back, bring the face slightly more closed relative to the path through the controlled downswing checkpoint.
Do not chase maximum curve. A playable golf draw is a modest curve that starts a little right and returns toward your target. When your path is dramatically right and your face is sharply closed, the result can become an overdraw or hook. Build the motion with rehearsals first, then add speed gradually.
Step 8: Use a focused golf practice routine
Practice the movement in stages instead of hitting every ball at full pace. This approach gives you a way to diagnose your ball flight without guessing.
Start with rehearsals
Make five slow rehearsals without a ball. Stop at shaft parallel in the downswing and check three items: hips forward, arms down, and clubface down. These are the core swing principles.
Hit partial shots
Hit short, controlled iron shots at about half speed. Your priority is starting the ball slightly right of the target and producing a small right-to-left curve. Do not try to hit a full draw immediately.
Progress to normal swings
Once the partial shots are consistent, make normal swings with one simple thought. For most golfers, “hips forward, arms down” is enough. Let the address setup and clubface rehearsal do the rest.
Use alignment sticks whenever possible. One on the ground along the target line gives you a reference for the clubhead. Another just outside your lead heel can help you learn the lower-body shift. These visual checkpoints turn an abstract golf swing feel into something you can measure.
Step 9: Troubleshoot your golf draw pattern
Ball flight offers immediate feedback on which piece needs attention.
- Ball starts right and stays right: Your path may be working correctly, but your clubface is too open relative to it. Rehearse the clubface pointing down at shaft parallel.
- Ball starts left and curves farther left: Your face is likely too closed. Reduce the face closure rather than trying to swing farther left.
- Ball starts left and fades: Your path may be out-to-in. Revisit the forward hip shift and arms-down delivery.
- Ball starts straight and does not curve: Your face and path may be very similar. Create a slightly more rightward path while retaining face control.
- Heavy or inconsistent contact: Check that you have not moved your body back with the ball. Return to the forward pressure and belt-buckle checkpoints.
Building a draw is not about one exaggerated move. The most dependable golf result comes from stacking modest adjustments that all support the same delivery: ball slightly back, pressure forward, hips toward the target, arms down, club behind the hands, and a clubface that is slightly closed relative to the path.
Golf Draw FAQ
Should you aim right to hit a golf draw?
You can stay aligned toward your intended target. This method creates a draw through club path and clubface conditions rather than requiring your body alignment to shift right.
Why does your ball push right instead of drawing?
Your club path may be traveling right of the target, but the clubface is too open relative to that path. Rehearse the clubface pointing more toward the ground during the downswing checkpoint.
How far back should the ball be for a golf draw with a 7-iron?
Move it only slightly back from a normal position just forward of center. The ball should move closer to the center of your heels, not all the way toward your trail foot.
What are the three main swing thoughts for this golf draw?
Focus on hips moving forward, arms working down, and clubface control. Combine those with a slightly back ball position and more pressure on your lead side at address.
0 Comments