
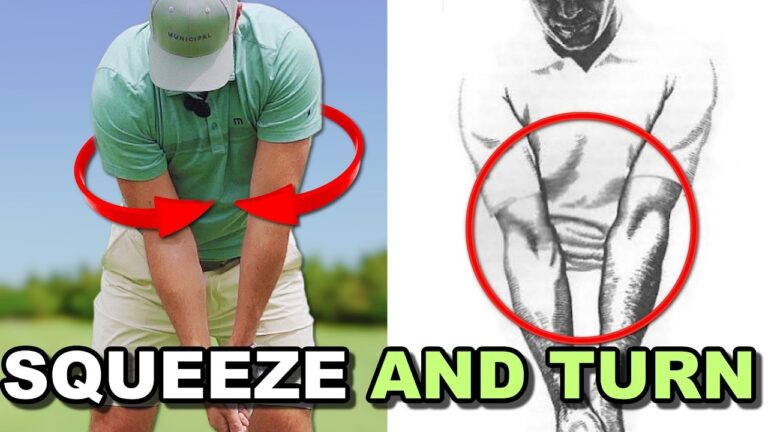

Better iron contact is not always about adding a new backswing move or trying to create more speed. Often, the fastest path to a more reliable golf swing starts with how your arms, elbows, hands, and club are organized at address.
The focus keyphrase for this guide is squeeze your elbows. This simple feel can help you preserve the radius of your swing, improve shaft lean, reduce casting, and make clubface control more predictable through impact. Paired with the right forearm rotation, it gives you a practical way to build solid contact and a playable draw pattern.
Table of Contents
- Step 1: Understand Why You Need to Squeeze Your Elbows
- Step 2: Build the Squeeze Your Elbows Setup Position
- Step 3: Check Your Hand Distance to Preserve the Golf Swing Radius
- Step 4: Practice the Squeeze Your Elbows Radius Drill
- Step 5: Add Forearm Rotation to Square the Clubface
- Step 6: Adjust the Squeeze Your Elbows Drill for Your Ball Flight
- Step 7: Build This Golf Impact Position Into Your Practice
- Step 8: Use the Key Swing Thoughts on the Course
- Step 9: Answer Common Questions About Squeezing Your Elbows
Step 1: Understand Why You Need to Squeeze Your Elbows
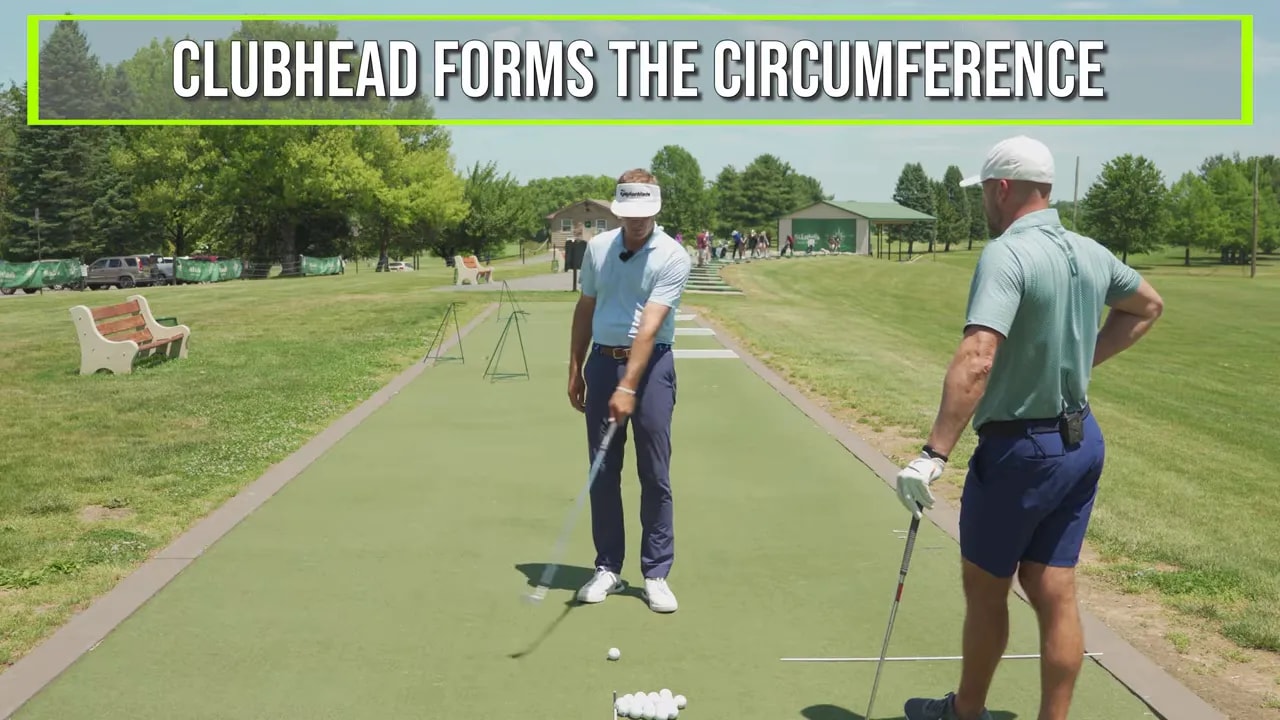
To squeeze your elbows effectively, first understand the job they perform in the swing. Your lead arm and the golf shaft form what can be described as the swing’s radius. The clubhead travels around that radius.
For clean iron shots, you want that radius to remain relatively stable through the strike. When your elbows pull apart or bend excessively as you approach the ball, the handle can move closer to your body. That changes the radius at exactly the wrong time.
The likely results are familiar:
- Thin shots caused by inconsistent low point and changing arm structure
- Topped shots when the clubhead rises too early
- Fat shots when the bottom of the swing moves behind the ball
- Casting, or early loss of shaft lean
- Unreliable face control and inconsistent curve
A useful image is to imagine a string connecting the butt end of the club to your midsection. At setup, that string has a certain length. Through impact, you want to avoid suddenly shortening it by pulling the handle inward and allowing the elbows to separate.
This does not mean your body should freeze or that your arms must be rigid. It means you need a dependable arm structure so the club can meet the ball with a repeatable radius, stable handle position, and predictable strike.
Step 2: Build the Squeeze Your Elbows Setup Position
The first place to work on the squeeze your elbows feel is at address. A strong setup makes the correct motion through the ball much easier to produce. Trying to manufacture it at full speed without an organized starting position is much harder.
Begin with a mid iron, such as a 6 iron or 7 iron. Set up with your arms comfortably extended rather than tightly bent. Then feel as though your elbows are gently squeezing closer together.
This is not a forceful squeeze. You are simply creating enough connection and structure that your arms do not begin too wide or too collapsed.
Use the “three position” for your elbows
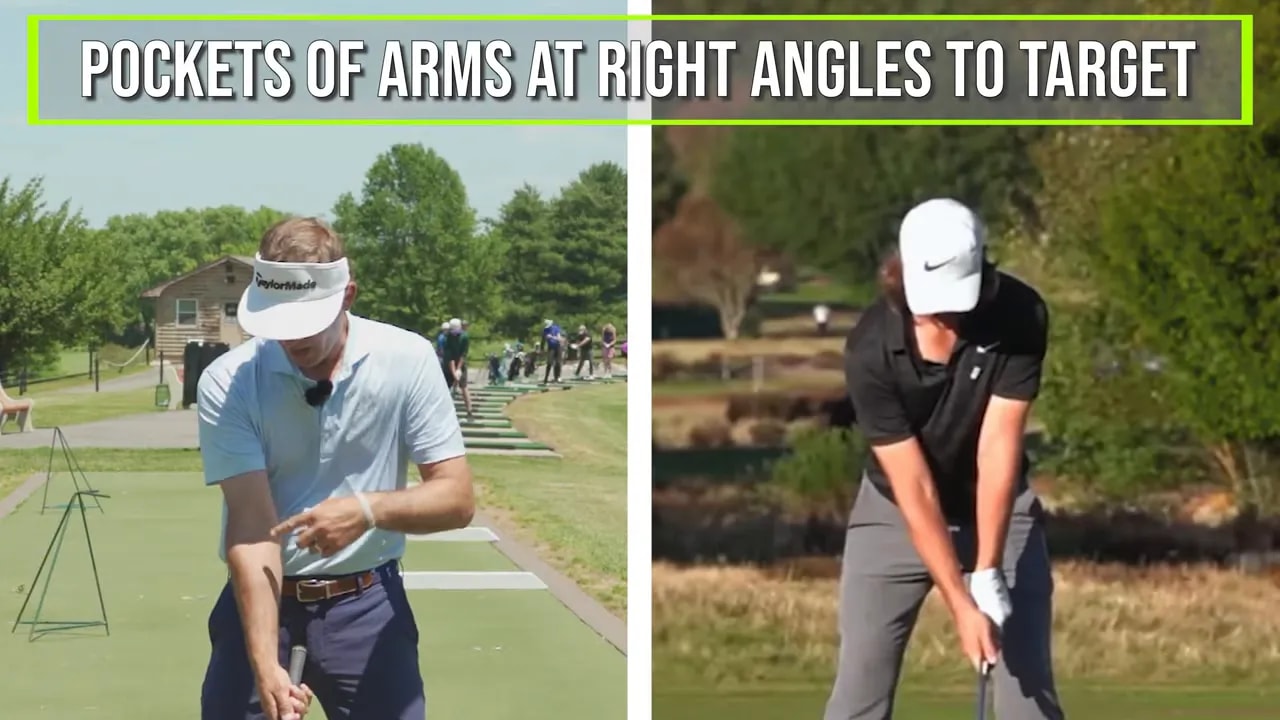
The elbow structure is called the three position. As a practical reference, the inside creases or “pockets” of your arms should feel oriented roughly at right angles to the target line. Your elbows should appear relatively close together, with your upper arms maintaining enough width to keep your arms organized over your torso.
A rough reference is that the arms may be about eight inches apart. This is not a universal measurement. Your body size, posture, and build matter. Treat it as a starting point rather than a precise rule.
Next, lean the shaft forward. The butt of the club should be ahead of the clubhead’s leading edge at address. This setup promotes a more useful handle position for striking an iron and helps prepare you to deliver the club with shaft lean rather than flipping the clubhead past your hands.
Golfers who stand too close often begin with bent elbows, a handle too close to the body, and arms already separated. From there, pulling the club even closer through impact becomes likely. Start farther from that pattern by organizing your elbow spacing and shaft position before the club ever moves.
Step 3: Check Your Hand Distance to Preserve the Golf Swing Radius
Once you squeeze your elbows into a useful setup position, check the distance from the butt of the club to your body. For a mid iron, a helpful starting checkpoint is approximately one and a half to two fists from the butt of the club to the fly of your pants.
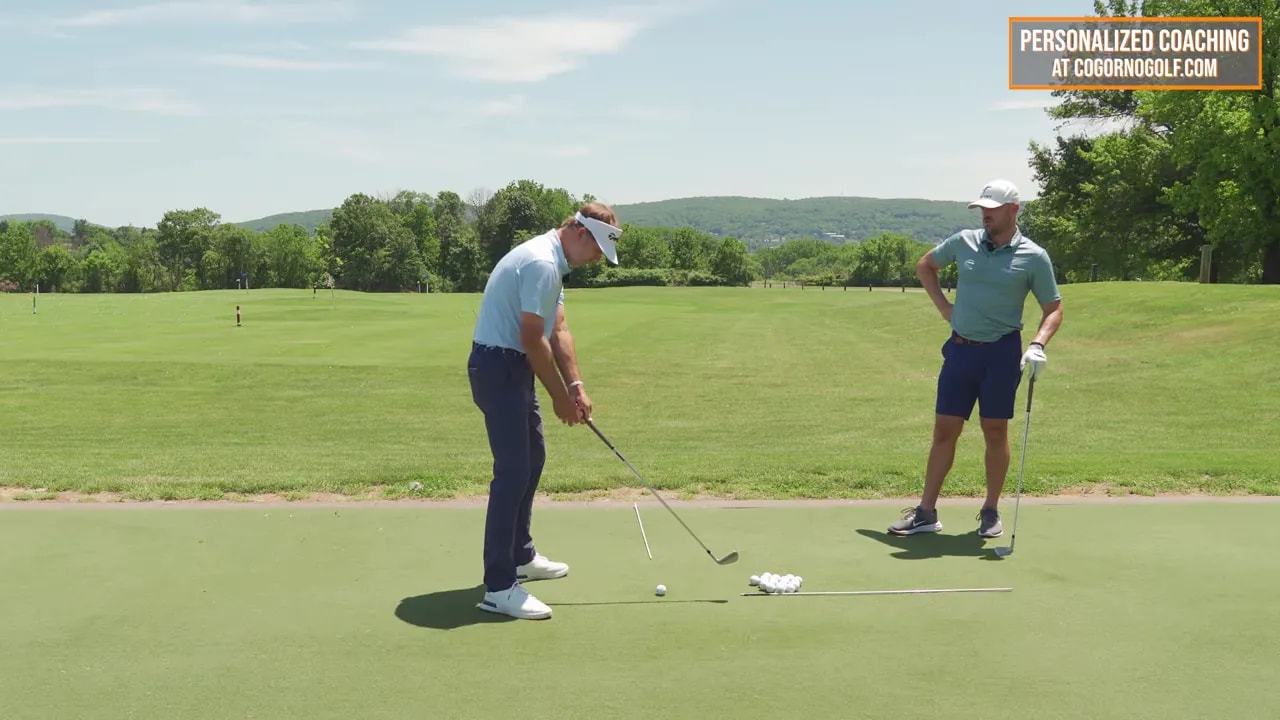
This reference encourages your arms to sit more on top of your torso instead of being cramped inward. It also gives you a simple spatial measurement to preserve as you swing through the ball.
Do not use this checkpoint as an excuse to reach excessively or stand uncomfortably far away. The goal is a balanced address with extended arms, connected elbows, and enough room for the handle to work without being pulled into your body.
Before each practice swing, run through this short setup checklist:
- Set your posture and let the arms extend naturally.
- Feel your elbows move closer together into the three position.
- Check that the shaft leans forward and the butt of the club is ahead of the leading edge.
- Confirm the butt of the club is roughly one and a half to two fists from your body.
- Maintain a relaxed grip and avoid adding unnecessary tension.
The setup is not a minor detail. It is the blueprint for your impact position. If you begin with the radius, elbow structure, and handle distance in a poor place, you will need compensations later in the swing.
Step 4: Practice the Squeeze Your Elbows Radius Drill
The most direct way to learn this pattern is with controlled punch shots. Use a short backswing and a short follow-through. Do not worry about hitting the ball far. Your priority is clean contact and a repeatable curve.
Set up using the elbow squeeze, forward shaft lean, and hand-distance checkpoints. Then make a compact swing while feeling that the relationship between your body and the butt of the club stays approximately the same from address through impact and into the follow-through.
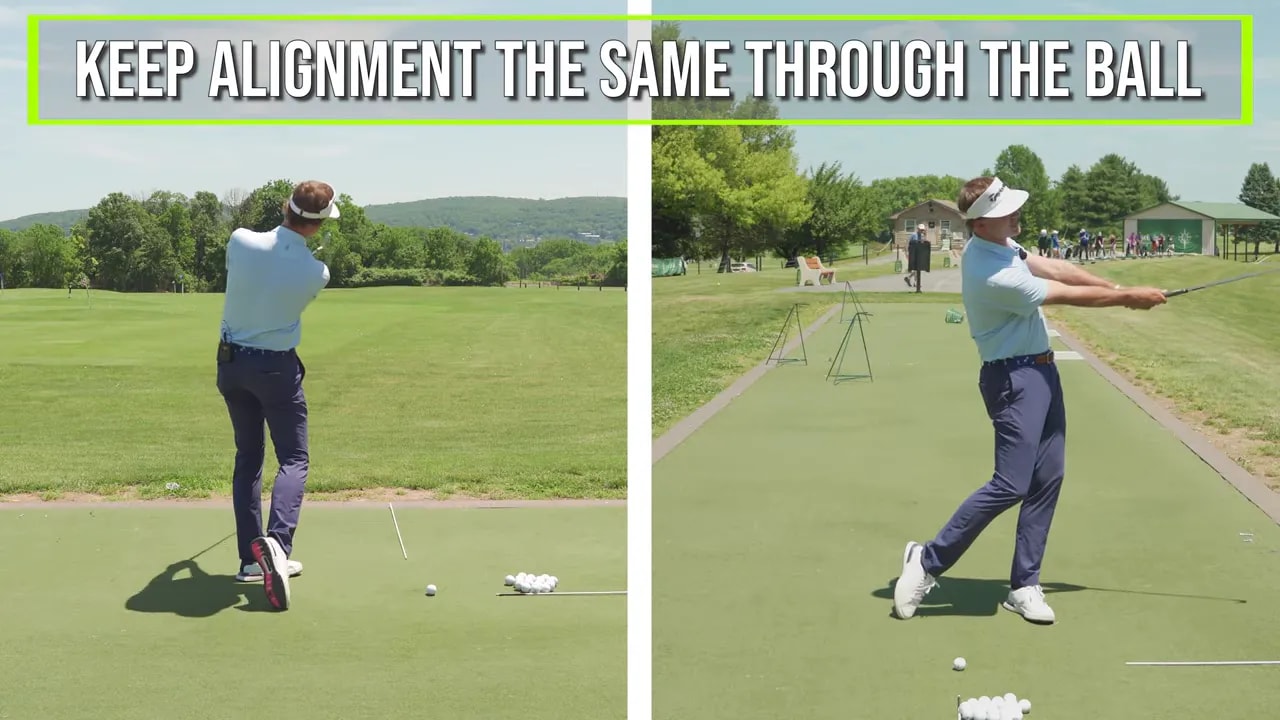
As you swing through, allow your arms to lengthen rather than fold and pull the handle inward. Your elbows should stay organized instead of separating dramatically. This helps preserve the lead arm and shaft radius and promotes a more stable low point.
Start with a punch-shot finish where the club travels only to about waist height or slightly higher. A shorter swing makes it easier to feel the correct geometry without the complexity of a full finish.
What a successful drill should produce
When the drill is working, your strike should feel more centered and solid. You may also begin to see a small draw, provided the clubface is sufficiently closed relative to the path. The ball does not need to fly full distance during this training phase.
Judge the drill by these outcomes:
- Contact is more solid, with fewer thin and fat strikes.
- The handle does not get pulled sharply toward your body.
- Your arms remain extended through the strike.
- Your elbows retain their structure instead of separating.
- Your shot shape becomes more consistent.
If the handle pulls inward, your elbows are likely bending and separating. Reset the address position, reduce swing length, and rehearse the feeling of keeping the handle farther from your body through the hitting area.
Step 5: Add Forearm Rotation to Square the Clubface
Preserving your radius improves contact, but you also need to control the clubface. Some golfers perform the extension drill well, then start pushing shots right because the face remains too open through impact.
The solution is not to let the clubhead race past the hands. Instead, learn to rotate the trail forearm so the face can close while the handle stays forward.
At setup, pair the elbow three position with a wrist position created by pronation of the trail forearm. For a right-handed golfer, this involves rotating the right forearm counterclockwise so the trail wrist and palm are organized to keep the clubface more closed relative to the shaft.
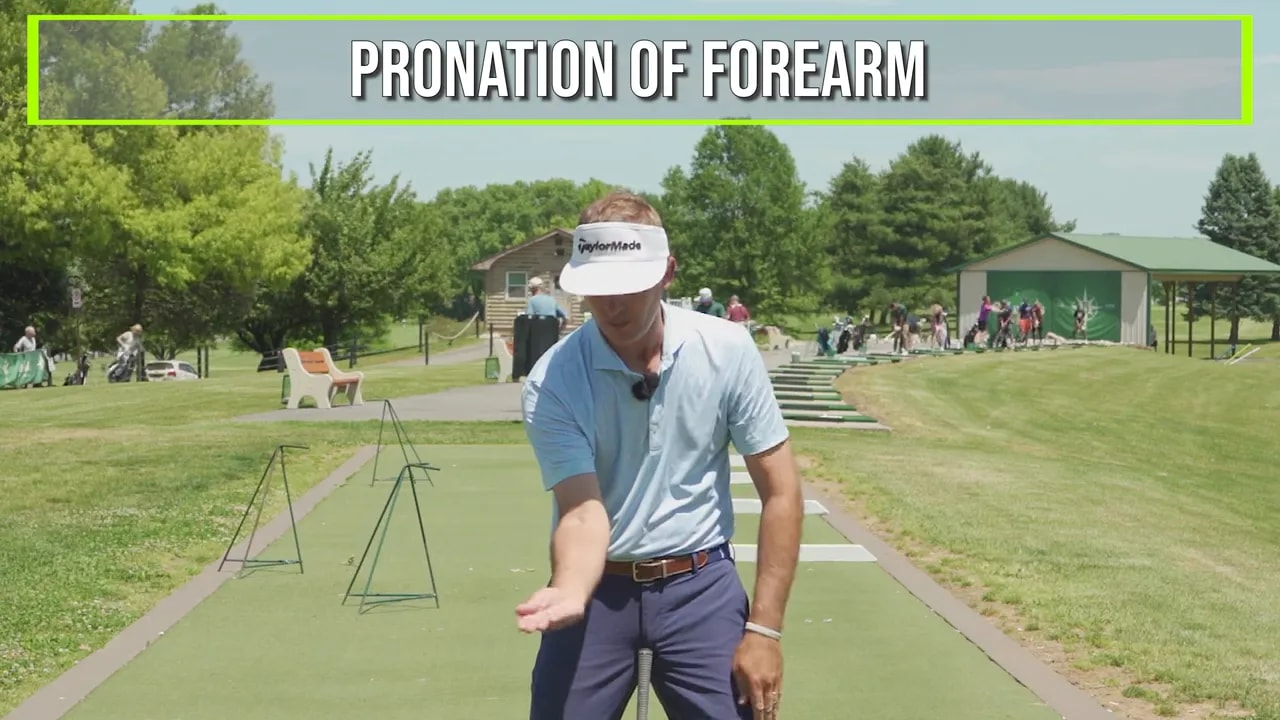
Think of these as two complementary pieces:
- Elbows in the three position: This supports the radius, arm structure, and impact alignment.
- Trail wrist in the one position: This comes from trail-forearm pronation and supports a face that is not excessively open.
Through impact, maintain the same general relationship. Your trail palm can feel as though it rotates more down toward the ground. That feeling helps close the clubface without requiring a flip.
This matters especially if you tend to slice, block, or push the ball. Many golfers can make a respectable backswing but lose the necessary forearm rotation through the hitting area. The clubface then stays open even when the arms extend correctly.
Do not confuse pronation with pulling the elbow behind you
The key is to rotate the forearm while keeping the trail elbow feeling forward and connected. Avoid moving the elbow backward behind your rib cage just to turn the palm down. That move can disrupt the handle position, alter the path, and undo the arm structure you built at address.
A productive feel is this: twist the face closed while the hands remain ahead of the clubhead, the trail elbow stays forward, and the elbows continue to feel as though they are moving toward each other rather than separating.
Step 6: Adjust the Squeeze Your Elbows Drill for Your Ball Flight
Every golfer needs a different amount of forearm rotation. The right feel depends on your usual miss and your current clubface pattern.
If your common shot curves too far right, you may need to exaggerate the trail-palm-down feeling. What feels like too much rotation can be exactly what is needed to turn a slice or weak push into a straight shot.
If you already hook the ball, do not add more rotation. Keep the elbow structure and radius drill, but reduce the amount of face-closing action through impact. You can also begin with a slightly more open clubface at address, with the toe set a bit farther behind the heel.
Use this simple ball-flight guide:
- Big slice or push: Preserve the elbow squeeze and feel more trail-forearm pronation through impact.
- Small push draw: Maintain the same pattern and refine the amount of rotation until the curve is manageable.
- Hook or overdraw: Keep the radius stable but reduce the closing rotation, or begin with the face slightly more open.
- Thin and fat contact: Prioritize elbow structure, forward shaft lean, and maintaining hand distance before changing face rotation.
The goal is not to force every shot into a large draw. A straight ball or a modest draw of a few yards is a practical target for many golfers. The larger objective is a strike and curve you can predict.
Step 7: Build This Golf Impact Position Into Your Practice
Use a progression rather than immediately taking full-speed swings. First, rehearse the setup without a ball. Feel the elbows closer together, the arms extended, the shaft forward, and the butt of the club positioned a sensible distance from your body.
Next, make several slow-motion swings where you preserve that structure into a short follow-through. Add the trail forearm rotation only after the radius feels stable. Then hit small punch shots and observe strike and curve.
A simple practice sequence can look like this:
- Make five setup rehearsals using the squeeze your elbows checkpoints.
- Make five slow-motion, no-ball rehearsals with a short follow-through.
- Hit five punch shots focused only on solid contact and stable hand distance.
- Hit five more punch shots while adding the trail-palm-down feel for face control.
- Gradually lengthen the swing only if contact and curve remain predictable.
Do not chase a perfect-looking position. Use your ball flight and strike quality as the feedback. A compact drill that produces solid contact and a consistent small draw is far more valuable than a full swing built on changing radius and an open clubface.
Step 8: Use the Key Swing Thoughts on the Course
You cannot carry five mechanical thoughts to the first tee. Once you have practiced the positions, simplify them into one clear cue based on your most common miss.
If you hit thin shots, fat shots, or struggle with casting, use: “Keep the handle away and squeeze the elbows.”
If you push or slice the ball, use: “Elbows close, trail palm down.”
If you hook the ball, use: “Keep the width, soften the rotation.”
These cues are not intended to replace your full swing motion. They are reminders that help you maintain the key impact relationships: a stable radius, organized elbows, forward handle, and controlled clubface.
Step 9: Answer Common Questions About Squeezing Your Elbows
Should you squeeze your elbows tightly in the golf swing?
No. The feeling should create structure, not tension. Your elbows should feel closer together and more organized, while your arms remain comfortably extended and your grip stays relaxed.
Can squeezing your elbows help stop casting?
It can help because it supports a more stable lead arm and shaft radius. When your elbows separate and the handle pulls inward, you are more likely to lose forward shaft lean. Preserving the arm structure makes it easier to keep the hands ahead of the clubhead through impact.
Why do my shots go right when I improve my extension?
You may be improving arm structure while leaving the clubface too open. Add the trail-forearm pronation feel, with the trail palm working more down through impact, while keeping the trail elbow forward rather than pulling it behind you.
What club should you use for the radius drill?
A 6 iron or 7 iron is a useful place to begin. Use controlled punch shots so you can prioritize the relationship between your elbows, handle, body, and clubface rather than trying to create maximum distance.
When you squeeze your elbows, preserve your hand distance, and rotate the trail forearm without losing elbow structure, you give yourself a clearer path to solid contact, more shaft lean, and dependable clubface control. Build the setup first, rehearse it with punch shots, and allow the quality of your strike to guide the next adjustment.
0 Comments