
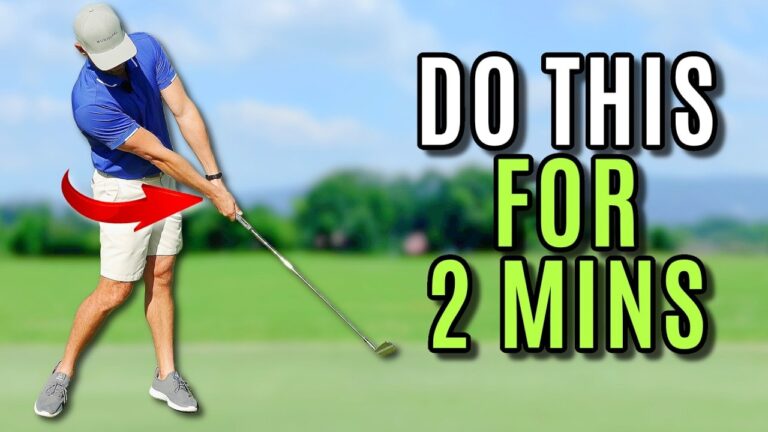

If you want to compress the golf ball more consistently, do not start by collecting ten new swing thoughts. Start with what happens immediately after impact. The best ball strikers tend to arrive in a remarkably similar position about two feet past the ball: their arms, hands, and club are extended, and most of their pressure has moved onto the lead side.
Those two movements give you a practical route to cleaner contact. Your trail arm straightening helps the clubhead reach the ground. Your move into the lead side helps shift the bottom of the swing forward, so the club strikes the ground at or beyond the ball rather than behind it.
This is not about trying to freeze in a posed finish. It is about training a reliable motion through impact, one that makes solid iron contact easier to repeat.
Table of Contents
- Step 1: Use the Ground Contact Test to Compress the Golf Ball
- Step 2: Build the Two Positions That Help You Compress the Golf Ball
- Step 3: Focus on the Trail Arm Instead of Forcing the Lead Arm
- Step 4: Move Your Weight Forward Without Chasing the Ball
- Step 5: Start the Three-Part Drill With Short Swings
- Step 6: Lengthen the Swing to Lead-Arm Parallel
- Step 7: Progress to a Full Swing While Keeping the Same Impact Goal
- Step 8: Use a Simple Practice Plan for Better Ball Striking
- Step 9: Avoid the Common Mistakes That Prevent You From Compressing the Golf Ball
- Frequently Asked Questions
Step 1: Use the Ground Contact Test to Compress the Golf Ball
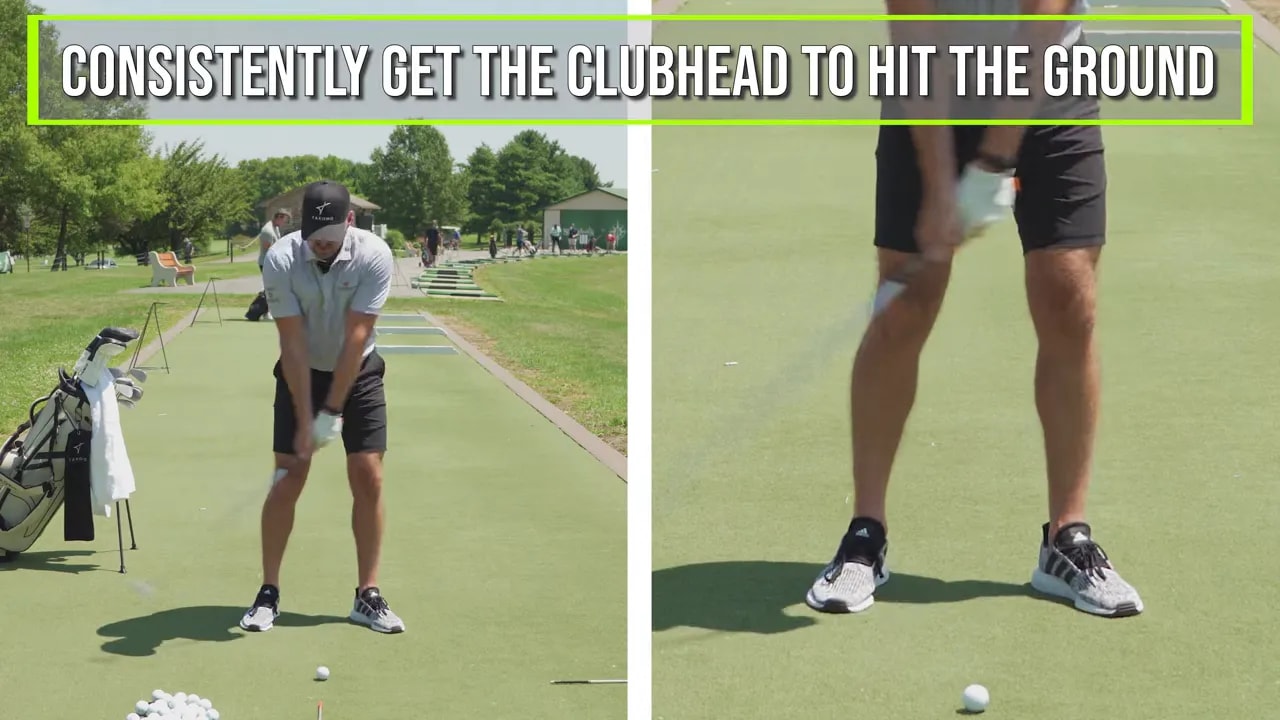
Before hitting a golf ball, take an 8 iron and make a few relaxed practice swings. Your only task is to brush the turf consistently. Then make the test more specific: can you strike the ground at or just past the ball position every time?
This simple test provides immediate feedback on ball striking. If the clubhead misses the ground, bottoms out too early, or varies wildly from swing to swing, you will likely struggle with thin shots, fat shots, inconsistent compression, and unpredictable distance.
Good ball striking is closely tied to predictable low point control. With an iron, the ball should be contacted before the club reaches its lowest point. The divot, or turf contact, should occur on the target side of the ball position.
Use this practice rule to keep your work honest:
- No ground, no ball.
- Make practice swings until you can brush the turf in the correct place repeatedly.
- Only then place a ball down and repeat the same motion.
This may feel basic, but it changes the goal from trying to create a perfect-looking swing to producing a repeatable strike. The ball is simply the result of a clubhead that returns to the ground in the right place.
Step 2: Build the Two Positions That Help You Compress the Golf Ball
There are two key checkpoints two feet past impact that support consistent iron compression:
- Your arms, hands, and club are fully extended away from your body.
- About 80 percent of your pressure is on your lead side.
At address, begin with roughly a 50/50 pressure distribution between your feet. By the time the club has moved a couple of feet beyond impact, move toward an 80/20 distribution, with approximately 80 percent on the lead foot and 20 percent on the trail foot.
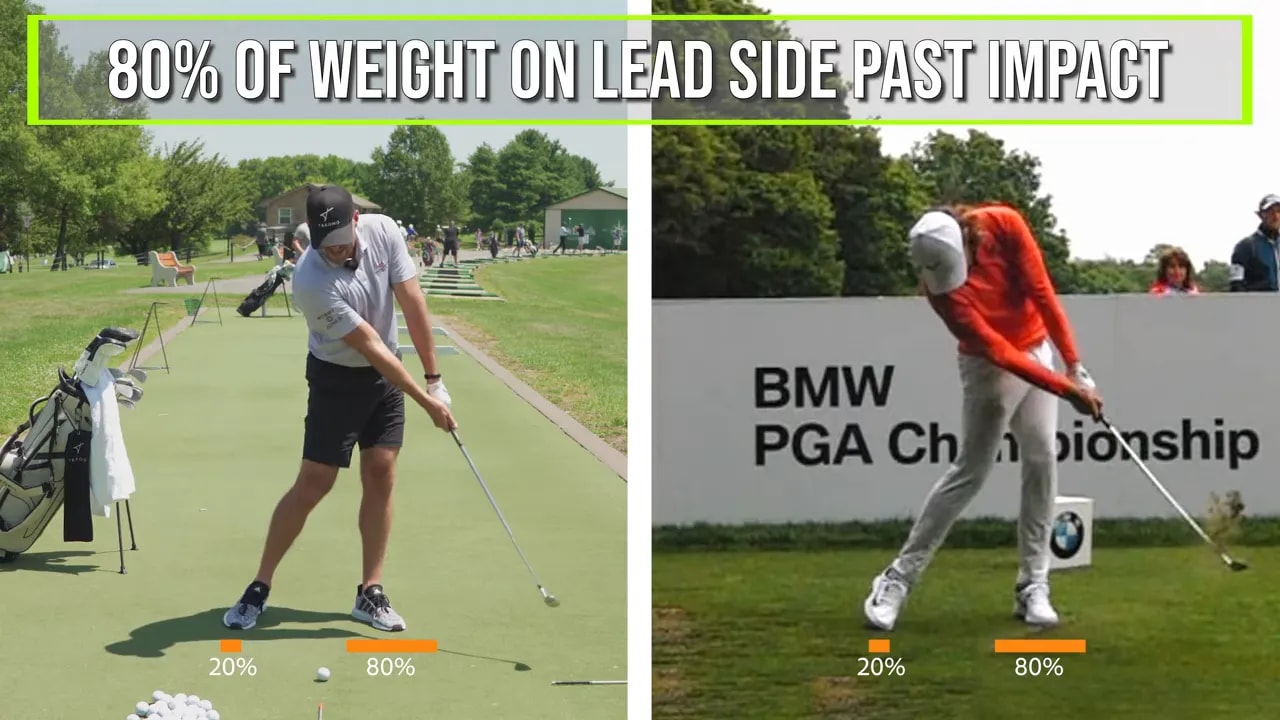
The lead-side move matters because it moves the low point forward. If your pressure and hips remain back, the bottom of the swing is more likely to stay behind the ball. That is a common recipe for heavy contact, scooping, or weak strikes.
Arm extension matters because it helps the clubhead reach the ground. When the arms and club extend through the shot, the clubhead gets farther away from your body and can travel down to the turf reliably.
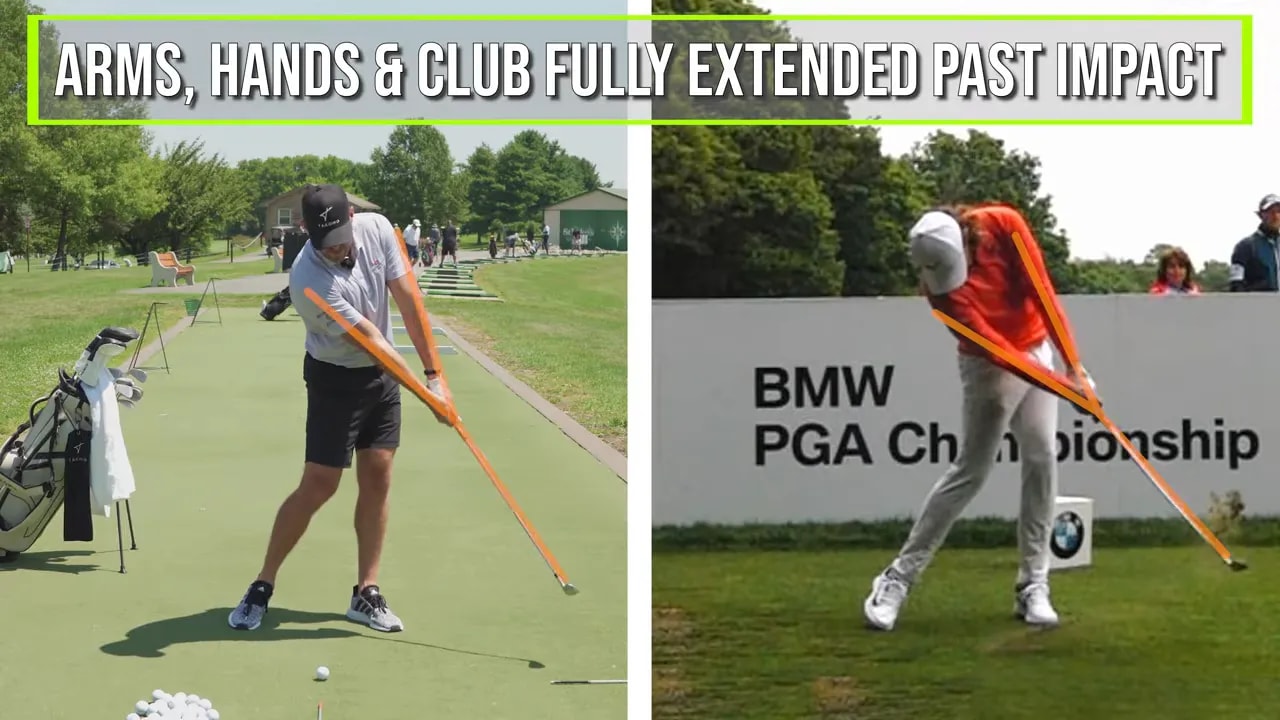
Think of these movements as partners. Trail-arm extension gets the clubhead down. Lead-side pressure gets the low point forward. Together, they create the conditions needed to compress the golf ball.
Step 3: Focus on the Trail Arm Instead of Forcing the Lead Arm
Many golfers try to create extension by concentrating on the lead arm. That is usually unnecessary. Your lead arm is already relatively straight at address, stays fairly straight during the backswing, and remains mostly straight into the downswing.
Your trail arm is the arm that changes significantly. At setup, it has a small amount of bend, roughly 15 degrees. By the time the club reaches a short takeaway position, it may be bent around 30 degrees. As the backswing gets longer, the trail arm bends more.
To compress the golf ball, your trail arm must progressively straighten through impact and become fully extended past the ball. This is the useful feel: punch the trail arm toward straightness through the strike.
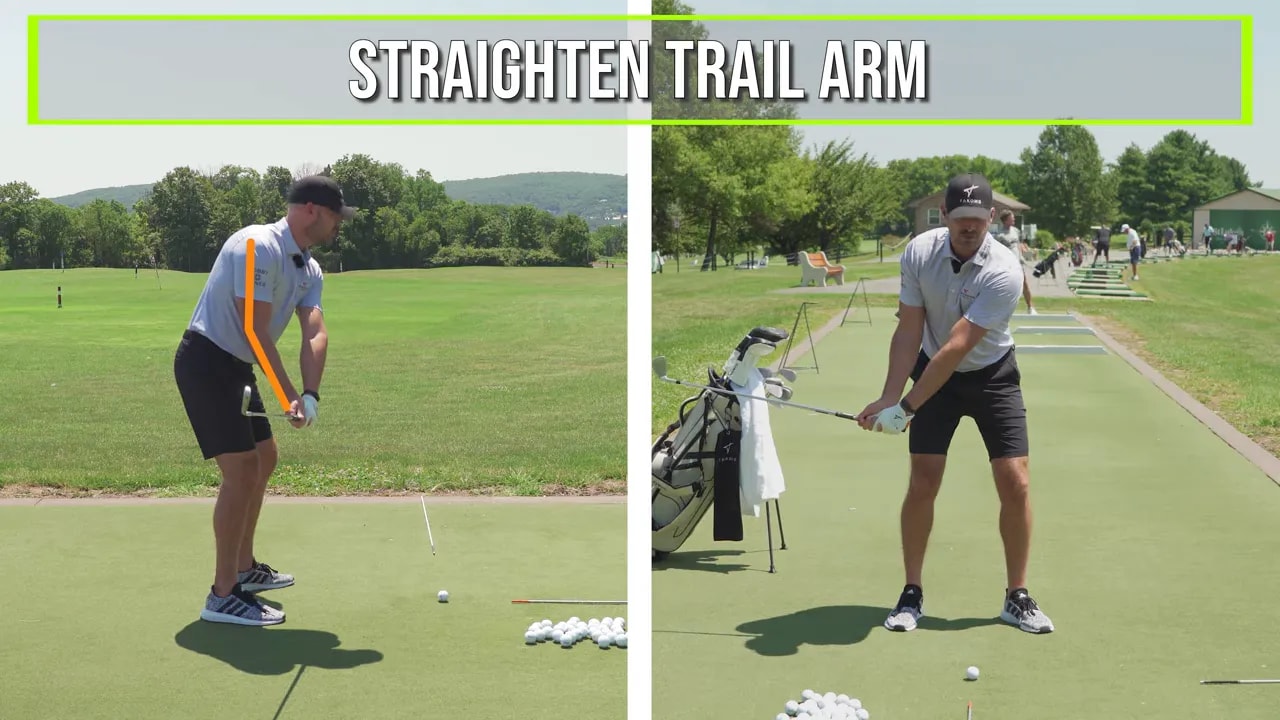
If you are right-handed, your trail arm is your right arm. If you are left-handed, it is your left arm. The label matters less than the function. Focus on the arm that bends in the backswing, then train it to straighten through the hitting area.
A longer backswing creates more trail-arm bend, which means you have more straightening to accomplish on the way through:
- At a small takeaway, the trail arm may be bent about 30 degrees.
- At lead-arm-parallel, it may be bent about 60 degrees.
- At the top of a full swing, it may be bent about 90 degrees.
In every case, the destination is the same: a straight trail arm two to three feet past the ball. Do not try to hold the arm rigid from the top. Instead, use the athletic sensation of extending or punching it through the ball.
Step 4: Move Your Weight Forward Without Chasing the Ball
Weight transfer in the golf swing does not mean throwing your entire upper body toward the target. You want your lower body and pressure to move forward while your head remains generally over the ball area through impact.
This distinction is important. If your head and upper body lunge far forward with the weight shift, you can lose your posture and alter the strike. The intended motion is a forward shift of pressure and hips, not a full-body dive toward the target.
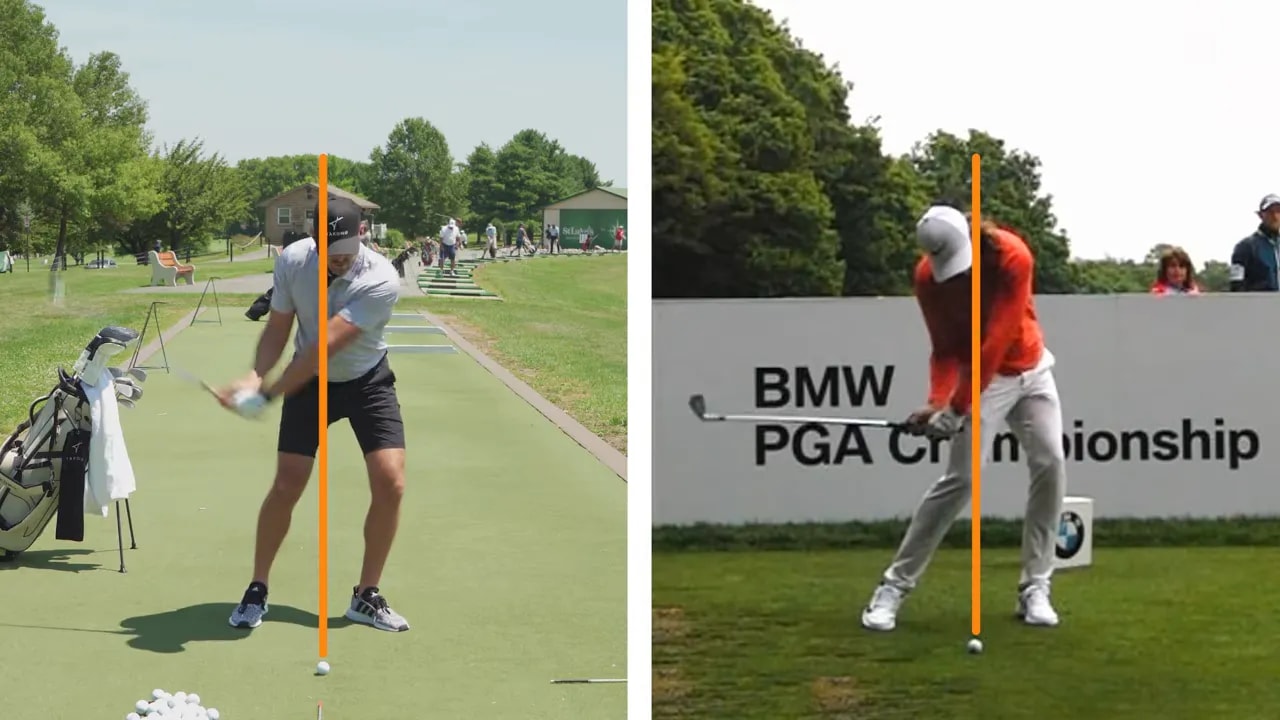
Use these checkpoints:
- Start with pressure roughly even between your feet.
- Feel relatively balanced during the takeaway and backswing.
- Move pressure and hips toward the lead side through impact.
- Arrive two feet past the ball with roughly 80 percent on the lead foot.
- Keep your head from racing forward with the hips.
If beginning at 50/50 makes the shift feel too large, you can start with slightly more pressure on the lead foot. A 60/40 or even 70/30 setup is acceptable if it helps you reach a strong lead-side position through the ball. The priority is not a rigid starting number. The priority is reaching the forward position at the right time.
Step 5: Start the Three-Part Drill With Short Swings
The fastest way to make this golf ball compression drill usable is to begin small. Use an 8 iron and start without a ball. Your goal is to own the strike pattern before adding the pressure of trying to hit a shot.
Part 1: Swing From Takeaway to Takeaway
Take the club back until it is approximately parallel to the ground. Your trail arm should now have roughly 30 degrees of bend. From there, swing through to a matching short follow-through.
As you move through the ball, feel two things happen together:
- Straighten the trail arm from its bent takeaway position.
- Move pressure into the lead foot until it feels close to 80 percent forward.
Keep the swing compact and controlled. The purpose is not speed. It is to repeatedly brush the turf at or just beyond the ball position while your arms extend and your pressure moves forward.
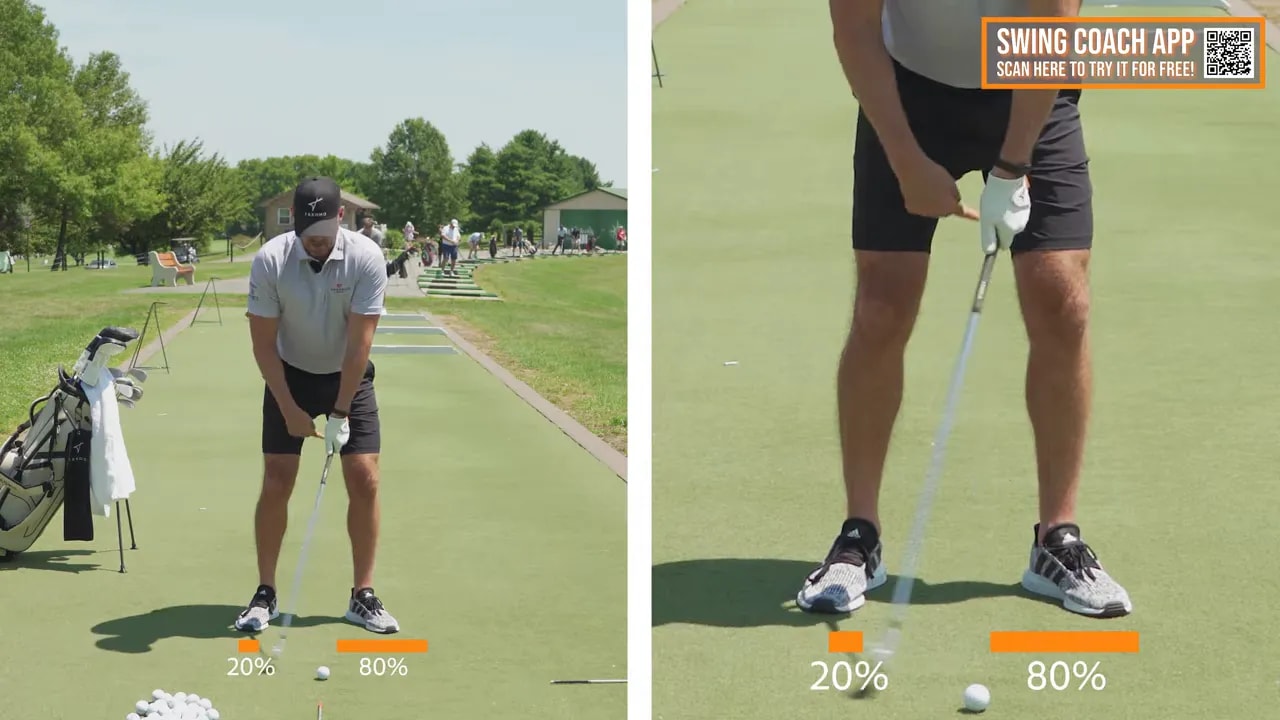
When you add a ball, treat this as a punch shot. A short 8 iron shot is enough. You are building impact conditions, not trying to hit a full-distance iron immediately.
Step 6: Lengthen the Swing to Lead-Arm Parallel
Once you can consistently hit the ground with the short drill, lengthen the backswing until your lead arm is approximately parallel to the ground. The setup and pressure feel remain simple: start balanced, feel mostly balanced in the backswing, then move to 80 percent on the lead side through the strike.
The difference is trail-arm bend. At this longer position, your trail arm may be bent around 60 degrees. Since it bends more going back, it must straighten more going through.
Use this sequence:
- Set up with balanced pressure.
- Take the club back to lead-arm-parallel.
- Feel the trail arm bent and ready to extend.
- Move into the lead side.
- Extend the trail arm fully two feet past the ball.
- Confirm that the clubhead brushed the turf at or past the ball position.
Do not be surprised if these shots fly farther and feel more solid than the short version. The swing is longer, but the impact goal has not changed. You are still training the same two essentials: full extension and pressure forward.
Step 7: Progress to a Full Swing While Keeping the Same Impact Goal
Only move to a full swing after the shorter motions produce reliable ground contact. At the top of a full backswing, the trail arm may be bent close to 90 degrees. That creates a bigger job on the way down: you need to fully straighten it through the hitting area.
Your full-swing feel should remain uncomplicated:
Stay balanced going back. Punch the trail arm straight through. Move pressure into the lead foot. Hit the ground past the ball.
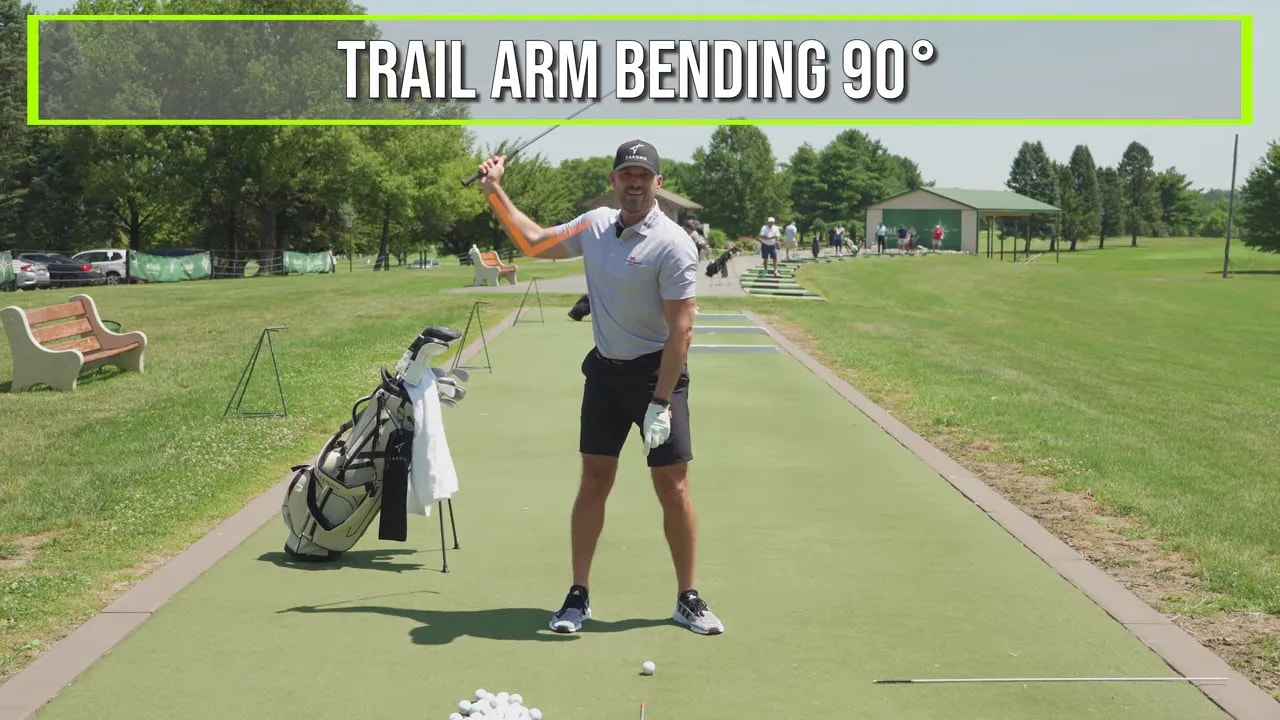
At full speed, do not try to consciously manage every angle. Keep your attention on the destination past impact. Picture the club, hands, and arms fully stretched out two to three feet beyond the ball, with your hips forward and your pressure predominantly on the lead side.
Make one or two practice swings before each ball. If you fail to make turf contact, return to practice swings. This keeps the feedback loop clear and prevents you from rehearsing the same contact issue over and over with a ball in front of you.
Step 8: Use a Simple Practice Plan for Better Ball Striking
You can turn the drill into a focused range session with an 8 iron. Start without a ball, then earn the right to hit one through consistent turf contact.
- Ground-contact rehearsal: Make practice swings until you can brush the turf three times in a row at or beyond the intended ball position.
- Short drill: Hit compact takeaway-to-takeaway shots while extending the trail arm and moving pressure forward.
- Medium drill: Progress to lead-arm-parallel swings with the same through-impact motion.
- Full swing: Add length only when the shorter version remains reliable.
- Recheck often: If contact becomes inconsistent, return to the shortest swing that produces clean turf contact.
This structure reduces clutter. Rather than worrying about many positions in the backswing, you can organize your practice around one measurable outcome: can you consistently reach the turf in front of the ball while extending through the shot?
Step 9: Avoid the Common Mistakes That Prevent You From Compressing the Golf Ball
Trying to lift the ball into the air
When you try to help the ball up, your low point often stays behind the ball. Let the loft of the iron do its job. Your job is to strike down to the turf with extension and forward pressure.
Keeping pressure on the trail foot
If your pressure remains back through impact, it becomes difficult to move the low point forward. Feel your hips and pressure moving toward the lead side through the strike.
Only thinking about the lead arm
Your lead arm is already fairly straight. Place your attention on the trail arm, the arm that has to straighten substantially from the backswing into the follow-through.
Adding speed before contact is stable
Start with controlled punch shots. A reliable short motion is more valuable than a full-speed swing that produces random low points.
Moving the head far forward
Shift pressure forward without chasing the ball with your upper body. Let your head stay generally over the ball while your hips and pressure move toward the lead side.
Frequently Asked Questions
Should you hit the ground before or after the golf ball with an iron?
With an iron, the club should contact the ball first and then strike the turf at or slightly beyond the ball position. This forward low point helps create solid, compressed contact.
Why is the trail arm important for golf ball compression?
The trail arm gains bend during the backswing. Straightening it through impact extends the arms, hands, and club away from your body, helping the clubhead reach the ground consistently.
How much weight should be on the lead foot through impact?
A useful checkpoint is approximately 80 percent of your pressure on the lead side two feet past impact, compared with a roughly balanced setup position. The forward pressure helps move the low point ahead of the ball.
Can you start with more weight on the lead foot?
Yes. Starting slightly forward, such as 60/40 or 70/30, can make it easier to reach a strong lead-side position through impact. The important goal is arriving with pressure forward, not forcing one exact setup number.
How do you practice the trail arm punch drill?
Start with short takeaway-to-takeaway swings without a ball. Brush the turf consistently, straighten the trail arm through the strike, and move pressure to the lead foot. Add a ball only after you can make reliable ground contact, then gradually lengthen the swing.
0 Comments