
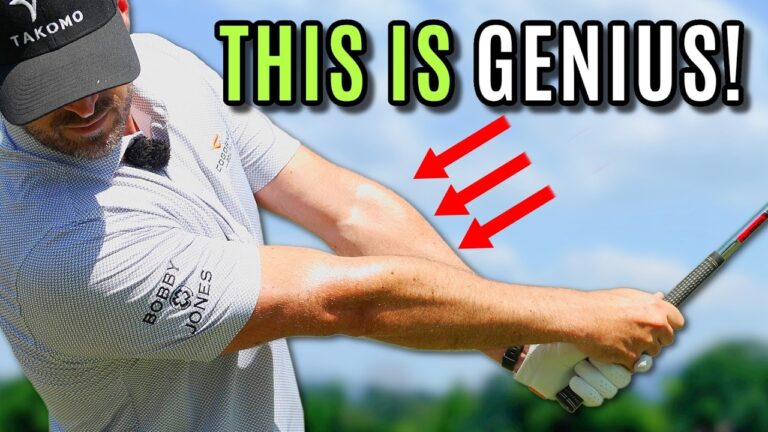

If you are a higher handicap golfer who fights weak slices, inconsistent contact, and a frustrating lack of distance, your issue may not be your grip, your backswing, or how hard you are trying to rotate. A common problem is that your body, arms, and club move through the downswing as one locked-together unit.
That all-in-one motion makes it difficult to release the golf club. Instead of allowing the clubhead to accelerate through the ball, you pull the handle through with your body. The usual result is an open clubface, an out-to-in path, weak shots to the right, and very little clubhead speed.
This high handicap golf swing drill teaches the opposite skill: let your arms, hands, and club move freely past your body. It is a three-part progression built around a simple athletic release, then a setup adjustment that quiets excessive body movement, followed by a small path correction to help turn a slice into a draw.
Table of Contents
- Step 1: Identify Whether This High Handicap Golf Swing Drill Fits Your Miss
- Step 2: Learn the Lead-Arm Release in This High Handicap Golf Swing Drill
- Step 3: Pull Your Trail Foot Back to Quiet Excessive Rotation
- Step 4: Add a Slight In-to-Out Arm Path to Fix the Slice
- Step 5: Use Ball Flight to Adjust the High Handicap Golf Swing Drill
- Step 6: Turn the Drill Into a Better Practice Routine
Step 1: Identify Whether This High Handicap Golf Swing Drill Fits Your Miss
Start by looking at the pattern of your typical ball flight. This drill is especially useful if you commonly hit weak fades or slices, lose distance with every club, or feel as though you are dragging the club through impact rather than swinging it through.
Many golfers in roughly the 10 to 25 handicap range begin the downswing by moving their chest, shoulders, arms, hands, and club together. The body races toward the target, the arms stay trapped in front of the chest, and the club never gets the chance to release naturally.
Strong ball strikers use their body, but their arms and club are not frozen to their torso. The clubhead is able to move past the body through impact. That separation is a major reason they can create speed and deliver a more functional club path.
The goal is not to stop rotating your body in a full swing. Your body will turn. The goal is to stop forcing everything to turn at exactly the same rate and learn the feeling of the arms and club swinging freely through the hitting area.
A useful checkpoint is your follow-through. If your lead elbow stays high, your lead arm remains rigid, and the club is held out toward the target, you are likely holding on to the release. That pattern often matches the weak slice and distance loss this drill is designed to address.
Step 2: Learn the Lead-Arm Release in This High Handicap Golf Swing Drill
The first part of the drill is all about the lead arm. For a right-handed golfer, that is your left arm. Practice this portion initially with only your lead hand on the club, without worrying about hitting a golf ball.
Make a short, easy through-swing and allow three things to happen after the club passes the impact area:
- Let the lead arm fold. Do not try to keep it straight forever.
- Let the lead arm rotate. Feel the lead elbow working slightly down and back rather than pointing upward.
- Let the club rehinge. Allow the club to fold upward rather than forcing the shaft to remain aimed down the target line.
This should feel loose, athletic, and free. It resembles the casual motion a capable golfer might make while swinging a club on the tee before hitting a shot. The club is not being dragged. It is being allowed to swing.
What the correct release should feel like
At the end of the drill motion, your lead arm should be folded somewhat, with the elbow lower and slightly behind you. The club should be rehinged, and your lead thumb should feel more upward. In an exaggerated practice version, the angle between your arm and the club can feel close to 90 degrees.
That exaggerated 90-degree feeling is a drill sensation, not necessarily the exact position you will create in a normal swing. In a full shot, the club will typically finish somewhere between a fully extended target-line position and that strongly rehinged practice position.
The key word is allow. Do not pull the lead arm through with a stiff elbow. Allow the arm to fold, allow it to rotate, and allow the club to rehinge.
Build the drill from rehearsals to golf balls
Make repeated lead-hand-only rehearsal swings first. Your lead arm may become tired, which is normal when you are learning to move it more freely. Then place both hands on the club and recreate the same release feeling with short swings.
At first, a solid pull hook is an acceptable outcome. For a golfer accustomed to weak slices, a shot that starts left and curves left demonstrates that the clubface is finally releasing rather than staying open. You are not trying to make that pull hook your permanent shot shape. You are using it as feedback that the release is changing.
One student who normally hit weak shots well right of the target gained substantial distance during this process, enough to fly greens with clubs that previously came up short. The important change was not a harder effort. It was a freer arm and club motion through the ball.
Step 3: Pull Your Trail Foot Back to Quiet Excessive Rotation
Once you can feel the lead arm fold, rotate, and rehinge, add the second part of the high handicap golf swing drill. This setup change helps prevent your upper body from racing open and pulling the club over the top.
For a right-handed golfer, pull your right foot back from your normal address position. Set it back far enough that the toes are roughly in line with the middle of your lead foot, or even a touch farther back.
This adjustment should make your trail hip and trail shoulder feel more closed at address. It is not a conventional full-swing setup change you must use forever. It is a practice tool that makes the intended movement easier to feel.
Golfers who move their body and arms together often have their head move forward toward the target early in the downswing. Their chest and shoulders open too quickly, and the club is pulled across the ball. By pulling the trail foot back, you create a useful constraint against that excessive early opening.
Use the shirt-buttons checkpoint
From this closed setup, make your release motion while feeling as though the buttons on your shirt stay pointed behind the ball. This is another purposeful exaggeration. Your chest and shoulders will still rotate during a real swing, but the feeling helps counteract an overly open, forward-moving upper body.
Keep the same arm action from Step 2. Let the lead arm fold, rotate, and rehinge while your chest feels quieter. The intent is to let the arms and club swing past your body, rather than forcing your chest and club to travel through as one solid piece.
As this starts to work, your head should stay back more naturally and the club should have room to release. A shot that began as a pull hook in Step 2 may now start closer to the target line, perhaps with a manageable draw.
Step 4: Add a Slight In-to-Out Arm Path to Fix the Slice
The final part of this high handicap golf swing drill adds a small path adjustment. When your body and arms move together, the club often gets thrown out and over the top. Even after improving the release and quieting the upper body, you may still need a little help directing the arms from in to out.
Keep your trail foot back. Keep the trail hip and shoulder feeling closed. Keep the shirt buttons feeling behind the ball. Then make the same free arm swing while sensing that your arms and club travel slightly more from inside to out.
The word slightly matters. You do not want to shove the club dramatically to the right or excessively around your body. Think of allowing your arms and club to travel a little more along your toe line through the strike.
When the three pieces work together, the ball flight can shift from a weak rightward slice toward a higher draw that starts near the intended target. The drill combines a freer release, less excessive opening of the chest, and a more useful through-swing path.
The complete sequence
- Make lead-hand-only rehearsals: fold the lead arm, rotate the elbow slightly down and back, and rehinge the club.
- Add your trail hand and preserve the same free release feeling.
- Pull your trail foot back so your trail hip and shoulder feel closed.
- Feel your shirt buttons remain behind the ball as the arms swing past your body.
- Add a modest in-to-out arm sensation, approximately along your toe line.
- Hit short shots first, then gradually build toward fuller swings and longer clubs.
Step 5: Use Ball Flight to Adjust the High Handicap Golf Swing Drill
This drill is built for the golfer who pulls the handle, slices, and loses speed because the body and arms stay locked together. Use your ball flight to decide how much of each feeling you need.
- If you still slice or pull: Continue to feel the arms swing slightly more in to out while keeping the body from opening excessively early.
- If you hit a weak right shot: Spend more time on the free lead-arm fold, rotation, and rehinge. You may still be holding the face open.
- If you hit a pull hook: This can be a productive early drill result. Add the trail-foot-back setup and quieter chest feeling to improve the path.
- If you already hit push hooks: Use the release concept, but do not add more in-to-out. Instead, feel the club working more around your body.
Do not judge the drill by one swing. Make several slow rehearsals, then hit a few shots. The objective is to create a new movement pattern, not to chase a perfect full-speed swing immediately.
Step 6: Turn the Drill Into a Better Practice Routine
Use this sequence before range sessions, before a round, or whenever your swing begins to feel tight and body-driven. A few no-ball rehearsals can reconnect you with the feeling of letting the clubhead move.
A productive practice order is simple:
- Perform several lead-arm-only release rehearsals.
- Make several two-hand rehearsals with the trail foot in its normal position.
- Pull the trail foot back and rehearse keeping your chest more closed.
- Add the slight in-to-out sensation.
- Hit short iron shots at reduced speed.
- Move to full iron shots, then test the same release with longer clubs and driver.
Longer clubs can make the improvement especially noticeable because a free release helps you get more clubhead speed through the ball. However, start with an iron so you can focus on the movement rather than trying to force distance.
The most valuable takeaway is simple: your arms, hands, and club need permission to swing past your body. Once you stop trying to move every part of the downswing as one rigid unit, you can begin replacing weak, glancing contact with a more powerful and reliable strike.
Frequently Asked Questions About This High Handicap Golf Swing Drill
Who should use this high handicap golf swing drill?
This drill is designed primarily for golfers who slice, hit weak shots to the right, lose distance, or feel their body and arms move through the downswing as one unit.
Should I keep my chest closed throughout a full golf swing?
No. Your chest and shoulders will rotate in a normal swing. Keeping them closed is an exaggerated drill feeling that helps if you tend to open your chest and move forward too early.
Why does the drill sometimes produce a pull hook at first?
A pull hook can show that you are finally releasing the club instead of holding the face open. Add the trail-foot-back setup and the slight in-to-out path feeling to help refine the result.
How much should I move my trail foot back?
For the drill, move the trail foot back until its toes are approximately in line with the middle of your lead foot, or slightly behind that point.
What if I already hit push hooks?
You can still use the free-release portions of the drill, but avoid adding more in-to-out. Feel the club and arms work more around your body instead.
0 Comments