
If you want better golf compression, more speed, and a strike that feels less forced, your wrists deserve more attention. A lot of golfers spend years trying to improve pivot, plane, and sequencing without ever learning what elite hands and wrists actually do through impact.
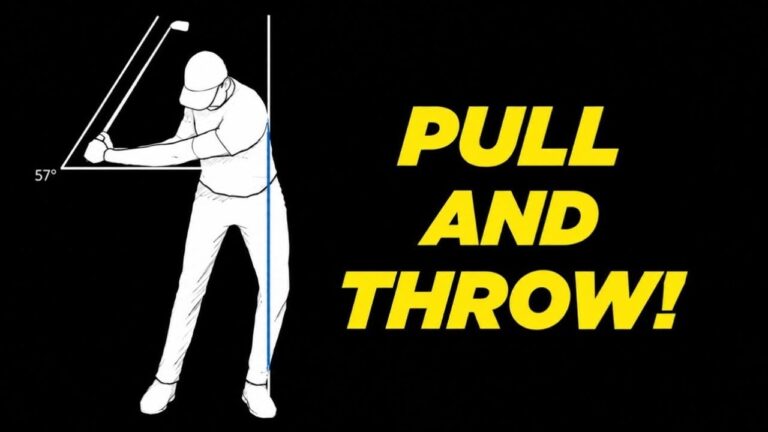
The central idea here is simple. Great golf ball strikers tend to have significant bend in the trail wrist on the way down and significant bend in the lead wrist on the way through. When you learn that pattern, you create a cleaner release, better shaft lean, and more effortless speed.
This is not about adding random hand action. It is about learning a measured, tour style wrist motion that gives you useful checkpoints for your golf swing.
Table of Contents
- Step 1: Understand the core golf wrist motion
- Step 2: Build the feel with a simple no club drill for golf
- Step 3: Rehearse the right wrist to left wrist sequence in your golf swing
- Step 4: Use the finish as your golf release indicator
- Step 5: Measure your lag against PGA style golf checkpoints
- Step 6: Use your left thumb as a golf downswing guide
- Step 7: Train the through swing checkpoint with an alignment stick
- Step 8: Match your golf feels to evidence, not guesswork
- Step 9: Use fade and draw feels without losing your golf wrist motion
- Step 10: Fix the common golf mistake of flipping and casting early
- Step 11: Practice this golf motion with a simple session plan
- Step 12: Know what success should feel like in golf
- FAQ
Step 1: Understand the core golf wrist motion
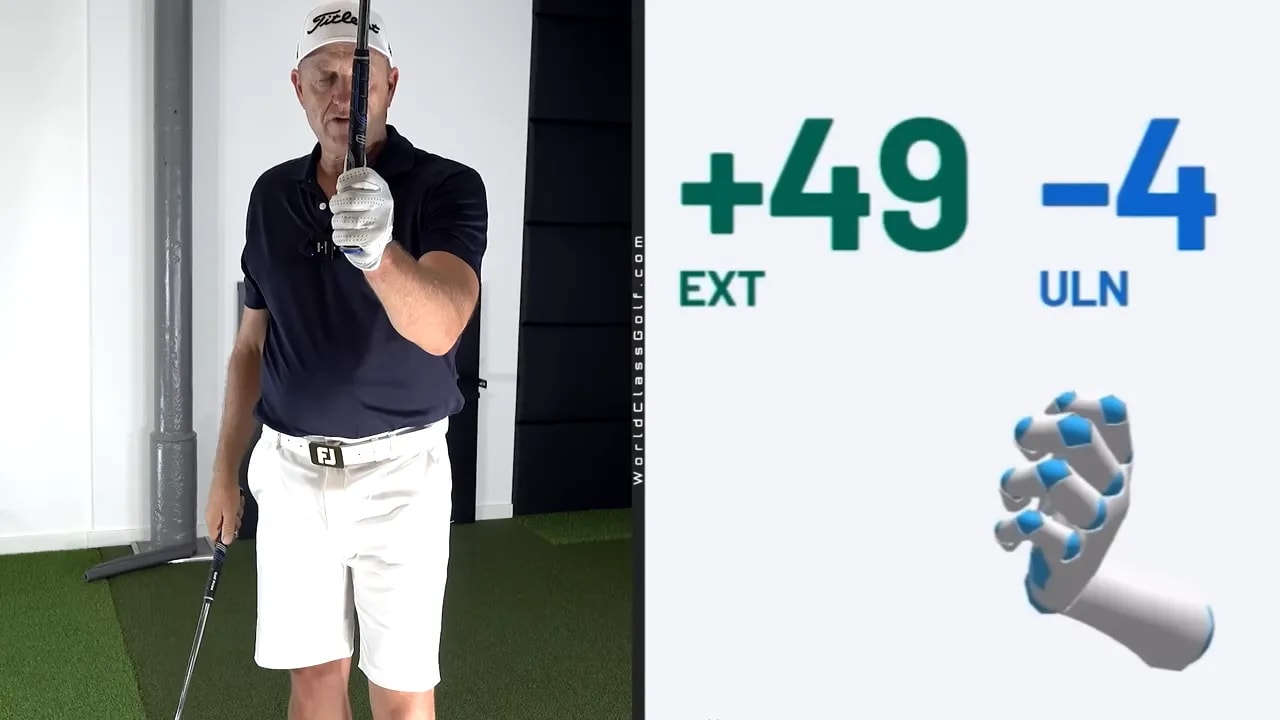
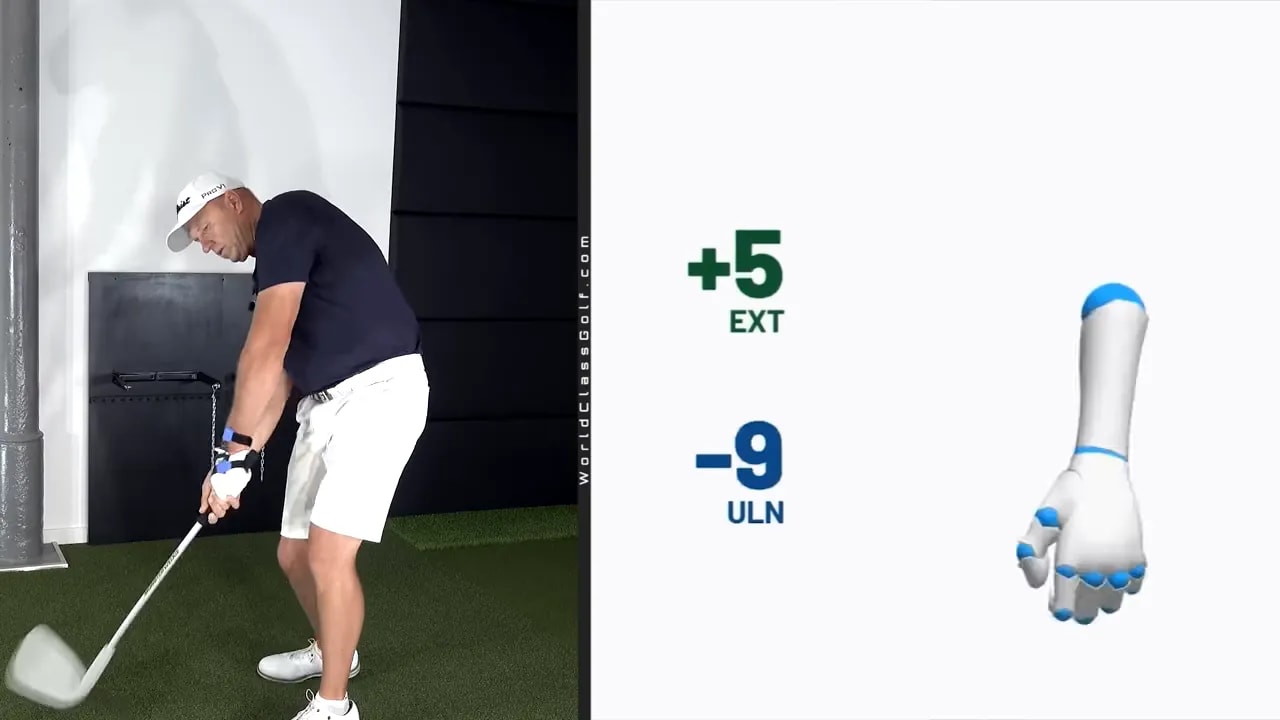
The first concept is the easiest to remember. On the downswing, the trail wrist should be bent back. For a right handed golfer, that means the right wrist is extended. Through the release and into the follow through, the lead wrist should then be bent back. For a right handed golfer, that means the left wrist becomes extended after impact.
The lesson frames this as a 45 degree plus pattern on both sides:
- Trail wrist bent back on the way down
- Lead wrist bent back on the way through
- A natural transfer through impact that improves compression
This matters because many amateur golf swings never get the proper release. Instead of moving from one wrist condition to the other, they stay stiff, hold the lead hand too much on top, or throw the club early.
That costs you speed and often adds poor contact.
Step 2: Build the feel with a simple no club drill for golf
Before you hit balls, train the motion without a club. This gives you a clear feel without worrying about the ball.
For a right handed golf player:
- Extend your right wrist back as far as it comfortably goes.
- Notice the creases in the skin at the back of the wrist.
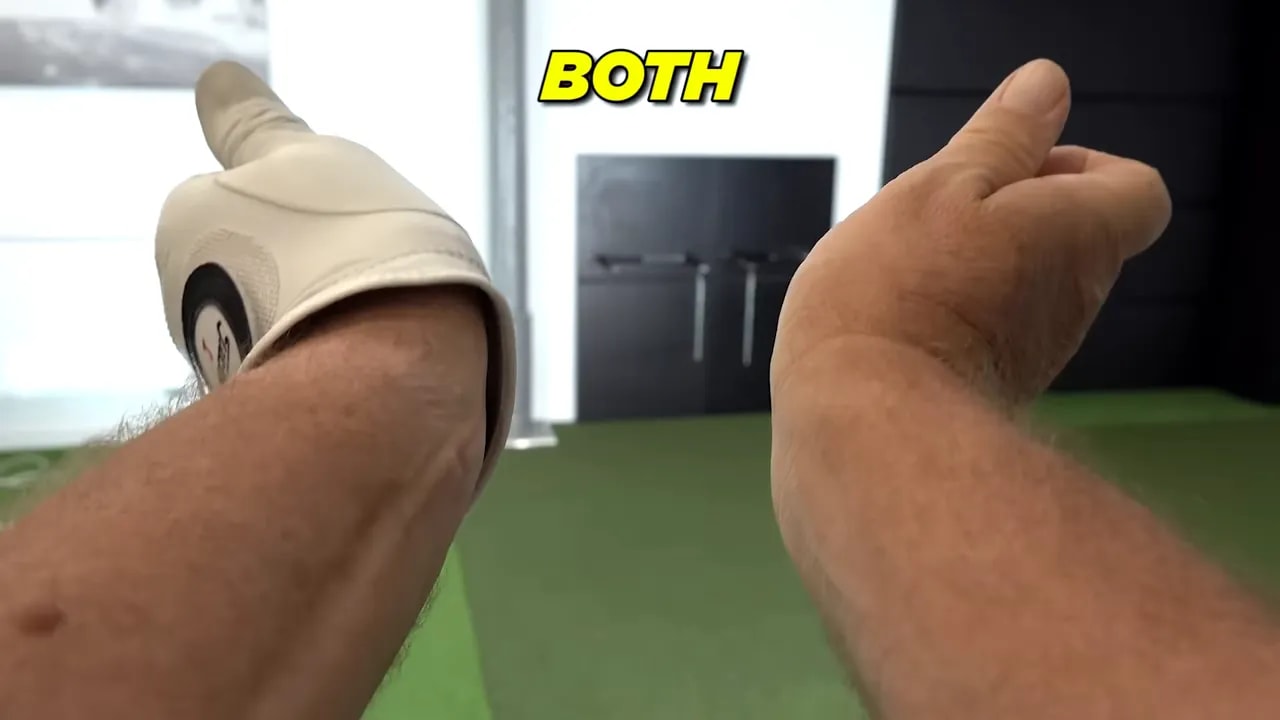
- Now extend your left wrist back as far as it comfortably goes.
- Notice the same creased look in the lead wrist.
- Alternate between the two to understand the pattern.
The goal is not tension. You want awareness. When you can clearly feel right wrist extension and left wrist extension, you have a much better chance of reproducing those movements in your golf swing.
This is especially useful if you have always relied on vague swing thoughts. Wrist motion becomes much easier when you can physically feel the positions first.
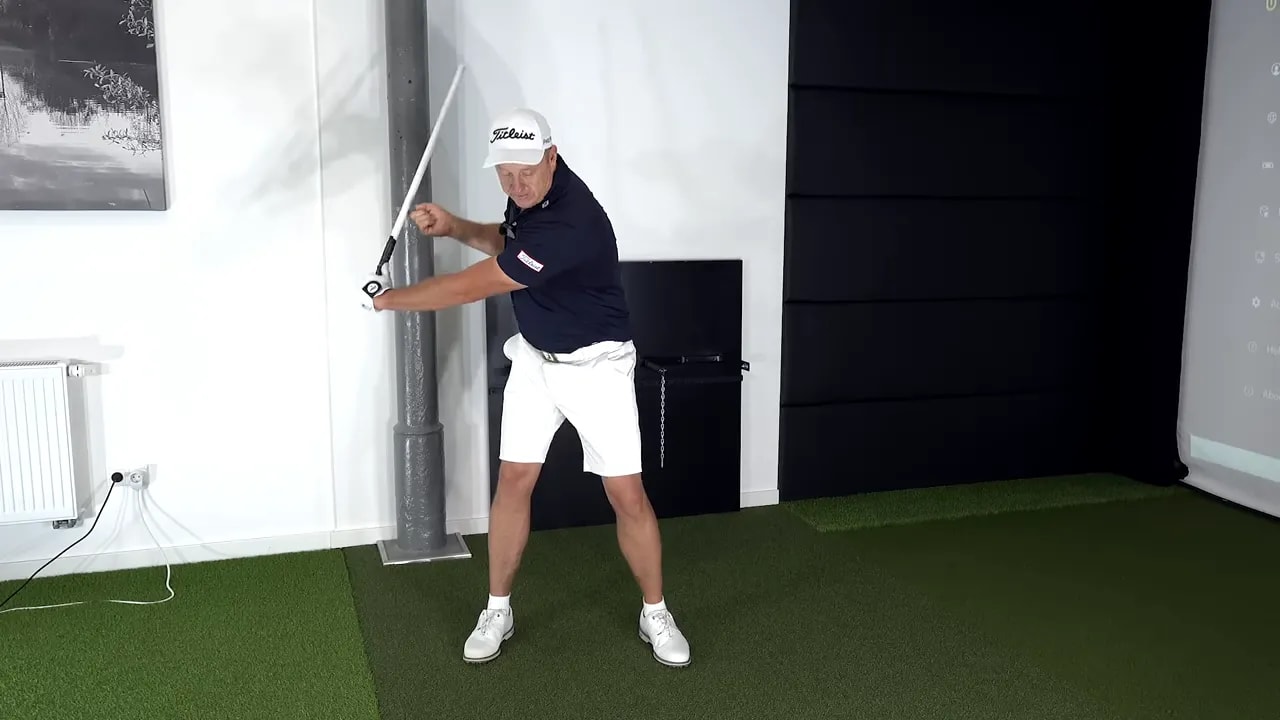
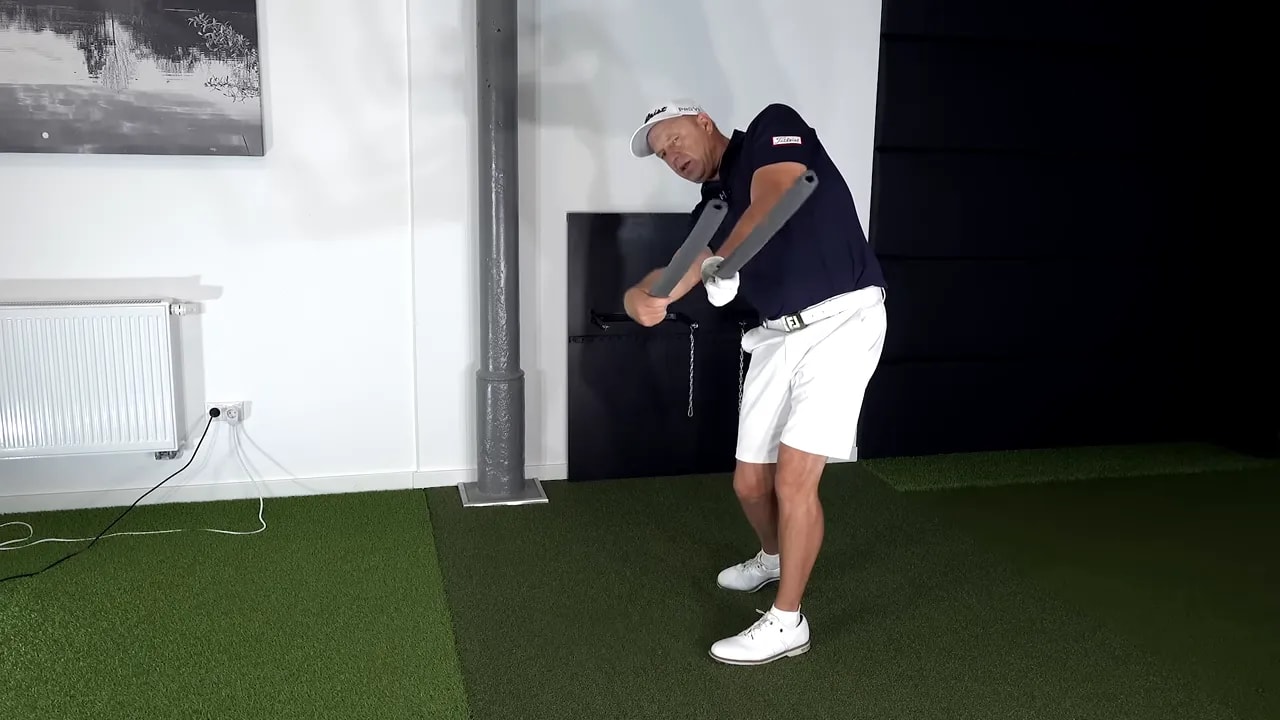
Step 3: Rehearse the right wrist to left wrist sequence in your golf swing
Once you have the feel, move to slow motion rehearsal with a club. Start with short swings. Set the trail wrist into extension going back and into transition. Then allow the motion to move through so the lead wrist extends after impact.
A useful checkpoint is to look down and confirm the wrist shape early in the downswing. If you can see that bent back trail wrist, you are more likely to preserve lag and arrive with better structure.
Then, in the finish, check whether the lead wrist has fully released and extended. If it has, the club will usually be moving more fluidly, and the finish will look freer rather than blocked.
The key instruction is not to make tiny, hesitant half swings. Make athletic rehearsals with enough motion to feel the club moving. A stiff practice swing usually creates a stiff release.
Step 4: Use the finish as your golf release indicator
One of the best ideas in this lesson is that your finish tells the truth. If your hands are still low, the grip points down, and the lead wrist looks flat or rigid, you probably did not fully release the club.
In a better golf release, the club exits quickly, the hands work up, and the lead wrist is clearly extended in the follow through. That lead wrist condition is treated as the release indicator.
Why does this matter?
- It shows that the club was allowed to swing through instead of being steered
- It helps produce stored lag and speed before impact
- It improves the chance of compressing the ball instead of flipping at it
- It creates a more fluid motion overall

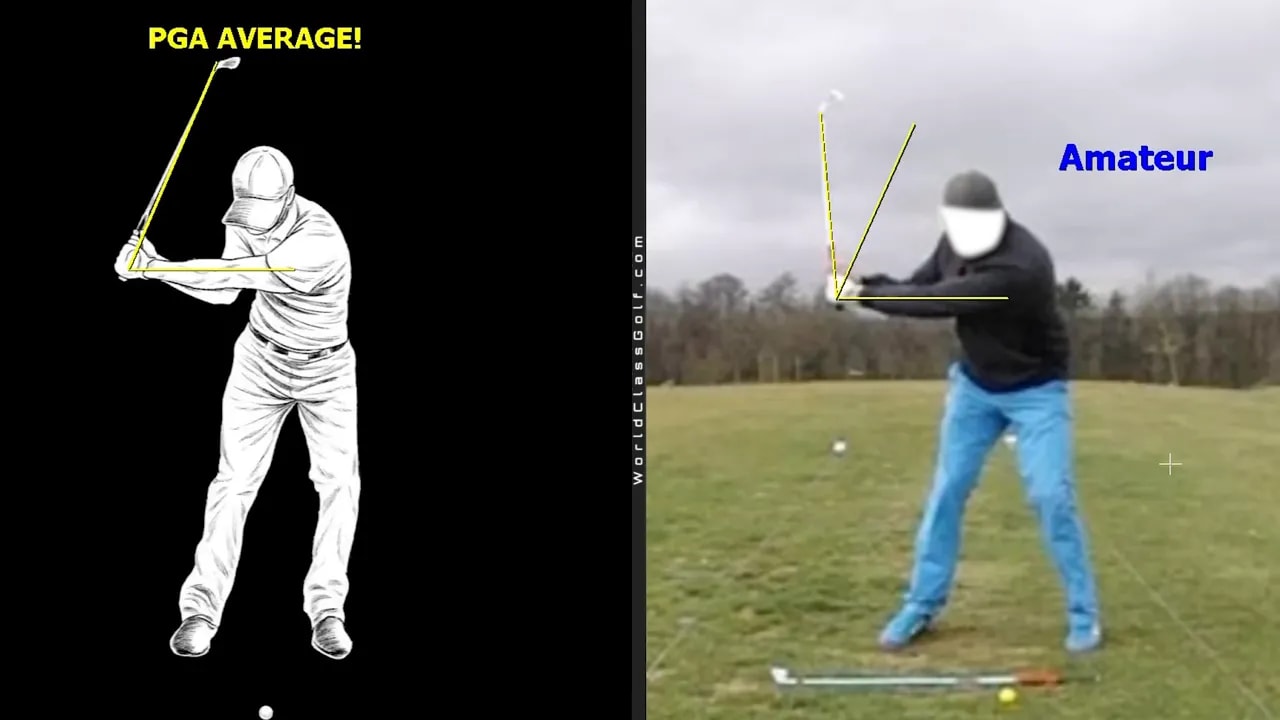
Step 5: Measure your lag against PGA style golf checkpoints
The lesson also introduces a practical number based checkpoint. Many amateurs carry too much shaft angle too late or lose it too early. The suggested reference point is the shaft angle in the downswing relative to a drawn line.
The message is straightforward:
- Around 90 degrees is too steep or too late for this checkpoint
- You want to get at least into the 70 degree area
- The 60 degree area is presented as a tour average benchmark
You do not need to guess. You can film your golf swing on your phone and compare it to those checkpoints. That gives you objective feedback instead of relying only on feel.
This matters because many golfers think they are creating lag when they are really just lifting the club or delaying the strike in an unhelpful way. Measured checkpoints make practice much more efficient.
Step 6: Use your left thumb as a golf downswing guide
Another simple feel is the direction of the lead thumb. For a right handed player, the left thumb gives you a clue about whether you are keeping or losing angle.
If the left thumb points more upward on the way down, you tend to keep the angle better. If the left thumb points down too early, you are usually throwing away lag.
The lesson suggests feeling the hands move in deep while maintaining that thumb orientation. That can help you avoid an early cast and improve the delivery into impact.
On the way through, the thumb should then work upward quickly as part of a complete release. So the thumb helps you check both sides of the motion:
- Downswing: thumb more up to preserve angle
- Follow through: thumb up again as the club fully releases
That is a very golfer friendly way to monitor wrist motion in real time.
Step 7: Train the through swing checkpoint with an alignment stick
If you struggle to know when to release the club, do not try to time it by inches or milliseconds. The lesson makes a good point here. From delivery to impact happens extremely fast, so trying to consciously release at one exact spot is unrealistic for most golfers.
Instead, use a checkpoint drill.
Take an alignment stick or similar plastic stick and hold it so you can clearly see the direction of the grip end. Then rehearse the through swing and make sure the end of the grip points toward the target before your hands get behind your head.
That checkpoint encourages:
- A full release
- Lead wrist extension through the finish
- A less wooden, less blocked motion
If your grip still points down late in the follow through, the release is usually incomplete.
Step 8: Match your golf feels to evidence, not guesswork
A strong theme throughout this instruction is evidence based golf. Instead of saying what a swing should feel like in the abstract, the lesson compares amateur patterns to tour style wrist data and visible positions.
That is important because different golfers need different feels. One player may need to feel more left hand pull. Another may need to feel more right hand release. But both still need to arrive at a similar checkpoint.
So rather than copying someone else’s exact sensation, build your own feels around a few reliable truths:
- Trail wrist bent back in the downswing
- Enough shaft angle at the checkpoint
- Lead wrist bent back through the release
- Grip end pointing properly in the finish
In golf, good feels are personal. Good positions are measurable.
Step 9: Use fade and draw feels without losing your golf wrist motion
Once the wrist pattern improves, you can use it to shape shots more effectively.
Fade feel
If you want a fade feel or want help avoiding a left miss, keep the logo on the glove feeling more upward through the strike. Another way the lesson explains it is to feel the heel of the club staying a bit higher through the ball. That helps neutralize the face and makes it harder to shut the clubface too early.
Draw feel
If you want to draw the ball, use the simple cue:
- Arms to the right
- Thumbs to the left
For a right handed golfer, that feel helps the path and club action work together in a way that encourages a soft draw. It also ties back to the same wrist motion pattern rather than requiring a totally different swing.
Step 10: Fix the common golf mistake of flipping and casting early
If you try this wrist motion and the ball starts left, the likely issue is not the concept itself. The more common problem is that you are flipping and casting too early.
When the wrists throw the club out early:
- The shaft loses lean
- The clubface closes too soon
- Impact becomes less stable
- The ball can start left or hook harder
The correction given is to feel a pull down on the lead hand that deepens the angle rather than throwing it away. That preserves structure longer and keeps the clubface more neutral into impact.
This is one of the most useful distinctions in all of golf instruction. A proper release is not the same as a flip. A full release happens because the club is delivered well and then allowed to swing through. A flip happens when the golfer dumps the angles too early in a last second attempt to square the face.
Step 11: Practice this golf motion with a simple session plan
To turn this into a useful golf practice session, keep it structured.
Warm up with wrist awareness
- 10 reps of right wrist extension
- 10 reps of left wrist extension
- 10 alternating reps of right wrist then left wrist
Move to no ball rehearsals
- Make slow swings feeling trail wrist bent back down
- Make slow through swings feeling lead wrist bent back after impact
- Check that the finish looks released, not stiff
Hit short punch shots
- Use small to medium swings
- Focus on contact and compression
- Do not chase speed yet
Progress to fuller swings
- Keep the same wrist checkpoints
- Film a few swings on your phone
- Compare your positions to the tour style benchmarks
If you lose the motion at full speed, go back to rehearsals. In golf, speed should come from a better sequence and release, not from trying harder.
Step 12: Know what success should feel like in golf
When you are doing this well, several things usually improve together:
- The strike feels heavier and cleaner
- The ball compresses better
- The club sounds more powerful without extra effort
- The follow through looks higher and freer
- Your hands no longer feel frozen through impact
That is why this kind of wrist education can change your golf quickly. It gives you a clear mechanical pattern, but it also creates a better athletic feel.
FAQ
Do you need exactly 45 degrees in both wrists for good golf impact?
No. The 45 degree idea is a simple benchmark and feel. The bigger point is that strong players usually have meaningful trail wrist extension on the way down and meaningful lead wrist extension on the way through.
Why do many golf swings feel wooden through impact?
That usually happens when the club is not fully released. The lead wrist stays too flat, the grip points down too long, and the hands never move into a free flowing finish.
What is the difference between a proper golf release and a flip?
A proper release preserves structure into impact and then lets the club swing through. A flip throws away angle too early, often closes the face, and can send the ball left.
How can you check this golf wrist motion at home?
You can rehearse the wrist positions without a club, use an alignment stick for the finish checkpoint, and film your swing on your phone to compare your shaft angle and release positions.
Can this golf wrist motion help both fades and draws?
Yes. For a fade feel, keep the glove logo feeling more up through impact. For a draw feel, use the cue of arms to the right and thumbs to the left while preserving the same overall release pattern.
What should you focus on first if this feels difficult in golf?
Start with the no club wrist drills. Learn to clearly feel trail wrist extension and lead wrist extension before trying to add speed or full swings.
If your golf swing has always felt like a mystery through impact, this gives you a practical roadmap. Learn the trail wrist on the way down. Learn the lead wrist on the way through. Use measurable checkpoints. Then build your own feels around those facts. That is one of the fastest ways to make your golf strike more compressed, more powerful, and far less forced.
0 Comments