
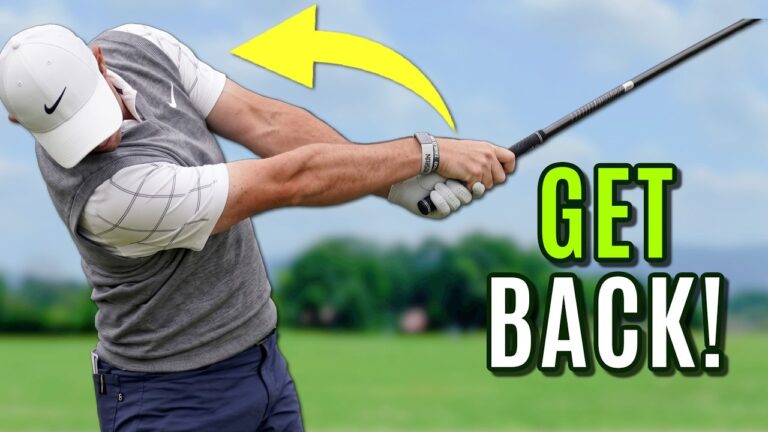

If you want to learn how to hit driver farther, start with how you use the lead side of your body. Your setup, backswing width, and lead shoulder movement through impact can either give you room to create speed or leave you cramped and hitting down on the ball.
The useful connection is that these are not three unrelated swing tips. A slightly tilted setup prepares you for a shallower strike. A wider backswing gives you room to generate speed. Then a lead shoulder that moves up and back helps you deliver the club without undoing everything you created.
You can see these shared ingredients in the driver swings of Tiger Woods, Rory McIlroy, and Justin Thomas. You do not need to copy every detail of their swings. Instead, use their common movements as checkpoints for your own.
The instructions below describe a right-handed swing, where your left side is your lead side. If you play left-handed, reverse the left and right references.
Build the motion in order: improve your driver setup, create backswing width, and then match your downswing feel to your miss.
Table of Contents
- Step 1: Learn How to Hit Driver Farther With a Tilted Setup
- Step 2: Start Your Backswing With Your Lead Shoulder
- Step 3: Create Backswing Width to Hit Driver Farther
- Step 4: Rehearse the Punch-Away Feel Without a Big Sway
- Step 5: Move Your Lead Shoulder Up and Back Through the Ball
- Step 6: Match Your Downswing Feel to Pulls, Fades, Pushes, or Hooks
- Step 7: Combine the Pieces Into a Simple Driver Routine
Step 1: Learn How to Hit Driver Farther With a Tilted Setup
Your first checkpoint happens before the club moves. At address, position your lead hip and lead shoulder slightly higher than your trail hip and trail shoulder.
In the professional examples, this lead-side-high relationship appears throughout the body. Your lead knee, hip, elbow, and shoulder can all sit higher than their trail-side counterparts. The clearest places to begin checking are your hips and shoulders.
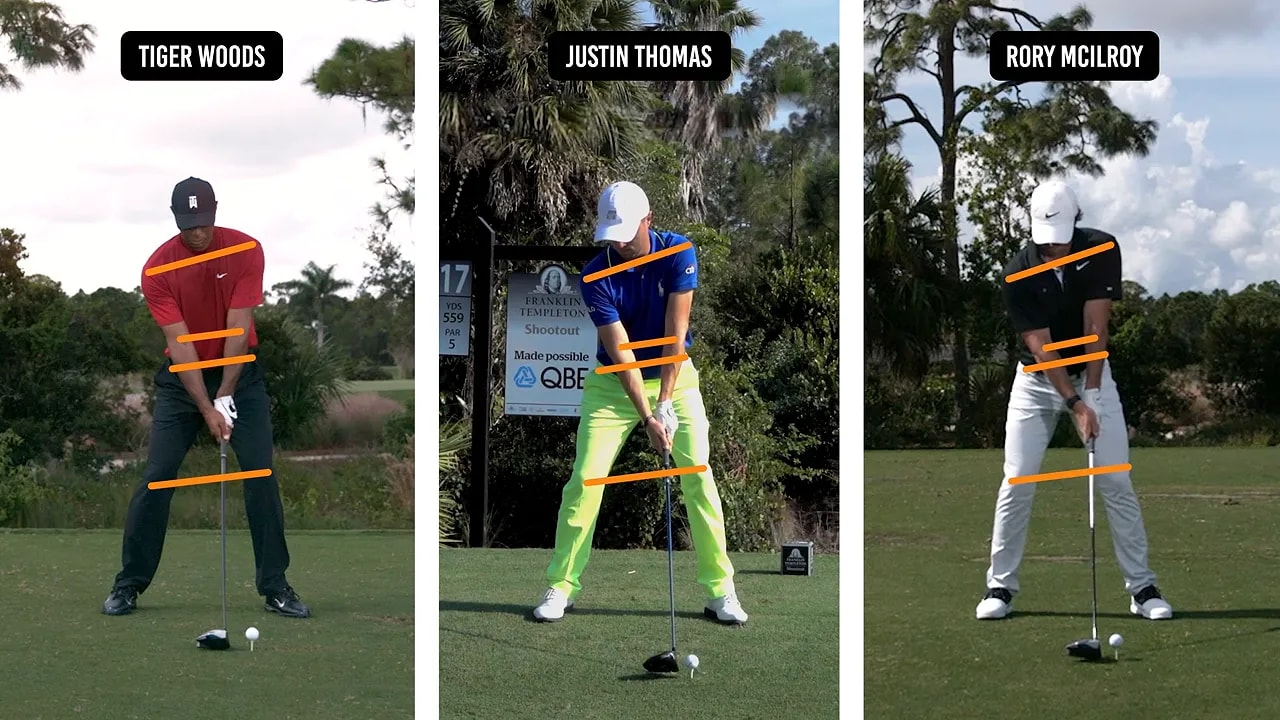
Build that setup with these simple cues:
- Move your lead hip slightly toward the target.
- Let your lead hip sit a little above your trail hip.
- Position your lead shoulder above your trail shoulder.
- Feel your belt buckle slightly closer to the target than your shirt buttons.
That last detail matters. You are not simply lifting your lead shoulder while leaving your hips behind you. Your lower body sits slightly forward relative to your upper body, creating a modest tilt away from the target.
The purpose is to make a level or slightly upward angle of attack easier to produce. Angle of attack describes whether the clubhead is traveling downward, level, or upward when it reaches the ball. Here, your goal is to avoid a steep downward driver strike and create conditions for more distance.
You can make compensations from a level or open-shouldered setup, but that adds another task to your swing. A better starting position improves your chances without guaranteeing a perfect shot.
Step 2: Start Your Backswing With Your Lead Shoulder
Once your setup is in place, use your lead shoulder to initiate the backswing. Feel it move underneath or behind your chin, rather than leaving it near its address position while your arms lift the club.
A useful reference is an imaginary vertical wall rising from your lead shoulder at address. As you turn back, your lead shoulder should move away from that wall. If it stays against the wall, you are likely creating an arms-dominated backswing.
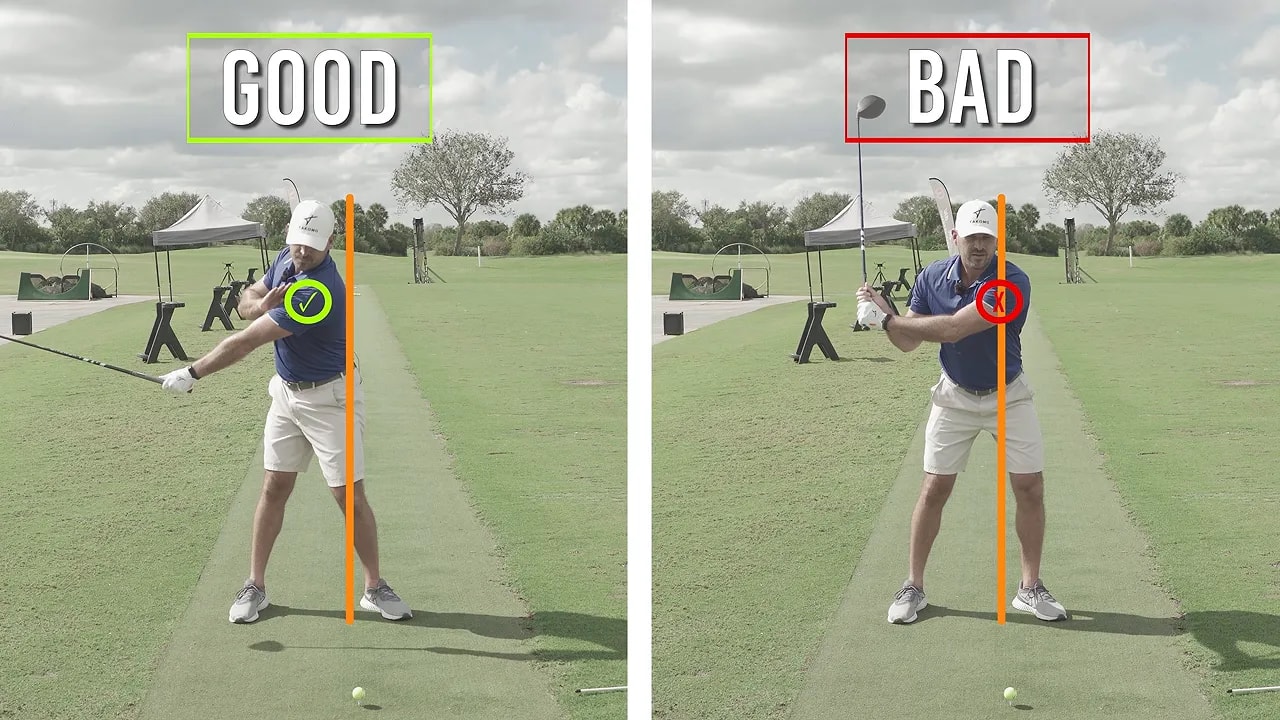
The difference becomes clear when your lead arm approaches parallel to the ground. In the stronger examples, your lead shoulder has traveled toward the middle of your body, reaching approximately the centerline or moving beyond it.
When your shoulder does not move enough, your arms tend to fold and the club becomes crowded close to you. You may feel that you have made a backswing, but you have created relatively little width.
Rehearse the contrast deliberately. First, leave your lead shoulder near its starting point and move only your arms. Then repeat the motion while turning your lead shoulder underneath your chin. Notice how the second version gives your extended lead arm somewhere to go.
Your checkpoint is not how high you can lift the club. It is whether your shoulder turn helps carry your arms and club away from their starting position.
Step 3: Create Backswing Width to Hit Driver Farther
With your shoulder moving correctly, add the feeling that your hands and clubhead travel well away from you. This is the width that an all-arms takeaway often lacks.
Use three connected cues:
- Lead shoulder back: Move it underneath or behind your chin.
- Lead arm extended: Keep length in the arm rather than folding it early.
- Thumbs and clubhead away: Feel your lead thumb point behind you as the clubhead stays far from your body.
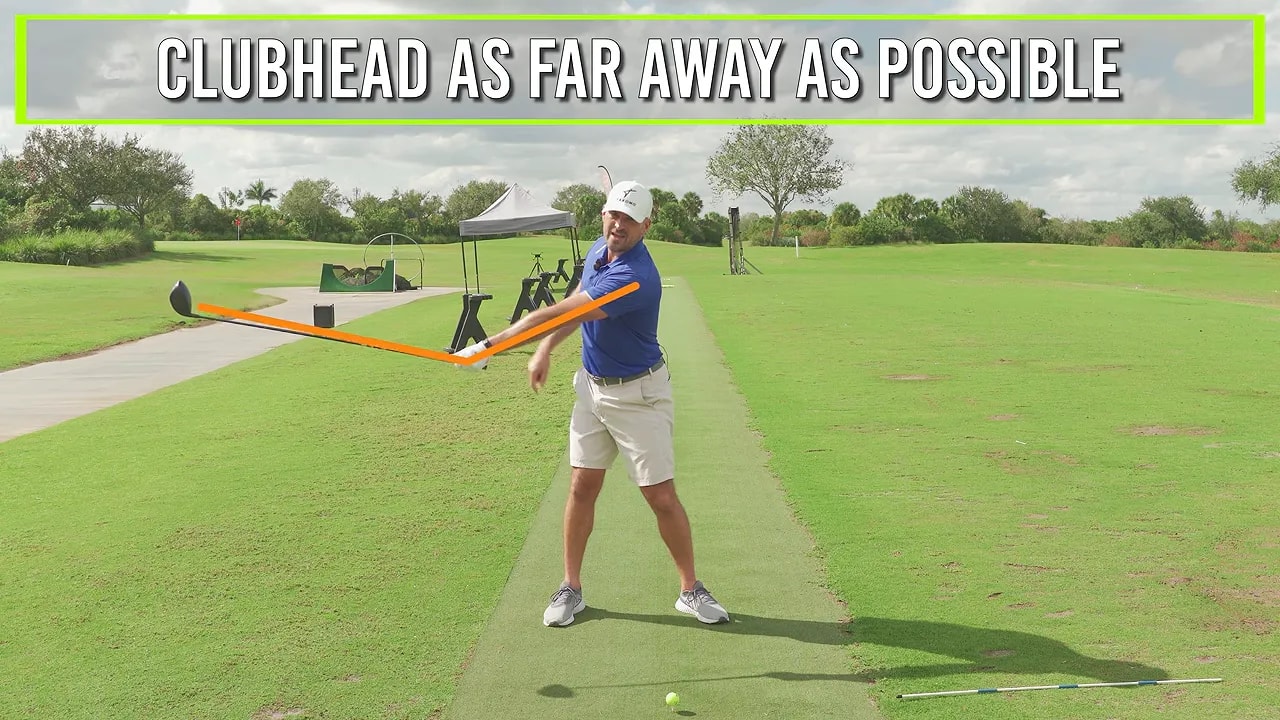
Bryson DeChambeau provides a useful exaggerated picture of this early width. You can borrow that broad, stretched-out feeling without trying to reproduce his entire golf swing.
There is an important distinction between a practice feel and the exact position you need. The professional examples still show some wrist hinge as the lead arm approaches horizontal. You are not trying to eliminate wrist movement or hold the club rigidly in line with your arm.
If your normal backswing is very narrow, however, feeling unusually wide may help you move away from that pattern. The exaggeration is a corrective cue, not a requirement to keep the wrists unhinged.
Width supports both goals of this driver lesson: creating speed and encouraging a shallower delivery. When the club gets narrow early and your arms fold around a shoulder that has barely moved, you leave yourself less room to extend through the ball.
Think of width as space you create during the backswing so you can use it on the way through.
Step 4: Rehearse the Punch-Away Feel Without a Big Sway
If “create width” sounds too abstract, use a more physical sensation: feel as though you are punching the club back away from you.
You can first rehearse this with the club held out in front of you, roughly level with the ground. Reach the club farther away through your lead arm and shoulder while keeping your head from following that reach forward.
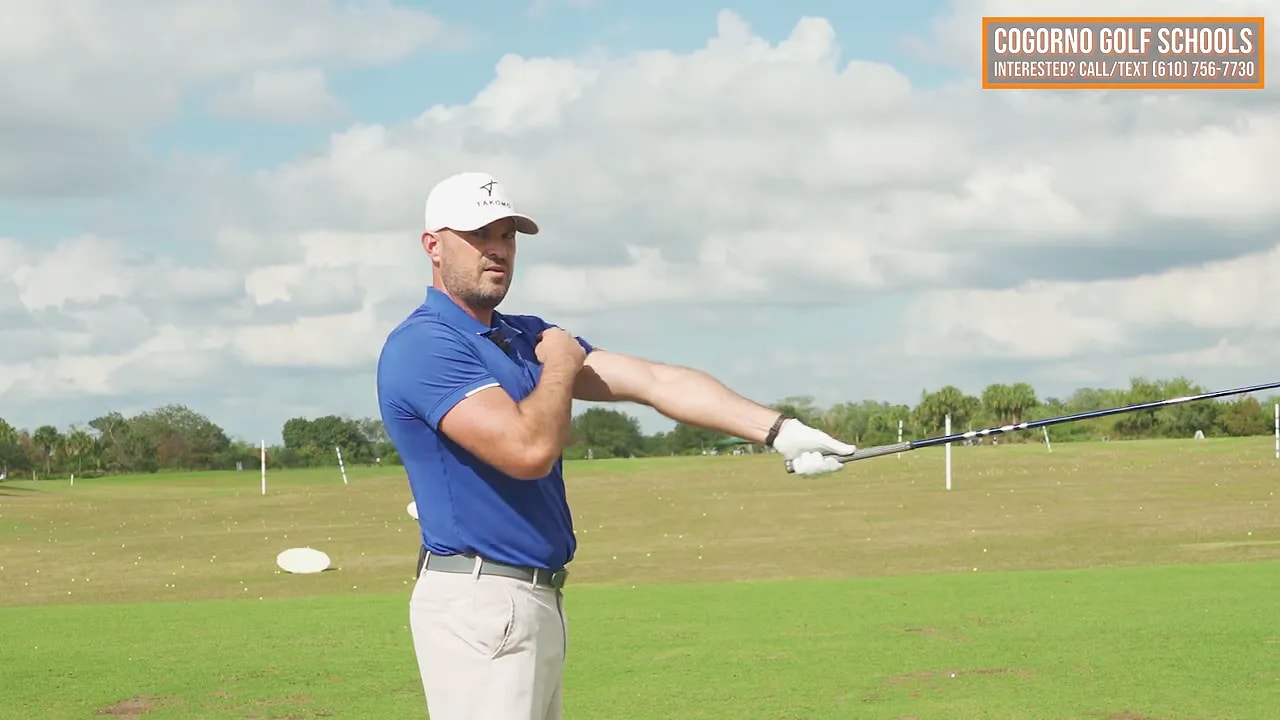
The reach comes partly from your lead shoulder moving around your rib cage. When you blend that action into your backswing turn, it helps create the feeling of a long lead arm and a clubhead that stays away from your body.
Combine the rehearsal with these checkpoints:
- Establish your lead-side-high setup.
- Turn your lead shoulder back underneath your chin.
- Feel your hands and club punch away as your lead arm stays extended.
- Allow a little pressure to move into your trail foot.
- Allow only a small amount of head movement away from the target.
You do not need to freeze your head in place. In the examples, the head can move slightly upward and away from the target, perhaps an inch or two. That is very different from a large lateral sway.
Keep the scale of the movement modest. The main action is shoulder movement and width, not shifting your whole body a foot away from the ball.
Before adding a downswing thought, try combining only the setup and backswing pieces. That lets you establish the starting conditions rather than asking yourself to manage every part of the swing at once.
Step 5: Move Your Lead Shoulder Up and Back Through the Ball
Your next task is to preserve the space and tilt you created. On the downswing, avoid driving your lead shoulder excessively toward the target.
Return to the imaginary wall from Step 2. Your lead shoulder moved away from it during the backswing. Coming down, it can return approximately to that original reference, but it should not keep lunging through it.
Instead, feel your lead shoulder move up and back as you swing through.
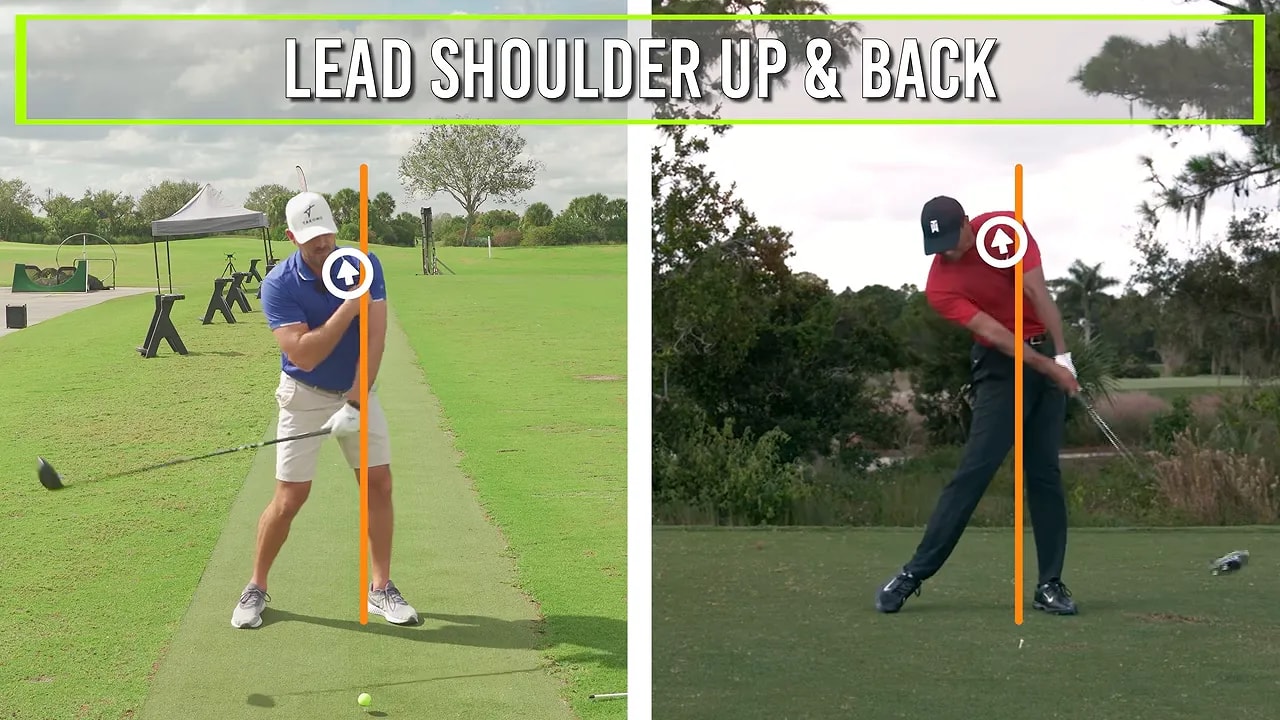
This movement helps you keep your head back while your arms and club extend away from you. It supports the level-to-upward strike and gives you room to create speed through the hitting area.
The opposite pattern is a lead shoulder that breaks too far through the wall toward the target. From there, the club can work down and left, and your arms may fold because you have run out of room.
A useful rehearsal is to imagine lifting and moving your lead shoulder back as though you were throwing someone off your back. Use that image to understand the direction, then blend it into the swing rather than treating it as a separate, abrupt action.
Your sequence now becomes:
- At address: Lead hip and shoulder slightly higher.
- Going back: Lead shoulder turns back while your arms and club create width.
- Coming through: Lead shoulder rises and moves back while your arms extend.
The broad movement stays consistent, but the best downswing feel depends on your usual ball flight.
Step 6: Match Your Downswing Feel to Pulls, Fades, Pushes, or Hooks
You can share the same setup and width fundamentals with another golfer while needing a different feeling through impact. Choose the adjustment that addresses your existing miss, not simply the one that sounds most powerful.
If you struggle with pulls and fades
If your driver tends to work steeply down and left, with pulls, fades, poor contact, or disappointing distance, rehearse your lead shoulder moving up while staying closed a little longer.
“Closed” means your shoulders feel less open toward the target during the early downswing. Combined with the upward shoulder movement, this can encourage the club to approach more from the inside rather than cutting sharply across the ball.
Your cue is: tilt, width, then up and closed.
This is a corrective sensation, not an instruction to keep your body closed throughout the entire follow-through. You are using the feel to change the approach into the ball.
If you struggle with pushes and hooks
If you already deliver the club too far from the inside and battle pushes or hooks, the up-and-closed feeling may exaggerate your problem.
Keep the tilted setup and wide backswing, but feel your lead shoulder move up and more around to the left. That additional around-the-body movement encourages the club to work more outward instead of staying excessively behind you.
Your cue is: tilt, width, then up and around.
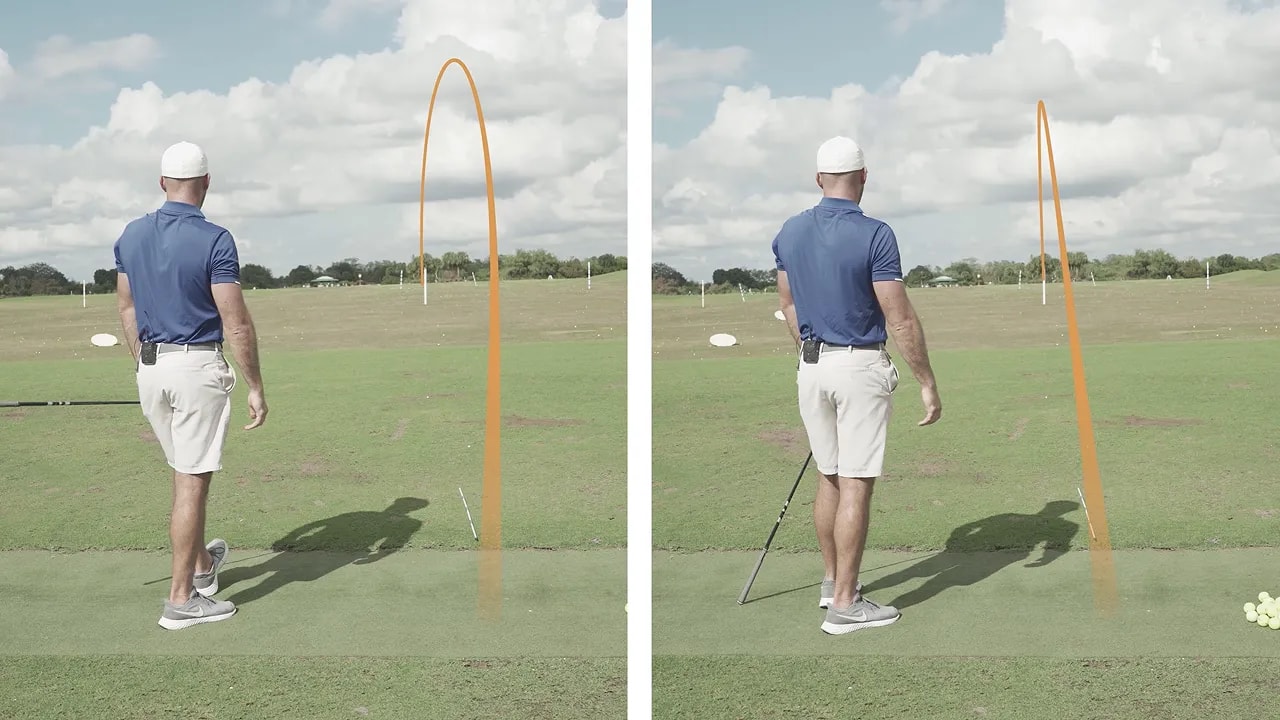
The demonstrated shots illustrate why this distinction matters. The up-and-closed feel produced a pronounced high draw, described as approximately 20 yards of curve. For a swing already tending too far from the inside, moving the shoulder more around produced a straighter flight.
You are not trying to make the biggest draw possible. You are trying to match the movement to the flight you need.
Step 7: Combine the Pieces Into a Simple Driver Routine
The most useful answer to how to hit driver farther is a sequence you can repeat, not a long checklist you carry into every swing.
Build your practice around three stages.
Establish your setup
Check that your lead hip is slightly forward and higher, your lead shoulder is higher, and your belt buckle sits a little toward the target relative to your shirt buttons. Make this your starting position before working on movement.
Add shoulder turn and width
Rehearse your lead shoulder underneath your chin while your lead arm stays extended and the club punches away. Allow a little trail-foot pressure and modest head movement away from the target. Then blend those pieces into a shot before adding another thought.
Choose one through-swing cue
Use your normal miss to decide between up and closed for the steep pull-and-fade pattern, or up and around for the push-and-hook pattern. Avoid switching between both feelings without a reason.
If you lose the motion, return to the relevant checkpoint. A cramped backswing sends you back to shoulder turn and width. A forward-lunging downswing sends you back to the imaginary wall and the up-and-back shoulder movement.
Your simplest reminder is: tilt, width, up and back. Establish the setup, create room going back, and preserve that room through the ball. Those connected movements give you a clearer route to more speed, a better driver strike, and a ball flight that fits your game.
0 Comments