
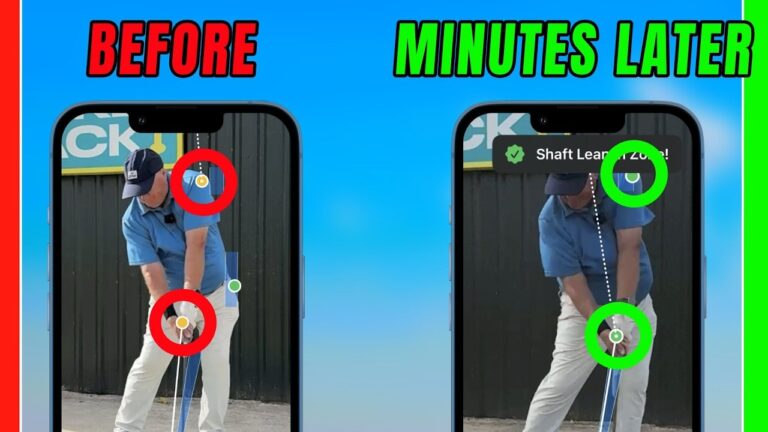

Better golf contact often comes from a movement that happens before the club reaches the ball. If your shots are heavy, your club path works too far from the inside, or you struggle to create forward shaft lean, your lead shoulder may be rising away from the ball too early in the downswing.
This golf practice sequence uses a simple idea: keep your lead shoulder lower for longer as you move pressure into your lead foot, then push up through impact and into the finish. For a right-handed golfer, the lead side is the left side. The movement is deliberately exaggerated at first, then blended into a natural, flowing golf swing.
Table of Contents
- Step 1: Connect your golf club path and attack angle
- Step 2: Identify the key lead shoulder move in your golf downswing
- Step 3: Use the three golf swing movement components
- Step 4: Build the golf movement with the crush-the-can rehearsal
- Step 5: Add a towel-free golf strike while keeping the movement
- Step 6: Blend the lead shoulder move into a flowing golf swing
- Step 7: Refine golf club path with a simple obstacle drill
- Step 8: Use the logo-on-the-ball cue for better golf contact
- Step 9: Take the golf drills to the course with one thought
Step 1: Connect your golf club path and attack angle
Start by recognizing that club path and attack angle often influence one another. A golf swing that travels significantly out to the right of the target is more likely to approach the ball too shallowly. In contrast, a player who swings over the top tends to deliver the club more steeply.
These relationships are not absolute, but they offer a useful starting point. If you tend to swing too far from the inside and your attack angle is too level, you may be able to improve both tendencies by changing one underlying movement rather than trying to fix everything separately.
A shallow, excessively in-to-out golf delivery can move your low point too far behind the ball. That can encourage heavy strikes, inconsistent contact, and a last-second attempt to throw the clubhead toward the ball. The goal is not to force a radically steep swing. It is to create a more functional downward strike, then keep moving through impact.
Use these observations as a guide:
- Too far in-to-out path: Often linked with a shallow delivery and low point that sits too far back.
- Over-the-top path: Often linked with a steep approach into the ball.
- Heavy contact: Can occur when your low point is behind the ball or when you fail to push upward after moving down.
- Early release: Can be a reaction to your upper body pulling away from the ball too soon.
Step 2: Identify the key lead shoulder move in your golf downswing
At the top of a typical golf backswing, your lead shoulder is lower than your trail shoulder. By impact, your lead shoulder has risen above the trail shoulder. That change is normal. The issue arises when the lead shoulder starts rising too early in the downswing.
When your lead shoulder pulls upward and away from the ball prematurely, your body can create extra space between the shoulder and the ball. Your brain may respond by kicking the club outward to find the ball. This can reduce shaft lean and contribute to a release that happens too early.
The corrective feeling is simple: during the early downswing, allow your lead shoulder to stay lower than your trail shoulder for longer. As you get closer to impact, the shoulders will naturally begin to level and then rise into the follow-through. Do not try to keep the lead shoulder down forever. Instead, delay the upward move.
This change should help you feel closer to the ball as the club approaches impact. That can encourage more forward shaft lean and a more downward approach. It also gives you a better chance to strike the ball before the turf rather than rescuing the swing with a hurried flip.
Step 3: Use the three golf swing movement components
Your golf swing uses three broad types of motion:
- Rotation: Turning your body through the swing.
- Lateral movement: Shifting pressure and movement toward the lead side.
- Vertical movement: Moving down into the ground before pushing upward.
Rotation matters, but it is not the only source of speed or control. There is also a lateral shift, particularly noticeable with the driver, and a vertical component. Great golf swings commonly show changes in both the belt line and head height. The movement does not need to be dramatic, but it should be present.
Think about jumping as high as possible. Before you push up, you instinctively move down to create pressure against the ground. The same broad concept applies here. To push up through the golf ball, first move down into your lead side.
In practice, this downward move may feel enormous, as though you are lowering by a foot. In reality, it may only be an inch or two. That contrast between feel and reality is important. Use an exaggerated practice feel to create a smaller, useful golf swing change.
Step 4: Build the golf movement with the crush-the-can rehearsal
Begin without trying to hit a ball. Make a short or three-quarter backswing and pause. Imagine a can placed under the instep of your lead foot. Your task is to crush it firmly.
As you crush the imaginary can, feel pressure move down into the lead foot. Do not worry about turning hard at this stage. Focus on moving forward and down, allowing your lead hip, lead knee, and lead shoulder to work toward the lead side and lower toward the ground.
This pressure movement encourages the lead shoulder to remain lower for longer. From this compressed position, push up through to a balanced finish.
Use this rehearsal in three parts:
- Backswing: Make a controlled backswing and stop.
- Compress: Move pressure down into the lead foot as if crushing the can. Keep the lead shoulder lower.
- Push up: Swing through and allow your body to rise naturally into the finish.
At first, remove the pressure to hit a good shot. You are training a movement, not trying to produce speed. The exaggerated rehearsal is useful because your habitual golf pattern will often try to return as soon as you swing on your own.
Step 5: Add a towel-free golf strike while keeping the movement
Once you can rehearse the pressure shift, introduce a ball. Keep the same sequence: backswing, pause, compress into the lead side, then swing through. Do not judge these early shots by distance. The purpose is to establish a steeper, more controlled approach into the ball.
A more negative attack angle with an iron can be a positive sign during this stage, especially if your starting point was excessively level. One early shot in the session moved to roughly five degrees downward, which showed a noticeably steeper delivery, even though the contact was still a little heavy.
If you create more downward strike but still hit the turf too early, do not simply try to move farther forward and down. You already have the downward component. The next requirement is to push up through the strike.
This is the full golf sequence:
- Move down and into the lead foot early in the downswing.
- Keep the lead shoulder lower for longer.
- Deliver the club with a more downward approach.
- Push upward and through after impact.
The push upward is what helps you avoid staying down too long and digging into the turf. It is not a jump before impact. It is the natural upward phase that follows pressure into the ground.
Step 6: Blend the lead shoulder move into a flowing golf swing
After several paused rehearsals and shots, remove the pause. Make slower, continuous swings while preserving the same feeling: backswing, lead shoulder down toward the lead foot, then push up through the finish.
Speed is not the priority. A smooth golf swing at reduced pace is enough to check whether the motion remains intact. The ball can be removed briefly if that helps you focus on the movement rather than the result.
As the move improves, you should see the lead shoulder staying in a better position at impact and the shaft leaning forward more effectively. The most useful feeling is often that your upper body stays closer to the golf ball for longer, rather than immediately pulling away from it.
Do not overload yourself with a long checklist. Avoid trying to think about shoulder height, shaft lean, attack angle, club path, hip motion, and rotation all at once. Condense the work into one clear task or feel.
Step 7: Refine golf club path with a simple obstacle drill
Once the strike is improving, add a non-technical task to influence club path. Place a headcover just behind the ball and slightly inside the target line, where an overly inside approach would strike it on the way through. Use a rubber tee or another small target initially instead of a golf ball if preferred.
Your task is to swing through without contacting the headcover. If the club comes too much from the inside, it will collide with the obstacle. If you deliver the club more appropriately, you can return the clubhead to the ball without touching it.
This is valuable because it gives your golf swing an external task. Rather than trying to manually manipulate the club path with several technical thoughts, you respond to a simple problem: miss the headcover.
Set up the drill carefully:
- Place the ball or a small rubber tee in its normal position.
- Set the headcover behind the ball and inside the intended clubhead path.
- Make slow practice swings that miss the headcover.
- Hit a few shots while maintaining the lead-side pressure and push-up pattern.
- Remove the obstacle and see whether the improved path remains.
Keep the obstacle far enough from the ball that it provides feedback without making you afraid to swing. The point is not to create a forced out-to-in golf path. It is to reduce an excessively in-to-out delivery.
Step 8: Use the logo-on-the-ball cue for better golf contact
To simplify the practice thought further, use the golf ball logo as a visual cue. Position the logo at approximately the two o’clock position when looking at the ball as a clock face, with 12 o’clock being the side facing away from you.
Your task is to feel as though the club reaches that two o’clock area. This gives you a useful picture of moving the club toward the ball from a less exaggerated inside route, while the lead shoulder works forward and down before you push upward.
It is a cue, not a demand to consciously steer the club. The value comes from combining an athletic intention with the body movement you have already rehearsed:
- Lead shoulder forward and down.
- Pressure into the lead foot.
- Clubhead approaching the two o’clock side of the golf ball.
- Push up and finish in balance.
In the practice results, club path improved from approximately eight to nine degrees in-to-out to around three to five degrees in-to-out. Attack angle, initially close to level, moved to roughly three to five degrees downward. Contact also became crisper, with less heavy turf interaction.
Step 9: Take the golf drills to the course with one thought
On the course, you will not want to recreate every drill. Choose one simple phrase that captures the entire intention. For this golf pattern, a strong option is: crush the lead foot, then push up.
If the club path is your main concern, use the ball-logo image instead: hit the two o’clock side of the ball. If your contact becomes heavy, return to the full sequence and check that you are not staying down through impact. You need the downward pressure early, followed by the upward push.
Practice from the most exaggerated version to the most natural version:
- Paused rehearsal without a ball.
- Paused rehearsal with a ball.
- Continuous slow golf swings.
- Headcover path drill.
- Ball-logo cue without an obstacle.
- Normal shots with one simple swing thought.
This progression gives you a practical way to change a golf swing without relying on random swing thoughts. The aim is not perfection in one session. It is a more reliable strike, a less excessive in-to-out path, improved shaft lean, and a lead shoulder that stays in position long enough to support the delivery.
Golf Lead Shoulder Move FAQ
Why does my lead shoulder rising early cause heavy golf shots?
When your lead shoulder pulls away from the ball too early, your body may react by throwing the club outward to reach the ball. That can disrupt shaft lean, move the low point back, and make consistent contact more difficult.
Should I keep my lead shoulder down through the entire golf swing?
No. Your lead shoulder should naturally rise through impact and into the follow-through. The goal is simply to keep it lower for longer during the early downswing before pushing up through the strike.
What does crushing the can under the lead foot do in golf?
It creates the feeling of moving pressure down into your lead side. This can help your lead shoulder stay lower, encourage a more downward club delivery, and prepare you to push upward through impact.
How can I reduce an excessively in-to-out golf club path?
Use a headcover positioned behind and inside the ball as an obstacle. Make swings that miss the headcover, then use the visual of approaching the two o’clock side of the ball to carry the improved path into normal shots.
0 Comments