
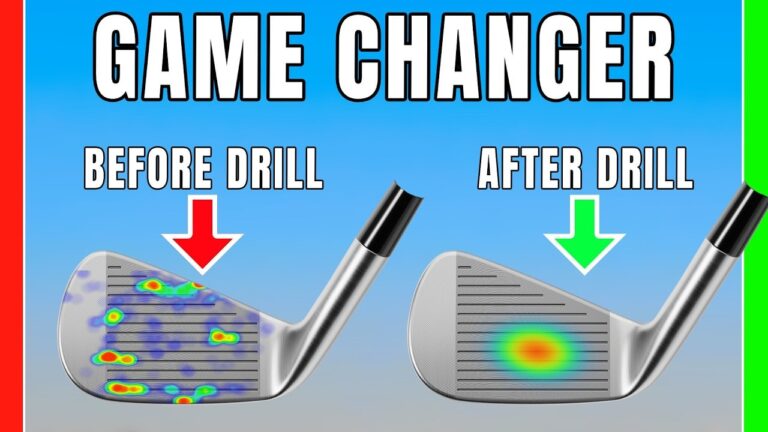

Clean iron contact is one of the most satisfying parts of golf, but it can disappear quickly when the clubface, body motion, and strike location do not match up. A shot that starts right, feels thin, or catches the turf inconsistently is not always caused by a dramatic swing flaw. Often, the issue comes from a few impact conditions that are slightly out of place.
This golf lesson follows a practical route to better iron striking: identify what happens at impact, improve the body angles that influence contact, refine the grip, and build the skill to control the clubface. The aim is not to chase a picture perfect golf swing. It is to help you understand what your own swing needs and give you a clear practice process.
Table of Contents
- Step 1: Diagnose Your Golf Contact Before Trying to Fix It
- Step 2: Build Better Golf Body Angles at Address
- Step 3: Let the Trail Leg React to the Turn
- Step 4: Progress From Slow Rehearsals to Short Golf Shots
- Step 5: Check the Grip Before Blaming Your Golf Swing
- Step 6: Train Clubface Control as a Golf Skill
- Step 7: Create a Simple Plan for Better Golf Contact
- Frequently Asked Questions
Step 1: Diagnose Your Golf Contact Before Trying to Fix It
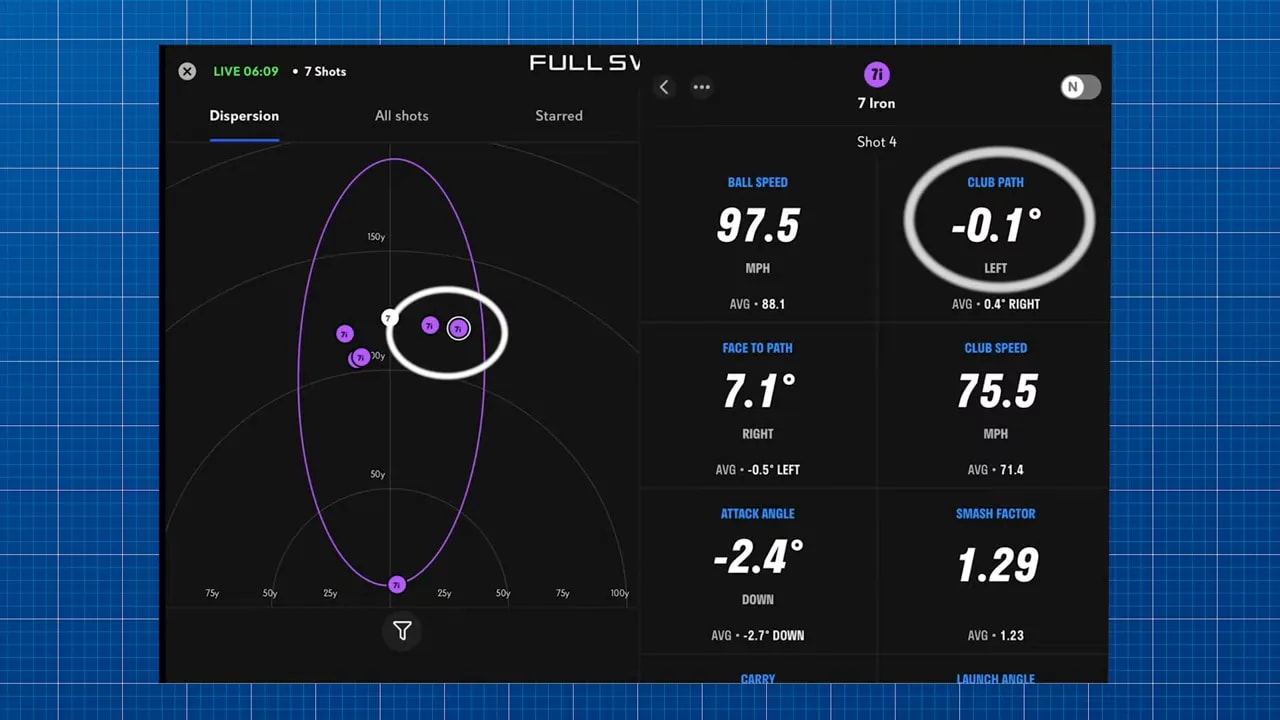
If your irons repeatedly finish right of target, begin by separating the ball flight into its key impact factors. In golf, the ball can be affected by several variables at impact:
- Clubface angle: The main influence on where the ball starts.
- Club path: The direction the clubhead travels through impact.
- Strike location: How consistently you contact the middle of the clubface.
- Attack angle: Whether the clubhead is travelling down, level, or up through the ball.
- Speed: A factor in distance, but not always the first priority for better contact.
In this case, the club path was travelling almost directly at the target. The problem was that the clubface was open, causing the golf ball to start and leak to the right. That distinction matters. Trying to rebuild your path when the path is already functional can create a new problem rather than solve the original one.
The other important finding was inconsistent centred contact. Even when your path and attack angle are reasonable, strike quality can vary if your body motion makes it difficult to return the club to the ball reliably.
Use this same diagnostic approach during your own golf practice. Avoid responding to every poor shot with a random swing thought. Instead, ask a simple sequence of questions:
- Where did the ball start relative to my target?
- Did it curve, or did it simply launch offline?
- Did the strike feel centred, heavy, or thin?
- Is the same pattern happening with several clubs?
A pattern is useful information. One poor shot is only one shot. Five similar misses in a row give you a meaningful clue about what needs attention.
Step 2: Build Better Golf Body Angles at Address
Before the club moves, your setup creates a relationship between your body and the golf ball. Because the ball is on the ground, you stand with forward bend from the hips, some knee flex, and a natural tilt through the shoulders and hips.
Those address angles are not identical for every golfer. Your height, club length, posture, and mobility will influence them. The key is that your body should be able to rotate while broadly maintaining its relationship to the ball.
A common contact issue occurs when the shoulders and hips turn too level in the backswing. As the hips move inward and the upper body loses its tilt, returning to a consistent impact position becomes more difficult. You may still find the ball, but the timing required becomes much more demanding.
For a right handed golfer, a more functional backswing turn generally allows the trail hip to work back and up. This supports the shoulder tilt and helps the head remain relatively centred. It also gives your arms and club a more stable environment from which to return to impact.
Use the Club Across the Shoulders Drill
This is a simple way to learn the motion without worrying about the ball:
- Take your normal golf posture.
- Place a club across the front of your shoulders.
- Keep your head relatively centred.
- Turn into your backswing and notice the angle of your shoulders.
- Feel the lead shoulder working more down rather than simply around level.
- Allow the trail hip to move back and slightly upward as you turn.
The sensation may feel exaggerated at first. That is normal. A change often feels larger than it actually is, particularly if your established movement has been repeated for years.
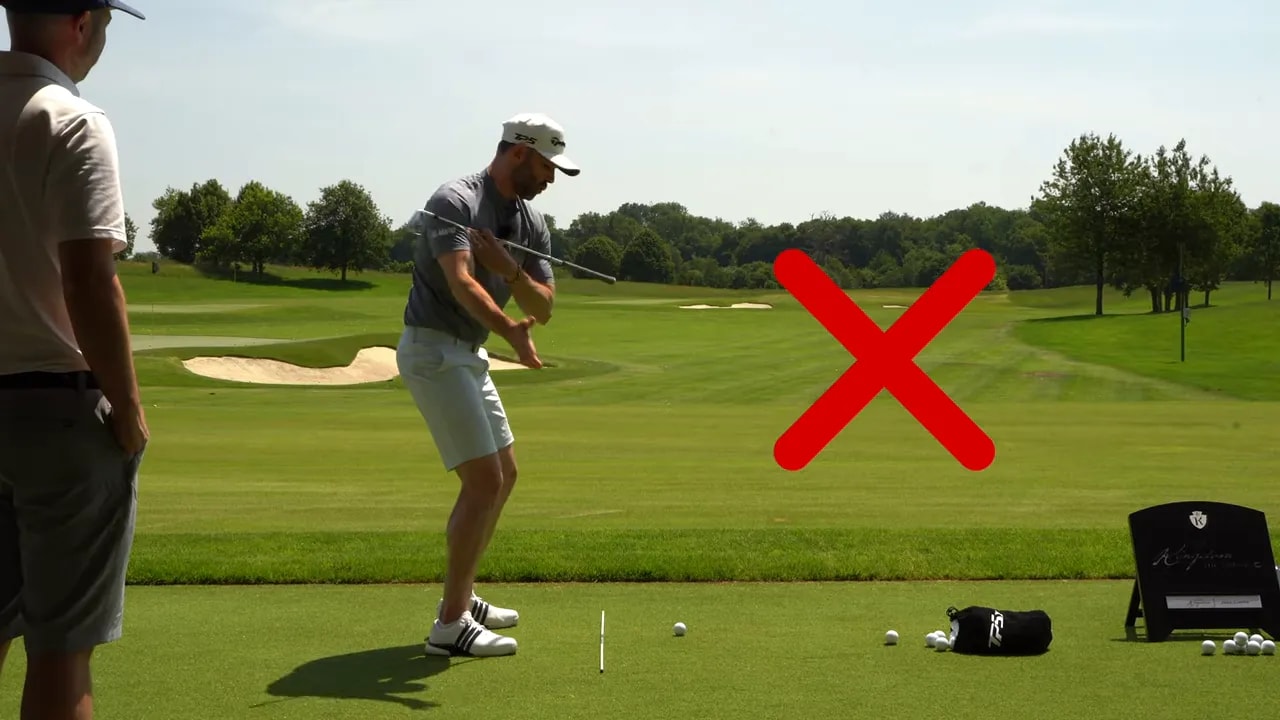
The goal is not to force your hips or shoulders into an extreme position. You are trying to turn around your address angles rather than flattening them. That distinction can make your golf swing feel more balanced and make the bottom of the swing more predictable.
Step 3: Let the Trail Leg React to the Turn
Many golfers try to keep the trail knee fixed in flex throughout the backswing. While the trail foot can remain planted, locking the knee can restrict a natural hip turn.
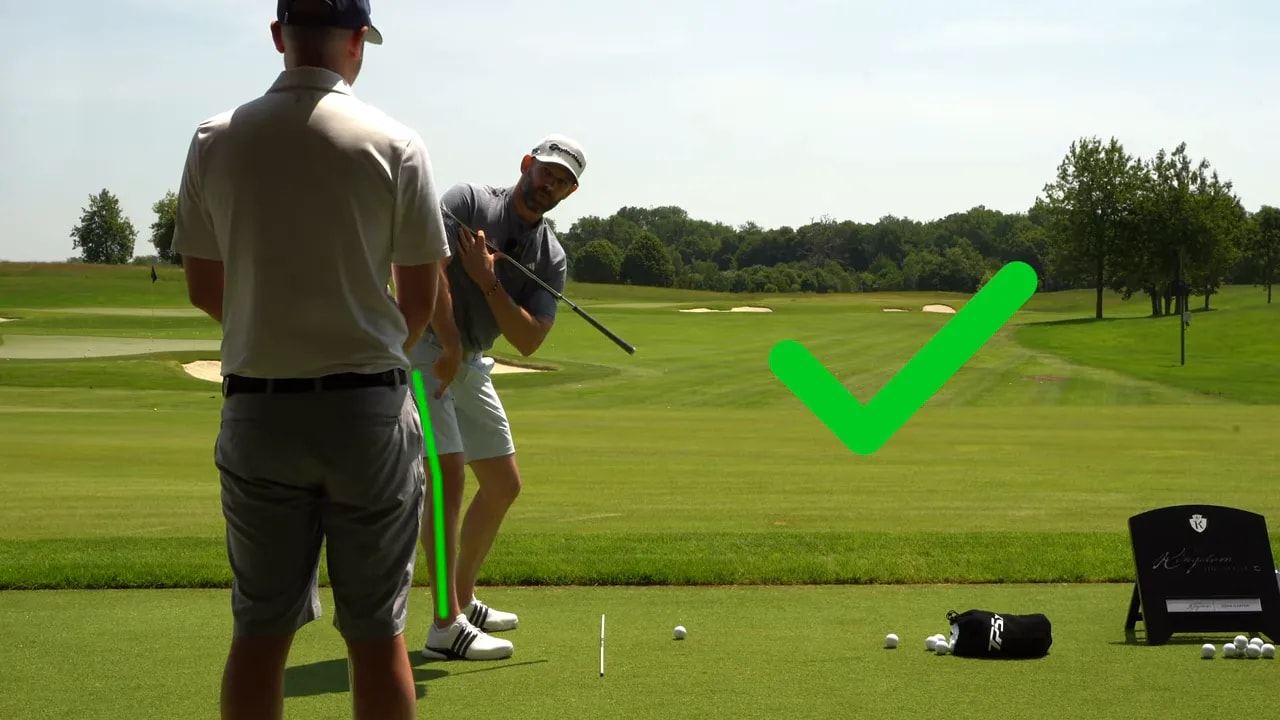
As the trail hip turns back and up, it moves farther from the trail foot. The trail leg should react by losing some flex and straightening slightly. This is not a deliberate attempt to snap the knee straight. It is the result of a better hip turn.
If your trail knee instead collapses inward, the hips can move toward the ball and the shoulders may become too level. Your body then has to make compensations to stay balanced. Often, the head pulls back or the chest stands up, making consistent golf contact even harder to achieve.
Use a Trail Hip Checkpoint
At the top of your backswing, check these sensations:
- Your trail hip feels deeper, back, and slightly higher.
- Your trail knee has softened or straightened a little as a reaction to the turn.
- Your weight feels more into the trail heel than toward the toes.
- Your shoulders retain some tilt instead of becoming level with the ground.
- Your head has not drifted dramatically away from its address position.
Start with rehearsals. Make a backswing, pause at the top, and assess the position. Do this without a ball before asking yourself to hit a full golf shot. It is much easier to learn a new body motion when you are not focused on where the ball finishes.
Step 4: Progress From Slow Rehearsals to Short Golf Shots
When you make a technical change, do not immediately demand full distance and perfect accuracy. That is a fast route back to your old movement. Begin with a motion that is small enough to control.
Make a backswing rehearsal, stop at the top, then swing through. Once you can repeat that movement, introduce a ball but reduce the target distance. A half swing that travels 50 to 60 yards is enough. The ball is simply there to be struck while you execute the movement.
At this stage, your focus is internal. You are checking whether your hips and shoulders moved as intended, not judging every shot by its final yardage. Once the motion becomes more familiar, the strike and direction can become the next area of attention.
A Productive Golf Practice Sequence
- Rehearse: Make the desired backswing with no ball.
- Pause: Hold the top position briefly and check your trail hip and shoulder tilt.
- Swing through: Return to impact without adding speed.
- Hit a short shot: Let the ball get in the way of the new motion.
- Review: Use video, a mirror, or a practice partner for feedback.
- Repeat: Build three good repetitions before increasing the swing length.
Feedback is essential. You first need to know what to change, then understand how to change it, and finally see whether you are actually doing it. From there, improvement becomes an exercise in managing exaggeration. If the hips still move forward, create more of the back and up feeling. If you go too far, reduce the feeling slightly.
Over time, repetition helps the new golf movement feel normal rather than forced.
Step 5: Check the Grip Before Blaming Your Golf Swing
Body motion can improve contact, but a clubface that stays open may also be influenced by your grip. A grip can look familiar and still make it difficult to square the face consistently.
A common pattern is a lead hand that is too weak combined with a trail hand that is too strong. For a right handed golfer, this combination can make it more difficult to return the clubface squarely through impact.
The correction used here was subtle:
- Rotate the lead hand slightly more on top of the handle while keeping the thumb broadly in place.
- Return the trail hand so that its thumb sits more on the lead side of the grip rather than directly on top.
- Keep the clubface reasonably square while making the adjustment.
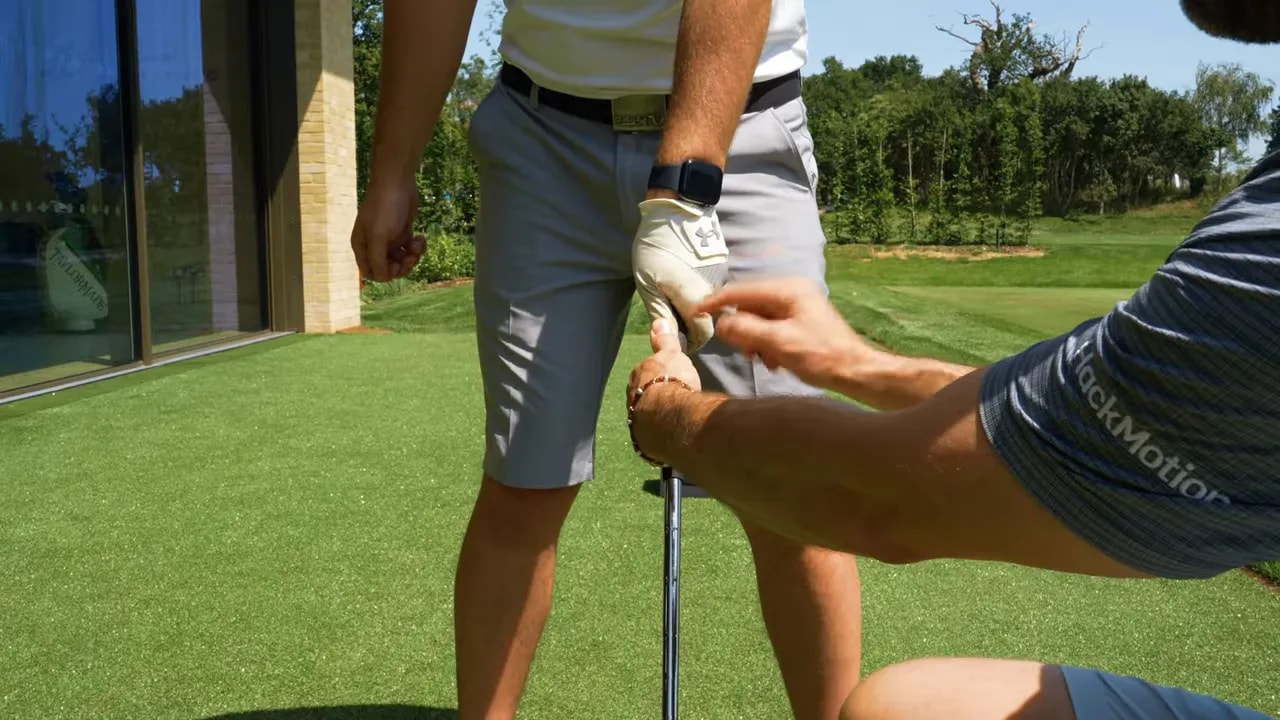
Do not be surprised if a better grip feels uncomfortable. Your hands are accustomed to their current placement. A new grip may feel wrong while being more functional for face control.
Make the adjustment gradually, then hit a few relaxed shots. You are looking for a ball flight that starts closer to target and requires less manipulation through impact. If you are uncertain about your grip, a qualified golf coach can help you find a position that fits your hands and swing.
Step 6: Train Clubface Control as a Golf Skill
Good technique matters, but golf is also a skill game. You cannot rely only on static checkpoints and expect every ball to fly straight. You need to learn how your hands and arms influence the clubface through impact.
A useful practice game is to keep your setup and general swing shape similar, then intentionally create three different shots:
- A shot that starts or curves left.
- A shot that starts or curves right.
- A straight shot between those two patterns.
Do not change your grip for each attempt. Instead, explore how your hands and arms release the club. You may find that you can turn the ball over to the left by allowing the face to close more, or send it right by retaining a more open face.
This is not a recommendation to manufacture wild shots on the course. It is a structured golf practice exercise. When you can deliberately create left and right, finding neutral becomes much easier. You gain awareness rather than simply hoping the clubface behaves.
Why a Good Looking Position Is Not Enough
A club can appear to be in an excellent position during the downswing and still produce a poor shot. The final result depends on what happens after that point: the release of the wrist angles, forearm rotation, strike location, and actual face angle at impact.
That is why golfers should avoid chasing one frozen image. Better contact comes from a repeatable movement and enough skill to manage the clubface through the hitting area.
Step 7: Create a Simple Plan for Better Golf Contact
When your irons are inconsistent, simplify the process. A useful plan should be specific enough to follow but small enough to repeat.
Your Next Range Session
- Hit several normal shots and note the dominant miss.
- Decide whether the issue is mainly start direction, curve, or strike quality.
- Make five slow club across the shoulders rehearsals.
- Make five trail hip back and up rehearsals.
- Hit five short shots with a pause at the top.
- Check your grip before moving to fuller swings.
- Finish with a left, right, straight clubface-control game.
Do not try to improve everything at once. In this example, the path and attack angle were not the priorities. The productive focus was body angles, centred strike, and face control. Your golf swing may need a different priority, which is exactly why diagnosis should come before drills.
Better iron contact is rarely about one magic position. It is the result of identifying the impact issue, making an appropriate movement change, using feedback, and practising until the motion becomes repeatable. That process is simple, even if it requires patience.
Frequently Asked Questions
Why do my golf irons keep going right?
If the ball starts right and continues right, an open clubface is a likely cause. Check your face control and grip before assuming your swing path is the problem. A launch monitor or simple ball-flight observation can help separate a face issue from a path issue.
Should my trail knee straighten in the golf backswing?
For many golfers, the trail knee will lose some flex as the trail hip turns back and up. It should be a reaction to a functional turn, not a forced attempt to lock the leg straight.
How can I improve golf contact without hitting full shots?
Use rehearsals and short swings. Pause at the top of the backswing, check the position of your hips and shoulders, then hit controlled shots of roughly 50 to 60 yards. Gradually build speed only when you can repeat the motion.
Can a grip change help an open golf clubface?
Yes. A lead hand that is too weak and a trail hand that is too strong can make it harder to square the clubface. Small grip adjustments may help, although they can feel unfamiliar at first.
Should I focus on swing positions or ball flight in golf practice?
Use both, but at different times. When learning a new movement, focus first on the rehearsal and body position. Once you can make that motion, use ball flight and strike quality as feedback. A balanced approach develops both technique and skill.
0 Comments