

If your golf swing gets loose in the backswing and your hips slide too far to the trail side, you are not alone. A lot of golf players try to fix hip sway by forcing the lower body to stay still, but that often makes the motion worse.
The better golf fix is to clean up how your upper body moves first. When your sternum and chest shift correctly, your hips can load without over-sliding, and you can move back to the lead side with much better timing. The key feel is simple: bump, turn, bump, turn.
This guide walks you through the move step by step so you can use it in your golf practice at home or on the range.
Table of Contents
- Step 1: Understand what hip sway in golf actually is
- Step 2: Stop trying to fix golf hip sway by “staying left”
- Step 3: Focus on your sternum first in the golf backswing
- Step 4: Learn the correct golf sequence: bump, turn, bump, turn
- Step 5: Practice the backswing bump in golf without a club
- Step 6: Use a simple checkpoint to prevent excess golf sway
- Step 7: Transition back to the lead side in your golf downswing
- Step 8: Add a slow motion golf drill for daily practice
- Step 9: Know what the move should feel like in golf
- Step 10: Avoid these common golf mistakes
- Step 11: Use this golf checklist before hitting driver
- Step 12: Build a more consistent golf swing with fewer moving parts
- Golf FAQ
- Final takeaway for golf players
Step 1: Understand what hip sway in golf actually is
In golf, hip sway usually means your pelvis slides too far to the right in the backswing if you are a right-handed player. Instead of loading into the trail side with control, your body drifts laterally.
That creates a chain reaction:
Your backswing gets long and unstable.
Your pressure shift becomes harder to time.
You add extra moving parts to the golf swing.
Getting back to the lead side can feel rushed or forced.
Many players notice this most with the driver because the longer club exposes balance issues more clearly.
Step 2: Stop trying to fix golf hip sway by “staying left”
One of the most common golf mistakes is trying to keep your upper body fixed to the left in the backswing because you want to hit through the ball and finish on the lead side.
That idea sounds logical, but it can backfire.
When you hold your upper body left while starting the backswing, your hips often get pulled into an awkward slide. Instead of creating a centered, athletic load, you create tension and poor sequencing. The result is the exact golf sway you were trying to remove.
So if you have been telling yourself to “stay left,” that may be the reason your motion feels stuck and unstable.
Step 3: Focus on your sternum first in the golf backswing
The real fix starts higher up. Your sternum and upper body help organize the motion underneath.
Rather than locking your chest in place, let your upper body shift slightly to the right as you begin loading into the backswing. This is not a big move. It is a subtle shift of about 1 to 2 inches.
That small move matters because it gives your body momentum in the correct direction. Once your upper body goes with the backswing load, your hips can move more naturally without over-sliding.

In practical terms for golf, this means:
You are not trying to freeze your chest.
You are not making a big lunge off the ball.
You are allowing a small, controlled trail-side move.
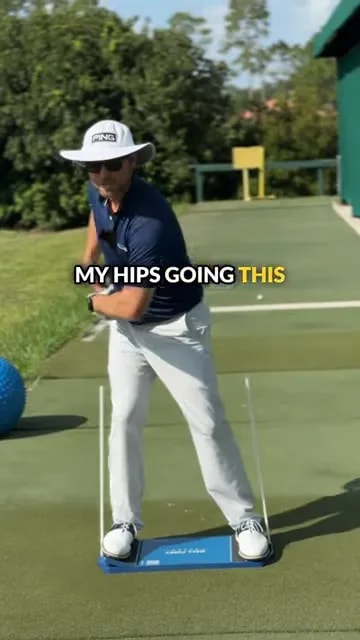
Step 4: Learn the correct golf sequence: bump, turn, bump, turn
If you want one simple pattern to remember in your golf swing, use this:
Bump into the trail side
Turn into the backswing
Bump to the lead side
Turn through to the finish
This sequence helps simplify your golf motion. Instead of trying to solve everything with hip action alone, you build a coordinated pressure shift and body turn.
Think of the first bump as a small load, not a slide. Then turn. Once loaded, move pressure back to the lead side and turn through.
Step 5: Practice the backswing bump in golf without a club
You can build this move at home without hitting balls. In fact, that is often the easiest way to improve your golf motion because you remove the urge to swing hard.
Try this simple drill:
Set up in your normal golf posture with feet about shoulder width apart.
Cross your arms over your chest or place a hand on your sternum.
Gently shift your upper body 1 to 2 inches toward the trail side.
From there, make your backswing turn.
Notice whether the motion feels more loaded and less shaky.
The shift should feel small and athletic. If it looks obvious, you are probably doing too much.
Step 6: Use a simple checkpoint to prevent excess golf sway
A useful checkpoint is whether your hips keep moving with the turn instead of crashing into a barrier behind you.
In golf practice, this can be trained with an external reference such as an alignment stick, a chair, or another object placed to give you feedback. The idea is not to trap yourself. It is to show whether your body is sliding too much instead of loading and turning.
If your upper body shifts correctly first, it becomes easier for your hips to continue moving with the backswing turn rather than slamming into the trail-side checkpoint.
This is a major concept in golf mechanics. Good motion is not just about avoiding movement. It is about allowing the right movement in the right order.
Step 7: Transition back to the lead side in your golf downswing
Once you have a better backswing load, the move back to the lead side becomes much easier.
That is one of the biggest benefits of this golf pattern. A proper trail-side bump and turn gives you momentum to return left instead of forcing it late.
As you start down:
Shift pressure back to the lead side
Let the lower body support the move
Turn through to a full finish
If your backswing was too sway-heavy, this part often feels rushed. If your backswing was organized, the transition tends to feel smoother and more powerful.
Step 8: Add a slow motion golf drill for daily practice
You do not need long practice sessions to improve this part of your golf swing. A few minutes a day can help if you stay precise.
Use this slow motion drill:
Start in setup.
Make a small trail-side bump with your sternum.
Turn to the top slowly.
Bump back to the lead side.
Turn through to the finish.
Repeat 10 to 20 times with control.
Say the pattern to yourself as you move: bump, turn, bump, turn.
This kind of slow, repetitive golf rehearsal can help you reduce unnecessary motion and feel more stable over the ball.
Step 9: Know what the move should feel like in golf
Good golf mechanics often feel different from what you expected. This one should feel:
Subtle, not exaggerated
Connected, not separated between upper and lower body
Balanced, not stuck on the trail foot
Rhythmic, not jerky
If it feels like your whole body is lunging right, that is too much. If it feels like your chest is frozen while your hips slide, that is the old problem.
The correct golf feel is a tiny upper-body move that supports a better turn.
Step 10: Avoid these common golf mistakes
When you work on hip sway in golf, watch for these errors:
Making the upper-body shift too big
You only need about 1 to 2 inches. More than that can create another form of sway.
Trying to lock the hips in place
Your goal is not to freeze the pelvis. Your goal is to let the hips move correctly within a coordinated backswing.
Keeping the chest left in the backswing
This is the big misconception. It often causes the hips to move poorly rather than better.
Practicing too fast
Speed hides problems in golf. Slow motion reveals them.
Forgetting the second bump
The trail-side load only works if you also move back to the lead side and turn through.
Step 11: Use this golf checklist before hitting driver
Before your next driver session, run through this quick golf checklist:
Am I allowing a small upper-body shift to the trail side?
Am I turning after the bump instead of sliding?
Am I getting back to the lead side before the finish?
Does my motion feel simpler with fewer moving parts?
Can I repeat it at slow speed before I swing full?
If you can answer yes to those questions, your golf swing is usually in a much better place.
Step 12: Build a more consistent golf swing with fewer moving parts
The main advantage of this fix is not just less sway. It is a cleaner overall golf motion.
When your sternum, upper body, and hips work together, your swing tends to look steadier and feel easier to repeat. That can help you hit the driver more solidly and with better direction.
For many golf players, the breakthrough is realizing that the lower body problem begins with an upper body misunderstanding. Once you correct that, the rest of the swing can organize itself much more naturally.
Golf FAQ
Can upper body movement really fix hip sway in golf?
Yes. A small, correct upper-body shift can improve how your hips load in the backswing. In golf, trying to fix the hips alone often misses the real cause of the sway.
How far should you shift in the golf backswing?
The shift should be subtle, about 1 to 2 inches toward the trail side. In golf, more is not better here. Too much movement can create a different balance problem.
Does this golf tip work only for driver?
The concept applies broadly in golf, but it is often easiest to notice with the driver because hip sway tends to show up more clearly with that club.
Can you practice this golf move at home?
Yes. This is a good at-home golf drill. You can rehearse the motion in slow motion without a ball, focusing on the sequence of bump, turn, bump, turn.
What should the golf swing feel like when done correctly?
It should feel stable, connected, and simple. Your golf swing should have less unnecessary movement, with a small trail-side load that helps you get back to the lead side more naturally.
Final takeaway for golf players
If your hips shoot right in the backswing, do not assume the answer is to hold everything left. In golf, that usually creates more trouble.
Instead, allow a slight upper-body and sternum shift to the trail side, then turn. From there, move back to the lead side and turn through. Keep it simple with the pattern bump, turn, bump, turn.
Practice it slowly for a few minutes a day, and your golf swing can become steadier, more repeatable, and easier to control with the driver.
0 Comments