
If you want better golf iron contact, a simple drill can help you improve two things at the same time: your path into the ball and your strike on the turf. The goal is straightforward. You want the club to approach from the inside, your weight to move forward before the downswing, and your divot to start in front of the ball.
That combination is a big part of solid golf ball striking. It can help you avoid fat shots, reduce thin contact, and create the compressed iron strike many players are trying to build.
This guide walks you through a step-by-step golf drill using an alignment-style obstacle and a line on the ground. It is especially useful with wedges and short irons, but the movement pattern can carry into the rest of your golf swing.
Table of Contents
- Step 1: Understand what this golf drill is trying to fix
- Step 2: Set up your golf drill station correctly
- Step 3: Use the inside-path barrier to improve your golf swing path
- Step 4: Train the correct golf low point with the line drill
- Step 5: Make the proper weight shift before starting down
- Step 6: Hit short, controlled golf shots first
- Step 7: Use this golf image if you keep picking the ball clean
- Step 8: Check your golf divots and ball flight after every rep
- Step 9: Avoid the most common golf mistakes with this drill
- Step 10: Progress this golf drill into your normal iron practice
- Step 11: Know who this golf drill helps most
- Step 12: Build a simple golf practice routine around it
- Frequently Asked Questions
- Final takeaway for better golf irons
Step 1: Understand what this golf drill is trying to fix
Many inconsistent iron shots come from one of two problems:
You swing too far across the ball instead of approaching from the inside.
You stay on your trail side too long, causing the club to bottom out too early.
When those issues show up in your golf swing, you often hit behind the ball, clip it thin, or struggle to control distance. Even if your swing path improves, poor weight movement can still produce weak contact.
This drill combines both pieces. One training aid or obstacle encourages an inside approach. A line on the turf gives you immediate feedback on low point control. Together, they create a practical golf practice station for more consistent irons.
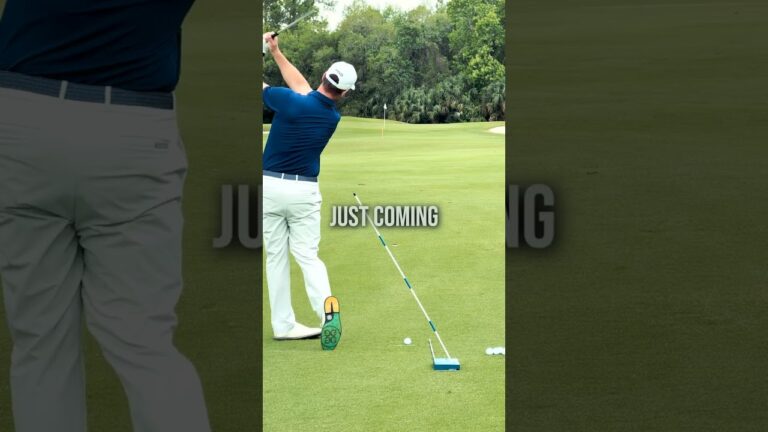
Step 2: Set up your golf drill station correctly
You do not need a complicated setup. The drill uses two simple references:
An obstacle that forces the club to approach from the inside
A visible line on the ground that shows where your divot starts
For the club, start with a wedge, 9-iron, or another short iron. A pitching wedge works well for this kind of golf practice because it is easier to control and easier to monitor turf contact.
For the line, use foot spray powder, strike spray, or any temporary ground marker that lets you clearly see where the club enters the turf.
Place the ball about two inches in front of the line when you begin. That gives you room to learn the strike pattern without making the drill too demanding on the first attempt.
Your objective is not just to hit the ball first. Your objective is to start the divot on the front edge of that line or just ahead of it. In solid iron golf shots, the low point should be in front of the ball, not behind it.
Step 3: Use the inside-path barrier to improve your golf swing path
The first half of the drill is about path. If your club comes over the top or too far outside, the barrier gives instant feedback because you will hit it.
This is useful in golf because many players trying to shallow the club or swing more from the inside never know if they are actually doing it. An obstacle changes that. If you miss it on the way down, your club is approaching on a better path.
Keep this in mind though: an inside path alone is not enough. Some players finally move the club inside, but then hang back and strike the ground too early. That is why the line on the turf matters just as much as the obstacle.
What you should feel
The club approaches the ball from the inside without crashing into the barrier
Your hands do not throw the club down early
Your body begins moving pressure forward before the club releases into impact
Step 4: Train the correct golf low point with the line drill
The line on the ground is your low-point checkpoint. In iron golf shots, a clean strike usually means the club reaches the bottom of the arc after the ball.
That is why the instruction is simple: start the divot at the front of the line.
If your divot starts behind the line, you likely stayed back or released the club too early. If you barely touch the turf and pick the ball clean every time, you may be getting too tentative and losing compression.
As your contact improves, make the drill harder by moving the ball closer to the line. Eventually, the advanced version is to set the back of the ball right at the front of the line. That demands precise golf impact control.
Progression for this golf drill
Start with the ball two inches in front of the line.
Learn to strike the turf in front of the line consistently.
Move the ball gradually closer to the line.
Advance to placing the back of the ball at the front edge of the line.
Step 5: Make the proper weight shift before starting down
This is the part many golf players miss. A lot of inconsistent iron contact comes from starting the downswing with the arms while pressure is still stuck on the trail side.
Instead, begin by shifting pressure toward your lead side before the arms come down. That sequence helps move the low point forward and gives you a better chance to compress the ball.
The key idea is this:
Complete the backswing
Shift pressure left for a right-handed golfer
Keep the hands back briefly while the lower body starts forward
Then deliver the club through the ball
In practical golf terms, that sequence helps prevent the common hang-back move that produces fat wedges and weak iron shots.
Step 6: Hit short, controlled golf shots first
Do not start this drill with full-speed swings. The best way to build a new movement in golf is to shorten the motion and focus on quality contact.
Use a smooth, controlled swing with a wedge or pitching wedge. Your checklist is simple:
Miss the inside-path barrier
Shift pressure forward before the arms fire down
Start the divot in front of the line
Finish in balance
If you can do those four things for four or five reps in a row, you are building a much more reliable golf iron pattern.
Step 7: Use this golf image if you keep picking the ball clean
One common mistake during this drill is getting too careful. Instead of striking down properly, you may try to help the ball into the air and barely touch the ground.
A helpful image is to imagine a nail sticking up from the back of the ball at an angle matching the shaft. Your task is to drive that nail down and through. That image encourages a more decisive strike and helps you compress the ball instead of scooping it.
For many golf players, this single image creates better turf interaction almost immediately because it shifts the focus from lifting the ball to striking through it.
Step 8: Check your golf divots and ball flight after every rep
Feedback is what makes this drill so effective. After each shot, check both the turf and the flight.
Good signs
The divot starts on or just in front of the line
You miss the path barrier
Contact feels clean and solid
The strike sounds compressed rather than glancing
Warning signs
The divot starts behind the line
You hit the barrier on the way down
You finish with pressure hanging back
You repeatedly catch the shot thin or heavy
In golf practice, immediate feedback beats guesswork. This drill gives you a clear yes-or-no answer on path and strike.
Step 9: Avoid the most common golf mistakes with this drill
Even a great golf drill can fail if you practice it poorly. Here are the biggest mistakes to avoid.
Trying to shallow the club without shifting forward
Coming from the inside is helpful, but if your pressure never moves to the lead side, your low point often stays back. That usually leads to fat contact.
Starting too advanced
If you put the ball right on the line too early, you may get frustrated. Start with the ball a couple of inches ahead of the line and earn the harder version.
Swinging too hard
Effort can hide flaws in golf practice. A smooth swing makes it easier to feel sequence, path, and turf interaction.
Only watching the ball flight
A decent shot can still come from poor contact. Always inspect the divot pattern. Turf tells the truth.
Trying to lift the ball
With irons in golf, the loft lifts the ball. Your job is to strike down and through with the low point ahead of the ball.
Step 10: Progress this golf drill into your normal iron practice
Once you can do the drill consistently with a wedge or pitching wedge, begin blending it into regular golf practice.
Hit 4 to 5 drill shots with the line and barrier.
Remove the barrier but keep the line.
Then hit a few normal shots while trying to reproduce the same weight shift and divot location.
Repeat the process with other short irons.
This helps the movement transfer from a training environment into your full golf swing. Keep in mind that the goal is not to become dependent on the setup. The goal is to build a better impact pattern.
Step 11: Know who this golf drill helps most
This drill is especially useful if you:
Hit fat iron shots
Catch wedges thin
Come over the top in your golf swing
Struggle to take a divot in front of the ball
Feel stuck on your trail side through impact
It can also help better players who want sharper wedge contact and more reliable distance control, since clean strike quality is a major part of precision golf.
Step 12: Build a simple golf practice routine around it
Here is a practical way to use this drill during a range session:
10-minute golf contact routine
Hit 5 half swings with the ball two inches ahead of the line.
Hit 5 three-quarter swings with the same setup.
Move the ball slightly closer to the line and hit 5 more.
Finish with 5 normal swings while keeping the same forward shift and divot location.
If contact begins to slip, return to the easier setup. In golf, it is usually better to rebuild a good strike pattern than to force reps at a level you cannot yet control.
Frequently Asked Questions
Can beginners use this golf drill?
Yes. It is beginner-friendly because it gives immediate feedback. Start with short swings and keep the ball a couple of inches ahead of the line until your contact improves.
What club should you start with for this golf drill?
A wedge, 9-iron, or pitching wedge is the best place to start. Shorter clubs are easier to control and make it simpler to monitor your divot position.
Why does this golf drill use a line on the ground?
The line helps you see where the club contacts the turf. For solid iron golf shots, the divot should begin at or in front of the line, which indicates the low point is forward of the ball.
How do you know if your golf weight shift is correct?
If pressure begins moving to your lead side before the arms fire down, you are sequencing it better. A forward divot and balanced finish are good signs that your shift is helping rather than hurting.
What if you keep hitting the golf ball thin?
You may be getting too cautious and trying to pick the ball clean. Focus on striking through the back of the ball and taking a small divot in front of it. The angled nail image can help.
Will this golf drill fix fat shots?
It can help a lot because it trains both inside path and forward low point. Fat shots often come from hanging back, poor sequence, or early ground contact, and this drill directly targets those issues.
Final takeaway for better golf irons
If your irons are inconsistent, focus on a practice drill that gives you real feedback. Train the club to approach from the inside. Shift pressure to the lead side before the downswing. Then make sure your divot starts in front of the ball.
That combination can clean up several common golf faults at once. Start with a wedge, begin with short swings, and use the line on the ground to track your progress. Once the strike becomes more reliable, you can gradually make the drill more demanding and transfer the feel into your full golf swing.
0 Comments