
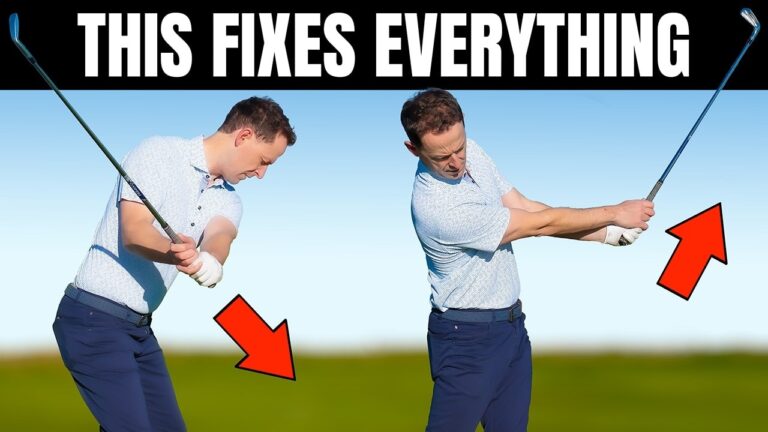
If your golf swing feels disconnected, inconsistent, or overly mechanical, the missing piece may not be your shoulder turn, hip rotation, or posture. It may be something far more basic and far more important: educated hands.
That is the central idea behind this golf swing lesson. Many golfers spend years trying to fix body positions without ever learning what the hands and arms are supposed to do. The result is a swing full of compensations. The body starts making emergency movements because it has nothing clear to support.
Great players often develop this instinctively at a young age, which is why it can go unnoticed and untaught. But once you understand how the hands and arms should work, the entire golf swing starts to make more sense. Your body can begin organizing itself around a purpose instead of guessing.
Focus keyphrase: educated hands golf swing
Table of Contents
- Step 1: Understand why the educated hands golf swing matters so much
- Step 2: Stop treating the club like a loose object and start using it like a lever
- Step 3: Learn the educated hands golf swing in the backswing
- Step 4: Train the downswing so the clubface squares naturally
- Step 5: Use the drill that links backswing, impact, and follow-through
- Step 6: Understand how this can improve hooks, slices, and poor contact
- Step 7: Add flow so the educated hands golf swing becomes natural
- Step 8: Time your body to your hands and arms, not the other way around
- Step 9: Take the educated hands golf swing onto the course
- Step 10: Build your swing around feel, not just positions
- Frequently Asked Questions
Step 1: Understand why the educated hands golf swing matters so much
The core message is simple: the hands and arms lead, and the body supports.
That idea runs against a lot of mainstream golf instruction, where the emphasis is often on body mechanics first. Golfers are told to rotate more, clear the hips, turn the shoulders, shift pressure, or shallow the club. Those pieces can matter, but they are hard to apply correctly if your hands and arms have no clear job.
A useful comparison is hammering a nail. When you pick up a hammer, you do not think first about your hip action or shoulder tilt. You understand what your hands need to do to strike the nail. Once that intention is clear, your body naturally arranges itself to support the task.
The golf swing works in a similar way. If you know what the club, hands, and arms are supposed to do, your body has something sensible to organize around. If you do not, you get the “funky” swing motions many amateurs struggle with.
That is why the educated hands golf swing can feel like a breakthrough. It gives your motion a reference point.
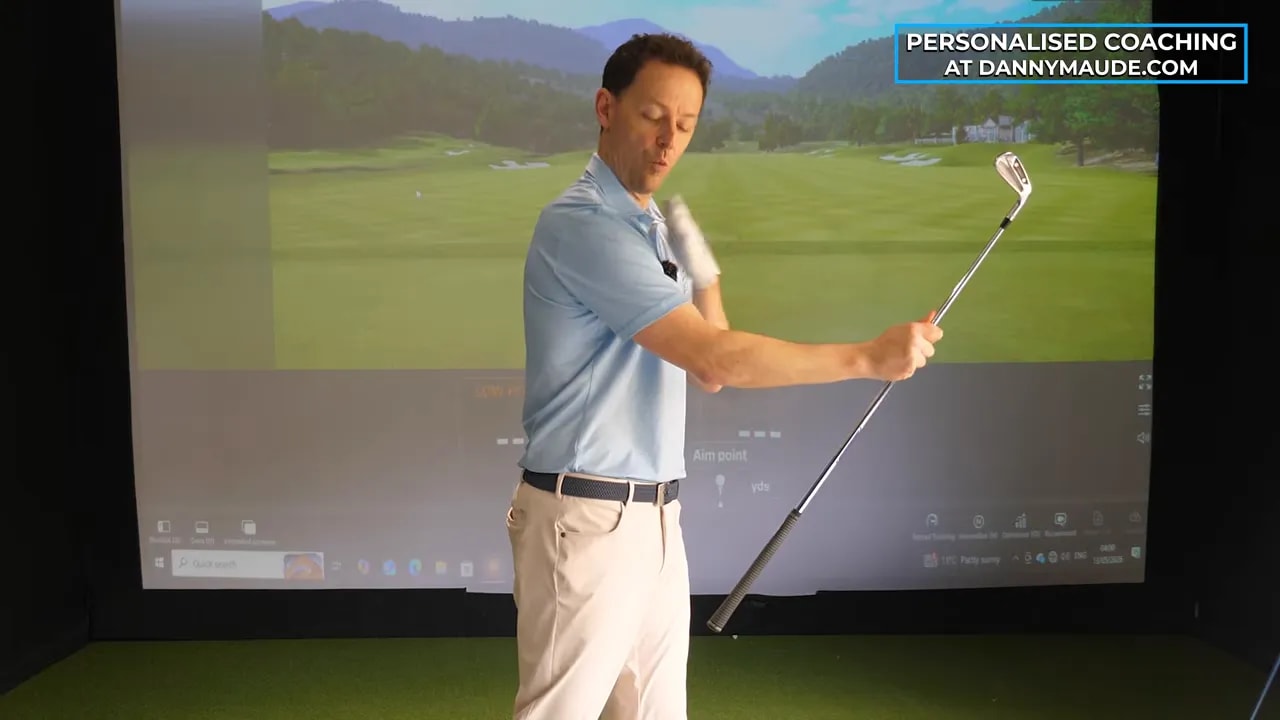
Step 2: Stop treating the club like a loose object and start using it like a lever
One of the biggest faults described in this lesson is how many golfers lift the club into the backswing instead of setting up a proper lever system.
Here is the difference:
- Poor pattern: the club gets picked up, the wrists and arms lose structure, and the swing quickly becomes harder to control.
- Better pattern: the club is organized as a lever, giving the swing shape, structure, and clearer control.
To begin learning that feeling, hold a golf club in front of you around midriff height. From there, apply a downward pressure that pitches the club over your trail shoulder. The important detail is not speed. It is the sensation of pressure and structure.
That pressure helps turn the club into a functioning lever. It also begins teaching your hands what their role is in the backswing.
This matters because a golf swing is not just motion for motion’s sake. It is a coordinated movement of a lever system. Once the club is supported properly, your arms and body can respond much more naturally.
What you should notice in the backswing
- The club feels supported instead of flung away.
- The trail hand senses pressure on top of the grip.
- The trail arm begins to fold and “sit down” naturally.
- Your body starts turning to support the motion without forced manipulation.
This is a key point. The body is not being manually arranged into a perfect pose. It is reacting to a better hand and arm movement.
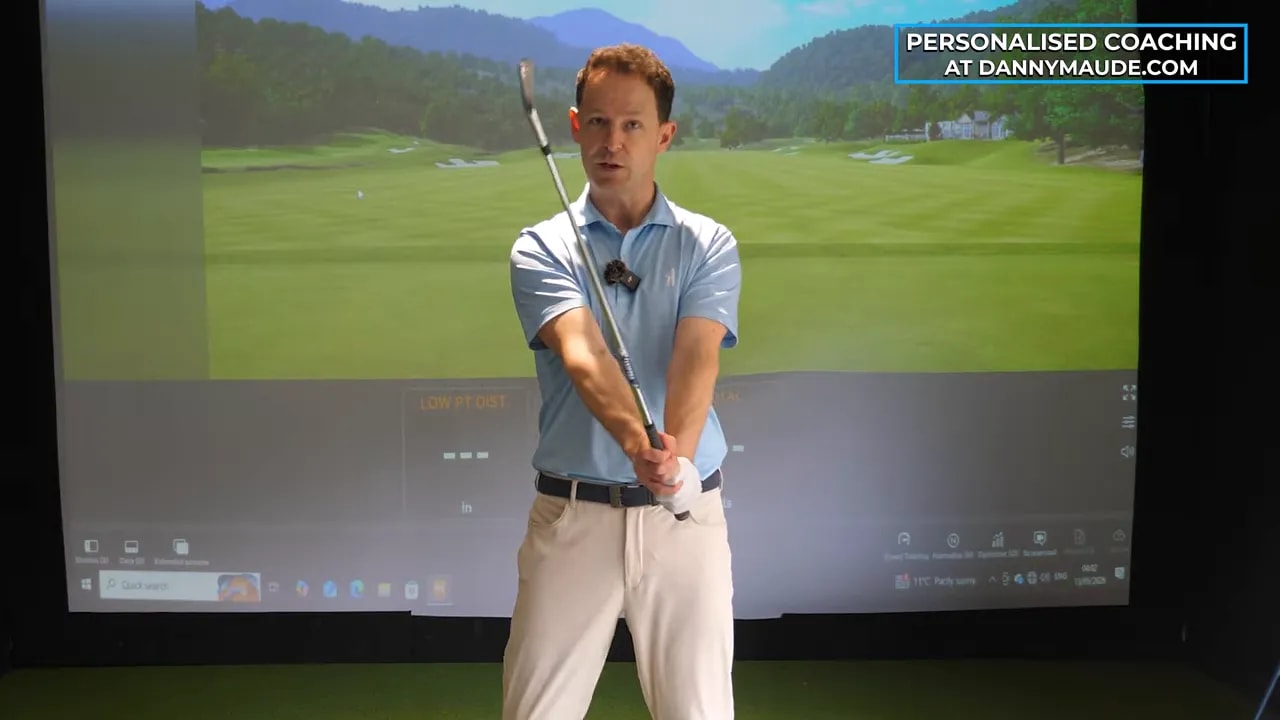
Step 3: Learn the educated hands golf swing in the backswing
The backswing piece of the drill teaches a specific pattern: the hands create structure, and the trail arm supports it.
When the hands work correctly, the club does not simply drift somewhere behind you. It moves on a meaningful arc. That arc gives you a better chance of returning the club consistently.
A lot of golfers search for a better backswing by thinking only about positions at the top. But this lesson shifts the focus to the movement that creates the position. That is a much more practical way to improve.
Think about these priorities in order:
- Create pressure on the grip.
- Set the club as a lever.
- Allow the trail arm to support that motion.
- Let the body turn in response.
If you do those things well, your backswing starts to feel less like a collection of checkpoints and more like one connected movement.
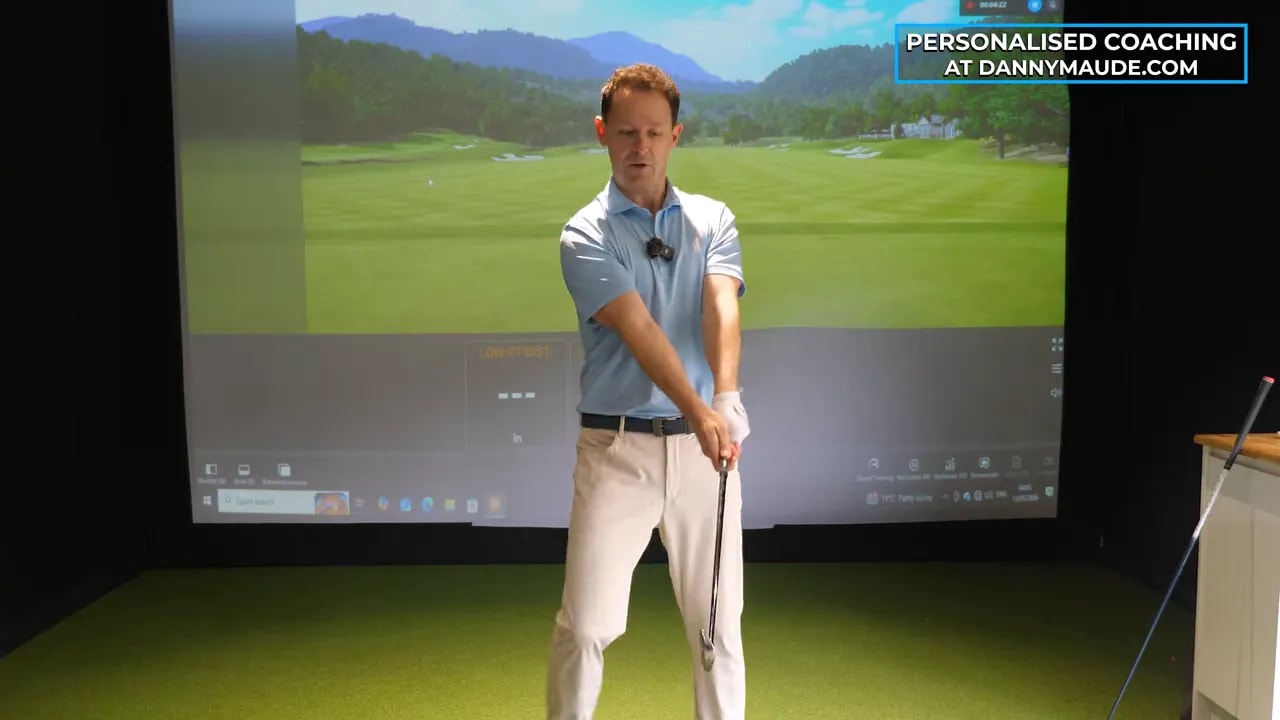
Step 4: Train the downswing so the clubface squares naturally
This is where the lesson becomes especially powerful.
Many golfers try to square the clubface with a last-second body move. They spin, lunge, or throw the club over the top in an attempt to stop the face from staying open. That often creates slices, pulls, weak contact, or a chain of compensations.
In the educated hands golf swing, the face begins to close more naturally because of how the hands and arms work.
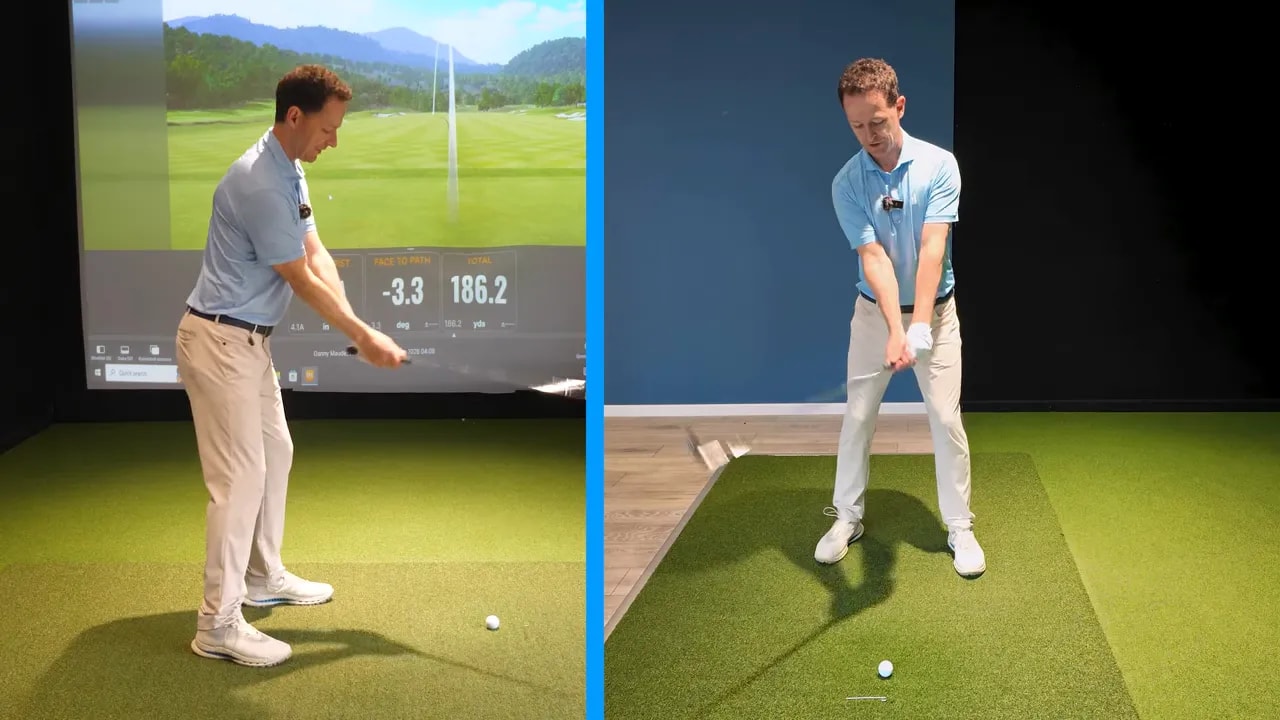
On the way down, the lead arm works downward, the grip begins to orient more toward the target, and both hands feel as though they are rotating downward with the thumbs working toward the ground. This is not a conscious roll or flip. It is a coordinated motion that organizes the clubface without forcing it.
That distinction is crucial. You are not trying to “save” the shot late. You are creating a downswing motion that already contains proper clubface control.
Why this helps so many golfers
- You stop relying on an over-the-top move to close the face.
- You reduce the need for late hand flips.
- You improve your chances of delivering the club more squarely.
- Your body can rotate in support instead of in panic.
Step 5: Use the drill that links backswing, impact, and follow-through
The drill shared in this lesson is simple, but it contains a lot of value because it teaches the motion as a continuous flow instead of as isolated positions.
Start by rehearsing the backswing motion with the lever intact. Then move into impact and continue into a follow-through where the club hinges up in line with the lead shoulder.
There is an important checkpoint here: leave the butt end of the club alone. In other words, do not throw the handle around or let the club lose its structure. Keep the lever organized.
The goal is to feel a smooth sequence from:
- Backswing pressure and structure
- Downward arm movement into impact
- A controlled hinge into the follow-through
This helps replace the common amateur pattern of “slinging” the club. Slinging creates inconsistency because the arms lose control of the clubhead. Educated hands keep the motion connected.
As you move through the drill, pay attention to how the elbows behave:
- In the backswing, the trail elbow begins to sit down.
- Through the strike and into the follow-through, the lead elbow takes over that supporting role.
The forearms also change orientation. Early in the motion, the lead arm sits more above the trail arm. Later, through the strike, the lead arm works more below. That changing relationship helps explain how the club is being controlled rather than thrown.
Step 6: Understand how this can improve hooks, slices, and poor contact
One of the most useful parts of this lesson is that it does not present educated hands as a fix for only one ball flight.
The same concept can help golfers who hook the ball, slice it, or strike it inconsistently. Why? Because the issue is often not the shape of the shot itself. It is the lack of control in how the club is being delivered.
For example, a golfer who hooks may drive the handle too far and then flip the club. Another golfer may leave the face open and come over the top trying to rescue it. Those are different outcomes, but both can stem from poor hand and arm education.
Once you understand how the hands should apply pressure, how the club should remain structured, and how the face should square naturally, the ball flight starts becoming easier to diagnose and control.
That gives you something even more valuable than a temporary fix. It gives you feedback you can actually use.
Signs your hands and arms may be undereducated
- Your swing only works when your timing is perfect.
- You feel like you have to manipulate the face at the last second.
- Your body action changes wildly from shot to shot.
- You can hit good shots, but you do not know why they were good.
- When things go wrong, you have no clear way to self-correct.
Step 7: Add flow so the educated hands golf swing becomes natural
Once you understand the drill statically, the next step is to make it flowing.
The lesson emphasizes free arm motion, but not careless motion. The arms should move with freedom while still controlling the lever. That blend of flow and structure is what creates a more athletic swing.
A practical way to rehearse it is to make several slow, connected motions where you feel:
- The pressure in the grip
- The backswing lever
- The downward movement into impact
- The hinge into the follow-through
As that becomes familiar, you can start hitting shots with the same sensation. The goal is not to collect more thoughts. It is to own one clear feel.
When this works, the ball flight often improves immediately because the clubface and path become easier to coordinate. In the example shown, the result is a small draw produced from a simple, organized motion.
Step 8: Time your body to your hands and arms, not the other way around
After the hands and arms are educated, the body still matters. It just enters the process in the right place.
The next job is to get the body and arms in sequence.
This can show up in two common ways:
- Body too far ahead: the body slides or rotates excessively, the arms lag behind, and you have to flick to catch up.
- Body too passive: the arms are trying to work, but the body does not support them enough, so the motion stalls or loses power.
These are timing problems, not proof that the educated hands idea is wrong. In fact, once you know what the hands and arms should do, timing errors become much easier to sense.
That is a huge advantage on the golf course. Instead of feeling that something is off without understanding why, you can tell whether your body got ahead, fell behind, or supported the motion correctly.
In that sense, your hands and arms become a kind of internal GPS for the swing. They give the body a motion to synchronize with.
A simple rehearsal for timing
- Make a slow backswing with the lever intact.
- Move into the downswing feeling the hands rotate the club correctly.
- Let your body respond and support the motion.
- Notice whether your body outruns your arms or fails to support them.
- Repeat until the motion feels connected and balanced.
Step 9: Take the educated hands golf swing onto the course
The final benefit of this approach is that it improves awareness.
Golfers often struggle because they are trying to remember too many pieces at once. If you focus on body positions alone, it is easy to become mechanical and lose all sense of the clubhead. But when you understand what the hands and arms are doing, you gain a simpler reference point.
That can help you recover faster during a round. If a shot starts hooking, you may recognize that your body raced ahead and forced a flip. If you leave the face open, you may sense that the hands never delivered the club properly. Instead of searching randomly, you can make a more informed adjustment.
This is also why golfers who developed naturally strong hand awareness early in life often appear to have effortless swings. Their motion may not be built around endless conscious mechanical checks. It is built around feel, structure, and club control.
You can train that too.
What to practice first
- Do the drill slowly without a ball.
- Feel the pressure in the grip.
- Keep the club functioning as a lever.
- Rehearse the backswing and follow-through positions.
- Then hit short shots while preserving the same arm and hand motion.
Only after that should you worry about matching body speed and full-swing timing.
Step 10: Build your swing around feel, not just positions
The biggest takeaway is not a single position. It is a different learning order.
Instead of starting with the body and hoping the hands cooperate, start by educating the hands and arms so the body has something meaningful to support. That shift can make your swing feel more coordinated, more athletic, and more repeatable.
If your game has felt stuck despite hours of mechanical work, this may be the missing piece. The educated hands golf swing is not about adding complication. It is about giving your motion a clearer purpose.
Once your hands and arms know what to do, your body can finally start helping instead of interfering.

Frequently Asked Questions
What does “educated hands” mean in the golf swing?
It means your hands and arms understand how to control the club during the backswing, downswing, and follow-through. Rather than throwing the club or making random compensations, they create structure, apply pressure correctly, and help square the face naturally.
Why do so many golfers struggle if they work hard on body rotation?
Because body motion alone does not tell the club what to do. If your hands and arms are unclear, your body often creates extra movements to compensate. That can lead to slices, hooks, poor contact, and an inconsistent swing path.
Can the educated hands golf swing help fix a slice?
Yes. One reason golfers slice is that they try to square the face with an over-the-top move or leave the face open for too long. Better hand and arm motion can help the clubface close more naturally, reducing the need for that compensation.
Can it also help golfers who hook the ball?
Yes. Hooking can come from driving the handle too much and then flipping the club. Educated hands help you control the clubhead more predictably, which can reduce that late release pattern.
Should I ignore body mechanics completely?
No. The body still matters. The point is that the body should support the hands and arms, not lead blindly. Once your hands are educated, body mechanics become easier to organize and time correctly.
What is the first thing I should practice?
Start with the lever drill at slow speed. Feel the pressure in the grip, keep the club structured, rehearse the backswing and follow-through, and only then begin hitting shots. Build awareness before speed.
If you have spent years chasing positions, this approach offers something different and often more useful: a way to feel the club, control the club, and finally give your body a motion worth supporting.
0 Comments