
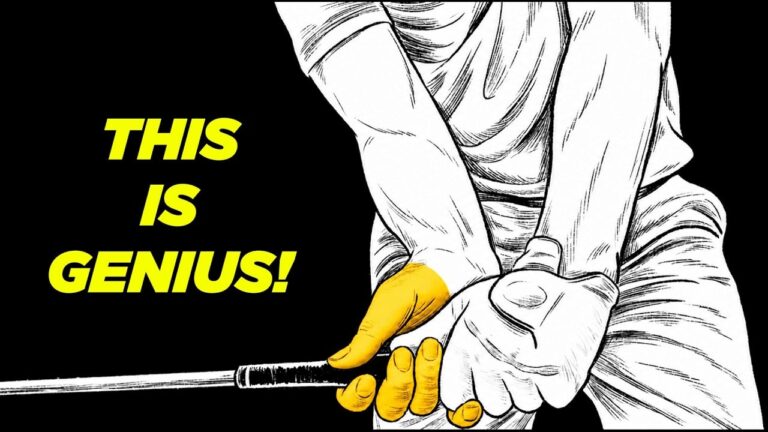

Your golf swing can look controlled and still be missing a crucial ingredient: a free release of the clubhead through and beyond impact. If you keep pulling the handle, hold your wrists rigid, or fold your lead arm too early, you can restrict the very motion that helps you create effortless speed.
The principle is simple: you need to let the golf club release past your body rather than drag it through the ball. That does not mean throwing away your wrist angles before contact or rolling the clubface over aggressively. You can deliver an iron with forward shaft lean, then allow your wrists to move freely as your arms extend into the follow-through.
Use the steps below to recognize a restricted release, rehearse a different wrist action, and build it into a manageable practice swing. The hand references describe a right-handed golf swing, so reverse them if you play left-handed. You can also jump directly to the golf release drill once you understand the intended movement.
Table of Contents
- Step 1: Identify What Is Restricting Your Golf Release
- Step 2: Recognize the Forearm Relationship in a Free Golf Swing
- Step 3: Set Up the Golf Release Drill With a Supportive Grip
- Step 4: Rehearse the Half to Three-Quarter Golf Release Drill
- Step 5: Preserve Impact Quality Without Holding the Angles Forever
- Step 6: Build the Wrist Feel Before Adding More Speed
- Step 7: Adjust Your Golf Release for Straight Shots, Draws, and Fades
- Step 8: Adapt the Release to Your Driver and Check Your Progress
Step 1: Identify What Is Restricting Your Golf Release
Before changing your golf swing, establish what you are trying to improve. A restricted release does not always look the same, and a straight trail arm alone does not prove that your arms and wrists are working freely.
Look for these patterns in your own motion:
- A held-off release: Your lead hand stays on top as you continue pulling the handle through.
- A pronounced chicken wing: Your lead elbow folds outward instead of allowing both arms to extend beyond the ball.
- A straight trail arm with a bent lead arm: You achieve some extension on one side but still restrict the overall release.
- A hang-back flip: You lean back and flip the club without developing useful extension.
- A stiff, wooden motion: You keep both arms and wrists so rigid that the clubhead cannot swing freely.
The last pattern can affect you even if you are an accomplished player. A movement that feels tidy or controlled may still limit your clubhead speed.
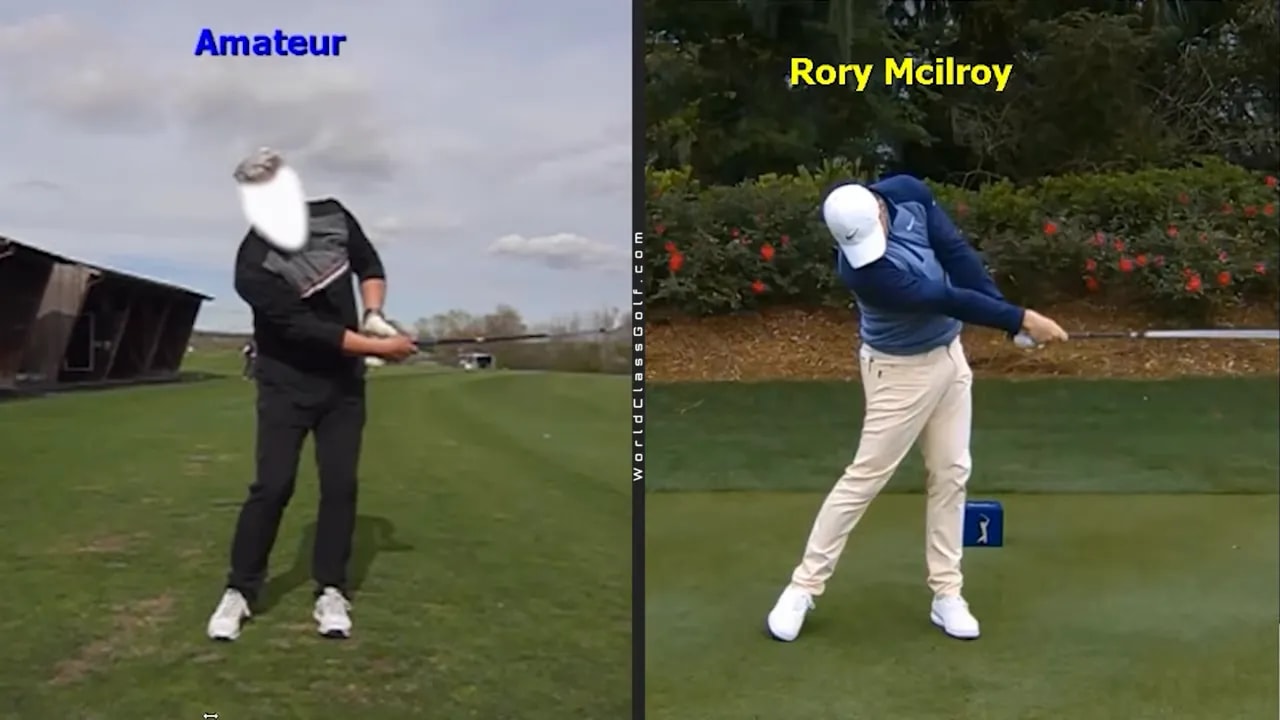
Your goal is not simply to make your arms look straighter. You are trying to replace a dragging action with a golf release that combines wrist freedom, arm extension, and a clubhead that moves through without being held back.
Step 2: Recognize the Forearm Relationship in a Free Golf Swing
An overhead angle makes one important feature easier to recognize: after impact, the forearms of an accomplished ball striker can move very close together.
In the Adam Scott example, you can see the arms extending with relatively little separation between the forearms. Compare that with the amateur example, where a much larger gap accompanies a held-on release.
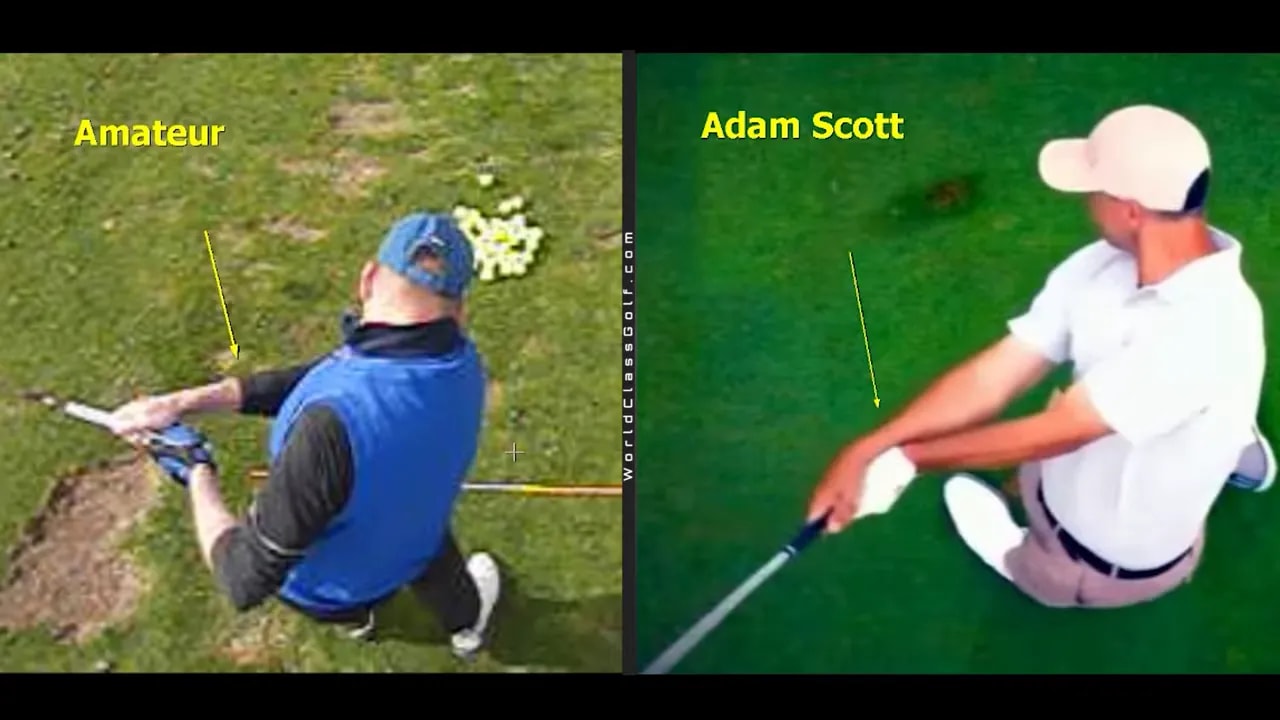
This gives you a useful practice feel: allow your wrists or forearms to come close together through the follow-through. You can exaggerate that sensation during a rehearsal, even feeling them touch.
Treat touching as a drill cue, not a position you must force at full speed. The purpose is to help you experience a different relationship between your hands, wrists, and arms. Squeezing your arms together rigidly would work against the freedom you are trying to develop.
Keep the larger objective in mind. Clubhead speed refers to the speed of the head of the golf club, not merely how hard you pull the grip. If you move the handle forcefully but prevent the clubhead from releasing, your swing can feel effortful without producing the free acceleration you want.
Step 3: Set Up the Golf Release Drill With a Supportive Grip
A grip that supports the intended movement makes this exercise easier. For the demonstration, a somewhat stronger lead-hand grip is encouraged, with the hand turned enough that the glove logo becomes more visible to you at address.
Here, stronger refers to hand position, not squeezing pressure. You still need enough freedom in your hands and wrists to swing the clubhead.
Use these setup priorities:
- Take your normal iron setup.
- Check whether your lead-hand position allows you to rehearse the release comfortably.
- Explore the slightly stronger position used in the drill rather than immediately making an extreme adjustment.
- Keep your hands and wrists loose enough to move.
- Plan a half to three-quarter swing rather than a full-speed attempt.
Grip matters because it influences how your wrist action presents the clubface. If your golf grip is already unusually strong or weak, the same release feel may produce a different-looking clubface position.
Do not treat the grip suggestion as a separate cure for every golf swing problem. Its role here is to support the wrist angles and release being practiced. The central task remains the same: store an angle during the swing, then allow the clubhead to move through rather than keeping it trapped behind a pulling handle.
Step 4: Rehearse the Half to Three-Quarter Golf Release Drill
Begin with a shorter motion so you can feel the difference between releasing the golf club and simply dragging it. You are not trying to create maximum distance at this stage.
Work through the following sequence:
- Make a compact backswing. Use roughly a half to three-quarter motion.
- Allow your wrist angles to form. Avoid turning the rehearsal into a stiff, one-piece sweep.
- Swing through the impact area. Let the clubhead move through instead of continually pulling the grip away.
- Feel your forearms or wrists come together. Use a gentle exaggeration to learn the sensation.
- Finish in a shortened follow-through. Pause there during the rehearsal so you can inspect your hands and clubface.
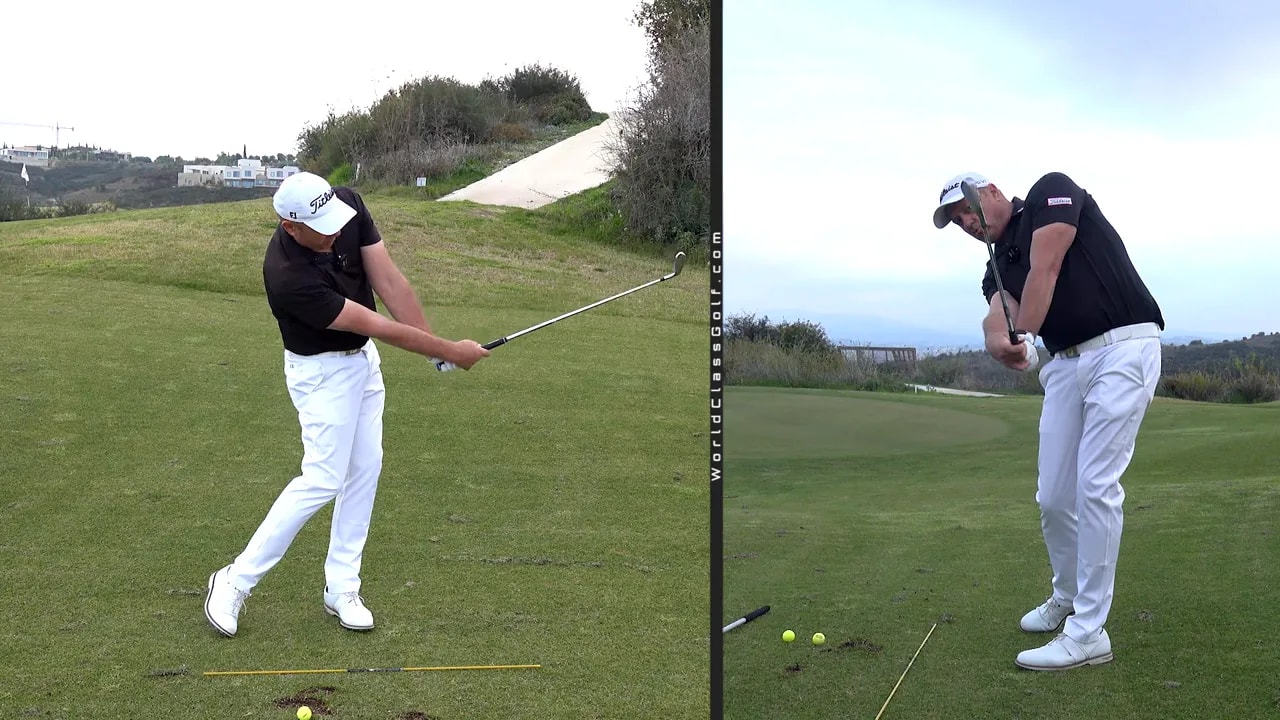
The intended sensation is a release that works more underneath, not a deliberate rolling-over of the clubface. Your hands are active and free, but you are not trying to twist the face shut as hard as possible.
Think of the end of a whip moving through. The analogy helps you focus on the clubhead rather than on hauling the entire golf club through with rigid arms. Build the movement slowly enough that you can distinguish the two sensations.
Once the rehearsal feels clear, use the same compact motion to strike a ball. Keep your attention on the release rather than turning the next attempt into a maximum-effort swing.
Step 5: Preserve Impact Quality Without Holding the Angles Forever
A common misunderstanding in golf is that good shaft lean requires you to preserve your impact wrist positions well into the follow-through. The professional examples show why you should separate those two moments.
You can arrive at impact with the handle ahead of the clubhead and still release the club freely immediately afterward. Forward shaft lean at contact and a free release after contact are compatible.
In the illustrated professional example, the shaft has approximately 12 degrees of forward lean at impact. Expressed relative to the ground in that image, the angle is about 78 degrees rather than a vertical 90 degrees. Use that measurement to understand the example, not as a number you must reproduce in every iron shot.
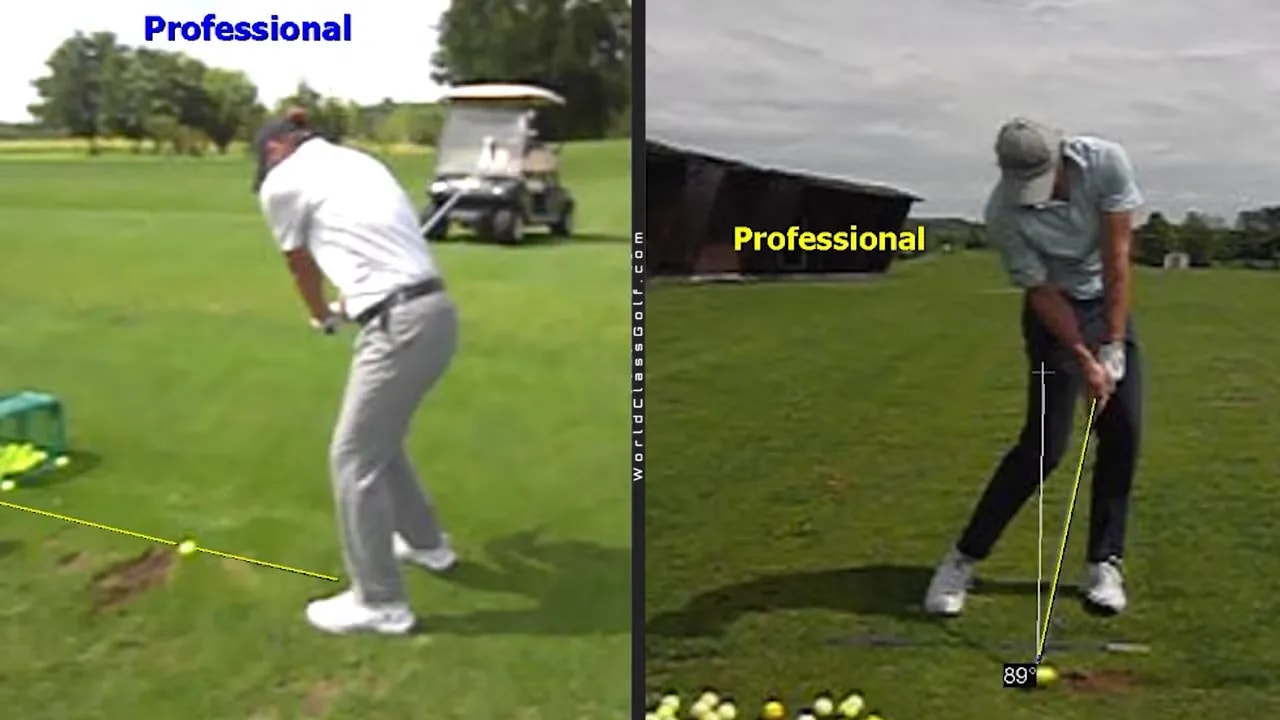
After impact, the lead wrist moves toward a cupped position while the trail wrist moves toward flexion. That changing wrist relationship is part of the release being demonstrated.
Do not confuse it with the earlier hang-back flip. You are not being asked to throw the clubhead past your hands before reaching the golf ball. You are learning to deliver the club, then let the stored angles go rather than freezing them.
Some timing remains involved. The aim is not to eliminate coordination from your golf swing, but to develop a useful hand-and-wrist motion instead of relying on stiffness for control.
Step 6: Build the Wrist Feel Before Adding More Speed
If the club makes the movement difficult to understand, rehearse the trail-hand action on its own. Focus on the difference between a supported wrist movement and simply fanning your palm open.
The demonstrated feel has your trail palm working down and away during the backswing rehearsal, rather than opening loosely upward. Move slowly and notice how that changes the relationship between your palm and forearm.
Then put both hands back on the golf club and rehearse backward from the intended follow-through:
- Start with your wrists or forearms close together beyond the impact area.
- Move back into a short backswing.
- Allow your wrist angles to form.
- Swing forward and return to the close-forearm feeling.
- Let your arms reach outward as the clubhead releases.
Starting with the finishing sensation gives you a reference point. Instead of hoping your hands find a new position during a fast golf swing, you already know the movement you are trying to return to.
Keep the distinction between extension and rigidity clear. You want your arms to extend through the ball, but you do not want to lock your elbows and wrists into a wooden shape. The drill should help your swing feel freer, not more constrained.
Step 7: Adjust Your Golf Release for Straight Shots, Draws, and Fades
Once you understand the basic release, recognize that its appearance can vary with the golf shot you intend to play. You do not need one identical clubface position for every shot shape.
For a generally straight iron shot, the demonstration uses a relatively underneath release feel with less obvious rollover. For a draw, the toe moves more over the heel. For a fade, the heel can feel a little higher, alongside the slightly leftward alignment described for that shot.
Use these as contrasting sensations rather than isolated ball-flight formulas:
- Straight iron: Explore the underneath release without aggressively rolling the face over.
- Draw: Rehearse more toe-over-heel movement with the intended inside delivery.
- Fade: Explore the contrasting heel-higher sensation with your fade setup.
Across all three, the shared principle is that you still release the golf club. A fade does not require you to make your wrists completely rigid, and a draw is not simply an uncontrolled flip.
Initially, establish a recognizable stock release before experimenting with these variations. That gives you a clearer basis for understanding what changes when you alter your hands and wrists, rather than mixing several unfamiliar golf feels into the same swing.
Step 8: Adapt the Release to Your Driver and Check Your Progress
Your driver release will not necessarily look exactly like your iron release. With the driver setup described here, you stand farther from the golf ball and strike more on the upswing. The examples show somewhat more clubface rotation through the follow-through.
A clock-face illustration helps explain the difference. When the shaft is approximately parallel to the ground after impact, the driver’s sole can point toward roughly 11 o’clock. In the draw example, the toe can move toward 12 o’clock.
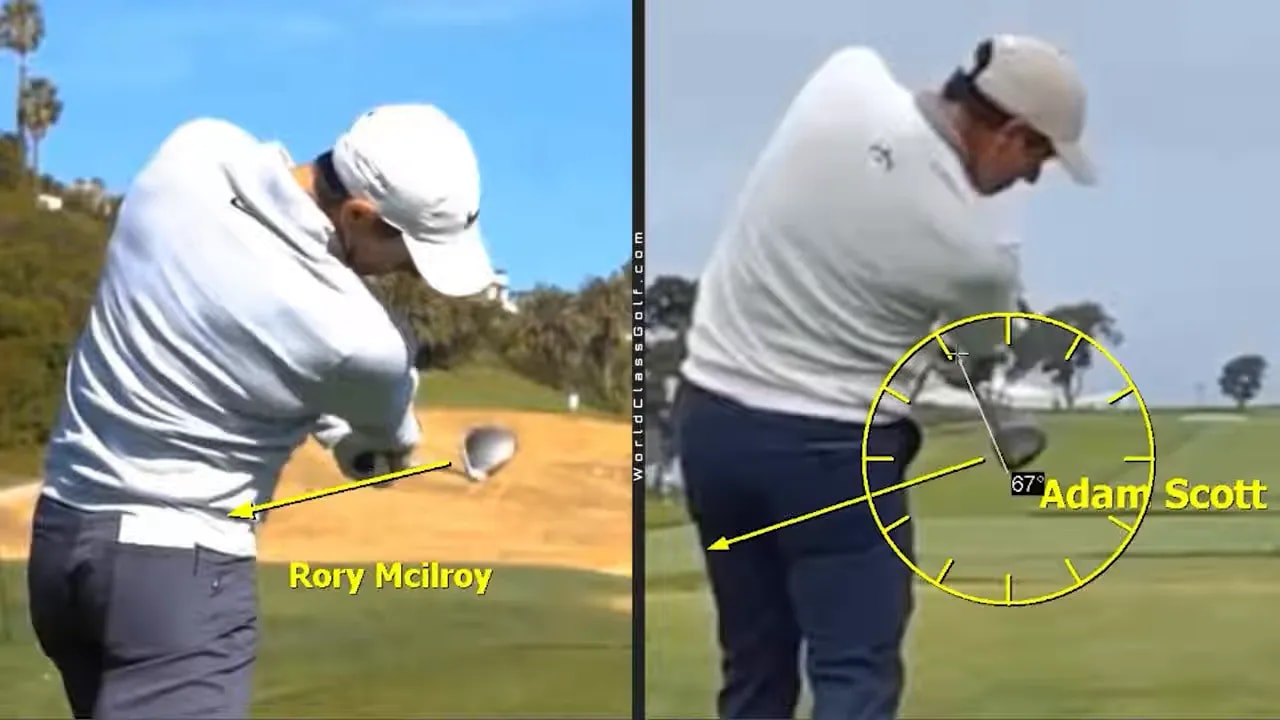
These are visual references, not universal checkpoints. Your grip and intended shot shape can change how the clubface looks. Keep the underlying golf principle consistent while allowing the details to vary.
To assess your progress, return to the questions that started the exercise:
- Are you still dragging the handle through the ball?
- Does your lead arm fold early, or can both arms extend?
- Can your wrists move without an aggressive face rollover?
- Can you retain useful impact alignments and then release?
- Does the clubhead feel freer in your shorter swing?
If you cannot tell which pattern applies to you, structured feedback can help you avoid guessing. You can explore personalized golf swing analysis or in-person golf schools for guidance, including instruction focused on senior golfers.
Your practical takeaway is to deliver the club, then let it go. Start with the compact drill, use the close-forearm sensation to encourage freedom, and resist the urge to hold your impact angles indefinitely. You do not need to copy an entire tour-level golf swing to develop a more effective release.
0 Comments