
If you want better golf contact and a more powerful release through impact, your trail elbow can make a huge difference. In golf, players who lose connection with the trail arm often run out of space, throw the club early, and struggle with casting. A tucked trail elbow can help you create room, keep the club on plane, and let your body rotation deliver the club more efficiently.
This guide explains how to use the trail elbow correctly in golf, why it matters, and how to practice it without creating a new swing fault.
Table of Contents
- Step 1: Understand what a tucked trail elbow does in golf
- Step 2: Learn the difference between connection and crowding
- Step 3: Use the trail elbow to create room for the club in golf
- Step 4: Keep rotating your body while the trail elbow tucks
- Step 5: Match the shaft to a good delivery angle in golf
- Step 6: Practice the trail elbow move with a simple golf drill
- Step 7: Avoid the most common trail elbow mistakes in golf
- Step 8: Know when this golf tip is most useful
- Step 9: Build the feeling into your full golf swing
- Step 10: Use a quick self-check before every golf practice session
- FAQ about the trail elbow in golf
- Final takeaway for better golf ball striking
Step 1: Understand what a tucked trail elbow does in golf
In golf, the trail elbow is the right elbow for a right-handed player and the left elbow for a left-handed player. Through the downswing, that elbow should work closer to your side so the club can approach the ball from a stronger, more repeatable delivery position.
The goal is not to pin the arm rigidly against your body. The goal is to create useful space. When the trail elbow works in close, you can keep some room between your arms and torso while still staying connected enough to release the club out in front of you.
This matters in golf because it helps with:
Club delivery through impact
Reducing casting and early release
Better awareness of the clubhead
More efficient body-driven speed
Improved strike quality with the driver
If your trail elbow flies too far behind you or stays disconnected in golf, the club often gets stuck or thrown early. That usually leads to flipping, weak contact, or inconsistent direction.
Step 2: Learn the difference between connection and crowding
One of the biggest misunderstandings in golf is thinking that tucked means squeezed. It does not. You want the trail elbow working near your shirt seam, but you still need enough space for the club to move freely.
A good checkpoint is this: the trail elbow feels close to your side, but your arms are not jammed against your chest. There is still room for the club to shallow, release, and extend out in front.
When golfers overdo this move, they often create a cramped delivery. Then the body stalls and the hands take over. That defeats the purpose. In golf, a tucked trail elbow should improve freedom through impact, not reduce it.
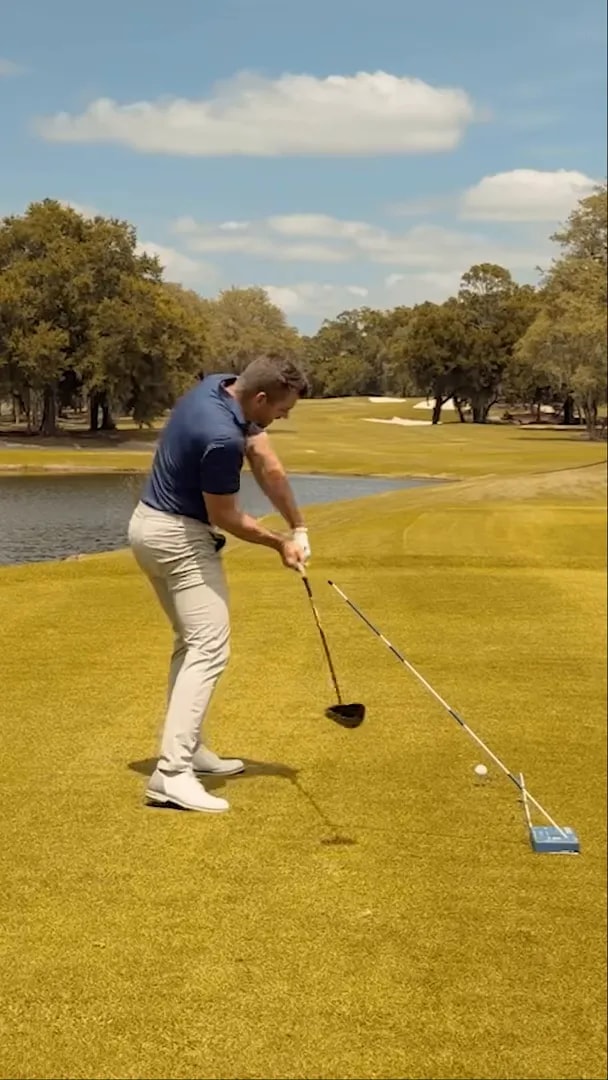
Step 3: Use the trail elbow to create room for the club in golf
At the heart of this golf move is simple geometry. If the trail elbow works closer to your side during the downswing, the shaft has a better path into the hitting area. That gives you room to release the clubhead in front of your body instead of throwing it from behind you.
Think about the opposite pattern. In golf, if your trail elbow gets too far away from your torso, your hands and club can move outward too early. Once that happens, you often lose the ability to keep the shaft aligned with a strong delivery angle. The release gets rushed, and the clubhead passes your hands too soon.
A better feeling is:
The trail elbow works in close on the way down
Your arms stay organized in front of your rotating body
The club releases outward through the ball
You continue turning instead of trying to save the shot with your hands
For many golfers, this is the missing link between a nice backswing and a powerful impact.
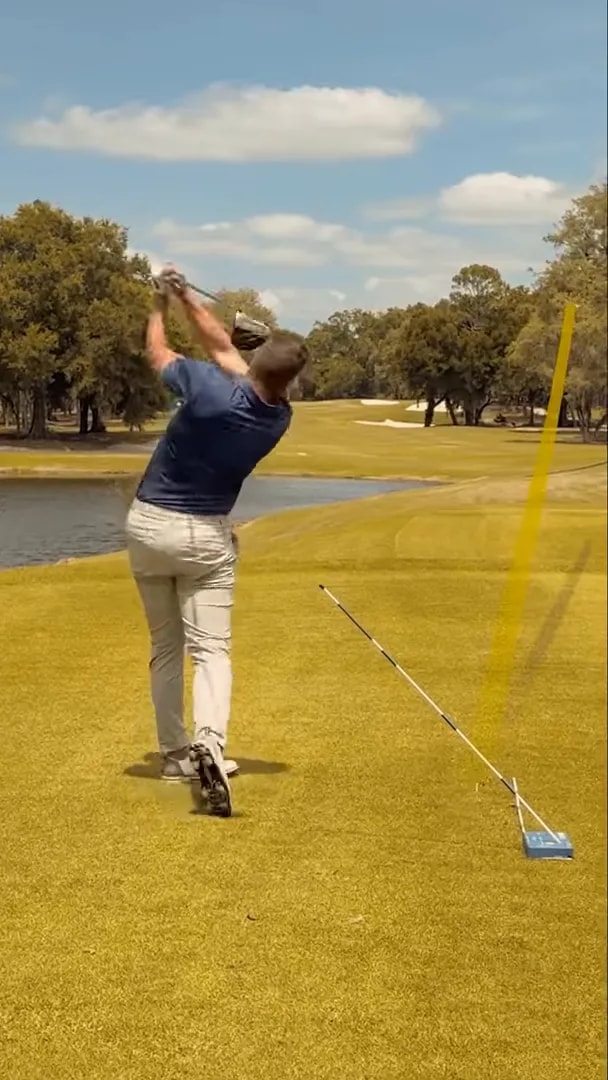
Step 4: Keep rotating your body while the trail elbow tucks
This is the key detail many golf players miss. Tucking the trail elbow does not mean you stop your body and hold your chest square. In fact, that usually creates the exact fault you are trying to avoid.
As the trail elbow moves in, your body should keep rotating. Your hips should open. Your chest should open. That rotation helps move the handle and club through the strike so you do not have to flip the clubhead at the last second.
If you try to keep your belt buckle facing forward for too long just to make the arm feel more connected, your golf swing can stall. Then the club has nowhere to go except past your hands. That leads to casting or a scooping motion through impact.
In practical terms, good golf sequencing here looks like this:
Trail elbow works closer to your side
Lower body continues opening
Chest opens with the motion
Club releases out in front naturally
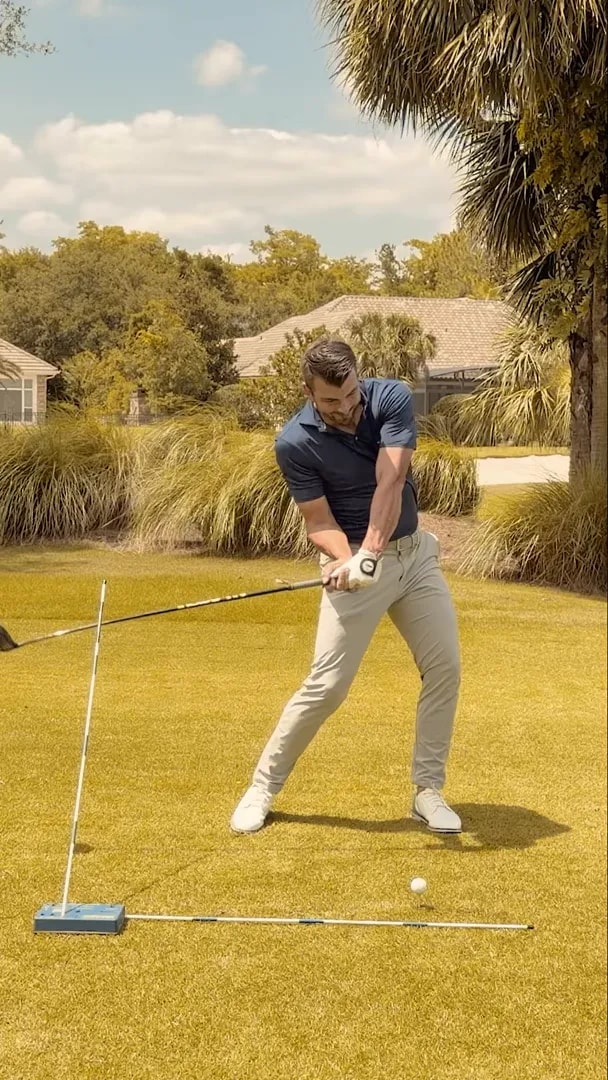
Step 5: Match the shaft to a good delivery angle in golf
Another helpful golf concept is the delivery angle of the shaft coming into impact. When the trail elbow is tucked well, it becomes easier to bring the club down on a stronger angle instead of steepening or throwing it outward.
A training aid or alignment stick can give you a visual reference. The goal is to feel the shaft tracing a similar approach angle as you move into the ball. This gives you immediate feedback on whether your trail elbow and body rotation are working together.
That combination can help you:
Sense where the clubhead is
Avoid getting too steep or too casted
Improve path and face control in golf
Build a more tour-like delivery pattern with the driver
You do not need to obsess over exact numbers to benefit. In golf practice, the visual is often enough. If the trail elbow tucks and the shaft approaches on a cleaner angle while the body opens, you are moving in the right direction.
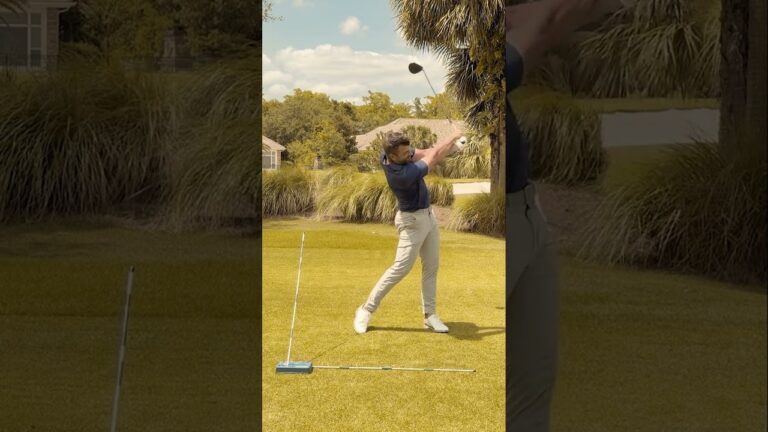
Step 6: Practice the trail elbow move with a simple golf drill
If you want to train this in golf, use a slow-motion rehearsal first. Speed comes later.
Basic trail elbow drill
Set up with a driver as usual.
Make a backswing to the top.
Start down slowly and feel the trail elbow move toward your side seam.
Keep a little space between your arms and torso rather than squeezing everything together.
Rotate your hips and chest open as you move into impact.
Let the club release out in front instead of throwing it early from the top.
Do this in slow reps before hitting balls. In golf, rehearsals help you separate feel from speed. If you go full speed too soon, your old pattern usually takes over.
As you improve, blend the motion into half-speed swings, then three-quarter swings, then full driver swings.
Three checkpoints for the drill
Checkpoint 1: The trail elbow feels tucked near the side seam
Checkpoint 2: The shaft approaches on a sensible angle
Checkpoint 3: Hips and chest are opening through impact
Step 7: Avoid the most common trail elbow mistakes in golf
Even a good golf concept can go wrong if the feel is exaggerated. Here are the main mistakes to avoid.
Mistake 1: Pinning the elbow too tightly
If you clamp the trail elbow against your side, you can lose freedom and create a stuck swing. In golf, tucked should feel connected, not trapped.
Mistake 2: Stalling your body
This is the big one. If your body stops rotating, the club will pass your hands too early. Then you will flip at the ball. The trail elbow works best when paired with opening hips and chest.
Mistake 3: Forcing the hands forward without sequence
Some golfers try to manufacture lag or forward shaft lean manually. That usually creates tension. In golf, the better move is to organize the trail elbow, then rotate through.
Mistake 4: Practicing only at full speed
This motion is easier to understand than to own. Slow practice helps you build the right golf pattern before adding speed.
Mistake 5: Ignoring clubhead awareness
A good trail elbow action should improve your sense of where the clubhead is during the downswing. If your golf swing feels more confusing after trying this, you may be overcomplicating the move.
Step 8: Know when this golf tip is most useful
This concept is especially helpful in golf if you tend to:
Cast the club from the top
Flip your hands through impact
Hit weak drives
Lose the shaft plane in transition
Feel crowded coming into the ball
Struggle to release the club out in front
It can be particularly effective with the driver because golf players often cast the longest club in the bag. With a tucked trail elbow and continued rotation, you can create a cleaner strike and a more powerful release pattern.
Step 9: Build the feeling into your full golf swing
Once you can rehearse the move, your next job in golf is to blend it into normal play. Use this progression:
No ball rehearsals for movement awareness
Half-swings to learn impact delivery
Driver swings at 70 percent to test coordination
Full swings only after contact improves
During this process, focus on one swing thought only: tuck the trail elbow and keep rotating. That is simple enough to repeat on the range and useful enough to hold up on the golf course.
Step 10: Use a quick self-check before every golf practice session
Before hitting drivers, run through this short golf checklist:
Is the trail elbow moving closer to your side on the downswing?
Do you still have room between the arms and torso?
Is the shaft approaching on a good angle?
Are your hips and chest opening through impact?
Are you releasing the club out in front instead of flipping it?
If you can answer yes to most of those, your golf swing is likely in a much better delivery position.
FAQ about the trail elbow in golf
Should the trail elbow stay glued to the body in golf?
No. In golf, the trail elbow should work close to your side, but it should not be jammed there. You still need enough space to release the club freely through impact.
Can a tucked trail elbow help stop casting in golf?
Yes. A better trail elbow position can help reduce casting in golf by improving how the club approaches impact. It works best when combined with continued body rotation.
Why does my golf swing still flip even when I tuck my trail elbow?
The most likely reason is that your body is stalling. If your hips and chest stop turning, the hands must take over. In golf, the tucked trail elbow and body rotation need to happen together.
Is this golf move mainly for the driver?
It is especially useful with the driver, but the same golf principle can help with other full swings too. The main benefit is creating room to deliver and release the club more effectively.
What should the trail elbow feel like in the downswing?
In golf, it should feel like the trail elbow is tucking near your side seam while your body keeps opening. The feeling should be connected and athletic, not squeezed or restricted.
Final takeaway for better golf ball striking
If you want more consistent golf contact and a stronger release, start with the trail elbow. Tucking it correctly can give you the room you need to deliver the club from a better position. Just remember the full pattern: trail elbow in, space maintained, body rotating, club releasing out front.
That combination is what helps this golf move work. When you practice it with slow reps and clear checkpoints, you can improve club delivery, reduce casting, and hit more powerful drives.
0 Comments