

If your iron contact feels thin, heavy, weak, or inconsistent, the fix may not be at impact.
That is the big lesson here. Better ball striking often starts much earlier in the swing, especially in the takeaway. When the club gets too low and too far inside early, everything that follows becomes harder. You are more likely to bottom out too soon, catch the turf behind the ball, blade it thin, or present the heel and lose compression.
The good news is that this pattern can improve quickly when you change the right piece. In this case, the key was adding more vertical wrist hinge earlier in the backswing and pairing that with a better club path on the way down.
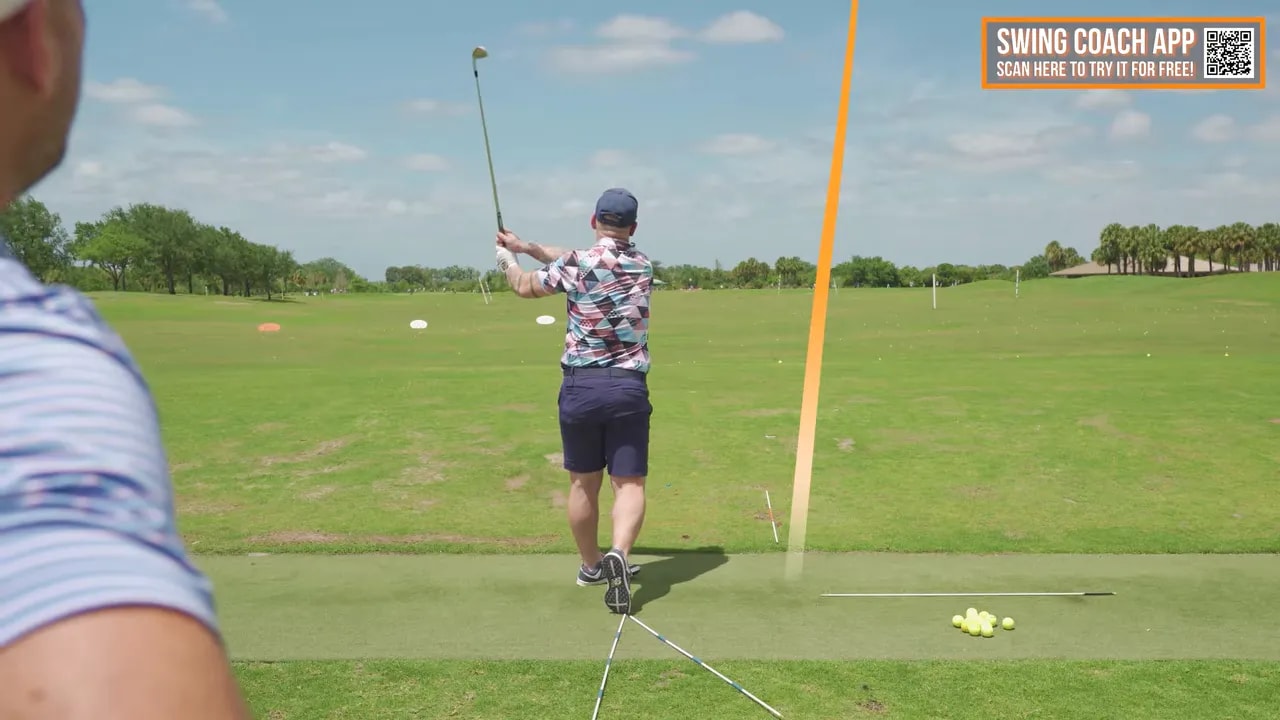
This tutorial breaks down the exact sequence used to improve iron contact, compression, and divot control.
Table of Contents
- Step 1: Diagnose why your ball striking is poor
- Step 2: Understand the golf takeaway mistake causing poor iron contact
- Step 3: Build the right wrist hinge for better ball striking
- Step 4: Improve setup so your takeaway starts on plane
- Step 5: Use the early hinge checkpoint to improve ball striking
- Step 6: Train ground contact with the thud the mat drill
- Step 7: Fix swing plane with the 3 o clock and 2 o clock station drill
- Step 8: Match the follow through to your new ball striking pattern
- Step 9: Use feedback to get your ball striking closer to neutral
- Step 10: Keep your best swing feels simple
- Step 11: Practice this ball striking routine on the range
- FAQ
Step 1: Diagnose why your ball striking is poor
If you struggle with irons, your first instinct might be to focus on what happens at impact. That is understandable, but it is often too late. Impact is usually the result of what happened in the first part of the swing.
The pattern being fixed here was simple and common. The club traveled too far low and inside during the takeaway, then stayed under plane. That creates a chain reaction:
- Your low point tends to move behind the ball.
- You are more likely to hit fat or thin shots.
- It becomes harder to take a crisp divot after the ball.
- You lose compression, height control, and distance.
For many golfers, weak iron shots are not caused by a lack of effort. They are caused by the club being out of position too early.
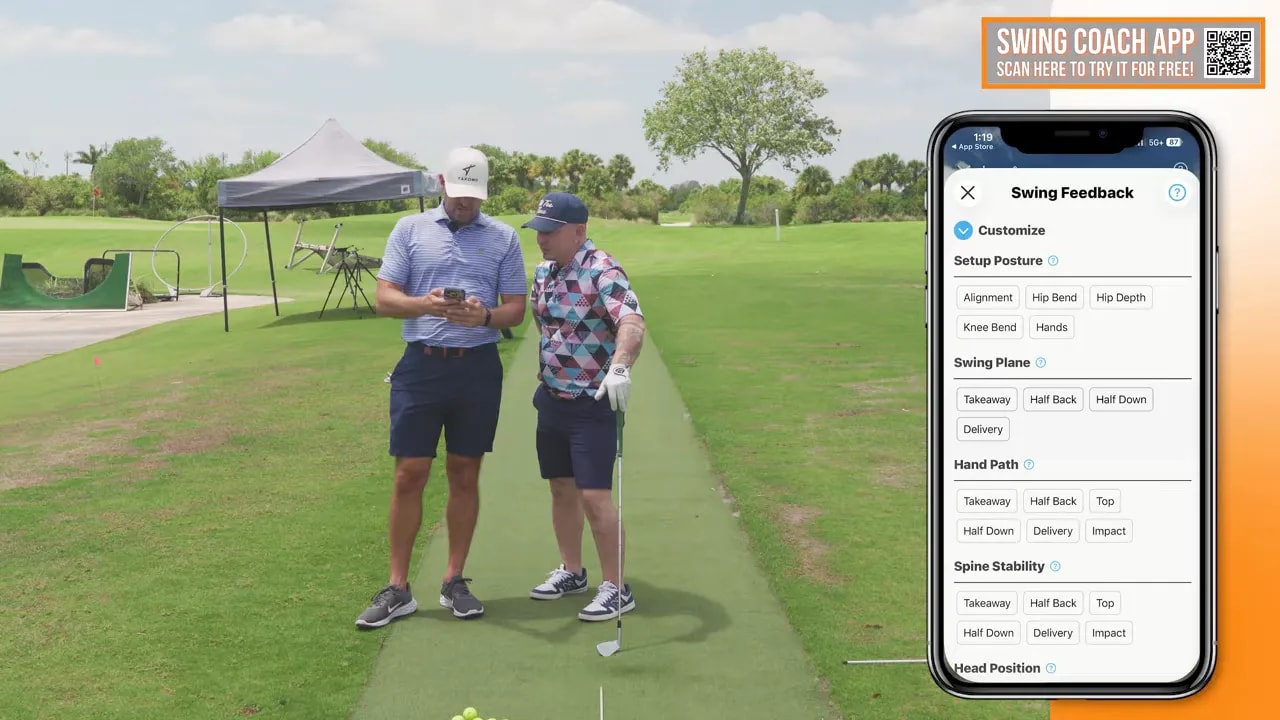
One useful checkpoint is swing plane feedback. In the lesson, the club was clearly registering as too far under plane early in the motion. That gave an objective starting point. Whether you use an app, video, or a mirror, the goal is the same: identify if the club is moving too far around you instead of hinging upward and staying more in front of your body.
Step 2: Understand the golf takeaway mistake causing poor iron contact
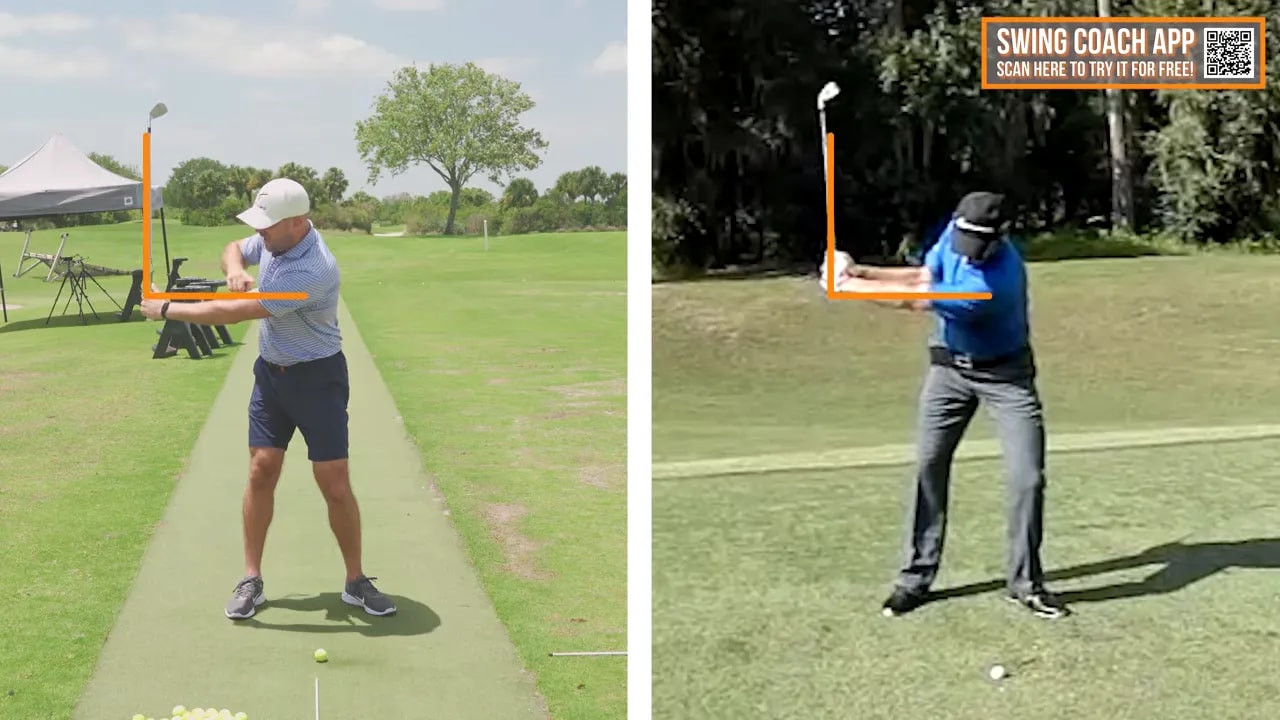
The central issue was a lack of vertical wrist hinge.
When the wrists do not hinge enough, the thumbs tend to point away from you longer, the shaft stays too flat, and the club gets dragged around the body. That may feel wide, but it often leaves the club too shallow too soon.
To compress an iron well, the club needs some upward set on the way back so it has room to work downward later. A simple way to think about it is this: for the club to strike the ground in the right place, it needs enough up so it can come down.
If there is no real hinge, there is usually not enough downward strike. That is why golfers with this pattern often complain about:
- Thin irons
- No divot
- Shots that feel decent but do not go far enough
- Contact that changes from shot to shot
So if you want to improve ball striking, start by checking whether the club is hinging vertically or just moving low and around.
Step 3: Build the right wrist hinge for better ball striking
The first major fix is learning how much hinge you actually need.
A strong checkpoint is to work toward roughly a 90 degree wrist hinge by the time your lead arm is parallel to the ground. By the top of the backswing, that angle may soften slightly, but the important part is that the club has set upward early enough.
For many golfers, that will feel exaggerated at first. In reality, it often only looks normal on camera.
A few useful feels were given:
- Let your thumbs begin to point more back toward you as the club hinges.
- Feel the club set upward instead of staying wide and low.
- Start the hinge progressively from the beginning rather than waiting until late in the backswing.
This is important. Golfers with an inside takeaway almost never add enough hinge on the first try. If that is your pattern, underdoing the change is far more likely than overdoing it.
That is why rehearsals matter. Before you hit a ball, make a few slow practice motions where the only goal is to hinge the club up earlier and more vertically.
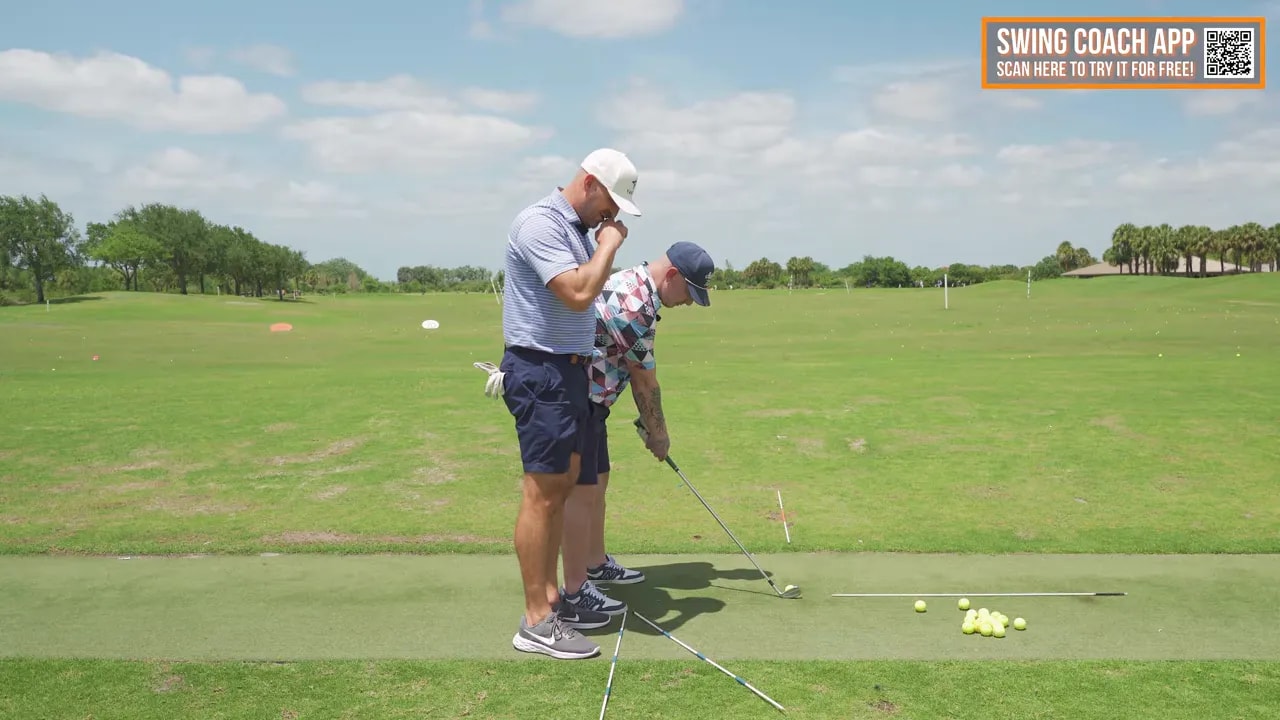
Step 4: Improve setup so your takeaway starts on plane
Setup can either help your pattern or fight against it.
One adjustment used here was lowering the handle slightly at address so the butt of the club lined up more closely with the belt buckle. That matters because handle position helps pre set the swing plane.
If your hands start too high and your wrists are already in an unhinged position, it becomes easier to drag the club low and inside. Lowering the handle just a bit can put the club on a more useful angle before the swing even starts.
There was also a small posture tune up with a touch more knee bend. Nothing dramatic. Just enough to support the new takeaway shape.
This step is worth emphasizing because many golfers try to repair a poor takeaway with a mid swing compensation. A better setup reduces the need for those fixes.
Step 5: Use the early hinge checkpoint to improve ball striking
Once your setup is organized, you can add a very clear checkpoint.
During the takeaway, when the butt end of the club reaches just outside your trail thigh, the shaft should be about parallel to the ground. If you have hinged correctly, the club should already look more set than rolled behind you.
This checkpoint is useful because it removes guesswork. If the shaft gets parallel only after the club has traveled too far behind your body, you likely did not hinge early enough.
Here is the rehearsal pattern:
- Start from a sound setup.
- Begin hinging right away.
- Pause when the butt of the club is just outside the thigh.
- Check that the shaft is about parallel to the ground.
- Confirm that the wrist set feels much more vertical than normal.
This is a great indoor drill too. You do not need to hit balls to learn the motion.
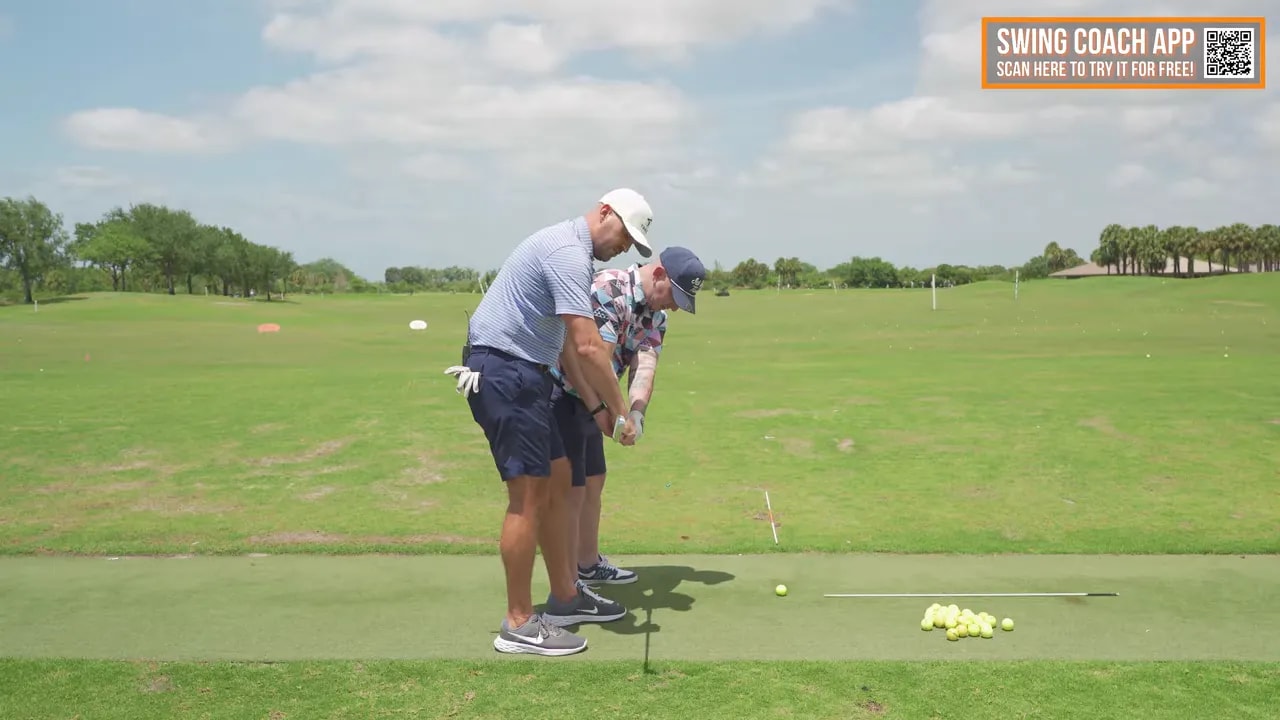
Step 6: Train ground contact with the thud the mat drill
Once the club is in a better backswing position, you need a new practice rule: make the club hit the ground.
That was the purpose of the thud the mat drill. After rehearsing the 90 degree hinge, the next move was simple. Swing down and make the clubhead strike the mat with intention.
Not brush it. Not barely touch it. Hit it with enough firmness to hear a real thud.
This drill helps because it teaches the club to interact with the turf. Golfers who struggle with compression often make swings where the club glides past the ground or bottoms out too early. A better hinge pattern makes solid ground contact easier, and the drill reinforces that feeling immediately.
If the club does not hit the mat firmly enough, the first assumption should be that you did not hinge enough on the way back.
A smart practice sequence is:
- Make two slow rehearsals to your hinge checkpoint.
- On the third motion, hinge to the same position.
- Then swing down and thud the mat.
- Repeat before every ball until contact improves.
This drill is golfer friendly because it gives instant feedback. You either hear and feel the strike, or you do not.
Step 7: Fix swing plane with the 3 o clock and 2 o clock station drill
Adding hinge solved part of the issue, but there was still another pattern to clean up. The club needed to stay more in front of the body and return on a better plane.
To do that, two reference stations were used on the ground. Think of the ball as 12 o clock. Then picture reference points out in front around 2 o clock and 3 o clock.
The original swing pattern was too far around on the backswing and even farther from the inside on the downswing. To get to neutral, the feel had to be very different.
Instead of feeling like the club was dropping behind him, the golfer needed to feel as though it was working more out and even slightly over compared to normal.
That is a key lesson for anyone trying to improve ball striking: your feel and your real motion are rarely the same. If you have been swinging too far from the inside for a long time, neutral will often feel outside to you.
The concept was:
- Take the club back with more hinge and less roll behind you.
- Feel the club working more toward the station that keeps it on plane.
- On the way down, exaggerate enough to avoid dropping too far underneath.
If your miss is fat and thin from an inside pattern, this exaggeration can be exactly what gets you back to center.
Step 8: Match the follow through to your new ball striking pattern
There was one more adjustment that helped complete the change.
The club was exiting too far out to the right after impact. For a golfer with this inside pattern, that follow through often goes with poor ground contact and blocks or pushes.
The correction was to feel the arms and hands work lower and more around the body through the finish, almost as if the hands moved more left of the torso than usual.
That does not mean chopping across the ball. It simply means your follow through should match a more neutral delivery instead of continuing the same under plane motion.
A short feel phrase used in the lesson captured the sequence well:
- Up
- Out
- Down
That gives you a compact way to remember the motion. Hinge the club up, keep it more out in front, then let it move down into the turf.
Step 9: Use feedback to get your ball striking closer to neutral
One of the smartest parts of the session was the commitment to feedback before hitting too many balls.
The goal was not to guess. It was to get the swing plane numbers closer to neutral first. When the readings improved from danger levels to much smaller numbers, that confirmed the changes were moving in the right direction.
This matters because exaggeration without feedback can drift into a different problem. But exaggeration with feedback is often exactly how you retrain a stubborn pattern.

If you use video or a swing app, focus on one variable at a time. In this case, the priority was swing plane. That made the practice simpler and more effective.
A solid feedback loop looks like this:
- Make a rehearsal with the new hinge and plane feel.
- Hit a shot with the same intention.
- Check whether the club was still too shallow or under plane.
- Increase or reduce the exaggeration as needed.
That process is much better than banging balls and hoping a fix sticks.
Step 10: Keep your best swing feels simple
By the end of the session, the golfer had a much better swing. Contact improved, the club was moving more on plane, and the best swings had the kind of turf interaction you want with irons.
The real takeaway is not to memorize dozens of details. It is to keep one or two strong feels that organize the motion.
For this pattern, the best summary is:
- Hinge earlier and more vertically
- Keep the club more in front of you
- Make ground contact inevitable
If you do those three things well, your ball striking can improve fast. You do not need to obsess over impact when the first part of the swing starts putting the club in a better spot.
Step 11: Practice this ball striking routine on the range
If you want to turn these concepts into a repeatable drill set, use this range routine:
- Setup check
Lower the handle slightly if needed and make sure your posture supports a more on plane takeaway. - Early hinge rehearsal
Make two slow backswings to the checkpoint with the shaft parallel and the butt of the club just outside the thigh. - Thud the mat drill
On the third rehearsal, swing down and make the club strike the ground firmly. - Hit one ball
Do not worry first about perfect direction. Prioritize better turf contact and compression. - Check the pattern
If the club still feels too far inside, add more hinge and more out in front on the way down. - Blend the follow through
Let the club work more around you instead of exiting too far right.
This sequence is especially helpful for high handicap golfers who fight thin shots, weak contact, and no divot.
FAQ
Why does an inside takeaway hurt ball striking?
When the club moves too low and too far inside early, it often gets under plane. That makes it harder to control low point, strike the ball first, and take a clean divot after impact.
How much wrist hinge should you have in the backswing?
A useful checkpoint is about a 90 degree hinge by the time your lead arm is parallel to the ground. The exact look will vary, but most golfers with poor iron contact need more hinge earlier than they think.
What is the thud the mat drill?
It is a drill where you rehearse the early hinge, then swing down and intentionally strike the mat or turf. The goal is to train better ground interaction and make proper downward contact feel natural.
If neutral feels over the top, is that normal?
Yes. If your normal pattern is too far from the inside, a neutral swing can feel much more outside than it really is. That is why video or swing feedback is so helpful.
Can this help with thin iron shots and no divot?
Absolutely. The whole point of these changes is to improve club position early, which makes solid contact, compression, and divot control much easier.
0 Comments