
In golf, a trail elbow that flies away from your side during the downswing can make solid contact feel nearly impossible. It often sends the shaft too steep, makes you lose lag, and leaves the clubface hard to control. If you want straighter, more powerful golf shots, learning how to keep the trail elbow connected is a simple but important fix.
This guide explains how the trail elbow affects your golf swing, why it can lead to casting, and how to train a better delivery with body rotation and a simple feedback station.
Table of Contents
- Step 1: Understand what the trail elbow is doing in golf
- Step 2: Learn why a flying trail elbow causes casting in golf
- Step 3: Recognize the signs your trail elbow is hurting your golf swing
- Step 4: Replace the push with a tucked trail elbow feel in golf
- Step 5: Use body rotation to deliver the club in golf
- Step 6: Match your shaft angle with a simple golf feedback station
- Step 7: Rehearse the move slowly before you hit full golf shots
- Step 8: Use this golf drill for straighter drives
- Step 9: Avoid these common golf mistakes while fixing the trail elbow
- Step 10: Know what better golf contact should feel like
- Step 11: Build this into your regular golf practice
- Step 12: Take this trail elbow key to the golf course
- FAQ
- Final takeaway for better golf
Step 1: Understand what the trail elbow is doing in golf
Your trail elbow is the elbow on your back arm in the golf swing. For a right-handed golfer, that is the right elbow. For a left-handed golfer, it is the left elbow.
In a good golf downswing, the trail elbow works closer to your side as your body rotates toward the target. That movement helps the club approach the ball on a more manageable path and makes it easier to sense the clubhead.
When the trail elbow pushes outward too early, several golf problems tend to happen at once:
The club shaft gets steeper.
The shaft can point too far inside the ball.
You tend to lose lag.
Clubface awareness gets worse.
Solid contact becomes much less reliable.
Many golfers make this move because it feels strong or powerful. In reality, it often makes the golf swing harder to sequence and harder to square up at impact.
Step 2: Learn why a flying trail elbow causes casting in golf
Casting in golf usually means you release the angle between your lead arm and the shaft too early. Instead of preserving that angle into the downswing, you throw it away before impact.
A trail elbow that pops out is closely tied to this pattern. When the elbow moves away from your body, the club often gets thrown outward and downward too soon. That makes it difficult to keep the hands leading and difficult to deliver the club with speed and control.
In practical terms, this can lead to:
Weak drives
Poor face control
Inconsistent contact
Glancing blows instead of centered strikes
A feeling that you have to save the shot at the last moment
If your golf swing feels rushed from the top, the trail elbow is worth checking early.
Step 3: Recognize the signs your trail elbow is hurting your golf swing
You do not need launch monitor data to spot this issue. In many golf swings, the pattern is visible and easy to feel once you know what to look for.
Common signs include:
Your trail elbow separates from your shirt seam in transition.
The shaft becomes noticeably steep halfway down.
You feel like you lose the clubhead during the downswing.
You struggle to know where the face is pointing.
Your misses come from poor contact more than poor effort.
Another clue is the feeling that your arms are taking over the golf swing while your body stalls. When the elbow flies, golfers often try to rescue the motion with the hands instead of rotating through the shot.

Step 4: Replace the push with a tucked trail elbow feel in golf
The simplest correction is also one of the most effective in golf: feel the trail elbow staying tucked closer to your side in the downswing.
This does not mean pinning the elbow tightly against your ribs with tension. It means keeping it connected enough that your body rotation can deliver the club instead of your trail arm pushing the club out.
A useful feel is this:
Keep the trail elbow near the side seam of your shirt.
Let the elbow move down and in front of the hip.
Allow the chest and hips to keep opening.
This improves structure without making the golf swing stiff. You are looking for connection, not restriction.
If you overdo the tuck and stop rotating, you can create a different problem. The elbow should stay organized while the body keeps moving. In golf, connection and rotation have to work together.
Step 5: Use body rotation to deliver the club in golf
One of the biggest mistakes golfers make is trying to fix the trail elbow with only the arm. The better answer in golf is to pair elbow position with body rotation.
As the downswing starts:
Your hips begin to open toward the target.
Your chest follows and opens as well.
The trail elbow stays closer to your side.
The club gets delivered by rotation, not by a last-second push.
When this sequence improves, many golfers notice immediate benefits. The clubhead feels easier to locate, contact becomes more predictable, and the strike feels more compressed.
This is especially useful with the driver, where poor sequencing can quickly turn into slices, blocks, or weak contact.
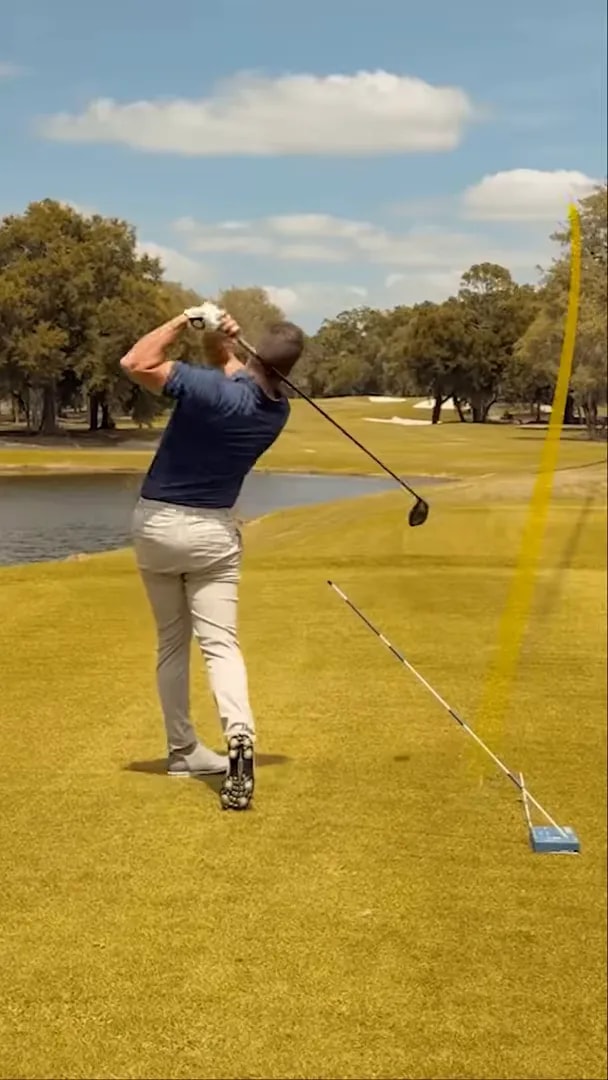
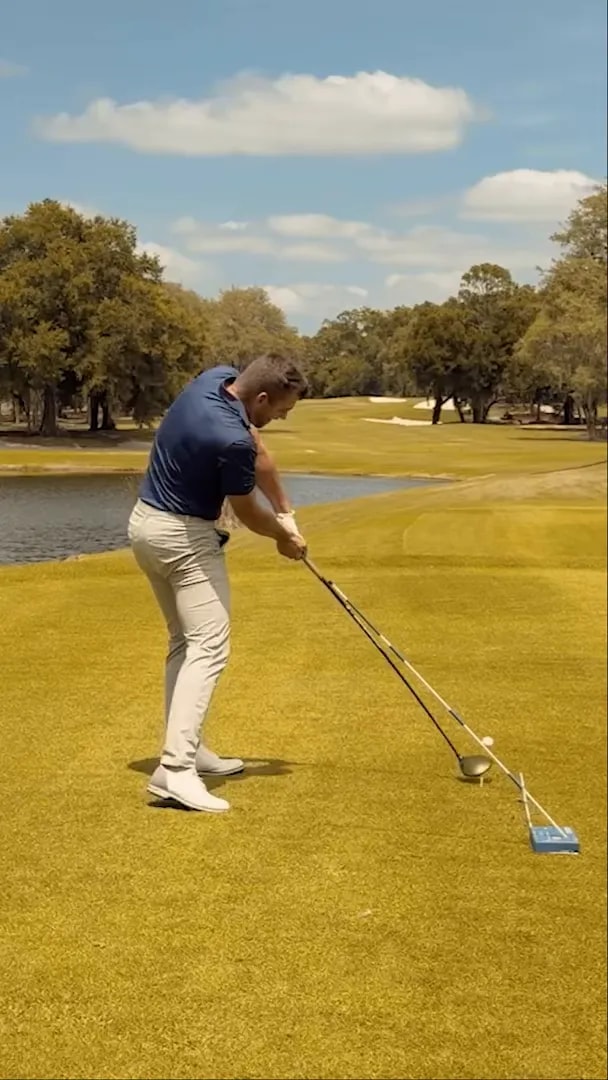
Step 6: Match your shaft angle with a simple golf feedback station
A practical way to train this move in golf is to use a ground station that gives you visual feedback on shaft delivery. The setup shown uses a blue training block and an alignment stick placed at a reference angle.
The goal is not to make a perfect copy of a tour swing. The goal is to create a repeatable golf checkpoint that helps you stop the cast and organize the downswing.
Use this three-part station:
Tuck the trail elbow into the side seam area of your shirt.
Match the shaft angle to the reference stick as closely as possible in the downswing.
Rotate the body so the hips and chest open toward the target.
This kind of feedback is powerful in golf because it combines feel and reality. What feels tucked may not actually be tucked. What feels shallow may still be steep. A reference station gives you a visual standard.
Step 7: Rehearse the move slowly before you hit full golf shots
If you try to fix this only at full speed, your old golf swing habits will usually win. Slow rehearsals are the fastest way to build a better pattern.
Start with these reps:
Make a backswing to the top.
Pause briefly.
Bring the trail elbow down toward your side.
Rotate your hips and chest open.
Check whether the shaft matches your reference angle.
Do this without hitting a ball at first. Then hit soft shots at partial speed. Build to full golf swings only after the downswing starts to feel organized.
A good rule is to move from:
No ball rehearsal
Half-speed swing
Three-quarter swing
Full golf swing
Step 8: Use this golf drill for straighter drives
If your main goal is better driver performance, this drill is especially relevant. The trail elbow and casting problem can be a major reason your drives feel wild even when your setup looks fine.
Try this driver drill on the range:
Set a reference stick on the ground at the delivery angle you want to feel.
Make two slow practice downswings keeping the trail elbow close to your side.
On each rehearsal, open your hips and chest toward the target.
Then hit one ball at about 70 percent speed.
Focus on solid contact first, not maximum distance.
As your golf motion improves, you should notice that speed begins to show up more naturally. Better structure often creates more efficient speed than trying to hit harder with the arms.
Step 9: Avoid these common golf mistakes while fixing the trail elbow
Golf swing changes often create compensations. When working on the trail elbow, watch out for these mistakes:
Holding the elbow too tightly
If you squeeze the trail elbow against your side, your golf swing can get narrow and stuck. The goal is connected, not trapped.
Only moving the arms
If the elbow tucks but your hips and chest do not open, you may still struggle with blocks or hooks. Rotation is part of the fix.
Trying to force lag
In golf, lag is usually the result of better motion, not something you create by tightening your wrists. Improve the elbow and rotation first.
Going full speed too soon
Speed can hide bad mechanics. Slow rehearsal makes the movement easier to learn and easier to repeat on the course.
Ignoring face control
Even with a better trail elbow, you still need awareness of the clubface. The good news is that many golfers find face awareness improves when the downswing is more connected.
Step 10: Know what better golf contact should feel like
When you fix this part of the golf swing, the change is often more about feel than appearance at first.
You may notice:
The clubhead feels easier to track.
Your transition feels less rushed.
Impact feels more centered.
Your body keeps moving through the shot.
Your drives launch with more authority and less effort.
Those are encouraging signs. In golf, the best swing fixes usually make the motion feel simpler, not more complicated.
Step 11: Build this into your regular golf practice
To make the change stick, add it to your golf practice in a repeatable way.
Here is a simple range plan:
5 rehearsals with no ball, focusing on tucked trail elbow and body rotation
5 half swings with a mid iron or hybrid
5 three-quarter swings with the driver
5 full swings while keeping the same feel
If your contact gets worse during the session, do not just swing harder. Return to the rehearsal stage and rebuild the motion slowly.
In golf, changes tend to hold better when you blend them into a routine instead of chasing them shot to shot.
Step 12: Take this trail elbow key to the golf course
On the course, you do not want five swing thoughts. Use one simple cue.
A practical on-course golf cue is:
Trail elbow in, body open through
That phrase keeps your focus on the two central pieces of the move. It is compact enough to use under pressure and clear enough to influence the swing.
If you are between clubs or feeling tense on the tee, this cue can help you avoid the common golf tendency to throw the club from the top.
FAQ
How does the trail elbow affect casting in golf?
If the trail elbow flies away from your side in transition, it often pushes the club into a steeper position and causes you to release the angle too early. That early release is a common form of casting in golf.
Should the trail elbow stay glued to my side in golf?
No. In golf, the trail elbow should stay connected, but not pinned. You want it working close to your side while your body rotates, not locked in place with tension.
Can a tucked trail elbow help my driver in golf?
Yes. A better trail elbow position can improve shaft delivery, help preserve lag, and make the clubface easier to control. For many golfers, that leads to straighter and more solid drives.
Why does a flying trail elbow make golf contact harder?
It often changes the shaft angle, reduces clubface awareness, and disrupts sequence. When those things happen together, centered contact in golf becomes much less consistent.
What is the best way to practice this golf move?
Start with slow rehearsals. Feel the trail elbow working near your shirt seam, match the shaft to a visual reference, and rotate your hips and chest open. Then build from half-speed swings to full golf shots.
Final takeaway for better golf
If you want to stop casting in golf, the trail elbow is a smart place to start. When it pops out, the downswing often gets steep, lag disappears, and face control becomes difficult. When it stays more connected and your body rotates through, the club is much easier to deliver.
Keep the concept simple:
Tuck the trail elbow
Match the shaft angle
Open the hips and chest
That combination can make your golf swing more repeatable and your driver more dependable.
0 Comments