
If you want better ball striking, cleaner turf interaction, and a more reliable downswing, one of the biggest keys is learning how your hips move forward. This simple hip drill for solid contact gives you a clear way to feel it.
Many golfers try to rotate hard but never get their pelvis far enough toward the target. That often leaves the low point behind the ball, adds inconsistency to contact, and makes the swing path harder to manage. The fix is not complicated. You need a simple rehearsal that teaches your hips to move forward while your body stays organized.
This drill focuses on a basic but important move. Your hips shift forward, your belt buckle moves toward the target, your trail foot releases, and your head stays back enough to help you strike the ball first and the ground second.
Table of Contents
- Step 1: Set up the simple hip drill for solid contact
- Step 2: Push your hips forward past center
- Step 3: Add belt buckle rotation toward the target
- Step 4: Let your trail foot release naturally
- Step 5: Keep your head back while pressure moves left
- Step 6: Rehearse the move slowly before adding a club
- Step 7: Blend the simple hip drill for solid contact into a swing
- Step 8: Use the finish position as your checkpoint
- Step 9: Understand why this improves low point control
- Step 10: Avoid the most common mistakes with this hip drill
- Step 11: Make the simple hip drill for solid contact part of your range routine
- Step 12: Use one simple feel on the course
- FAQ
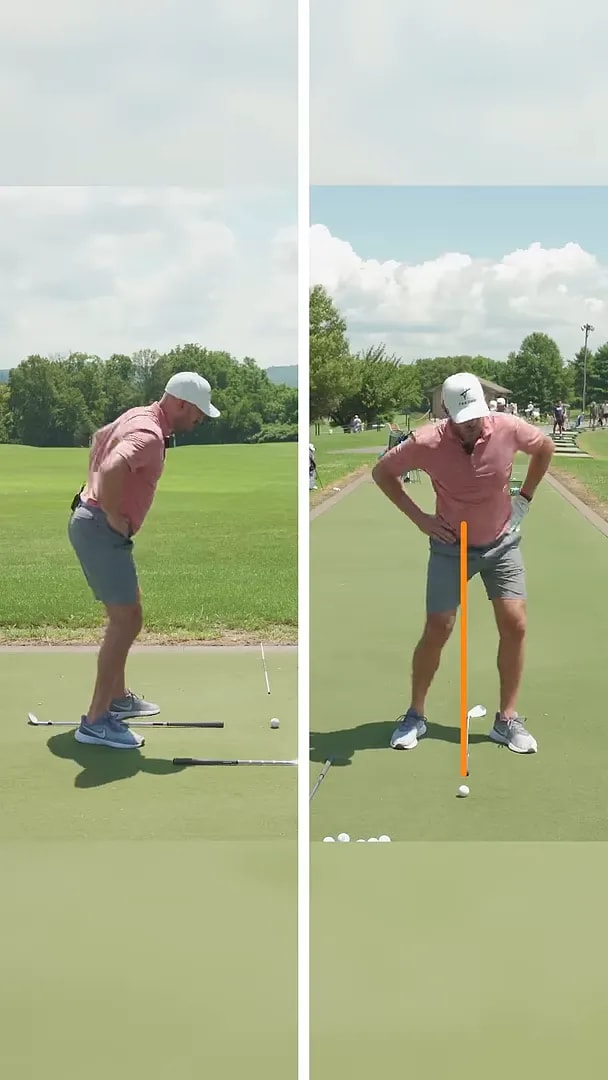
Step 1: Set up the simple hip drill for solid contact
Start without making a full swing. Place your hands on your hips so your attention stays on pelvic motion rather than club movement. Then put an object in the middle of your stance. In the demonstration, the object acts as a clear reference point between the feet.
The purpose of that object is simple. It gives you a center marker so you can measure whether your hips are actually moving forward. Without a reference, it is easy to feel a shift that is too small or to confuse rotation with lateral movement.
At address, stand in your normal golf posture with your feet about shoulder width apart. Keep your balance centered and your knees softly flexed. The object should sit roughly between your shoes so you can compare your pelvis to that point as you move.
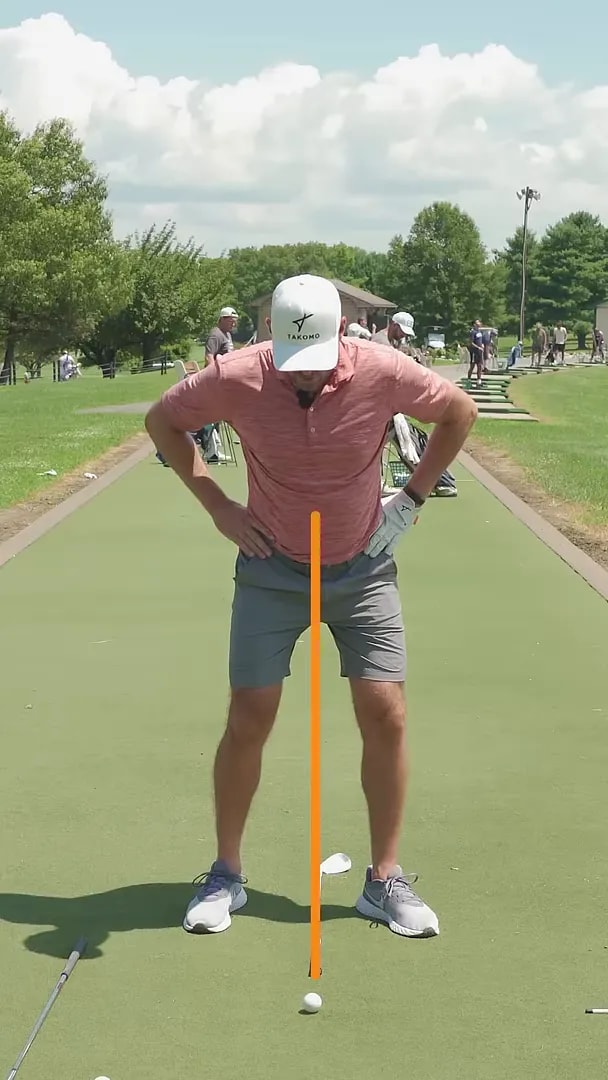
This first setup matters because the simple hip drill for solid contact is all about awareness. If you can clearly see where center is, you can clearly feel when your hips get in front of it.
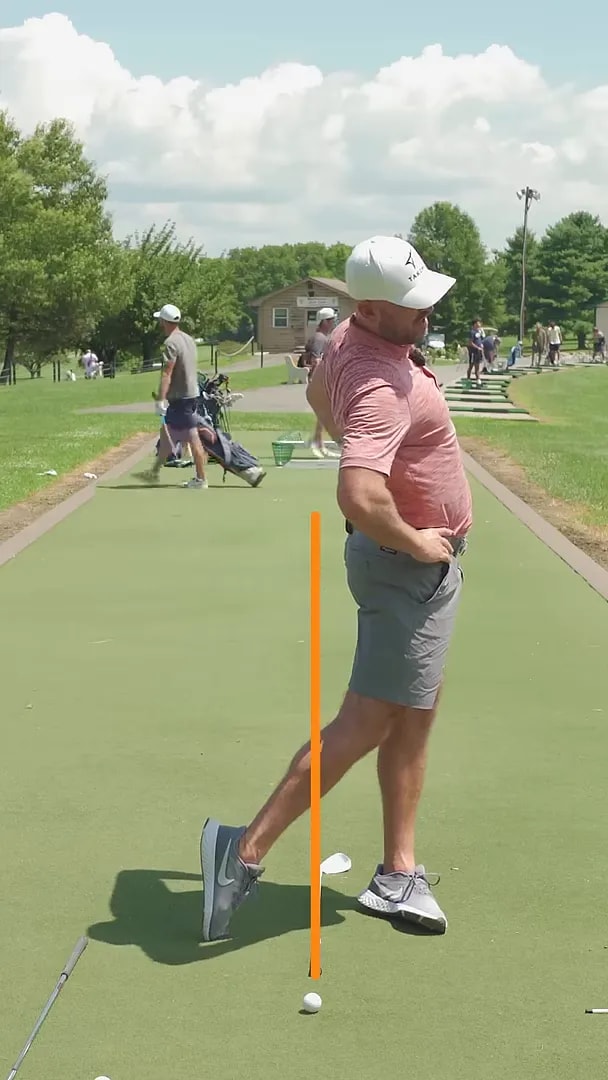
Step 2: Push your hips forward past center
From that setup, move your hips forward so your pelvis gets ahead of the object between your feet. Think of your whole belt line moving several inches toward the target.
This is the heart of the move. Many players turn their shoulders and chest but leave the lower body hanging back. That can produce fat shots, thin shots, and glancing strikes. By getting the hips forward, you improve where the club bottoms out.
A good checkpoint is your belt buckle. As you move into the impact style position, feel your belt buckle traveling toward the target, not staying centered and not hanging over your trail foot.
You are not trying to slide wildly. You are trying to move forward in a controlled way while still turning through. The hips shift, then continue rotating. That combination helps you deliver the club from a stronger position.
Step 3: Add belt buckle rotation toward the target
Once the pelvis moves forward, let it keep opening. A useful image is taking the front of your hips and turning them so the belt buckle points more toward the target.
This is where many golfers improve both contact and direction. Forward motion alone is not enough if the body stalls. Rotation alone is not enough if the pelvis never gets forward. You need both pieces working together.
When you blend them correctly, the club has a better chance to approach from the inside while the bottom of the swing arc gets in the right place. That is why this simple hip drill for solid contact can help with more than just compression. It can also support straighter shots.
Notice the overall shape you want to create:
- Hips forward of center
- Belt buckle moving and opening toward the target
- Chest not lunging ahead of the ball
- Pressure moving into the lead side
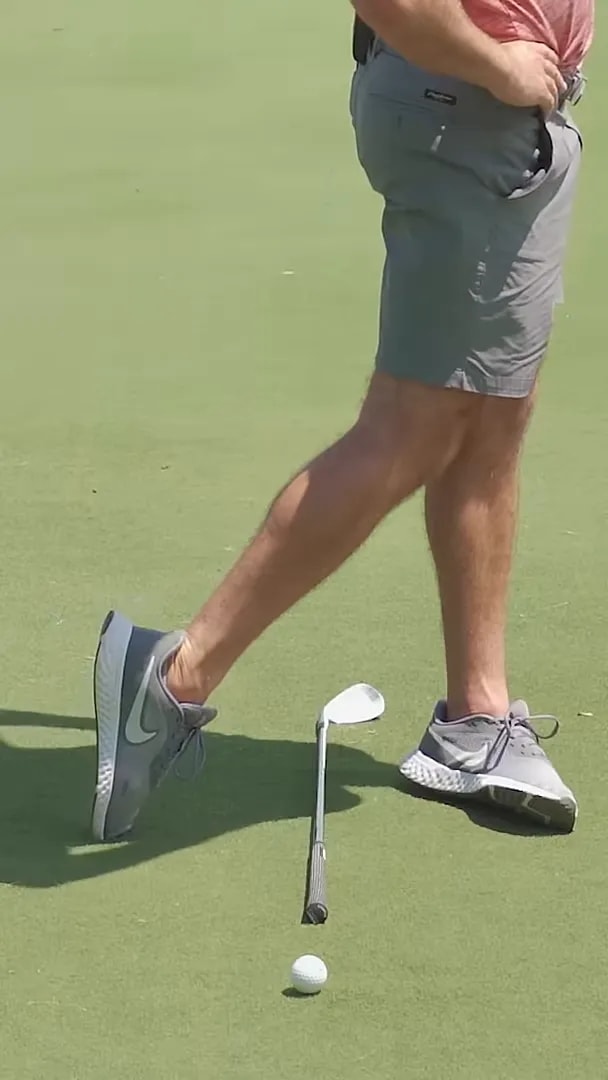
Step 4: Let your trail foot release naturally
One of the clearest parts of the drill is what happens to the trail foot. If your right foot stays flat on the ground and never turns, it becomes much harder to get your hips fully forward.
That is why the drill uses a simple cue with the trail shoe. As your hips move forward, let the shoelaces of the trail foot begin to turn toward the target. That release is a sign that the lower body is not locked up.
This does not mean spinning out on the toe too early. It means allowing the trail side to unweight and rotate as a response to proper pressure shift and hip motion. If the trail foot remains frozen, the hips often stall and the body can hang back.
A helpful checkpoint is the trail kneecap. As the hips move through, the trail knee should also work more toward the target instead of remaining behind you.
This trail foot release gives you a golfer-friendly feel that is easy to remember on the range:
- Turn the trail shoelaces toward the target
- Allow the trail knee to work forward
- Do not keep the trail foot glued to the turf
Step 5: Keep your head back while pressure moves left
A strong impact pattern is not just about getting everything forward. Your hips move toward the target, but your head stays back enough to preserve space and help the club strike the ball before the turf.
This can feel counterintuitive at first. Some golfers hear “move forward” and respond by throwing their whole upper body toward the target. That usually hurts contact rather than helping it.
The better pattern is lower body forward, upper body stable, and enough secondary tilt to keep the club working down and through correctly. You can think of it as falling into the lead side while still keeping your head from drifting ahead.
That combination is one reason this simple hip drill for solid contact is so useful. It teaches the difference between a quality forward shift and a full body lunge.
Step 6: Rehearse the move slowly before adding a club
Before you hit balls, repeat the motion in slow rehearsals. Put your hands on your hips, shift the pelvis forward, turn the belt buckle toward the target, let the trail shoelaces turn, and finish with your weight favoring the lead side.
Repeat that pattern several times until it starts to feel natural. You want a clear body map before a club enters the picture.
Slow reps help because they remove the urge to rush. When golfers jump straight into full swings, they often return to old habits. A rehearsal-first approach makes the move easier to own.
A simple practice sequence looks like this:
- Address the ball with hands on hips.
- Notice the object centered between your feet.
- Move the hips ahead of that center point.
- Turn the pelvis so the belt buckle works toward the target.
- Allow the trail foot and knee to release forward.
- Hold the finish for a second and check your balance.
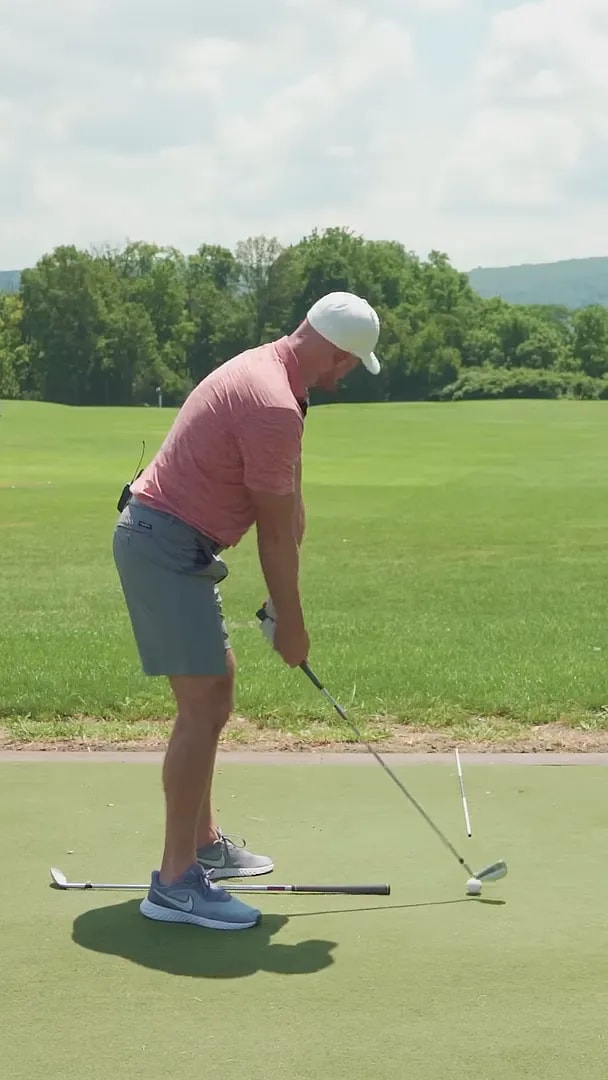
Step 7: Blend the simple hip drill for solid contact into a swing
Once the rehearsal feels comfortable, add the club. Start with partial swings. You are not trying to hit hard. You are trying to carry the same body motion into impact.
At setup, feel athletic and balanced. During the downswing, return to the same checkpoints you used in the drill:
- Hips moving forward
- Pelvis opening
- Trail foot releasing
- Head staying back
When you do this well, impact tends to look more organized. The handle is forward, the body is posted on the lead side, and the strike tends to get cleaner.
The move can feel bigger than it really is. That is common. Good swing changes often feel exaggerated before they become normal. If your contact improves and your balance stays solid, you are likely moving in the right direction.
Step 8: Use the finish position as your checkpoint
The finish can tell you whether the downswing was organized. A good finish after using this simple hip drill for solid contact shows that the hips kept moving, the body turned through, and the trail foot released correctly.
If you can hold your finish with most of your pressure on the lead foot and your trail foot up on the toe, that usually means your lower body kept going. If you finish flat footed on the trail side or off balance, your shift and turn probably need work.
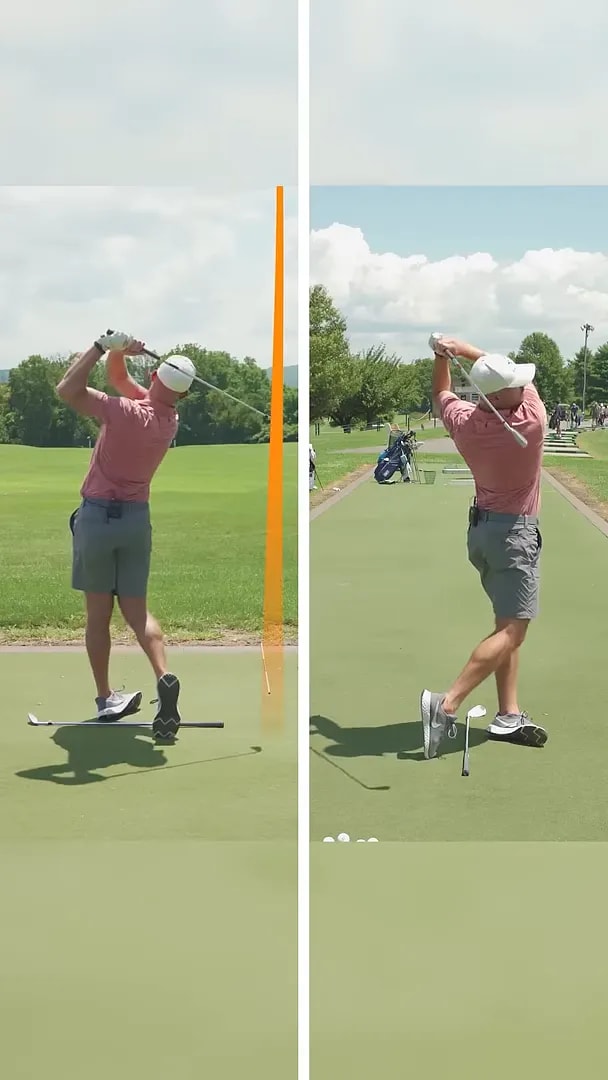
Use this finish checklist:
- Weight mostly on the lead side
- Trail heel off the ground
- Hips turned through
- Body balanced enough to hold the pose
Step 9: Understand why this improves low point control
Low point control is one of the foundations of good ball striking. With irons, you generally want the club to contact the ball and then the turf. If your hips do not move forward enough, the bottom of the swing can stay too far back, making solid contact much harder to repeat.
By shifting the pelvis forward and continuing to rotate, you place your body in a better impact position. That makes it easier for the club to bottom out in front of the ball rather than behind it.
For many golfers, that is the difference between:
- Heavy shots and crisp strikes
- Thin contact and compressed contact
- Flippy timing and predictable impact
This is why the move is so valuable. It is not a cosmetic swing change. It is a functional pattern that directly affects strike quality.
Step 10: Avoid the most common mistakes with this hip drill
Even a simple drill can go wrong if the feels are misunderstood. Here are the biggest errors to avoid.
Sliding without turning
If you shove your hips laterally but never open them, you can get stuck and block shots or flip the club through impact. Make sure the belt buckle moves forward and opens.
Keeping the trail foot glued down
If the trail foot stays flat and passive, your hips will struggle to fully clear. Let the trail heel come up as a result of proper movement.
Driving the upper body forward
Your hips go forward, but your head should not race toward the target. Keep the upper body from lunging.
Rushing into full speed
Start with rehearsals and half swings. Build the motion before adding speed.
Ignoring balance
If you cannot hold the finish, the move is probably too aggressive or mistimed. Solid contact usually comes with solid balance.
Step 11: Make the simple hip drill for solid contact part of your range routine
The fastest way to own this move is to practice it in a repeatable pattern. You do not need a long training session. You need a consistent one.
Try this short range routine:
- Make 5 slow rehearsals with hands on hips.
- Hit 5 short iron shots at half speed.
- After each swing, hold the finish and check your trail foot.
- Make 5 more rehearsals if contact starts to slip.
- Move to fuller swings only when the strike stays clean.
This routine keeps the feel connected to the ball flight and contact. It also prevents you from slipping back into an all-arms downswing.
Step 12: Use one simple feel on the course
When you play, you do not want five swing thoughts. Choose one golfer-friendly cue from the drill and trust it.
Good options include:
- Push the hips forward
- Belt buckle to the target
- Turn the trail shoelaces toward the target
Pick the one that gives you the best contact. Keep it simple. The goal is not to think mechanically over the ball. The goal is to trigger a better motion with one clear feel.
FAQ
Why does moving the hips forward help solid contact?
It helps move the low point forward so the club is more likely to strike the ball before the turf. It also supports a more efficient impact position with pressure on the lead side.
How far should the hips move in this simple hip drill for solid contact?
The feel is that your hips move clearly ahead of center, not just a tiny bump. The exact amount varies, but it should be enough that your pelvis is visibly forward of the reference point between your feet.
Should the trail heel come off the ground?
Yes, naturally. As your hips move forward and rotate, the trail heel should begin to release. That helps the trail shoelaces and kneecap work more toward the target.
Can this drill help if you hit fat iron shots?
Yes. Fat shots often come from poor low point control, and this drill is designed to improve that by teaching better forward hip motion in the downswing.
What should your head do during the move?
Your head should stay back relative to your hips. The lower body moves forward, but the upper body should not lunge toward the target.
Is this a full swing drill or a rehearsal drill?
Start with rehearsals. Once the movement is clear, blend it into short swings and then full swings. That progression makes the change much easier to keep.
If your strike has been inconsistent, this simple hip drill for solid contact is a strong place to start. It is easy to rehearse, easy to check, and directly tied to better impact. Get the hips forward, let the trail side release, keep the head back, and build the motion slowly until crisp contact becomes your normal pattern.
0 Comments