
If your golf swing produces slices, pulls, blocks, or snap hooks, your trail shoulder in the downswing may be a major reason why. In golf, the trail shoulder has a big influence on swing plane, club delivery, and where the club travels through impact. When it moves incorrectly, solid contact gets much harder.
This guide explains the most important trail shoulder red flags in golf, how they affect ball flight, and how to train a better downswing motion step by step. If you have been trying to fix your golf swing with grip changes, alignment tweaks, or release thoughts but your shots still curve too much, this is a smart place to start.
Table of Contents
- Step 1: Understand why the trail shoulder matters so much in golf
- Step 2: Spot the first red flag in your golf swing, the trail shoulder moving out toward the ball
- Step 3: Spot the second red flag in your golf swing, the trail shoulder dropping too far under plane
- Step 4: Learn the middle ground, how the trail shoulder should move in good golf mechanics
- Step 5: Check your golf swing halfway down
- Step 6: Build better setup conditions for your trail shoulder in golf
- Step 7: Improve clubface control so your golf swing stops compensating
- Step 8: Use a simple golf drill to train the correct trail shoulder path
- Step 9: Rehearse before hitting golf balls
- Step 10: Start with a forgiving practice station in golf
- Step 11: Match your golf shot shape to your delivery
- Step 12: Avoid the most common golf mistakes when fixing the trail shoulder
- Quick golf checklist: is your trail shoulder helping or hurting?
- What good progress looks like in golf
- FAQ
- Final takeaway for better golf
Step 1: Understand why the trail shoulder matters so much in golf
In a right-handed golf swing, the trail shoulder is the right shoulder. In a left-handed golf swing, it is the left shoulder. Its job in the downswing is not simply to move out toward the ball or drop wildly underneath. Instead, it needs to help the club approach on a workable plane.
When the trail shoulder works well in golf, you can:
Deliver the club more on plane
Reduce the steep over-the-top move
Create a shallower delivery
Improve face control through impact
Hit straighter shots with more predictable curvature
When it works poorly, it usually creates one of two common golf problems:
The trail shoulder moves too much out toward the ball, producing a steep over-the-top path.
The trail shoulder drops too far under plane, producing a stuck delivery from too far inside.
Most golfers fall into one of those patterns.
Step 2: Spot the first red flag in your golf swing, the trail shoulder moving out toward the ball
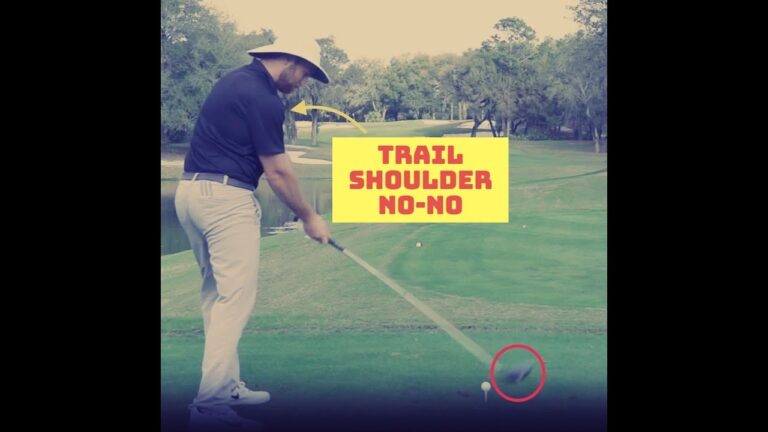
The first major red flag in golf is when the trail shoulder starts the downswing by moving outward toward the golf ball. This usually sends the club steeply across the ball from outside to inside.
This is the classic over-the-top move.
What it looks like
Your upper body opens early
Your shoulder feels like it is lunging toward the ball
The club moves above the desired plane
Your downswing feels steep and leftward
What shots it tends to create in golf
Slices
Pulled shots
Pulled fades
Weak contact with lost distance
Many golfers can still keep this shot in play because the ball starts left and curves back. But it usually costs distance and consistency. Even if the result is playable, it is rarely efficient golf.
Why this happens
A common reason is an open clubface tendency. If the face is too open on the way down, your body often reacts by sending the club over the top to make the ball start farther left. That can feel like a fix, but it usually creates a steep path and glancing contact.
In other words, your golf swing may not be “choosing” an over-the-top move by accident. It may be compensating for face control problems.
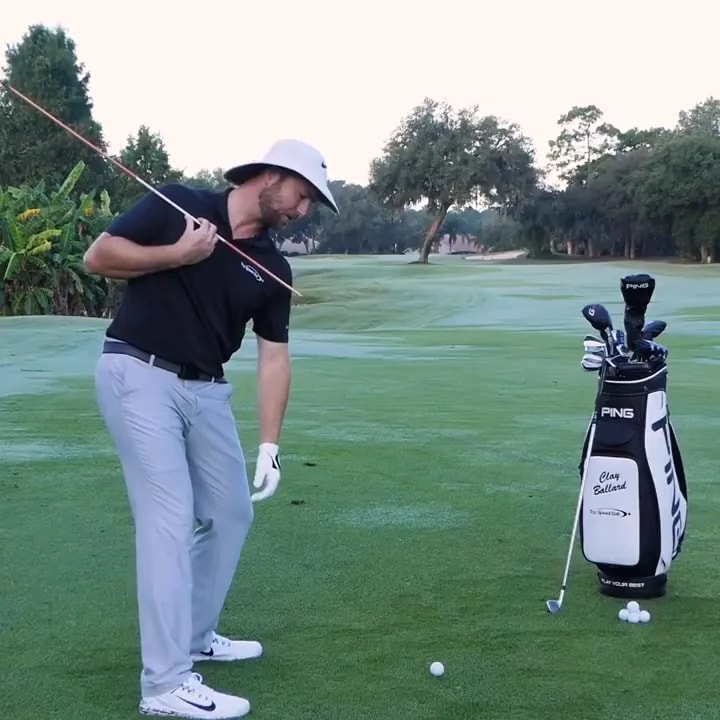
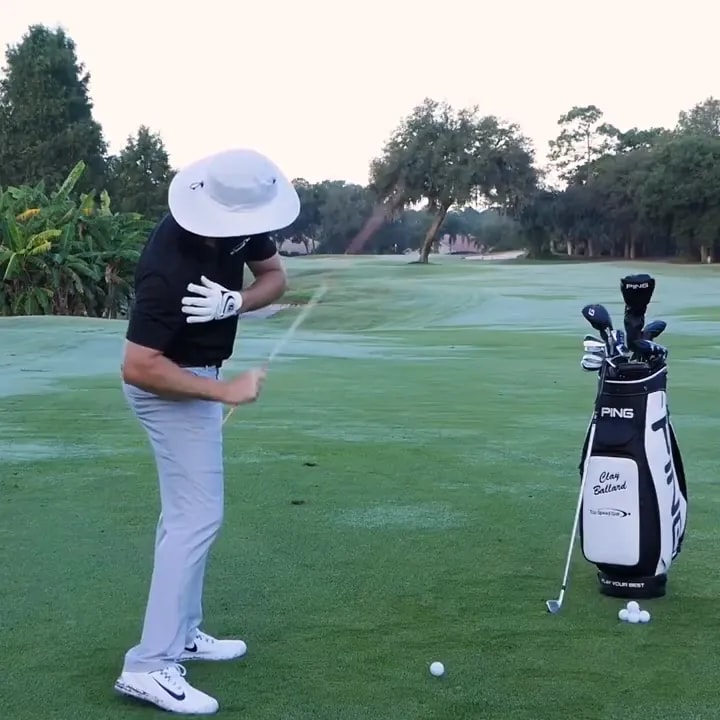
Step 3: Spot the second red flag in your golf swing, the trail shoulder dropping too far under plane
After struggling with an over-the-top move, many golfers try to do the opposite. They attempt to force the club to come more from the inside by dropping the trail shoulder dramatically downward and behind them.
That often creates a different golf problem instead of solving the first one.
What it looks like
The trail shoulder gets excessively low early in the downswing
The lead shoulder lifts too much
The club falls too far underneath the intended plane
You feel trapped or stuck late in the swing
What shots it tends to create in golf
Blocks pushed well right
Snap hooks
Inconsistent contact from the inside
This pattern is tricky because golfers often think they are finally shallowing the club correctly. But there is a difference between being shallower and getting excessively underneath. Good golf swings do not simply dump the club behind the body. They deliver it on a manageable plane.
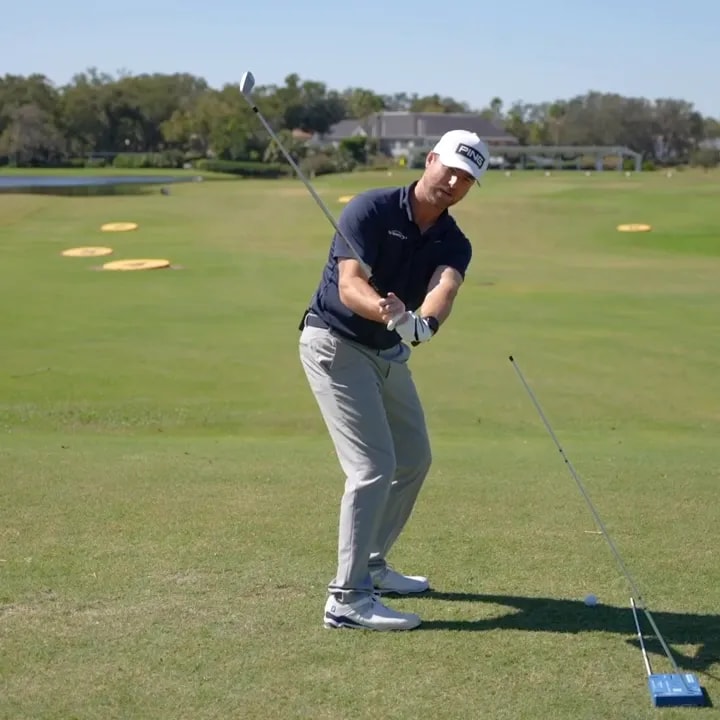
Step 4: Learn the middle ground, how the trail shoulder should move in good golf mechanics
The goal in golf is not “more over” or “more under.” The goal is a trail shoulder motion that helps the club travel down on plane and arrive squarely through impact.
That means:
The shoulder should not kick out toward the ball
The shoulder should not collapse too far underneath
The club should work into a shallower, on-plane delivery
If you picture the shaft approaching from a balanced angle rather than a dramatic one, you are on the right track. A useful checkpoint is whether the club appears to match or sit near your intended swing plane halfway down.
In golf, that is the zone where many downswing errors become obvious.
Step 5: Check your golf swing halfway down
A simple way to evaluate your trail shoulder action is to pause your swing or a recording of your swing around halfway down. At that point, look at the club and ask:
Is the shaft too steep above plane?
Is it too far under plane?
Does it look reasonably matched to the plane I want?
This checkpoint matters because the trail shoulder strongly influences where the club is at that stage. If your shoulder drives outward, the shaft usually gets steep. If your shoulder dives under too much, the shaft often gets stuck under plane.
For many golfers, this is the fastest way to connect body motion to ball flight.
Step 6: Build better setup conditions for your trail shoulder in golf
The downswing is easier when your setup gives your trail shoulder room to work correctly. If your address position is crowded or poorly aligned, your golf swing may force compensations before you even start down.
Focus on these setup ideas:
Balanced body alignment. Set your feet, hips, and shoulders in a consistent address position.
Good tilt. A functional spine tilt helps create room for the trail shoulder to move without lunging outward.
Space for the arms and shoulder. Avoid standing so cramped that the shoulder has nowhere to go except toward the ball.
You do not need a complicated checklist. In golf, simple setup improvements can make the trail shoulder much easier to control.
Step 7: Improve clubface control so your golf swing stops compensating
One of the biggest hidden issues in golf is trying to fix path while ignoring face. If your clubface is too open, your body may keep creating an over-the-top motion to save the shot.
That is why some golfers work on “shallowing” for weeks and never improve. The body still does not trust the face.
To reduce that compensation pattern:
Use a grip that helps you square the face more naturally
Avoid dragging the handle forward in a way that leaves the face hanging open
Train the face and path together, not separately
If the clubface is more cooperative, your trail shoulder in golf usually has less reason to throw the club over the top.
Step 8: Use a simple golf drill to train the correct trail shoulder path
A very effective golf drill is to use a visual plane reference, such as an alignment stick set on an intended swing angle. The exact training aid matters less than the concept. You want a visible guide that helps you see whether the club is above plane, below plane, or on plane.
How to do the drill
Set up with a visual reference that represents your intended golf swing plane.
Make a backswing and begin the downswing slowly.
Pause about halfway down.
Check whether the shaft matches the intended plane more closely.
If the club is still too steep, rehearse a shallower motion.
If the club is too far underneath, feel the club work less from the inside.
Repeat without hitting a ball until the motion feels more natural.
This is one of the best ways to train the trail shoulder in golf because it gives immediate feedback. You are not relying only on feel.
Step 9: Rehearse before hitting golf balls
Many golfers make the mistake of jumping straight into full-speed shots. That often brings back old patterns. A better process is to rehearse the motion first, then add a ball only after the movement starts to feel comfortable.
A useful progression
Stage 1: Slow practice swings with a pause halfway down
Stage 2: Fluid swings without a ball
Stage 3: Easy shots with plenty of room to swing on the intended plane
Stage 4: Gradually build to normal speed
This progression matters in golf because the trail shoulder is easy to manipulate artificially when you are thinking too hard. Rehearsals help turn the move into a real pattern instead of a one-swing fix.
Step 10: Start with a forgiving practice station in golf
When you first hit balls, give yourself room. If you use a plane guide or alignment stick, position the ball with enough space so you do not feel forced to avoid the station with a last-second compensation.
Starting with extra room helps you:
Make a freer downswing
Train the trail shoulder without panic
Build confidence before narrowing the station
In golf practice, starting easy often leads to faster improvement than starting strict.
Step 11: Match your golf shot shape to your delivery
Your ideal shaft delivery can vary slightly depending on the shot you want to hit.
For a straighter golf shot, the club can work very close to the intended plane.
For a draw-biased golf shot, the club may approach a bit more from the inside, but still not in an exaggerated stuck position.
The important point is that “inside” and “on plane” are not the same as “dropped way underneath.” A lot of golf instruction gets blurred at that point. A proper trail shoulder motion supports a workable path. It should not create extremes.
Step 12: Avoid the most common golf mistakes when fixing the trail shoulder
As you work on this part of your golf swing, be careful not to fall into these traps.
Mistake 1: Trying to fix path without fixing face
If the face stays too open, your body may keep throwing the club over the top.
Mistake 2: Overcorrecting by dumping the shoulder under
Shallow is good in golf. Stuck is not.
Mistake 3: Training only with full swings
Most shoulder pattern changes happen faster with pauses and rehearsals.
Mistake 4: Ignoring setup
Poor posture, poor alignment, or too little room can create a bad trail shoulder motion before the downswing even begins.
Mistake 5: Judging progress only by one shot
In golf, improvement is better measured by repeated motion and typical ball flight, not one perfect swing.
Quick golf checklist: is your trail shoulder helping or hurting?
Do you often slice or pull the ball?
Does your trail shoulder feel like it lunges toward the ball?
Does your club look steep halfway down?
Do you block shots or snap hook them after trying to shallow?
Does your trail shoulder drop dramatically while the lead shoulder lifts?
Do you practice with a visual swing plane reference?
Have you checked whether an open face is causing your path compensation?
If you answered yes to several of these, your trail shoulder is likely a major piece of your golf swing puzzle.
What good progress looks like in golf
You do not need a perfect-looking swing to improve. In golf, better trail shoulder movement usually shows up as:
Less slicing and pulling
Fewer blocks and snap hooks
More centered contact
A club delivery that looks less extreme
A straighter, more predictable starting line
If your misses become smaller and your contact gets stronger, you are moving in the right direction.
FAQ
What is the trail shoulder in golf?
The trail shoulder is the shoulder farthest from the target at address. For a right-handed golf swing, it is the right shoulder. For a left-handed golf swing, it is the left shoulder.
Can the trail shoulder cause an over-the-top golf swing?
Yes. If the trail shoulder moves out toward the ball early in the downswing, it often sends the club steeply over the top. That can lead to slices, pulls, and weak contact in golf.
Why do I block or hook the ball when trying to shallow in golf?
A common reason is dropping the trail shoulder too far underneath. That can move the club too far from the inside and leave you stuck. In golf, that pattern often produces pushes and snap hooks.
How do I know if my trail shoulder is too steep in the downswing?
Check your swing around halfway down. If the shaft is well above your intended plane and your shoulder feels like it is moving toward the ball, your downswing is likely too steep.
Should the trail shoulder drop in the golf downswing?
It can lower as part of a proper motion, but it should not dive excessively underneath. In golf, the goal is not to force the shoulder down as much as possible. The goal is to help the club deliver on a functional plane.
What is the best drill for trail shoulder control in golf?
A strong option is a slow-motion pause drill using a visual plane reference. Rehearse to the top, start down, pause halfway, and check whether the club is on a better plane. Then repeat until the motion becomes more natural.
Final takeaway for better golf
If your golf swing feels inconsistent, your trail shoulder deserves close attention. The two biggest red flags are easy to remember: moving too much out toward the ball and dropping too far underneath. One pattern tends to create slices and pulls. The other tends to create blocks and hooks.
Better golf usually comes from finding the middle ground. Train the trail shoulder so it supports a shallower, on-plane delivery. Use setup, clubface control, and slow rehearsals to make the change stick. When the trail shoulder improves, many other parts of your golf swing begin to work better too.
0 Comments