
If your golf ball striking often looks inconsistent, a common culprit is simple: your lower body is not finishing the move in time. When your knees and hips do not close the “gap” through the hitting zone, you are more likely to hit fat shots, thin shots, and anything in between.
This golf improvement approach focuses on one practical sequencing change: get the right knee to the finish line and learn how to turn and shift through impact more effectively. The result is usually more solid contact and a more repeatable path, without you having to “think” about the mechanics every swing.
Table of Contents
- Step 1: Identify the contact problem golfers create (the knee and turn gap)
- Step 2: Use the “club-under-your-armpit” position drill to feel the right move
- Step 3: Close the knee gap and get the right knee to the finish line
- Step 4: Fix the “turning too level” problem
- Step 5: Add tilt by shifting your ribs forward (not backwards)
- Step 6: Understand the “55-degree rule” for your golf swing plane
- Step 7: Practice the “drop arms to 45 degrees” drill for turning with tilt
- Step 8: Measure progress by whether you move through, not whether you “hit hard”
- Step 9: Use swing analysis or guided feedback to shorten the learning curve
- Step 10: Add a separation focus so your swing delivers better impact
- FAQ
- Quick takeaway for your golf game
Step 1: Identify the contact problem golfers create (the knee and turn gap)
Most amateurs struggle to “move through” the golf ball effectively because they either:
- Do not turn enough, so they stand up or stall.
- Try to turn, but the shoulders turn too “level,” which blocks the downswing from continuing into the hitting zone.
Instead of creating smooth rotation and pressure transfer, many swings end up in a pause or stop type of impact. That shows up as poor contact consistency and the feeling of a pause, stop, collision through the ball.
The fix is not “swing harder.” The fix is to get your body doing the correct move at the correct moment so you can turn through and strike the ball with more control.
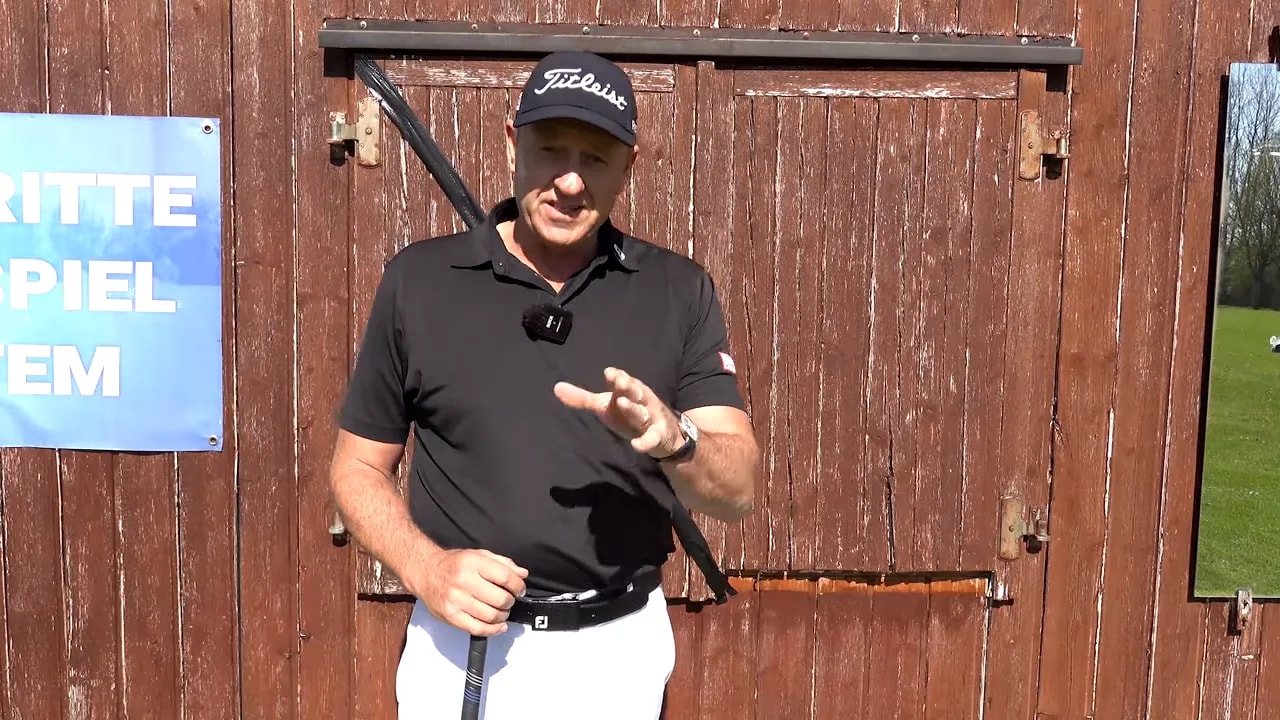
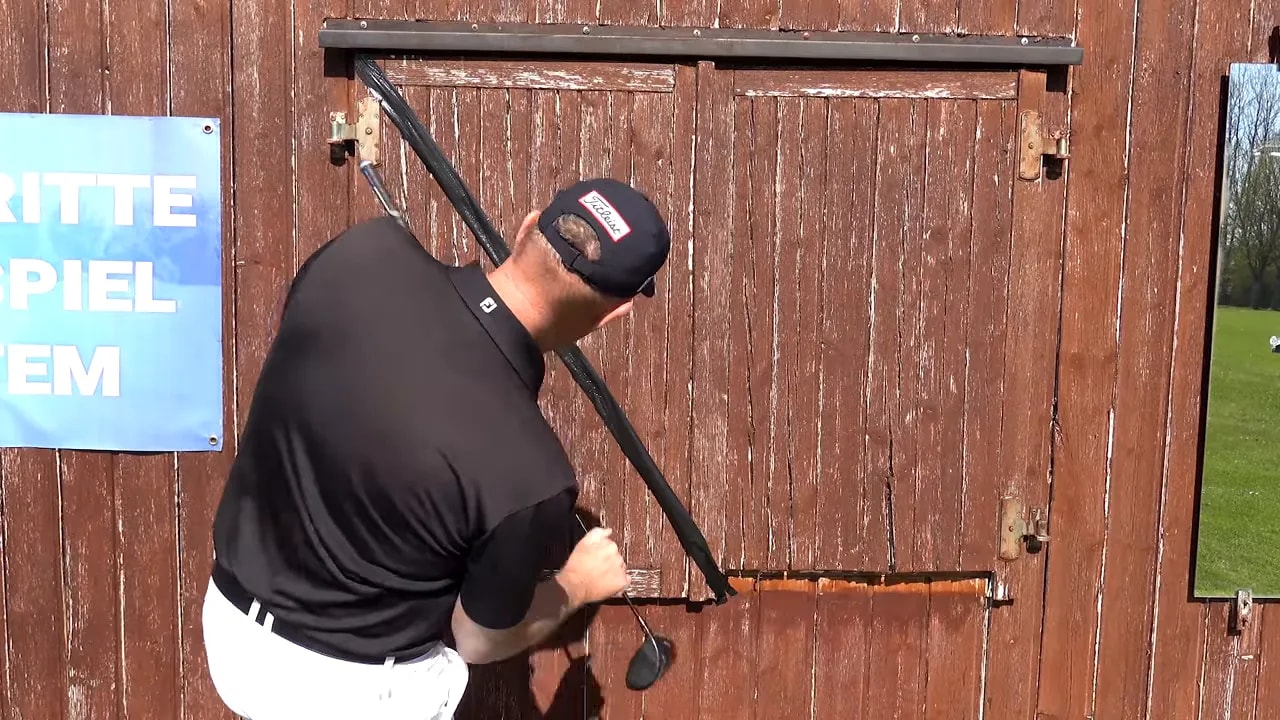
Step 2: Use the “club-under-your-armpit” position drill to feel the right move
You can practice this anywhere you have space. All you need is a golf club.
Setup
- Stand in your address position.
- Take a golf club and pop it out so it is roughly one foot length in front of you.
- Reach down as low as you can.
- Pay attention to what your body naturally does: lift and closure patterns you can feel immediately.
Key detail: where the club sits matters
Place the club position around your toe line. The goal is to avoid moving your body toward the ball in a way that causes your trail foot to land in a compromised spot.
When you find the correct club position, you should feel like you are setting up for a better release of pressure and a more usable trail-side finish. This is the foundation for moving through impact instead of colliding with it.
Step 3: Close the knee gap and get the right knee to the finish line
This drill is designed to help you close the “gap” your knees create when you do not rotate properly. The goal is simple to describe, but powerful to feel:
- Get your right knee to the finish line.
- Let that movement support rotation so the club can pass through the hitting zone without interruption.
For many golfers, the current swing fails here. You might think you are turning, but at impact your hips and body do not show the rotation needed to deliver consistent ball striking.
The practical takeaway is that your lower body sequencing supports the strike. When the right knee finishes correctly, turning through becomes more “automatic,” and you are less likely to fall into fat or thin contact.
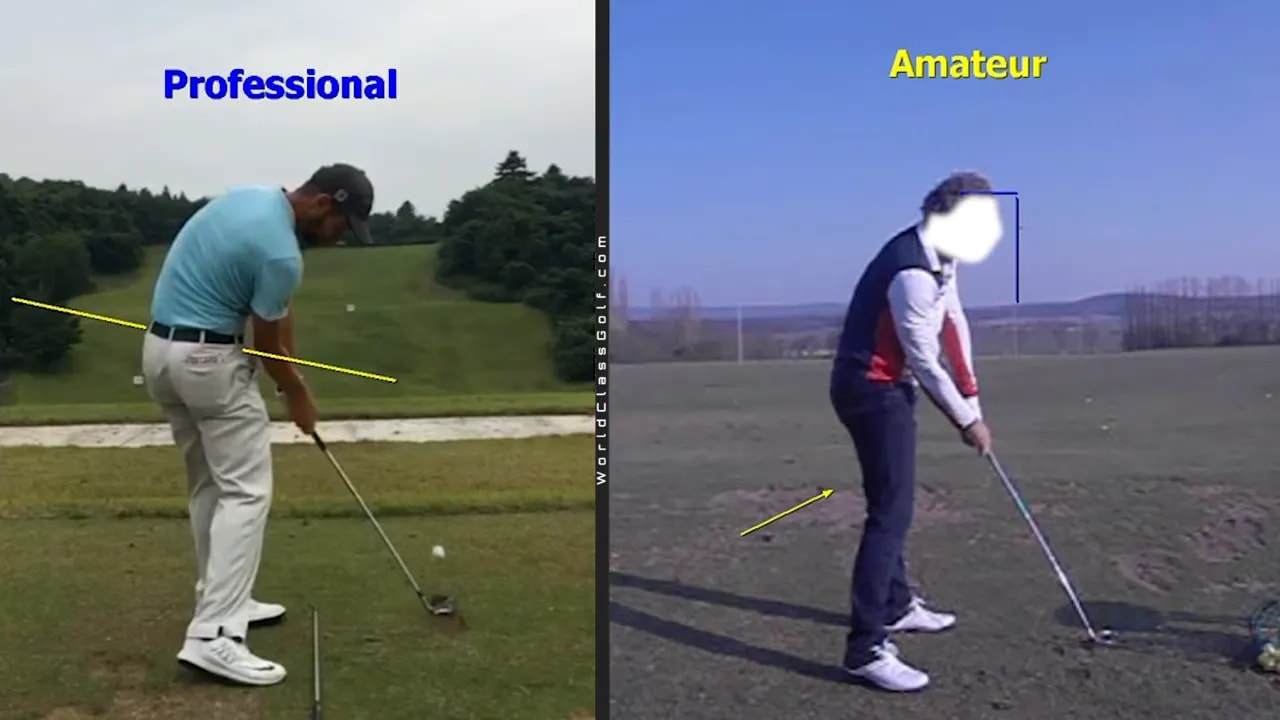
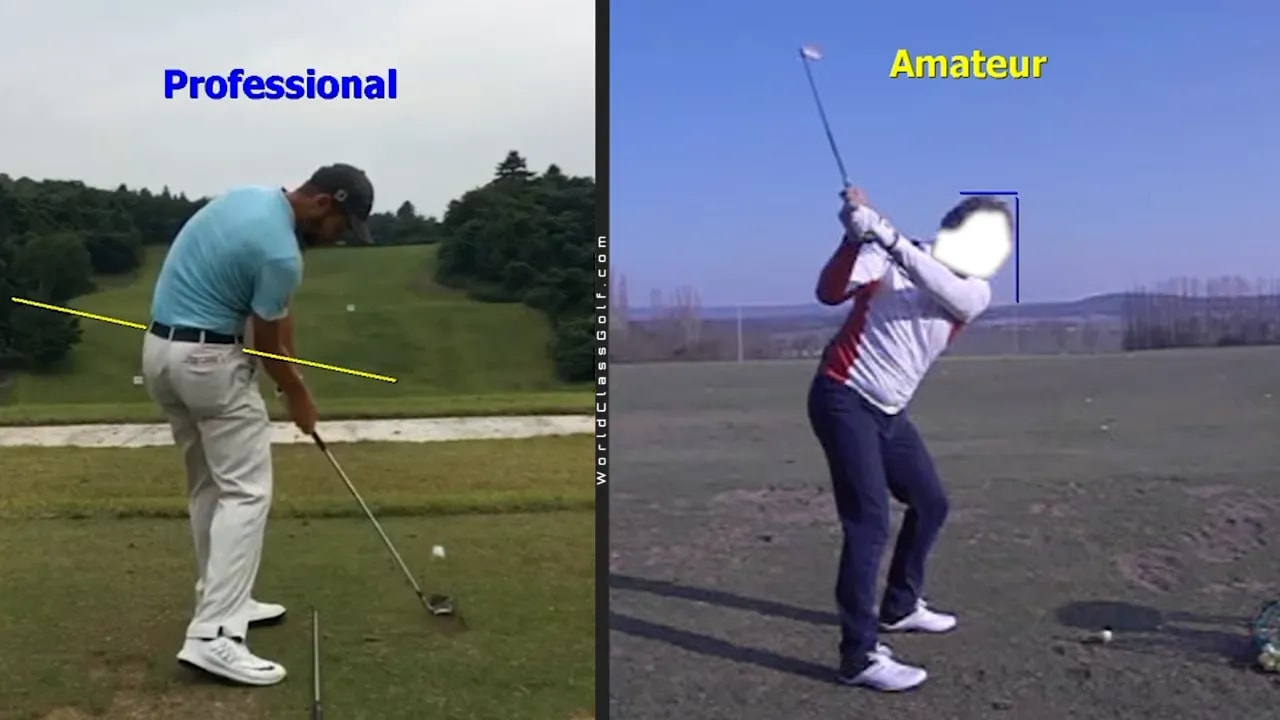
Step 4: Fix the “turning too level” problem
A frequent amateur error is turning “too level” with the shoulders. When the shoulders rotate level and the body does not close the correct knee gap, the downswing often stops or stalls at the ball.
That is why some golfers feel like they have to force the through-swing with their arms. The result is often:
- Inconsistent contact
- Less effortless power
- A steeper effort required to “catch” the ball
Instead, focus on the move that helps you turn with the right body relationships. When you use the knee finish feeling plus the correct shift, turning becomes more usable and your swing can continue moving through the hitting zone.
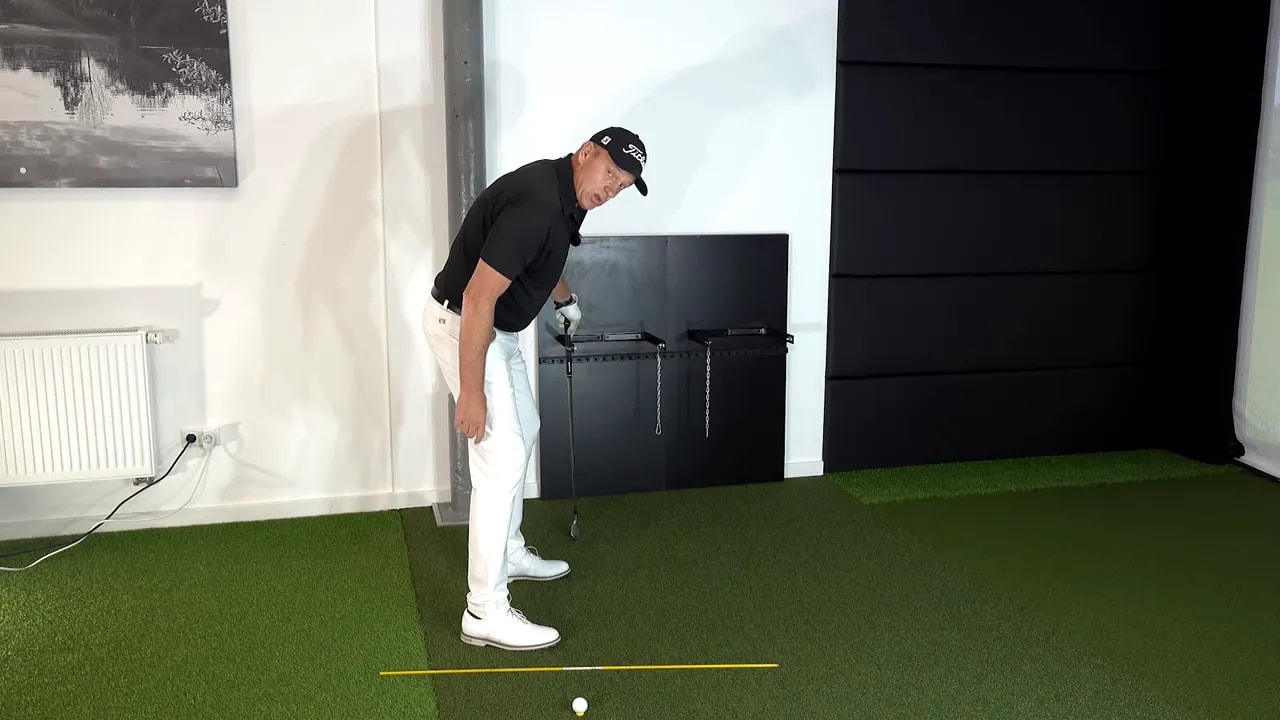
Step 5: Add tilt by shifting your ribs forward (not backwards)
Solid golf ball striking is not only rotation. It also involves how you manage your torso orientation into impact.
One visualization that helps is watching the side of your ribs. You want that side to shift forward. The goal is deliberately forward tilt.
A common mistake is going forward but letting your body tilt in the wrong direction, often by drifting backward or leaving parts of your body out of the motion.
Use this cue:
- Feel the side of your ribs shift forward.
- Make sure you keep your left side working in a way that supports the strike (not collapsing).
This forward rib tilt can help you stay in a better impact position. If your ribs stay too far back or your torso tips the wrong way, your club delivery becomes awkward and contact suffers.

Step 6: Understand the “55-degree rule” for your golf swing plane
To make this feel more concrete, the instruction uses a measurable shoulder plane concept. The idea is that the shoulder plane steepness changes through the downswing.
Here is the concept you can use to guide practice:
- Midway through the downswing, the shoulders tend to be closer to a 55-degree relationship to the ball line.
- On the way back, the shoulder plane is often closer to 40 degrees (as described in the training explanation).
You do not need to be technical on the course. But you can use this rule of thumb to understand why “level shoulder turning” can block impact. The body needs the right tilt and steering through the transition so your delivery stays on track through the hitting zone.
Practical golfer translation: when your shoulders get too level and stay that way, you are more likely to stop, stall, or collide with the ball rather than pass through it.
Step 7: Practice the “drop arms to 45 degrees” drill for turning with tilt
Now that you understand the feel, you need a drill you can repeat. This one uses a simple arm position to make your turn and tilt easier to find.
How to do it
- Set up like you would for an iron.
- Position your arms about 90 degrees relative to your body at first.
- Drop your arms down to about 45 degrees.
- Turn through slowly while keeping the rotation going.
- As you turn, line up the club and let your shoulders feel the tilt you have been aiming for.
- Move back and through to re-create the feel of turning with the correct body orientation.
What you should feel:
- Your right leg moving through as you turn helps take strain off the lower back.
- Your left chest and shoulder are “working up” as you move into the golf ball.
- Your head position tends to finish on the side rather than staying centered in a way that encourages a stall.
This drill aims to connect your turn and tilt with a smoother downswing so the club can deliver without awkward timing.
Step 8: Measure progress by whether you move through, not whether you “hit hard”
When a swing change works, you usually notice:
- Contact becomes more consistent
- Shots come out more repeatable, especially around the middle of the clubface
- Less effort is needed to generate power because your body sequencing is doing more of the work
The specific goal described in the coaching approach is to be in the better impact zone position past and present. As you get closer to that position, ball striking improves. If you are far away from it, your body delivery becomes harder to time and contact deteriorates.
That is why this “golf move” is so effective for many golfers. It addresses the mechanical relationship that creates the contact problem in the first place.
Step 9: Use swing analysis or guided feedback to shorten the learning curve
If you want faster improvements, you can add swing feedback to your practice routine.
One tool referenced is SwingUplap (mentioned as “swing slap” in the instruction). It supports the idea of measuring shoulder plane behavior and viewing end positions where head and body relationship matters.
Even without measurement tools, you can still use the same learning approach:
- Pick the two feels: right knee to finish and ribs shift forward.
- Practice short reps so your body learns the sequence.
- Track whether your contact improves (less fat and thin).
Step 10: Add a separation focus so your swing delivers better impact
Another theme in the golf instruction is improving separation from the top of the swing. Separation helps you get into a better impact position by organizing the downswing sequence between the upper and lower body.
While the exact separation program details were referenced separately, the key point you can apply now is this: if your swing collapses or the downswing feels like everything arrives at the same time, contact becomes less reliable.
When separation improves, it can “free up” your delivery so your club passes into impact more efficiently.
FAQ
Why do I hit fat shots even when I feel like I’m swinging down?
Fat shots often happen when your body does not move through the hitting zone correctly. If your knees and hips do not close the gap and your shoulders turn too level, the swing can become a pause or collision at impact, causing the club to strike the ground before the ball.
How long should I practice these drills before I expect better golf contact?
Practice in short reps and prioritize feel over volume. Since the drills focus on sequencing (right knee finish and forward rib tilt), many golfers notice improvement quickly once they can reproduce the feel reliably. The best way to confirm progress is to track whether fat and thin contact decrease during range sessions.
Do I need special equipment to do the move for my golf swing?
No. The core drills can be done with only a golf club. If you add measurement tools later, they can help confirm shoulder plane and body positions, but the starting point is simple practice and consistent feel.
What is the simplest cue if I forget everything during my swing?
Use one cue at a time. A good default is: get your right knee to the finish line. If you want a second option, pair it with shift your ribs forward. These two feelings support turning and impact delivery without forcing your arms.
What if I turn through but still miss the ball?
Turning alone is not enough if it is “too level” or if your knees do not close the gap. Focus on tilt (forward rib shift) and the ability to move through the hitting zone without stalling. The goal is fluid continuation into impact, not a stop.
Quick takeaway for your golf game
If your golf ball striking feels inconsistent, focus on the sequencing that prevents collision and enables turn through the ball. Start with the knee finish feeling, add forward rib tilt, and practice turning with the right tilt using the arm drop drill.
When your body gets into the correct relationships through the hitting zone, power becomes more effortless, and contact becomes more reliable.
0 Comments