

If your golf ball flight is inconsistent, with thin shots and unpredictable distances, you might be battling a common but often hidden issue: the tendency to pull your head back and flatten your shoulders during the swing. This guide outlines specific drills and strategies to help you transition to a more consistent and powerful golf swing that emphasizes keeping your head slightly out through impact.
Table of Contents
- Step 1: Understand the Invisible Move — Golf Body Mechanics
- Step 2: Set Your Trail Hand Checkpoint — Wrist & Face Control
- Step 3: Keep Your Head Out Through Impact — Release & Posture
- Step 4: Turn with Tilt — Spinal Safety & Efficiency
- Step 5: Practice Drills You Can Do Today
- Step 6: Train with Purpose — Measurement & Rep Planning
- Step 7: Use Data — How Close You Are to the Pros
- Common Mistakes to Avoid
- Why Keeping the Head Out Doesn’t Hurt Your Back
- Timeframe for Seeing Improvement
- Normal Lateral Shift in an Efficient Swing
- Simplest Tools to Practice These Techniques
- Can Older Players Adapt These Changes?
Step 1: Understand the Invisible Move — Golf Body Mechanics
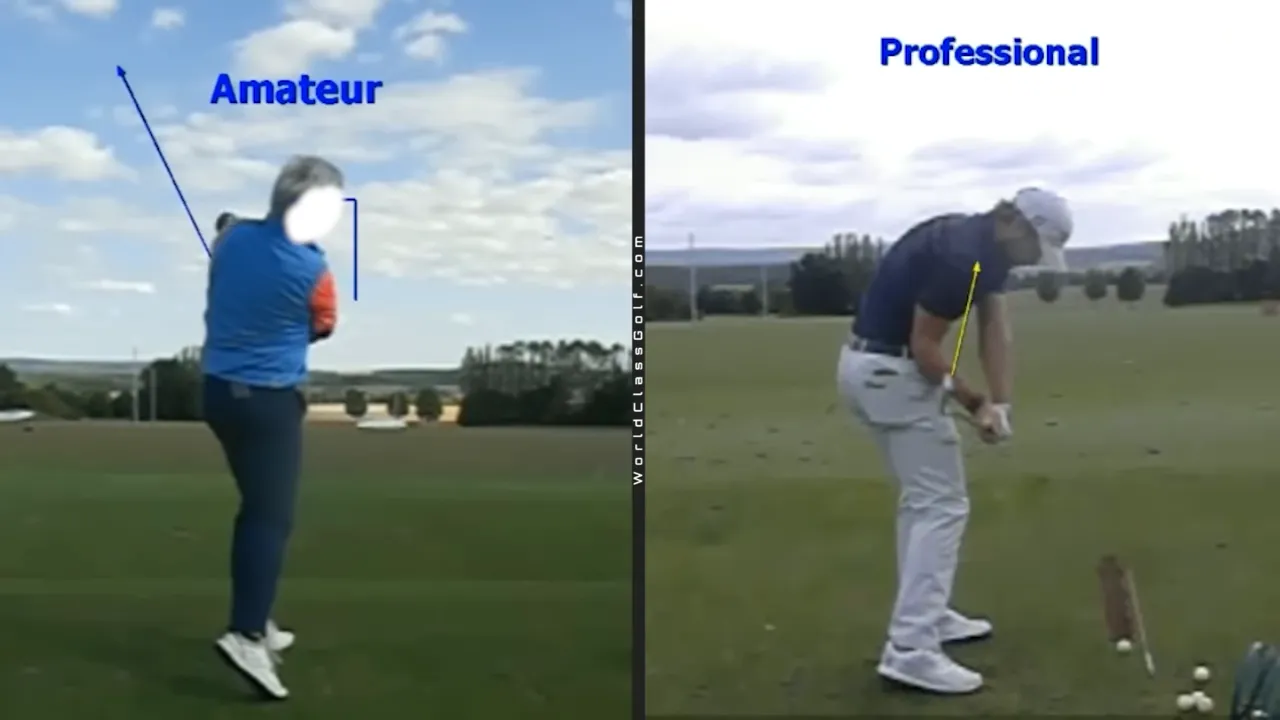
Many golfers wrongly assume that moving the head closer to the ball is a mistake. Elite ball strikers actually keep their head slightly out through impact, which steepens the shoulder plane and initiates a powerful sequence that enhances contact. Pulling the head away during the downswing flattens the shoulders, promotes leg kicking, and leads to standing-up — a pattern for inconsistency.
In essence, maintaining a head-out position ensures steeper shoulder motion, allowing for a downward and through-the-ball movement rather than an upward flinch at impact, producing cleaner strikes.

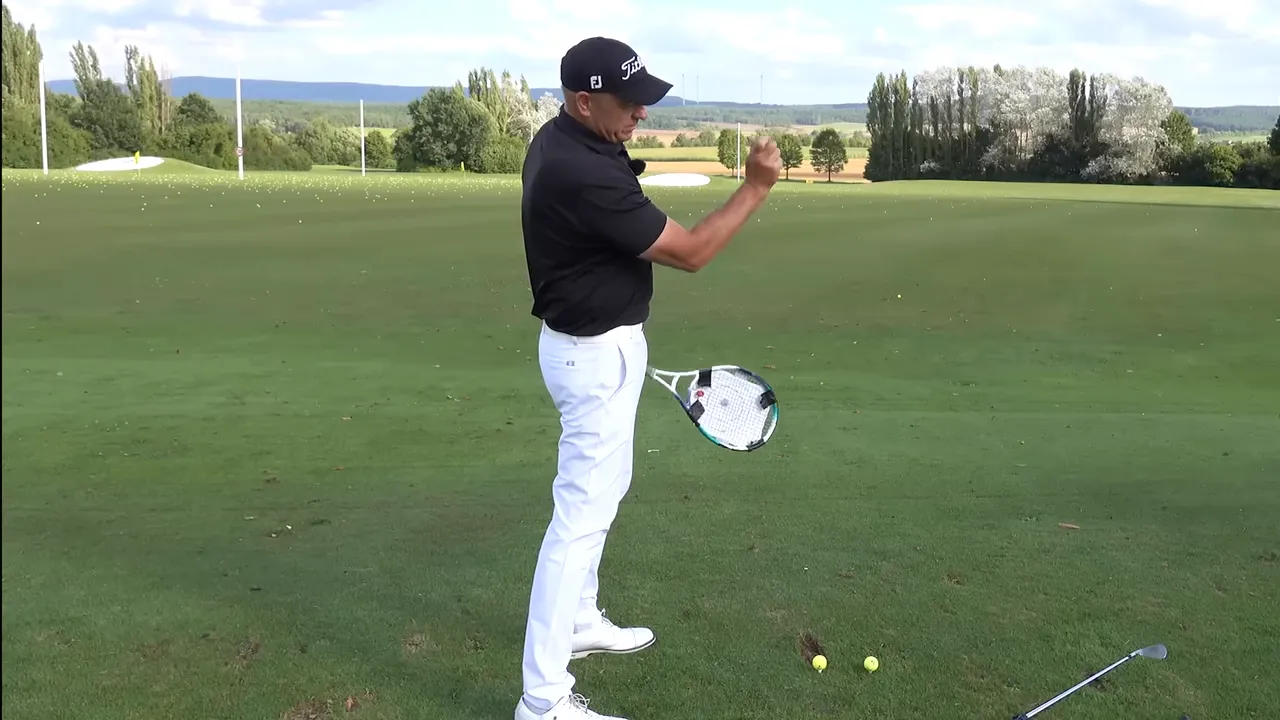
Step 2: Set Your Trail Hand Checkpoint — Wrist & Face Control
A consistent and repeatable hand position on the trail wrist is crucial for wrist and face control. Focus on achieving the ‘bullseye down, bullseye away’ feel. This specific wrist alignment reduces the need for intense club face roll through impact and ensures steady shoulder position during transition, promoting an under-release motion.
Step 3: Keep Your Head Out Through Impact — Release & Posture
Keeping the head slightly out promotes a chain reaction crucial for effective ball striking:
- Head out → shoulders remain steep
- Steeper shoulders → trail leg stays back
- Leg position held → arms swing under and through
- Under release → more consistent contact
A simple foam noodle can serve as a tactile cue to maintain consistent head position throughout practice swings, reinforcing the desired pattern.
Step 4: Turn with Tilt — Spinal Safety & Efficiency
Contrary to popular belief, more bending during impact doesn’t risk your back if you simultaneously turn. Turning combined with tilt keeps the lower back straight and distributes load more evenly, reducing stress. Aim to replicate the impressive balance young athletes demonstrate, using their natural shoulder tilt to safely improve ball flight.
Step 5: Practice Drills You Can Do Today
Implement these practical, equipment-light drills to engrain head-out and under-release techniques:
Drill A — Wall Cap Drill
- Start with a cap against the wall, left hand on the lead leg.
- As you backswing, point the trail hand away, saying ‘stop’ with the signal.
- Keep the cap against the wall through the downswing.
This will encourage the correct shoulder and hip movement needed for an under-release.
Drill B — Hanger or Ring Contact Drill
Maintain constant contact with a ring or foam tool on your forearm during swings to foster the head-out position.
Drill C — Alignment-Stick Touch
Place sticks at a 45-degree angle and focus on touching them as you swing forward to instill a forward-and-under feeling, crucial for proper lateral shifting.

Step 6: Train with Purpose — Measurement & Rep Planning
Smart practice is metric-based. Use this sequence for structured improvement:
- Maintain consistent wrist alignment throughout the swing.
- Use tactile cues to reinforce head position.
- Conduct focused drills like the wall cap and alignment-stick exercises.
- Record your swings to compare shoulder angles and shifts with elite averages.
- Track performance metrics like impact quality, striving for center strikes.
Adopt a holistic rep scheme: start with slow-motion reps focusing on feel, progress to medium speed with intent to maintain the feel, and finally move to full swings prioritizing technique.

Life’s too short to play crappy golf.
Step 7: Use Data — How Close You Are to the Pros
Elite golfers adhere to specific mechanical benchmarks that you can aim for:
- Shoulder plane at impact — around 55 degrees, slightly outside the ball direction.
- Backswing shoulder plane — roughly 40 degrees for optimal rotation.
You need not exactly replicate the pros but moving closer to these standards can noticeably enhance your game.
Common Mistakes to Avoid
Avoid these typical errors:
- Pulling the head back and causing shoulder flattening.
- Kicking the trail leg out, disrupting the chain.
- Improper wrist setup, forcing face rolls at impact.
- Rotating or tilting inadequately, causing compression or strain.
Why Keeping the Head Out Doesn’t Hurt Your Back
Timeframe for Seeing Improvement
Normal Lateral Shift in an Efficient Swing
Simplest Tools to Practice These Techniques
Can Older Players Adapt These Changes?
Final Checklist Before You Practice
- Ensure trail wrist alignment: bullseye down, bullseye away.
- Utilize a head-out tactile cue through impact.
- Prioritize turning with tilt, avoiding unwarranted bends.
- Employ alignment sticks for a forward, down, and under feel.
- Consistently record and check your shoulder plane against standard benchmarks.
By focusing on these critical checkpoints and committing to intentional, measurable practice, you’ll soon notice improved strike quality and control, enhancing your overall golf experience. Prioritize head-out placement, wrist precision, and an optimal tilt for better golfing performance.
0 Comments