
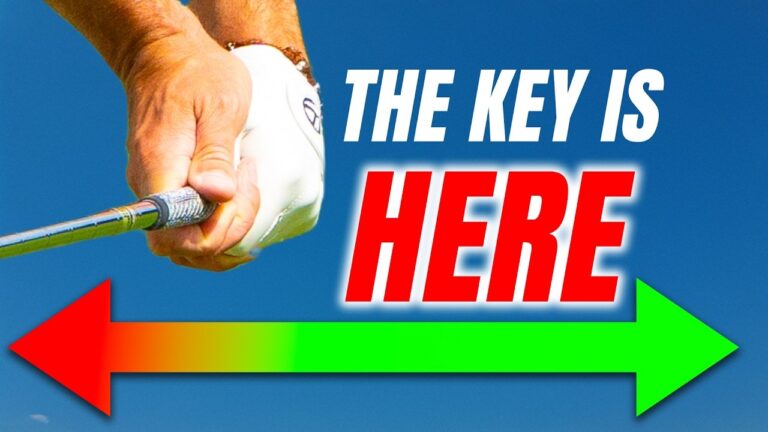

A more reliable golf strike does not always come from trying to keep the club close to your body. In fact, that instinct can create the exact problems many golfers are trying to eliminate: heel strikes, shanks, an out-to-in path, an early release, and a lack of compression.
The key is a counterintuitive move in the downswing. At delivery, when the shaft is roughly parallel to the ground on the way down, your hands should be farther away from your body than they were at address. This position helps place the club behind your hands and gives you room to bring the grip back inward through impact.
It is not a recommendation to push your hands away from you at impact. It is a practical way to organize the delivery position so you can approach the ball from the inside, create shaft lean, and strike your golf shots more solidly.
Table of Contents
- Step 1: Understand the Golf Delivery Position
- Step 2: Learn Why Your Hands Naturally Move Out in the Golf Swing
- Step 3: Stop Pulling the Hands Too Close to Your Body
- Step 4: Use an Alignment Stick to Build the Correct Golf Reference
- Step 5: Rehearse the Inward Grip Move Through Impact
- Step 6: Add Short Golf Swings Before Full Shots
- Step 7: Use the Drill to Improve Path, Compression, and Speed
- Step 8: Avoid Overdoing the Golf Drill
- Step 9: Make the Move Part of Your Regular Golf Practice
Step 1: Understand the Golf Delivery Position
Before making a swing change, define the position you are trying to improve. In this golf drill, delivery refers to the point in the downswing where the club shaft is approximately level with the ground, shortly before impact.
At address with an iron, notice where the butt end of the grip sits in relation to your toes. Now picture the club in delivery. A common amateur instinct is to try to put the grip back into the same space it occupied at address, or even closer to the body.
That is usually the wrong reference point.
A more functional delivery position has these characteristics:
- The hands and grip are farther from your body than they were at address.
- The clubhead is more inward and behind the hands.
- Your trail elbow has room to move in front of your body rather than becoming trapped at your side.
- You have space to move the grip inward and toward your lead thigh through impact.
The distinction between delivery and impact is essential. The grip should be farther out at delivery, then move up and inward as the clubhead releases toward the ball. If you try to keep the hands out through impact, you will misunderstand the drill.
Step 2: Learn Why Your Hands Naturally Move Out in the Golf Swing
This move makes more sense when you consider the geometry of the backswing. At address, your hands are positioned lower than the clubhead. As you swing the club back and begin to set the wrists and fold the arms, your hands rise to a level more comparable to the clubhead.
That elevation of the hands is a natural consequence of making a backswing. When you transition into the downswing, your hands do not need to immediately return to their original address location. They can remain farther out while the clubhead works more inward.
Think of it as a sequence:
- At setup, your hands are relatively low and closer to your body.
- During the backswing, your arms and wrists fold, raising your hands.
- At delivery, the hands are still farther out than they were at address.
- Through impact, the grip moves inward toward the lead thigh while the clubhead kicks outward into the ball.
This is why a delivery position with the hands farther away is not automatically dangerous. It does not mean you will shank the ball. When the rest of the motion works correctly, it can actually help you move the clubhead away from the heel and produce a more centered golf strike.
Step 3: Stop Pulling the Hands Too Close to Your Body
Many poor contact patterns start with an attempt to pull the grip inward too early in the downswing. While it may feel as though this makes the swing more compact or controlled, it tends to create a chain of compensations.
When your hands move closer to your body too soon, the clubhead tends to tip outward. The shaft gets thrown onto the outside of your hands, which can make the club travel out-to-in through the hitting area.
From there, several common golf faults can appear:
- Heel strikes and shanks: The club can be forced outward toward the ball, making heel contact more likely.
- An out-to-in path: With the club thrown outside early, it becomes harder to approach the ball from the inside.
- A trapped trail elbow: Your trail elbow may become blocked against your side rather than moving freely into delivery.
- Early release: Without room for the arms and hands to work, you can lose shaft lean and flip the clubhead toward the ball.
- Reduced speed: A restricted delivery makes it difficult to accelerate the club efficiently through impact.
The important lesson is simple: bringing your hands inward does not automatically bring the club inward. In many cases, it produces the opposite result. Hands inward too early sends the club outward. Hands farther out at delivery allows the club to stay inward.
Step 4: Use an Alignment Stick to Build the Correct Golf Reference
An alignment stick provides a clear visual reference for this golf drill. Place it on the ground midway between the ball position and your toes. It should run parallel to your target line.
At address, observe where the grip sits relative to the stick. Then make a slow backswing and pause in delivery. In the desired position, the grip should appear farther away from your body and more above the alignment stick than it was at setup.
Meanwhile, the clubhead should feel as though it has moved behind you, not out toward the ball. This gives you a useful relationship to remember:
- When the hands work out, the clubhead works more in.
- When the hands work in too early, the clubhead works more out.
Start without a ball. Make several slow rehearsals where you move from address to delivery and stop. Check that you are not trying to force an extreme position. The goal is a useful feel that gives your arms and club space, not an exaggerated reach toward the ball.
A mirror, a phone recording from down the target line, or a practice partner can help you confirm the position. However, the alignment stick alone provides a practical on-range checkpoint.
Step 5: Rehearse the Inward Grip Move Through Impact
The second half of the motion is what makes the drill work. Once your hands are farther away at delivery and the club is behind you, move the grip inward toward your lead thigh as you swing through.
For a right-handed golfer, the grip moves up and left through impact. This is the same basic concept often described as the hands exiting left. The handle does not continue traveling outward at the ball. Instead, it works back into your body while the clubhead extends outward to meet the ball.
Use this simple rehearsal:
- Set up to the ball with an iron.
- Make a short backswing and allow the hands to rise naturally.
- Move down slowly into delivery with the hands farther out and the clubhead behind your hands.
- Pause for a moment to recognize the available space.
- Move the grip inward toward your lead thigh as you swing through.
The feeling can be described as out at delivery, then in through impact. This action can help the clubhead accelerate outward into the ball rather than being pushed outside early.
Step 6: Add Short Golf Swings Before Full Shots
Do not begin by hitting full-speed shots. Use small swings to learn the movement and develop confidence in the new delivery position. A half swing is enough to create a meaningful change in strike.
Begin with a six iron or another mid iron. Set up normally, then make a rehearsal where you pause briefly in delivery. Feel the grip farther out, the clubhead behind you, and the trail elbow with room to move.
From there, swing through and bring the grip toward the lead thigh. Your intent is not to manipulate the face or scoop the ball into the air. Let the clubhead release naturally as the handle moves inward.
Use a gradual progression:
- Stage 1: Rehearse without a ball, moving from setup to delivery to finish.
- Stage 2: Hit short, controlled shots with a pause at delivery.
- Stage 3: Remove the pause but keep the same delivery feeling.
- Stage 4: Build toward normal-length swings while preserving the sequence.
A centered strike is the most useful feedback. You may also notice that the swing feels freer, with more space for both elbows and less need to flip the club at impact. These are positive signs that your golf swing is organizing itself more efficiently.
Step 7: Use the Drill to Improve Path, Compression, and Speed
When you create room in delivery, you give yourself a better chance to produce several desirable golf ball-striking conditions at once.
Approach the Ball More From the Inside
Keeping the clubhead behind the hands in delivery makes it easier to avoid an early outside move. As the grip moves inward through impact, the clubhead can travel outward into the ball from a more inside path.
Create More Shaft Lean
With your hands farther out at delivery, the trail elbow has more freedom. This helps prevent it from becoming trapped behind your body. In turn, you have more opportunity to deliver the handle ahead of the clubhead instead of releasing it too early.
Strike the Center of the Face More Often
Golfers who fear the shank often pull the hands inward, yet that move can send the clubhead toward the heel. A better delivery relationship can help move the clubhead inward before impact, then allow it to extend naturally into the ball.
Feel More Clubhead Speed
As the grip is pulled inward and up through the strike, the clubhead can kick outward with speed. You are not trying to force speed with your hands. You are creating the space and sequence that allow the club to release more efficiently.
Step 8: Avoid Overdoing the Golf Drill
This is a drill designed to give you a new feel. In practice, the movement may look more pronounced than it will in your normal golf swing. That is appropriate. Exaggeration can help you escape a habitual fault.
Do not try to hold the grip farther from your body at contact. The important position is delivery. By impact, the grip should be moving inward toward the lead thigh.
Also avoid treating the drill as an isolated hand action. Your arms, body rotation, and club all work together. The purpose is to organize the relationship between the hands and clubhead, not to reach for the ball or disconnect your arms from your body.
Use the following checkpoints:
- At delivery, your hands are farther out than at setup.
- At delivery, the clubhead is behind your hands rather than outside them.
- Through impact, the grip moves up and inward toward the lead thigh.
- The clubhead releases outward into the ball.
- Your contact improves without forcing the motion.
Step 9: Make the Move Part of Your Regular Golf Practice
Use this drill whenever you notice heel strikes, shanks, weak contact, an out-to-in path, or a feeling that your trail elbow is trapped. It is especially useful when your swing feels crowded through the ball.
Start each practice session with a few slow delivery rehearsals. Then hit a small number of half shots before progressing to fuller swings. The goal is to retain the sense of room at delivery and the inward movement of the grip through impact.
The lasting takeaway is straightforward: do not try to pull the hands close to your body in the downswing. Let them remain farther away in delivery so the club stays behind you. Then move the grip inward through impact. That sequence can transform how freely you move through the ball and how solidly you strike your golf shots.
Golf Delivery Position FAQ
Should my hands be farther away from my body at impact?
No. The hands should be farther away at delivery, shortly before impact. Through impact, move the grip inward and toward your lead thigh.
Can this golf drill help with shanks?
It can help if your shanks are linked to pulling the hands inward too early and forcing the clubhead outward. The drill encourages a delivery position with the club behind the hands, which can support more centered contact.
Why does bringing my hands closer make the club move outward?
When the grip is pulled inward prematurely, the shaft can tip outward and place the clubhead outside the hands. This can promote an out-to-in path and heel contact.
What club should I use for this golf practice drill?
A mid iron, such as a six iron, is a useful starting point. Begin with short swings and build toward normal shots only after the delivery position feels comfortable.
0 Comments