
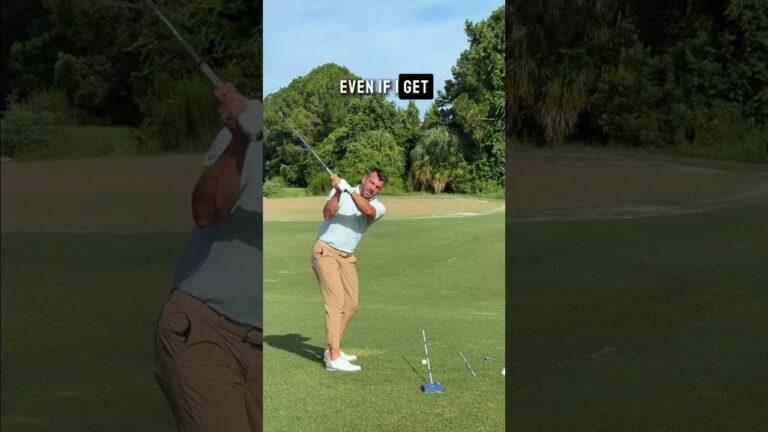

Solid golf iron shots are not created by trying to hit harder at the ball. They come from delivering the club with a stable lead wrist, a controlled clubface, and enough forward shaft lean to strike the ball before the turf. If your iron shots slice, balloon, feel thin, or lack that crisp compressed sound, your wrist conditions through the downswing may be a major reason.
This step-by-step golf guide shows how your lead wrist can help you shallow the club, square the face, and create a stronger impact position with wedges and irons.
Table of Contents
- Step 1: Understand what iron compression means in golf
- Step 2: Use a flat or slightly bowed lead wrist to shallow the golf club
- Step 3: Keep the lead wrist condition into the downswing
- Step 4: Create forward shaft lean to compress golf irons
- Step 5: Practice the lead-wrist and shaft-lean drill
- Step 6: Avoid the golf mistakes that ruin iron compression
- Step 7: Build a repeatable golf practice routine
Step 1: Understand what iron compression means in golf
In golf, compression is the sensation and result of contacting the ball with a descending clubhead and forward shaft lean. At impact, the handle is ahead of the clubhead, the lead wrist remains stable, and the ball is struck before the club brushes the ground.
For a right-handed golfer, the lead wrist is the left wrist. For a left-handed golfer, it is the right wrist. This wrist has a major influence on two things that determine iron contact:
- Clubface control: Whether the face arrives open, square, or closed.
- Shaft lean: Whether the handle leads at impact or the clubhead flips past the hands.
A stable lead wrist supports a more predictable golf swing. When the wrist loses its structure and bends excessively through impact, the clubhead can release too early. This is commonly called casting or flipping, and it removes the forward lean needed for a compressed strike.
The goal is not to force your wrists into a rigid position for the entire swing. Instead, you want a lead wrist condition that is controlled enough to keep the clubface organized while the club approaches the ball.
Step 2: Use a flat or slightly bowed lead wrist to shallow the golf club
A common problem in iron golf swings is an over-the-top downswing. When the club approaches too steeply from outside the intended swing path, the face often wants to open. The usual results are shots that start right, slice, or occasionally get pulled sharply left when you try to save the shot with extra hand rotation.
Your lead wrist position near the top of the backswing can influence whether the club naturally shallows or stays steep.
- Overly cupped or highly hinged lead wrist: Can encourage the club to work more upright and over the top.
- Flat lead wrist: Helps keep the clubface in a more manageable position.
- Slightly bowed lead wrist: Can encourage the club to lay down and approach from a shallower path.
“Bowed” means the back of your lead wrist bends slightly toward the back of your forearm. For many golfers, a flat wrist is a useful starting point. A slight bow may help if you tend to leave the clubface open and cut across the ball.
Do not confuse a slightly bowed wrist with aggressively rolling the hands. The purpose is to organize the clubface and encourage a shallower delivery, not to manufacture a hook. In a functional golf swing, the body keeps turning while the wrists preserve useful structure.
How to check your top-of-swing wrist position
Make slow practice swings without a ball. Pause near the top and look at your lead wrist. If it appears dramatically bent backward, begin by feeling it flatten slightly. If your face has been consistently open and your shots slice, experiment with a very small bow rather than a large change.
Small changes matter. You are looking for a repeatable feel that helps the club approach from the inside without needing a last-second hand action.
Step 3: Keep the lead wrist condition into the downswing
Creating a flat or slightly bowed lead wrist at the top is only part of the solution. In golf, many players lose that position early in the downswing. The wrist begins to hinge back, the clubface opens, and the player feels forced to rotate the forearms aggressively just to get the ball near the target.
Instead, keep the lead wrist relatively flat or slightly bowed as the club starts down. This supports a face that is square or only slightly closed relative to the swing path, allowing you to swing from the inside with less need for a rescue move.
The practical sequence is simple:
- Reach the top with a flat or subtly bowed lead wrist.
- Begin the downswing while preserving that wrist condition.
- Allow the club to shallow as it moves toward the ball.
- Continue turning through the strike rather than throwing the clubhead at the ball.
For golfers who slice, this is important because an inside path alone does not solve an open clubface. If the face is wide open, you may instinctively over-rotate to square it. That compensation can send the ball left or create inconsistent curves. Better golf ball striking comes from matching a controlled clubface to the path, not from timing a frantic hand release.
A simple checkpoint for better golf ball flight
During a slow-motion rehearsal, stop when your hands are about waist high on the downswing. Notice whether the lead wrist has returned to a large cup or hinge. If it has, rehearse keeping it flatter as you move through that position.
A flatter or slightly bowed lead wrist can help you retain a more stable face while the club travels from the inside. That makes a straight shot or a controlled draw more achievable without over-rotating the forearms.
Step 4: Create forward shaft lean to compress golf irons
Forward shaft lean is the impact relationship where the grip end of the club is ahead of the clubhead. It is a central feature of compressed iron golf shots because it helps position the club to strike down through the ball.
With a wedge, the forward lean can be more pronounced. The demonstrated wedge impact position uses roughly 17 degrees of forward shaft lean. With a 7-iron, the amount is less exaggerated, about 8 to 10 degrees. These figures are useful reference points, not a reason to force the handle excessively forward with every club.
Your lead wrist matters because forward shaft lean and wrist structure work together. At impact, a noticeably bowed lead wrist supports the handle-forward relationship. When that bow disappears too early, the clubhead can pass the hands, producing a casted impact with little or no shaft lean.
Use this impact checklist:
- The lead wrist remains structured rather than collapsing backward.
- The hands are ahead of the clubhead.
- The shaft leans toward the target.
- The club is moving down through the ball.
- Your body continues moving and turning through the strike.
For a right-handed player, avoid trying to scoop the ball into the air with the right hand. Iron loft is designed to launch the ball. Your job in golf is to deliver the club correctly, not to lift the ball.
Step 5: Practice the lead-wrist and shaft-lean drill
You can practice the key positions with a wedge, a ball, and alignment sticks. The setup provides visual feedback for path and impact, helping you feel whether your lead wrist is supporting a shallow, square delivery.
Set up the drill
- Place a ball on the turf.
- Set an alignment stick so it provides a visual guide above or near the target line.
- Use another stick on the ground to help establish the intended line.
- Begin with a wedge and make short, slow practice swings.
The objective is to preserve a flat or slightly bowed lead wrist as you approach impact. This helps keep the face more stable so you can swing from the inside without immediately sending the ball right.
Rehearse before hitting balls
Start with no ball. Make a backswing, pause, then slowly move into an impact pose. Check that the handle is forward and the lead wrist has not collapsed. Repeat this several times before hitting short shots.
Next, hit small wedge shots at reduced speed. Do not chase distance. Judge the strike by whether you contact the ball first and produce a controlled, penetrating flight. Once that feel becomes more reliable, move to a mid-iron and use a smaller amount of forward lean than you used with the wedge.
A productive range progression is:
- Wedge: Exaggerate the bowed wrist and forward shaft lean feeling.
- Short iron: Keep the same structure with less exaggeration.
- 7-iron: Use a balanced amount of forward lean and a stable lead wrist.
- Full swing: Retain the same impact intention without forcing positions.
Step 6: Avoid the golf mistakes that ruin iron compression
Trying to compress irons can go wrong when you focus on only one piece of the movement. Use the following mistakes as a troubleshooting guide.
Trying to shallow the club while leaving the face open
An inside-out path is not automatically a good path. If your lead wrist hinges back and opens the face on the way down, you may block the ball right or compensate with excessive rotation. Work on preserving the wrist condition, not merely dropping the club behind you.
Forcing too much bow
A slight bow can be useful, but more is not always better. An exaggerated bow may shut the face too much for your current motion. Start with a flat wrist, then add only enough bow to help you control the face and approach from a shallower path.
Using wedge shaft lean with every club
Wedges can use more forward shaft lean than a 7-iron. Do not assume every golf club needs the same impact picture. Use the wedge to learn the feeling of compression, then scale the feel down as the clubs get longer.
Flipping to make the ball rise
Flipping is often an attempt to help the ball into the air. It tends to remove shaft lean and weaken the strike. Trust the loft on the club and let the descending strike create the contact.
Over-rotating the hands to square the face
If you depend on an aggressive roll through impact, your start direction can become unreliable. Build clubface control earlier in the downswing by keeping the lead wrist flatter or slightly bowed. This gives you a better chance to square the face without a last-moment correction.
Step 7: Build a repeatable golf practice routine
Use one clear swing priority at a time. For this drill, make the lead wrist your priority from the top of the swing into impact. You do not need to think about a long list of positions during every shot.
Before each ball, use this short routine:
- Make one slow rehearsal with a flat or slightly bowed lead wrist.
- Pause briefly in an impact position with the handle forward.
- Hit a controlled shot with a wedge or short iron.
- Observe the starting direction and strike quality.
- Adjust the size of the wrist feel gradually, not dramatically.
The best sign of progress is not a single perfect shot. Look for more consistent contact, fewer high weak slices, less need to flip the hands, and a more stable ball flight. Those changes show that your golf swing is arriving at impact in a more organized position.
Takeaway: To compress irons, use your lead wrist to support three connected essentials: shallow the club, control the face, and maintain forward shaft lean. Begin with a flat wrist, add only a slight bow if needed, and rehearse the impact position with a wedge before taking the feeling into longer irons.
Step 8: Golf iron compression FAQs
Should you bow your lead wrist to compress golf irons?
A flat lead wrist is a useful starting point, and a slight bow can help some golfers shallow the club and control an open face. The amount should be modest and repeatable rather than forced.
Why do I flip my wrists when hitting golf irons?
Flipping occurs when the lead wrist loses its structure and the clubhead passes the hands too early. This reduces forward shaft lean and can lead to weak, thin, or inconsistent contact.
How much forward shaft lean should a 7-iron have?
A 7-iron impact position can use approximately 8 to 10 degrees of forward shaft lean. This is less than the more exaggerated forward lean used with a wedge.
Can a bowed lead wrist help fix a golf slice?
A slight bow may help if your clubface tends to open during the downswing. It should be paired with a controlled inside approach so you can square the face without over-rotating your hands.
0 Comments