
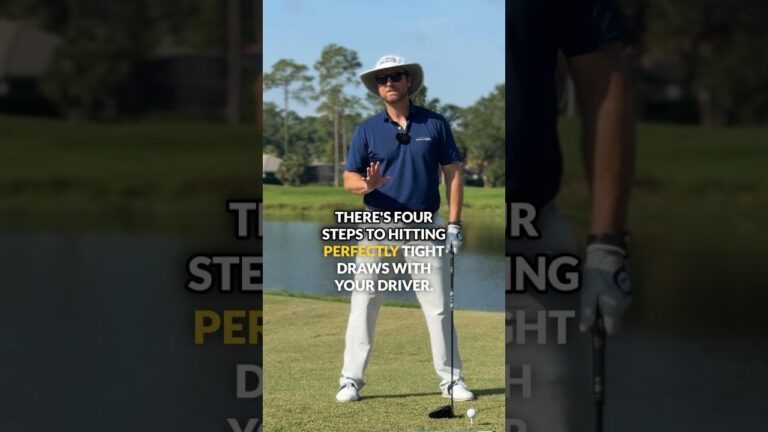
If you want to play better golf, learning how to hit a tight driver draw can help you add control, shape tee shots more reliably, and build a more repeatable swing feel. A draw with the driver is not just about curving the ball from right to left. In golf, a tight draw means a controlled shot shape that starts slightly right of target and turns back gently without becoming a hook.
This guide breaks the move into four simple golf checkpoints: where your fingertips go, where your trail elbow works, how your trail hand sits on the club, and how to use a simple swing path reference. If you struggle with slices, weak fades, or inconsistent tee shots in golf, these steps give you a clear place to start.
Table of Contents
- Step 1: Understand what a tight driver draw means in golf
- Step 2: Move your fingertips toward your right knee to create the right golf setup feel
- Step 3: Tuck your right elbow toward your right belt loop for a better golf delivery
- Step 4: Put your right hand more under the grip to support a draw in golf
- Step 5: Swing under the stick to build an inside path in golf
- Step 6: Blend all four golf checkpoints into one repeatable motion
- Step 7: Know what can go wrong when trying to draw the golf ball
- Step 8: Use ball flight to judge whether your golf draw is improving
- Step 9: Take this golf draw pattern from the range to the course
- Frequently Asked Questions About Golf Driver Draws
- Step 10: Use these golf steps as your driver draw checklist
Step 1: Understand what a tight driver draw means in golf
Before changing your swing, make sure you know what you are trying to create.
In golf, a tight driver draw is a tee shot that:
Starts close to your intended line
Curves slightly from right to left for a right-handed player
Stays controlled rather than over-rotating into a hook
Comes from an inside approach through impact
The goal is not a huge sweeping curve. The goal in golf is a compact, predictable shape you can trust under pressure.
Many golfers make the mistake of trying to “flip” the clubface shut to force a draw. That usually creates timing problems. A better golf approach is to improve the setup and delivery so the ball shape becomes a natural result.
Step 2: Move your fingertips toward your right knee to create the right golf setup feel
The first checkpoint is simple: let your fingertips move toward your right knee.
For a right-handed golfer, this creates a useful trail-side tilt and helps organize the body for an inside delivery. In golf, this matters because a draw pattern usually needs the club to approach from the inside rather than cutting across the ball.
This move can help you feel:
More connection to your trail side
A setup that encourages an upward, sweeping driver strike
Less tendency to lunge steeply from the top
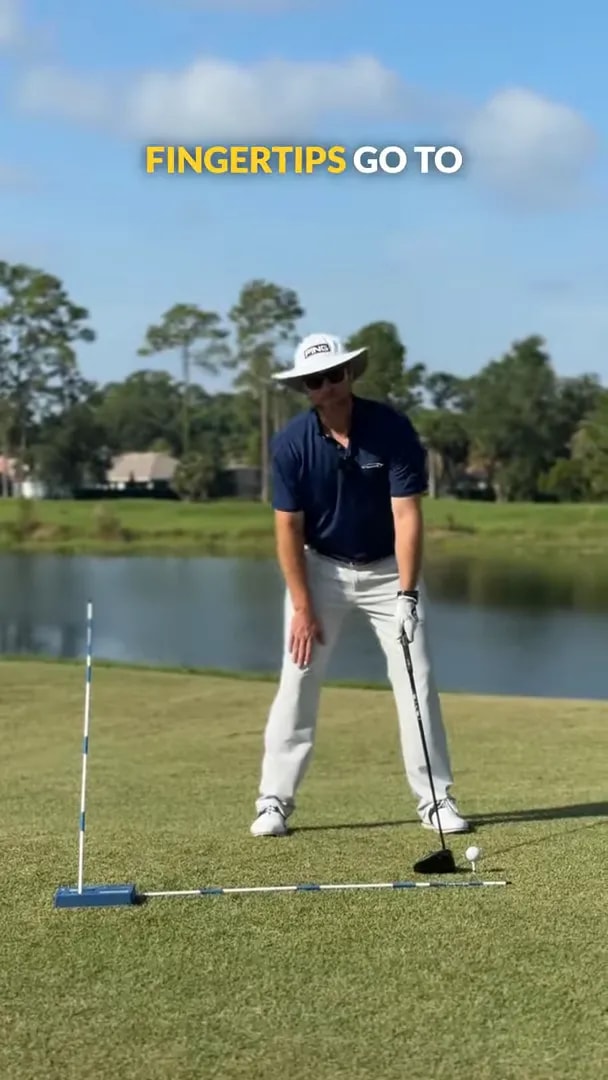
How to apply this in golf
Set up to the ball with your driver.
Allow your upper body to feel slightly tilted so your fingertips work more toward your right knee.
Keep the motion athletic, not forced.
Use this as a feel, not an exaggerated position.
If you overdo it, you may hang too far back and lose balance. In golf, the best setup feelings are usually subtle.
Common golf mistake
Do not confuse this with simply leaning your whole body away from the target. The purpose is to create a better trail-side organization, not a dramatic sway.
Step 3: Tuck your right elbow toward your right belt loop for a better golf delivery
The second checkpoint is to tuck your right elbow toward your right belt loop.
This is a useful golf cue because it helps shallow the club and keeps the trail arm from flying away from the body. When the right elbow works more efficiently in transition, the club has a better chance to approach the ball from the inside.
That matters in golf because many slices come from the exact opposite pattern:
The trail elbow gets disconnected
The club gets steep
The downswing comes over the top
The face is left open and the ball peels right
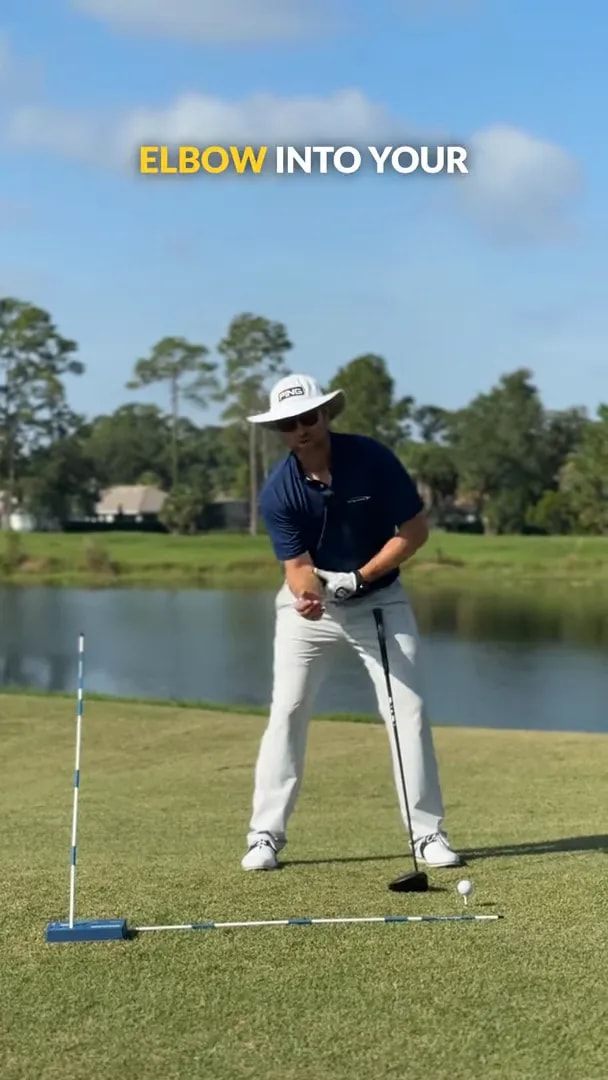
What this should feel like in golf
You are not pinning your elbow rigidly to your side. Instead, you are giving your trail arm a more compact path. In golf, that compact path often leads to better sequencing and a cleaner strike.
A good checkpoint is this: if your right elbow immediately flies out away from your ribcage, the club is more likely to get steep and cut across the ball.
Practice drill
Make slow rehearsal swings without hitting a ball.
As you start down, feel your right elbow work toward your right hip area.
Stop at delivery position and check that the club feels as if it is approaching from the inside.
Then hit soft drivers at half speed.
In golf, speed tends to hide flaws. Slowing down first helps you build the movement pattern.
Step 4: Put your right hand more under the grip to support a draw in golf
The third checkpoint is to let your right hand go under the grip.
For many golfers, this means adopting a slightly stronger trail-hand position. In practical golf terms, the right hand sits a bit more underneath the handle instead of too far on top.
This can help you:
Square or slightly close the face more naturally
Reduce the open-face look that often produces a slice
Match the inside path with a face that can produce a controlled draw
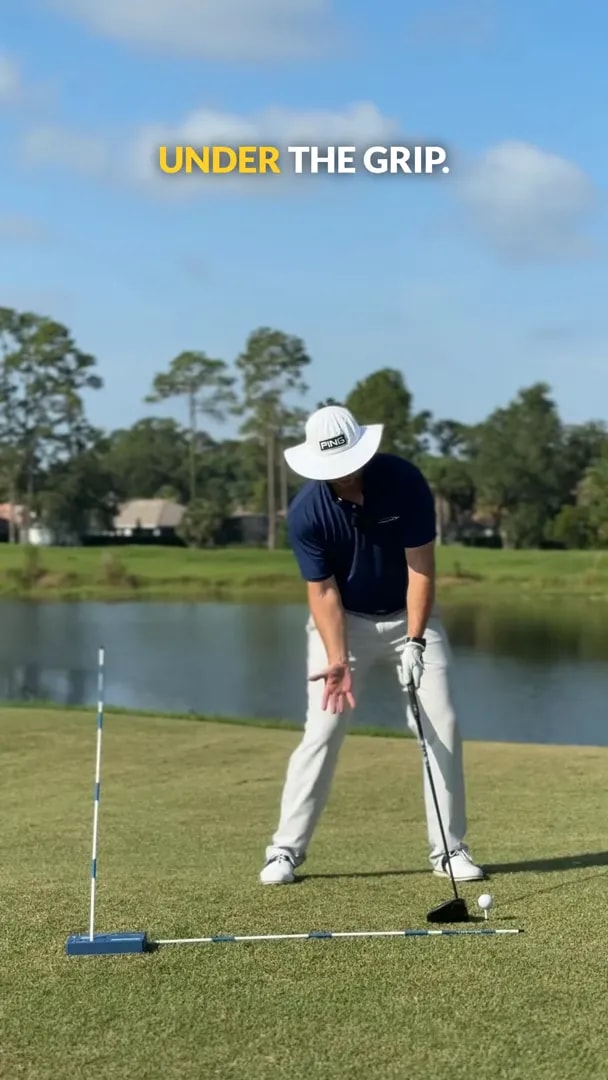
Why this matters in golf
A lot of golfers improve path but still cannot draw the ball because the clubface stays too open. Golf ball flight depends on both path and face. If your path moves from the inside but the face remains open, you may still block the shot right.
By getting the right hand more under the grip, you improve the chance of delivering a clubface that matches the draw pattern.
How far should you go?
Do not twist the hand so far under that hooks become your new miss. In golf, grip changes should be tested gradually.
Start with a small adjustment and hit a few balls. If your usual slice turns into a straighter shot or a gentle draw, you are moving in the right direction.
Step 5: Swing under the stick to build an inside path in golf
The final checkpoint is to swing under the stick.
This is the external cue that ties everything together. In golf, external cues often work better than a pile of technical thoughts. Instead of trying to control every body part at once, you give yourself one simple task: deliver the club under a reference stick so the path stays from the inside.
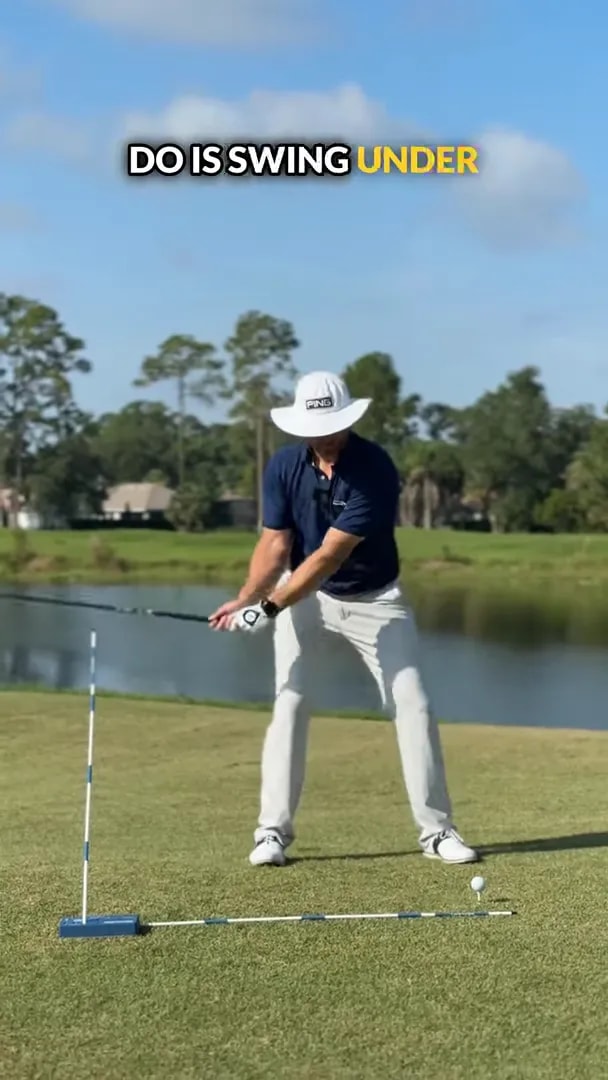
What the stick does in golf practice
The stick acts as a path barrier. If you swing over it, your downswing is likely too steep or too far outside. If you deliver the club under it, you are more likely to produce the kind of inside path associated with a draw.
This is one of the most useful golf training ideas because it gives immediate feedback.
How to use this golf drill
Set a reference stick so it represents the outside path you want to avoid.
Make slow motion rehearsal swings first.
Feel the club work under the stick on the way down.
Then hit controlled driver shots while keeping the same feel.
If you are new to this in golf, begin with practice swings only. Add the ball once you can repeat the movement without hitting the training aid.
Step 6: Blend all four golf checkpoints into one repeatable motion
The biggest mistake in golf is treating every checkpoint as an isolated move. These pieces work best together.
Your sequence is:
Fingertips toward the right knee for a better trail-side setup feel
Right elbow toward the right belt loop for a shallower, more connected delivery
Right hand under the grip for a more draw-friendly face position
Swing under the stick for an inside path through impact
In golf, these feels support each other. The setup helps the delivery. The elbow movement supports path. The grip supports face control. The stick gives you feedback.
A simple golf practice routine
Make 5 slow rehearsals with no ball.
Hit 5 drivers at 50 percent speed.
Hit 5 drivers at 75 percent speed.
Only move to full speed when the ball starts with a controlled draw pattern.
This kind of progression is useful in golf because it builds the pattern before adding speed.
Step 7: Know what can go wrong when trying to draw the golf ball
Even good golf tips can create problems if the feels are exaggerated. Here are the main errors to watch for.
Overdoing the inside path
If you swing too far from the inside in golf, the ball can start too far right and either stay there or hook hard left.
Making too strong of a grip change
If your right hand gets too far under the club, your golf miss may change from a slice to a snap hook.
Forcing the elbow inward
If you jam the trail elbow too tightly, your golf swing can lose freedom and speed. Think compact, not cramped.
Ignoring contact quality
Shot shape is only one part of golf. If contact moves all over the face, your ball flight will stay inconsistent no matter how good the path feels.
Step 8: Use ball flight to judge whether your golf draw is improving
Your golf swing feelings matter, but the ball tells the truth. Use these patterns to evaluate your progress.
Good sign
The ball starts slightly right and turns gently back
Contact feels solid
The curve stays tight rather than excessive
Block
Path may be from the inside, but the face is too open
Check the right hand position on the grip
Pull hook
Face may be too closed, or the pattern is too handsy
Reduce the amount of trail-hand adjustment
Slice
The club is likely still moving too much over the stick or too steeply from outside
Revisit the right elbow and path feel
In golf, matching your swing feel to the resulting ball flight is how lasting improvement happens.
Step 9: Take this golf draw pattern from the range to the course
Range success does not always transfer to the course. To make this useful in real golf, simplify your thoughts before each drive.
Instead of trying to remember all four details at once, pick just one cue:
“Right hand under”
“Elbow to belt loop”
“Swing under the stick” as a mental image
In golf, one clear intention usually works better than stacking multiple mechanical thoughts over the ball.
You can also rehearse the move once beside the tee, then step in and trust it. The goal is to train on the range and play with freedom on the course.
Frequently Asked Questions About Golf Driver Draws
How do you hit a draw with the driver in golf?
To hit a draw in golf, you need a club path that approaches from the inside and a clubface that is closed relative to that path but still controlled. A useful four-step pattern is moving your fingertips toward your right knee, tucking your right elbow toward your right belt loop, placing your right hand more under the grip, and swinging under a reference stick.
Why do golfers slice the driver instead of drawing it?
In golf, a slice often comes from an outside-to-inside path and an open clubface. A steep downswing, disconnected trail elbow, or weak trail-hand position can all contribute to that pattern.
Does a stronger right-hand grip help in golf?
For many players, yes. In golf, placing the right hand slightly more under the grip can help the clubface square up more easily and support a draw. The key is moderation. Too much can lead to hooks.
What does swinging under the stick mean in golf?
It means using a stick or training aid as a visual path barrier so the club approaches from the inside instead of coming over the top. It is a simple golf drill for training a draw-friendly downswing path.
Can beginner golfers use these draw tips?
Yes, but beginner golf practice should stay slow and controlled. Start with rehearsal swings and small grip or path changes. Build the feel first, then add speed after contact and direction improve.
Step 10: Use these golf steps as your driver draw checklist
If you want a simple golf checklist to remember, use this:
Setup: fingertips toward the right knee
Transition: right elbow toward the right belt loop
Grip: right hand more under the club
Path: swing under the stick
That is a compact framework for producing tighter driver draws in golf. Keep the feels small, practice them in order, and judge success by your ball flight rather than by how dramatic the motion looks.
When used correctly, these four golf steps can help turn weak, glancing driver shots into stronger, more controlled tee balls with a reliable draw shape.
0 Comments