
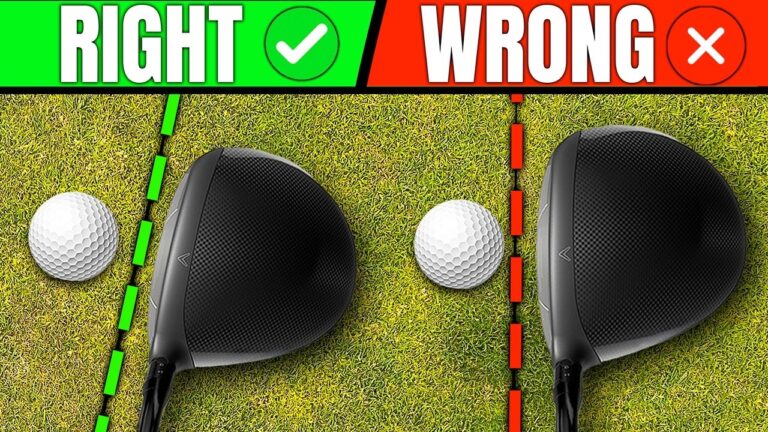

If you struggle with a driver slice, setting the clubface open behind the ball probably sounds like the last thing you should try. You already send the ball curving away from the fairway. Why give the face an even bigger head start in the wrong direction?
The answer is that your setup can be a training tool, not just a starting position. An open clubface drill gives you a specific task: learn to square the face through impact rather than carry an open face into the ball.
That change in intention can encourage your hands and arms to work more freely, reduce the urge to lunge with your body and potentially unlock extra driver distance. The aim is not to make an exaggerated setup your permanent solution. It is to discover a movement you may struggle to find when you keep trying the same correction.
Table of Contents
- Step 1: Understand Why Closing the Face May Not Fix Your Slice
- Step 2: Set Up the Open Clubface Drill
- Step 3: Let Your Hands and Arms Find a Different Release
- Step 4: Notice Whether You Stop Lunging for Power
- Step 5: Give Your Hands and Arms an Active Role
- Step 6: Use the Feet-Together Drill to Train Balance
- Step 7: Use the Club’s Sound to Explore Speed
- Step 8: Bring the Drills Together Without Adding Complexity
Step 1: Understand Why Closing the Face May Not Fix Your Slice
Before changing your address position, understand the pattern you are trying to interrupt. In the slicing pattern addressed here, you deliver an open clubface while cutting across the ball. Simply pointing the face farther left at address does not necessarily change what happens during the swing.
You can begin with a closed face and still make compensations that leave it open through impact. Your starting position and your delivery are not the same thing.
This was the difficulty behind a lesson with Paul, a golfer whose main goal was to find the fairway with his driver. He had been trying to counter his slice by closing the clubface, but the problem remained.
The coaching hypothesis was that his body was responding to that closed starting position by working in the opposite direction. Rather than allowing the face to square naturally, he continued making the movements associated with his slice.
Your first checkpoint is simple: are you changing how the club moves through the ball, or merely changing how it looks before you swing?
If your usual correction has become a frustrating routine without changing the ball flight, a deliberately different task may help you explore a different response.
Step 2: Set Up the Open Clubface Drill
The open clubface drill reverses the familiar correction. Instead of closing the face to fight your slice, you deliberately open it and then give yourself the job of squaring it through impact.
The demonstrated setup uses a clubface approximately 45 degrees open, pointing to the right for the right-handed swing shown. This is a substantial exaggeration, not a small adjustment you could easily overlook.
- Set up to a teed ball with your driver.
- Place the club behind the ball with the face approximately 45 degrees open.
- Recognize that leaving the face in that orientation will not achieve the shot you want.
- Give yourself one task: find a way to square the face as the club moves through impact.
- Make your swing with that task in mind rather than adding a list of wrist, arm and body instructions.
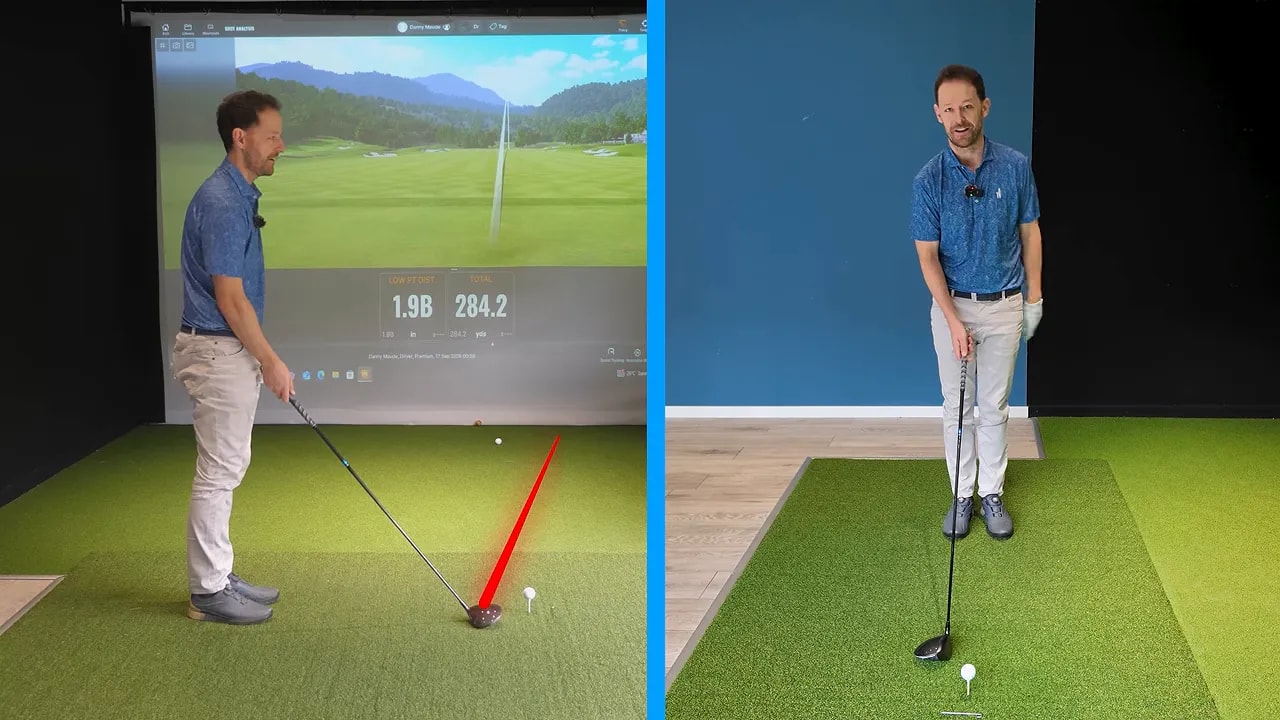
The important distinction is between starting open and staying open. You are not practicing how to hit a driver with the face pointing right at impact. You are creating a starting condition that encourages you to learn the opposite movement.
This is why the drill can feel so strange. You are making the apparent problem bigger at address to encourage a different solution during the swing.
Keep your attention on the task. If you turn the exercise into several separate mechanical corrections, you lose the simplicity that made it useful in the first place.
Step 3: Let Your Hands and Arms Find a Different Release
With the face wide open, you have a clear reason to change how you deliver the club. In Paul’s case, his hands and arms began working differently without detailed instructions about precisely how to move them.
Rather than continuing his familiar opening and cutting-across pattern, he found a way to bring the clubface back around through the impact area. The task encouraged the movement.
This is the central learning principle behind the exercise: create a problem that invites the response you want. You do not always need to consciously organize every moving part.
Your useful sensation may be that the club releases more freely or that your hands and arms finally have permission to participate. The goal is to recognize that difference, not force yourself into a collection of positions.
Treat an early hook as information
Paul’s first response was not a perfectly straight drive. His slice initially became a hook. After a few more balls, that stronger curve settled into a smaller draw, and he began finding the fairway more consistently.
If your familiar slice changes into a hook during this exercise, you have at least produced a different result. You may be overdoing the new response, but you are no longer repeating exactly the same pattern.
That does not make a hook the finished goal. You still want a manageable ball flight. It simply means you should distinguish between discovering the opposite movement and learning to control how much of it you use.
Paul also described feeling more relaxed and confident at setup. That matters because the exercise replaced an anxious attempt to prevent a slice with a clear task he could respond to.
Step 4: Notice Whether You Stop Lunging for Power
The unexpected benefit was not just a change in direction. Paul also appeared to gain distance, despite working on accuracy rather than trying to hit harder.
The estimated improvement was around 20 to 30 yards or more, but it was not measured. Treat that as an observation from one lesson, not a promised distance gain.
The more useful takeaway is the movement change noticed alongside it: Paul’s forward body lunge disappeared during the drill.
If you struggle for distance, you may recognize the feeling of heaving your body toward the target to help the ball along. That effort can become your main intention, leaving your hands and arms feeling passive or restricted.
With the face starting so far open, Paul appeared to respond by using his hands and arms to square it. He no longer relied on the same forward heave.
You can use this as another checkpoint during practice:
- Do you feel yourself throwing your whole body toward the target?
- Are your arms swinging the club, or do they feel dragged along?
- Does the new task let the club move more freely through the ball?
- Can you produce a different flight without adding more physical effort?
You do not need to manufacture a distance increase. First establish whether you can change the delivery and reduce the sense of working too hard.
Step 5: Give Your Hands and Arms an Active Role
The speed emphasis in this lesson is deliberately directed toward your hands and arms. If you have spent years trying to remove them from your swing, that may be a valuable change of focus.
The demonstrations include drives of approximately 270 yards and 267 yards with intentionally limited footwork and an emphasis on swinging the hands and arms. Those shots illustrate the coaching point: substantial distance does not have to feel like a full-body heave.
For your practice, think of your hands and arms as actively swinging and releasing the club while your body supports the action.
Support does not mean inactivity. Your body still works to stabilize you, resist unwanted movement and help you control direction. You are changing the emphasis, not trying to turn your torso into a statue.
This distinction also helps you make sense of advice about using less hand action. If you already have a fast, active release, a body-focused cue may help balance it. If you have suppressed that release, copying the same cue may not address your problem.
Your immediate task is to feel the club move with freedom. Once you have that sensation, you can work on supporting it more effectively rather than smothering it with extra body effort.
Step 6: Use the Feet-Together Drill to Train Balance
You do not have to be a slicer to benefit from learning a freer arm swing. The feet-together drill gives you another way to explore that feeling without relying on an exaggerated clubface position.
By narrowing your base, you make excessive body movement easier to notice. If you lunge or throw yourself around, keeping your balance becomes much harder.
- Stand with your feet together.
- Make practice swings while allowing your hands and arms to swing the club.
- Notice whether you can remain balanced throughout the motion.
- Recognize any urge to create speed by heaving your body.
- When you hit a ball with the drill, retain the same balanced swinging sensation.
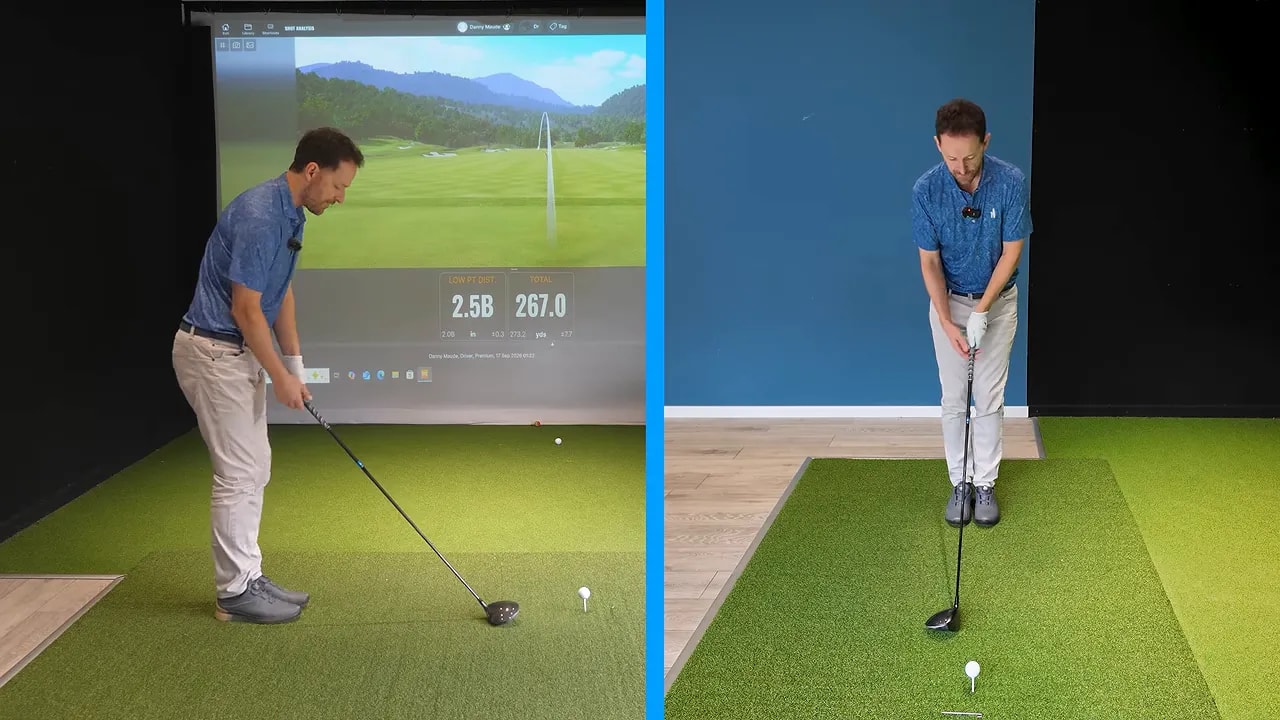
Your body will still be working. In fact, you may feel it stabilizing and resisting the motion of the club. That is consistent with the purpose of the exercise.
The distinction you are learning is between supporting a fast swing and trying to force speed through excessive movement.
Use balance as feedback rather than treating it as a separate technical position. If you repeatedly lose it, you have a clear sign that the movement is not yet controlled.
The demonstrated feet-together shot also shows that a narrower stance does not automatically prevent a useful drive. Your priority, however, is the sensation and control, not matching a demonstration’s yardage.
Step 7: Use the Club’s Sound to Explore Speed
Another exercise shifts your attention away from the ball entirely. Turn the club upside down and make practice swings, listening to the sound as it moves through the air.
Your task is to create a whipping or swishing sound with your hands and arms rather than trying to generate it through a large body heave.
The demonstrated variation places one foot behind the other, creating a staggered stance that discourages excessive turning. That constraint helps you explore the arm action more clearly.
- Turn the club upside down for practice swings without a ball.
- Place one foot behind the other in a staggered stance.
- Swing using both hands and listen to the club moving through the air.
- Explore the feeling of your hands and arms creating the whip.
- Keep the action free rather than turning it into an effort to swing as hard as possible.
You can think of the sensation as a whip or a catapult. Both descriptions point toward a club that accelerates freely, rather than a motion dominated by pushing your body toward the target.
The sound gives you an immediate point of focus. You are learning what freer speed feels like without also trying to judge contact and ball flight on every repetition.
Step 8: Bring the Drills Together Without Adding Complexity
Your next practice session should have a clear purpose. If your main problem is a driver slice, start with the open clubface drill. If you mainly struggle to feel speed or balance, the feet-together and upside-down club exercises offer different entry points.
Keep each exercise connected to its intended lesson:
- Open clubface drill: learn to square the face through impact instead of repeating your familiar slice delivery.
- Feet-together drill: feel your arms swing while your body maintains balance.
- Upside-down club drill: explore the sound and sensation of a freer, faster release.
Avoid turning all three into simultaneous swing thoughts. Paul’s improvement came from a simple task, not from trying to consciously rebuild every part of his motion.
Judge your progress by more than one impressive shot. Notice whether your curve changes, whether your balance improves and whether the swing feels less forced. If you produce a hook, recognize the new response while continuing to seek a more controlled flight.
For additional structure, you can use the open clubface drill practice plan. If you need help checking whether your movement is changing, the Swing Coach app offers swing analysis and drills based on identified movement patterns. The described offer includes a 14-day free trial, with availability on iPhone.
As your release becomes freer, your next priority is to let your body support that speed and help you control direction. Do not confuse reducing a lunge with removing your body from the swing.
The lasting lesson is not that a square clubface is wrong. It is that an exaggerated starting position can help you discover a delivery that a conventional correction has failed to produce. Give yourself a clear task, use the result as feedback and learn how to square the face without feeling that you must work harder.
0 Comments