
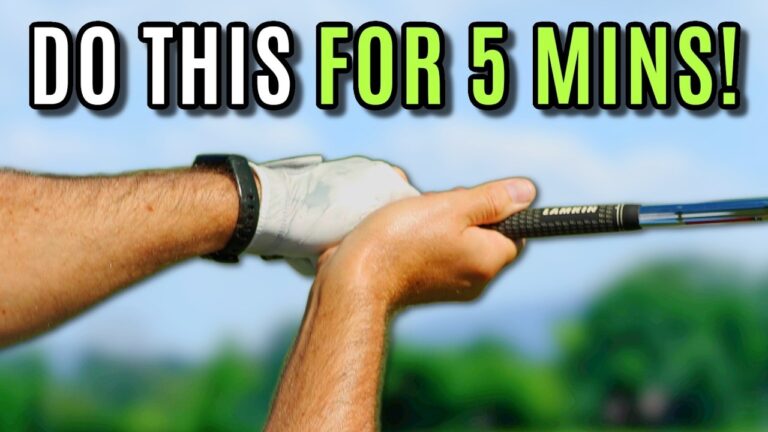

If your iron shots feel weak, float high, or curve away from the target, your first instinct might be to fix your downswing. But your struggle to create PGA wrist motion can begin much earlier, with wrist angles that leave the clubface open.
Once the face is open, you may compensate by throwing the clubhead past your hands or swinging over the top. Those moves can help you get the face back toward the target, but they also make solid contact and forward shaft lean harder to achieve.
The solution is not simply to hold your wrist angles longer. You need to organize the clubface early, preserve that control as you change direction, and then release the club appropriately. Start with a nine iron and build the motion in manageable pieces.
Table of Contents
- Step 1: Understand What PGA Wrist Motion Does to the Clubface
- Step 2: Set Up the Finish Line Drill
- Step 3: Begin PGA Wrist Motion With a Slightly Down Takeaway
- Step 4: Bend the Trail Wrist More as You Complete the Backswing
- Step 5: Preserve the Same Wrist Feel in Transition if Needed
- Step 6: Interpret a Pull Draw Before Abandoning the Drill
- Step 7: Deliver the Club With Shaft Lean, Then Release It
- Step 8: Match PGA Wrist Motion to Your Golf Grip
- Step 9: Adjust Shaft Lean for Your Speed and Club
Step 1: Understand What PGA Wrist Motion Does to the Clubface
Your glove logo and trail palm give you two useful reference points for understanding wrist motion. For a right-handed golfer, these are the logo on your left glove and the palm of your right hand.
In this drill, feeling those reference points turn slightly down toward the ground or away from you helps close the clubface and reduce loft. Feeling them turn upward or back toward you does the opposite, encouraging an open face and added loft.
Dynamic loft is the loft you deliver at impact, rather than simply the loft stamped on your club. Your wrist angles and shaft position influence how much loft reaches the ball.
When you organize the face earlier, you give yourself a better opportunity to:
- Deliver the club from slightly inside the target line.
- Arrive with your hands slightly ahead of the clubhead.
- Produce solid contact with a more controlled iron flight.
If you leave the face open, pushing your hands forward is not a complete solution. You still need to square the face, which is why an early release often persists despite your best efforts to eliminate it.
Think of face control as the preparation that makes a better delivery possible. Before forcing a tour-style impact position, give yourself a clubface that can work with it.
Step 2: Set Up the Finish Line Drill
Place an alignment rod or spare club on the ground in line with the ball, extending toward your stance while leaving room to swing. This creates a visual reference for the ball’s position, your imaginary finish line.
Your goal with the nine iron is straightforward: your hands reach the target side of that line before the clubhead reaches the ball. That produces forward shaft lean.
Adam Scott’s iron impact provides a useful reference. His hands sit slightly forward of the clubhead, around the inside of his lead thigh. You are looking for that general relationship, not trying to copy an exact amount of lean.
Rehearse the position slowly before hitting:
- Take your normal nine-iron setup.
- Make a short backswing.
- Move toward impact with your hands slightly ahead of the clubhead.
- Continue through rather than stopping at the ball.
The finish line gives your practice a clear purpose. However, it only works well when you combine it with the clubface control developed in the next steps.
Step 3: Begin PGA Wrist Motion With a Slightly Down Takeaway
Start small. During the takeaway, bend your trail wrist back a little. You do not need to crank it into its maximum bend immediately.
As you do this, feel your glove logo, trail palm, and clubface turn slightly down. The word “slightly” matters. Your goal is not to point the face dramatically at the turf.
At address, your trail wrist may be relatively straight and your lead wrist slightly cupped, depending on your grip. During this first movement, you are making a modest adjustment that prevents the face from rolling open.
From that short takeaway, swing through and feel your hands cross the finish line before the clubhead. Allow the club to release afterward.
Use three checks to assess your shots:
- Contact: The strike should feel solid, with the ball coming firmly off the face.
- Height: Your nine-iron flight should be somewhat lower than normal.
- Direction: The ball should fly reasonably straight as you coordinate the motion.
Spend time here before making a longer swing. In the student example behind this drill, roughly 15 minutes went into this short motion alone. If you cannot control the face at this length, adding more backswing gives you more movement to manage.
Your first practice cue is simple: slightly down, then hands ahead.
Step 4: Bend the Trail Wrist More as You Complete the Backswing
If your takeaway improves but your ball flight still does not, check what happens between the takeaway and the top.
This is where your trail wrist progresses from slightly bent back to considerably more bent back. As you add that bend, feel your trail palm and glove logo point away from you, rather than turning back toward you.
The feel has an angled, twisting quality. You are not simply lifting your arms or adding wrist bend without regard to the face. You are using the motion to keep the clubface from opening as the backswing continues.
Build the sequence slowly:
- Move into your takeaway with the clubface slightly down.
- Add more backward bend to your trail wrist as you continue upward.
- Feel your trail palm or glove logo turn away from you.
- Return through the ball with your hands slightly ahead.
You can focus on your trail palm, your glove logo, or the clubface itself. Choose whichever gives you the clearest sense of control. You do not need three separate thoughts for one movement.
If the takeaway and backswing changes produce solid, straight shots, stay with them. You do not need to add another correction just because another correction exists.
Step 5: Preserve the Same Wrist Feel in Transition if Needed
You might get the face organized going back, only to undo that work as you start down. If your glove logo and trail palm turn toward you in transition, you can reopen the face and return to a steep delivery with an early release.
If that describes your pattern, extend the same “away” feel into the initial downswing.
Keep your trail wrist bent back and feel your trail palm remain pointed away from you as your hands lower. Alternatively, feel your glove logo stay away. Maintain that intention toward delivery, approximately until the shaft reaches parallel to the ground.
This is an additional feel for a specific problem, not a requirement to consciously manipulate every stage of your swing. If the earlier changes already work, you can leave transition alone.
Your developing sequence is now:
- Takeaway: Slightly down.
- Backswing: Away.
- Transition: Away, if you need it.
Keep using short, controlled shots to judge the result. Your goal is improved contact and flight, not the strongest possible sensation in your wrists.
Step 6: Interpret a Pull Draw Before Abandoning the Drill
For a right-handed golfer, an early sign of progress can be a shot that starts left and curves farther left. If that pull draw also feels noticeably more solid, it may mean your face control has improved while your old delivery remains.
Previously, you may have needed an early release and an outside-to-in swing to compensate for an open face. Now you have a more closed face, but you are still using the same compensations.
A better-organized clubface combined with your old release can send the ball left. That does not automatically mean you should return to opening the face.
Instead, check whether you are still:
- Throwing the clubhead past your hands too early.
- Delivering the club too far from outside the target line.
- Failing to get the handle slightly forward at impact.
Keep the earlier face-control work while rehearsing a slightly more inside approach and appropriate forward shaft lean. In this pattern, that can help move your starting direction farther right.
A pull draw is feedback, not the finished goal. Judge it alongside strike quality and your delivery, rather than treating any left shot as proof that the wrist motion is wrong.
Step 7: Deliver the Club With Shaft Lean, Then Release It
As you approach impact, return to the same general “slightly down” feel you used in the takeaway. Your trail wrist remains bent back, while your glove logo feels slightly down toward the ground.
The complete rehearsal cue becomes down, away, away, down.
This sequence prepares the face so you can approach from slightly inside with your hands ahead. But it does not mean freezing your wrists through the strike.
Your trail wrist should gradually straighten as the club moves through impact and into the follow-through. Using Adam Scott as a reference, the release is complete around 45 degrees past impact, roughly two to three feet beyond the ball, rather than directly at it.
Think of the progression as loaded, gradually releasing, then straightened. Your hands remain slightly ahead at impact while the release is already developing.
If you release too early
You may need an exaggerated feel of releasing less and later. Place an impact bag in line with your lead toes and rehearse getting the grip to that forward reference before the clubhead. Keep your body turning normally rather than trying to move only your hands.
This is a corrective exaggeration. You are using a stronger feel to move an early release toward neutral, not trying to reproduce an extreme handle-forward position in every shot.
If you drag the handle too much
Use the opposite intention. Feel the clubhead catch up so the grip and clubhead arrive at the ball together. This feel applies when you already create excessive shaft lean, not when you flip the club early.
The right release cue depends on your starting point. Ball striking tells you whether the feel is helping.
Step 8: Match PGA Wrist Motion to Your Golf Grip
Your golf grip changes how much face-closing wrist motion you need. That is why copying another golfer’s wrist appearance without considering your own grip can be misleading.
With a stronger grip, your hands are turned farther clockwise around the handle from a right-handed player’s perspective. You may show a cupped lead wrist even with a square clubface at address.
A stronger grip generally needs less of the down-and-away movement to square the face.
With a weaker grip, your hands are turned farther counterclockwise. You generally need more of these face-closing movements. Players such as Jon Rahm and Collin Morikawa illustrate how a weaker grip can work with a more bowed lead wrist.
Your objective is not a particular-looking wrist position in isolation. It is a clubface that lets you deliver the club effectively.
If your grip is strong, be especially careful about overdoing the drill. If it is weak, the necessary change may feel more substantial. In either case, use contact, starting direction, and curvature to guide the amount.
Step 9: Adjust Shaft Lean for Your Speed and Club
Forward shaft lean is useful, but more is not always better. Your swing speed and club selection determine how much you can use while maintaining enough height and carry.
Reduce the exaggeration at slower speeds
With more clubhead speed, you can deliver less loft and still launch the ball high enough. At slower speeds, excessive shaft lean can produce shots that fly too low to carry effectively.
If you are a senior golfer or simply generate less speed, keep the face square but aim for only modest forward lean with your irons. Your hands can beat the clubhead across the finish line by a small amount.
You should also avoid exaggerating face closure. The goal is solid contact with usable flight, not the lowest possible shot.
Use less shaft lean as the clubs get longer
- Short irons: Your hands can be farther forward, with the ball relatively farther back.
- Longer irons: Use less forward lean as the ball position moves forward.
- Driver: Use the least forward lean, with the handle and clubhead feeling more nearly aligned at impact.
With the driver, especially at speeds around 100 mph or below, do not transfer an exaggerated nine-iron impact position directly into your tee shots. Your wrists still control the face and loft, but you need less face-closing exaggeration and less forward shaft lean.
For your next practice session, return to the finish line drill with a nine iron. Establish the slightly down takeaway first, then add only the backswing, transition, or release feels your shots require.
Effective PGA wrist motion is not about forcing every position. It is about controlling the face early enough that you no longer need the same last-second compensations. Build that control in small swings, adapt it to your grip and speed, and let solid contact guide your progress.
0 Comments