
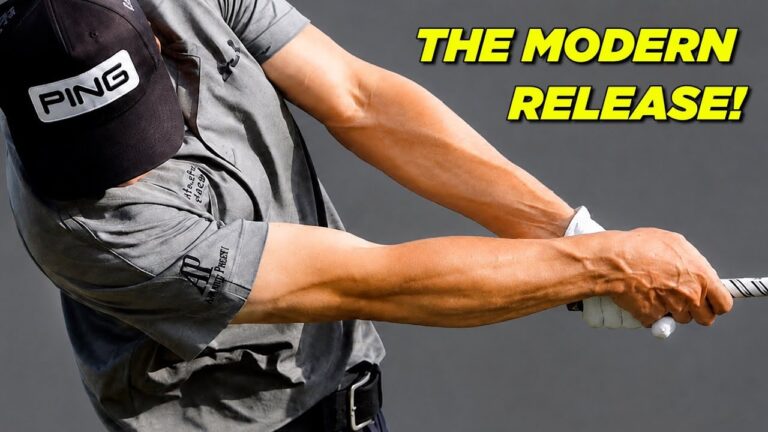

A powerful golf driver swing is not simply an iron swing with a longer club. The driver requires width, an upward strike, and enough clubface rotation through impact to deliver speed without leaving the face open. Many golfers improve their body position, get the club approaching from the inside, and then still hit a weak push to the right because their hands and wrists never release correctly.
The solution is not to force a frantic hand roll. It is to create the right structure first, then learn a controlled rotation of the lead-hand fingers, hands, and wrists while your head remains behind the ball. This step-by-step golf guide explains how to build that release pattern, feel it in practice, and carry it onto the tee.
Table of Contents
- Step 1: Build a driver setup that supports an upward golf strike
- Step 2: Understand why the driver needs a different golf release
- Step 3: Use the three lead-hand fingers as your golf release checkpoint
- Step 4: Separate arm rotation from shoulder movement
- Step 5: Check that your golf impact position stays behind the ball
- Step 6: Create depth early to make the driver release easier
- Step 7: Blend the golf drills into a repeatable driver swing
Step 1: Build a driver setup that supports an upward golf strike
Your release is much easier when your setup gives you room to swing from the inside and strike the driver on the way up. Start by organizing your body around the ball rather than placing the club down and hoping the motion works itself out.
At address, use these broad reference points:
- Allow a line down from your lead shoulder to fall near the inside of your lead heel.
- Let a line from the side of your head run roughly through your zipper area.
- Set your trail shoulder so it is positioned farther behind the ball than your lead shoulder.
- Consider dropping your trail foot slightly back to make turning easier and help promote an inside approach.
The key goal is to create enough space for your trail shoulder to move back in the backswing and then work under your chin in the downswing. With the driver, your head needs to remain behind the ball as you approach impact. This gives you something to release against and helps the club travel outward through the shot.
That head position is especially important for high, powerful golf drives. If your head races forward while your hands rotate, the club tends to work too low and the entire delivery becomes difficult to control. Keep the head back and you have a better chance of delivering the driver with upward motion, extension, and face rotation.
Step 2: Understand why the driver needs a different golf release
Great drivers of the golf ball create substantial clubhead travel and width in both directions. The club moves well back in the backswing, then travels outward through impact rather than simply chopping down at the ball. Because the driver is sweeping outward, it requires more rotation through the strike than an iron does.
This is where many golfers struggle. A steep, downward motion can make it easy to flip or close the clubface, but that steep pattern is not an effective way to hit a driver. When the club is moving from the inside and extending out to the right of the target line, rotating the clubface becomes more demanding. You must learn to rotate the hands and fingers without losing your body position.
When golfers get their shoulders and head into a good driver position but fail to rotate, the common result is a push or a ball that starts too far right. The path may be improved, but the clubface stays open relative to that path.
Think of the driver release as a coordinated sequence:
- Your body turns and creates room.
- Your head stays behind the ball.
- Your arms extend outward through impact.
- Your fingers, hands, and wrists rotate so the clubface can square naturally.
This is not an instruction to throw the clubhead from the top. The rotation occurs through the hitting area as the club extends out, supported by a stable head position and a proper turn.
Step 3: Use the three lead-hand fingers as your golf release checkpoint
A useful visual checkpoint occurs when the clubshaft is approximately parallel to the ground after impact. In a strong driver release, you should be able to see the first three fingers of your lead hand as the club extends down the target line and begins to move out to the right.
This lead-hand-finger appearance reflects the rotation that many elite drivers of the golf ball demonstrate. It is not about locking the lead wrist into one static shape. Wrist extension and trail-wrist flexion can contribute to rotation, but the practical focus for most golfers is simpler: allow the fingers and hands to rotate through the shot.
A clear feel is:
- Keep your head to the right of the ball.
- Extend your lead arm through the hitting area.
- Rotate the first three fingers of your lead hand through impact.
- Allow the clubhead to move away from you rather than pulling it abruptly around your body.
Elite golf swings provide a useful model, but you do not need to copy every angle perfectly. Your first objective is to move closer to the general pattern: head back, arms extending, and lead-hand fingers visibly rotating through the strike.
Step 4: Separate arm rotation from shoulder movement
To learn the release, isolate the movement from your elbow joint down through your hands. This helps you avoid a common error: rotating your entire shoulder and upper arm aggressively instead of allowing the forearms, wrists, hands, and fingers to do their job.
There are two useful separations in the golf swing:
- Your hips can move forward while your head stays back.
- Your hands and forearms can rotate while your triceps and shoulder remain comparatively quiet.
For a simple rehearsal, stand without a ball and place your hands in front of you. Point your trail palm generally away from you and orient your lead palm toward your body. Slowly rotate the hands and forearms, paying attention to the lead-hand fingers turning over. Keep the upper arms calm.
You can also feel the trail elbow working across your stomach as your thumbs begin to point more toward the target through the release. This is a small but important golf motion. It helps you become familiar with the crossover action that squares the clubface while the club travels outward.
Do not let this drill become a head-moving exercise. If your head moves forward as you rotate, you lose the upward driver delivery. Maintain the feeling that your head is behind the ball while the hands rotate beneath it.
Use a thumb-pointing rehearsal
Make a slow-motion swing with a driver or alignment stick. Rehearse the lead thumb pointing down toward the ball area, then rotating so it points more toward the target as you move through. This gives you a tangible way to feel the hands crossing over through impact.
Another effective rehearsal is to place your lead hand on your trail bicep. Make a slow through-swing motion and rotate your free hand while keeping that bicep position relatively stable. You are teaching yourself that the release comes from below the elbow, not from an uncontrolled upper-body spin.
Step 5: Check that your golf impact position stays behind the ball
The head staying back is not merely a visual preference. It creates the support needed for a functional release. When your head is behind the ball, you can extend the arms and release the clubhead out to the right. When your head has already shifted forward, rotating the hands often sends the club too low, disrupts the strike, and makes the face difficult to manage.
A technical reference can help if you use video analysis. At driver impact, a line through the shoulders of many top players sits in an upward range of roughly 30 to 35 degrees. That does not mean you should chase an exact number during a round of golf. It means that an upward shoulder orientation is a common feature in effective driver impact positions.
Use your phone camera to check broad positions rather than obsessing over small details. Look for these priorities:
- Your head remains behind the ball at impact.
- Your lead arm has room to extend.
- Your shoulders show an upward tilt rather than becoming level or tipped down.
- Your club exits outward as your hands rotate.
Video can be especially valuable when your ball flight contradicts your feel. A player may believe that the head stays back, for example, while the recording shows it moving forward before impact. Evidence-based feedback gives your golf practice a clear target instead of relying on guesswork.
Step 6: Create depth early to make the driver release easier
The release becomes far easier when your hands reach a deep, organized position in the backswing. Elite drivers such as Rory McIlroy and Greg Norman show notable hand depth, with the lead arm reaching a position around 40 degrees in the illustrated comparison. The practical lesson is that the hands work back into a useful corridor behind you rather than being lifted straight up in front of the chest.
Depth is built through an early turn. If you leave your trail shoulder in place and merely lift your arms, your hands cannot get back into the correct pocket comfortably. Turn the shoulders earlier and your hands can move deeper without forcing them behind your body.
This is good news for many golfers, including those who no longer want or need a long backswing. A shorter golf backswing can still create speed and consistency when you turn early, wind up the body efficiently, and position the hands correctly.
A useful checkpoint occurs when your lead arm is parallel to the ground in the backswing. By that point, your trail shoulder should already be moving behind the ball. You do not need to wait until the top of the swing to begin turning.
Practice the wall drill for hand depth
Stand about six inches from a wall or another safe object behind you. Address an imaginary ball, then place your lead hand against the outside of your lead leg or into your lead pocket. Hold a club or alignment stick with the trail hand to make the direction easy to see.
Now make an early turn. As your shoulders wind back, allow your hands to move into the pocket behind you. The wall provides a simple reference for the depth corridor.
- Set up in your normal driver posture.
- Begin turning your shoulders early in the takeaway.
- Feel your trail shoulder moving behind the ball.
- Allow your hands to work back into the corridor instead of lifting straight up.
- Pause and notice how much easier it is to create depth when you turn first.
Without the turn, the hands have nowhere useful to go. With the turn, you create space, store energy sooner, and prepare the club to approach from the inside. From there, the release pattern becomes much more natural.
Step 7: Blend the golf drills into a repeatable driver swing
Do not take every drill thought onto the tee. Build the motion in stages, then simplify it to one or two athletic feels. A productive golf practice sequence can look like this:
- Make several setup rehearsals with your head and trail shoulder behind the ball.
- Perform slow lead-hand finger rotations with no ball.
- Make short swings while keeping the head back and allowing the thumbs to rotate toward the target.
- Rehearse an early backswing turn and feel the hands moving into the deep pocket.
- Hit controlled drivers at reduced speed, prioritizing start line and solid contact.
- Gradually increase speed only when the ball flight remains predictable.
Your swing thought can be as concise as: turn early, head back, rotate the fingers. That sequence organizes the major ideas without overloading your mind.
If the ball continues to start right, first confirm that you are not holding the clubface open through impact. If you begin hooking the ball, do not immediately stop rotating the hands altogether. Check whether you are overdoing the release or whether your setup and path have changed. Productive golf improvement comes from matching your practice feedback to the actual ball flight.
The best driver release is not a separate hand trick added to a poor swing. It is the result of a coordinated motion: an early turn creates depth, a stable head position gives you room to release, the arms extend through the ball, and the hands rotate the face through impact. Practice these pieces in order and your driver can become easier to launch, easier to square, and more reliable under pressure.
Golf Driver Release FAQ
Why do I push my driver to the right?
A push often occurs when your body position and inside path are improving but your hands and wrists do not rotate enough to square the clubface. Keep your head behind the ball and rehearse the rotation of the first three fingers of your lead hand through impact.
Should my hands rotate more with a driver than with irons?
The driver generally requires more clubhead rotation through the ball because it travels outward and is struck with an upward intention. The rotation should be supported by good body position, not forced with a sudden flip.
How can I keep my head behind the ball in golf?
Set up with your trail shoulder behind the ball, make an early turn in the backswing, and avoid allowing your upper body to surge forward during the downswing. Use slow rehearsals before hitting shots to make the position familiar.
What is the simplest driver release swing thought?
Use the sequence: turn early, keep your head back, and rotate your lead-hand fingers through the shot. It captures the essential golf movements without requiring you to think about multiple technical positions at once.
0 Comments