

Consistent golf ball striking is not simply about swinging harder or trying to keep your head perfectly still. For clean iron shots, you need to control where the club reaches the bottom of its arc and then move through impact with purpose. That is where compression comes from.
Many amateur golf swings bottom out behind the ball. The result is familiar: fat shots, thin shots, weak contact, and a 7 iron that flies more like an 8 iron because added loft robs the strike of compression. The key is to shift and turn so your body and club arrive in a more efficient impact position.
The following step by step golf guide focuses on the central checkpoint: getting your lead side, sternum, hips, and trail leg moving correctly through the ball. Use these ideas as practical feels, not rigid poses. Start slowly, rehearse the movement, then build it into your full swing.
Table of Contents
- Step 1: Understand the golf swing low point
- Step 2: Build a golf setup that supports forward contact
- Step 3: Turn through the golf ball instead of hanging back
- Step 4: Improve your golf shoulder tilt through impact
- Step 5: Use the golf magic move: let the trail knee win the race
- Step 6: Drive the trail leg toward the target, not outward
- Step 7: Check your golf impact positions with simple benchmarks
- Step 8: Turn the golf drill into reliable ball striking
Step 1: Understand the golf swing low point
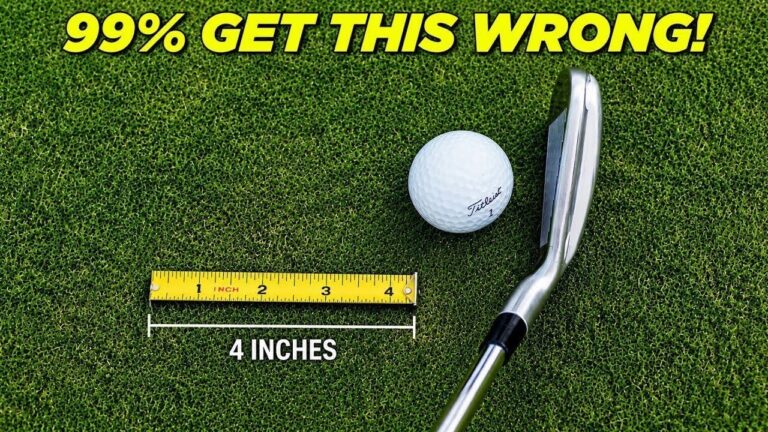
The low point is the lowest part of your clubhead’s swing arc before the club starts rising again. With an iron, that low point should be two to three inches ahead of the golf ball, not directly under it and certainly not behind it.
A useful body reference is your sternum, or the center of your chest. In a well-organized iron strike, your sternum is positioned forward enough at impact to place the bottom of the arc ahead of the ball. The club then contacts the ball first and the turf second.
When your sternum stays behind the ball, the low point tends to fall behind it as well. You may hit the turf early, producing a heavy strike, or try to save the shot by lifting the club, producing a thin one. These misses are often different outcomes of the same low-point problem.
For better golf contact, make this your simple impact intention:
- Move your pressure and body toward the lead side.
- Place the clubhead on a descending path into the ball.
- Let the divot, if one is taken, occur ahead of the ball.
- Continue turning through the strike instead of stalling.
Step 2: Build a golf setup that supports forward contact
Your setup can make low-point control much easier. Begin with the shaft and lead arm appearing as one straight line from face-on. Place a little more pressure into your lead foot, approximately 60 percent lead side and 40 percent trail side.
This is not an exaggerated lean. It is a small starting bias that makes it easier to move forward during the downswing rather than trying to make a large last-second recovery. From there, a modest shift toward the target can place you in a much stronger impact structure.
Keep your head relatively steady as you practice. This does not mean freezing your head in place. It means avoiding a large move toward the target that forces you to make compensations on the way down. Your body can shift and rotate while your head remains controlled enough to return the club to the ball predictably.
Use the tee-ahead drill
Place a tee, or half a tee, about one clubhead length ahead of the ball on your target line. Your task is to strike the ball and then clip or knock out the tee ahead of it. The drill gives you immediate feedback about your golf swing low point.
If you hit behind the ball or cannot reach the forward tee, your low point is likely too far back. Start with half swings. You are training the location of impact, not trying to produce maximum speed.
Step 3: Turn through the golf ball instead of hanging back
Forward shift alone is not enough. You also need to turn correctly through the ball. If you stop rotating, remain behind the ball, or try to keep your chest closed, you make it difficult to get the sternum and low point forward.
At impact, the referenced professional averages show approximately 30 to 50 degrees of hip turn and roughly 25 to 35 degrees of torso turn. These measurements are not targets that you need to force during a round. They show that effective iron impact includes a meaningful amount of opening and rotation through the shot.
Think of your lead side as clearing rather than sliding away. Your hips and torso open as you move forward, creating room for your arms and club to approach the ball. This combination helps you cover the ball with the body rather than attempting to scoop it into the air.
For many golfers, a helpful feel is: shift, open, strike. The shift moves the low point forward. The opening provides room and keeps the club moving through impact. Together, these actions support crisp golf compression.
Step 4: Improve your golf shoulder tilt through impact
A common amateur pattern is becoming too level through the strike. When your shoulders stay overly level while you try to move forward, you can compromise the angle of attack and lose the ability to turn freely.
A more effective impact pattern includes lead-side elevation. In the data presented, professional iron impact shoulder tilt is commonly around 22 to 28 degrees. This reflects a lead shoulder that is higher and farther from the lead foot than the trail shoulder during the strike.
You do not need to calculate angles on the range. Instead, use a clear physical feel: as you shift and rotate through the shot, let the lead shoulder move upward and away from your lead big toe. This helps prevent a level, stalled motion and supports the forward shaft lean needed for strong golf iron contact.
Try the resistance-band feel
Use a light fitness band under your lead foot. Hold the band and gently pull upward as you rehearse moving into impact. As you shift forward, feel the lead side rising and the space between your knees narrowing.
The band is a feedback tool, not a source of heavy resistance. Its purpose is to help you feel the lead side lifting while your body moves forward and turns. If you do not have a band, use this alternative:
- Place your trail hand on the outside of your trail knee.
- Place your lead hand on your lead hip.
- Rehearse driving the trail side toward the lead side.
- Feel the lead hip and lead shoulder moving upward through impact.
This creates a useful golf motion without overthinking mechanics. It also discourages the tendency to stay level and stuck behind the shot.
Step 5: Use the golf magic move: let the trail knee win the race
The most important feel in this approach is simple: your trail knee should reach the finish line before your hands do.
The “finish line” is an imagined vertical line positioned at the lead side. In effective impact movement, the trail leg drives toward that line early in the downswing. That action helps shift pressure forward, close the gap between the knees, and initiate the turn through the ball.
Many amateur golfers do the opposite. Their hands race toward impact while the trail knee stays back. This leaves the body behind the ball, delays the shift, and often produces the fat and thin contact they are trying to eliminate.
Use this sequence in slow-motion practice:
- Make a backswing to a comfortable length.
- Begin down by driving the trail knee toward the lead-side finish line.
- Allow your hips to begin opening.
- Keep rotating as your arms move through.
- Finish balanced on your lead side.
When your hands are approximately parallel to the ground in the early follow-through, aim to have your thighs nearly together already. This is a strong checkpoint that confirms the lower body has continued moving and you have not left the trail leg behind.
Step 6: Drive the trail leg toward the target, not outward
The trail leg should not kick out toward the ball or away from the target line. The intended direction is toward the lead side and toward the finish line. Think of the trail knee moving inward and forward as the gap between the knees closes.
This direction matters because it combines two essential golf actions:
- Shift: It moves your mass and pressure toward the lead side.
- Turn: It helps the pelvis open rather than forcing the hips to slide without rotation.
Rehearse the move without a ball first. Make short swings over the grass while focusing on getting the trail knee through. Then set up to a ball, make a small backswing, and reproduce the same lower-body action. Build speed only after the movement feels repeatable.
This pattern applies beyond full iron shots. The same trail-leg drive and lead-side movement can improve punch shots and controlled pitch shots, although the motion will naturally be smaller.
Step 7: Check your golf impact positions with simple benchmarks
Technical checkpoints can be useful when they clarify what you are trying to feel. They become unhelpful when they make you chase exact numbers during every swing. Use the following professional reference ranges as a way to assess your movement from a face-on recording.
- Hip turn at impact: approximately 30 to 50 degrees open.
- Torso turn at impact: approximately 25 to 35 degrees open.
- Shoulder tilt at impact: approximately 22 to 28 degrees.
- Lead-leg measurement: around 65 degrees in the demonstrated professional model, with strong ball strikers generally below 70 degrees.
The larger point is not that every golfer must look identical. Physical build, mobility, grip, stance, and swing style vary. However, these positions show a consistent trend: skilled golf ball strikers are moving forward and rotating through impact, not remaining level and trapped behind the ball.
Record a face-on swing with your phone and pause it near impact. Check whether your sternum has moved forward, whether your hips are beginning to open, and whether your trail knee is progressing toward the lead side. A simple comparison can reveal why your low point is inconsistent.
Step 8: Turn the golf drill into reliable ball striking
Do not take several new swing thoughts to the course. Choose one primary feel based on your current miss. If you hit fat or thin irons, start with the tee-ahead drill. If you struggle to move off your trail side, rehearse the trail knee reaching the finish line first. If you feel stuck and level, use the lead-shoulder-upward feel.
A focused practice progression can look like this:
- Five rehearsals: No ball. Shift, rotate, and drive the trail knee toward the finish line.
- Five half swings: Use the tee-ahead drill and prioritize ball-first contact.
- Five three-quarter swings: Keep the same trail-knee and lead-side movement.
- Five full swings: Maintain rhythm and finish in balance.
- Review your strike: Notice divot position, contact quality, trajectory, and distance.
Clean golf compression is not created by trying to trap the ball with your hands. It is the outcome of a body that shifts and turns correctly while the club continues moving down and through. When the trail knee arrives early, the lead side clears, and the sternum moves forward, the club has a far better chance of reaching its low point ahead of the ball.
Work patiently. Start with short, controlled motions and prioritize solid contact. Once the movement becomes familiar, your golf swing can produce more reliable turf interaction, stronger iron flight, and the satisfying feeling of a properly compressed strike.
Golf Swing Compression FAQ
Why do I hit fat and thin golf shots with the same swing?
Both misses can come from a low point that stays behind the ball. Hitting the turf early produces a fat shot, while lifting or altering the club to avoid the ground can produce a thin shot.
Where should the low point be for iron shots in golf?
For a clean iron strike, the low point should be roughly two to three inches ahead of the ball. This allows you to contact the ball first and then brush or take a divot after it.
What is the trail knee finish-line drill?
It is a movement feel in which your trail knee drives toward an imagined vertical line at the lead side before your hands reach impact. This encourages a forward shift, hip rotation, and better golf low-point control.
Should I try to hold my head completely still in my golf swing?
No. Keep your head controlled and avoid excessive movement, but do not freeze it. Your body still needs to shift toward the lead side and rotate through the shot.
0 Comments