
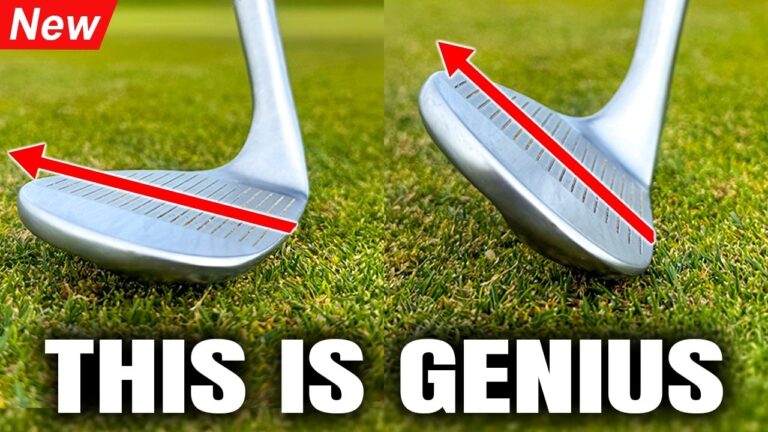

If your golf chipping feels unpredictable, you are not alone. One chip comes off perfectly, the next one is chunked, and the one after that rockets across the green. That inconsistency is what makes the short game so frustrating.
The good news is that better contact around the greens often comes from a simpler idea, not more complicated mechanics. The core golf chipping technique here is designed to help you hit cleaner, lower, more controlled chip shots from tight lies, awkward lies, and even rough. It works for a huge percentage of the shots you face around the green.
The big shift is this: instead of trying to help the ball up with extra loft and a flicking action, you learn to start with loft and then deliver the club in a way that de-lofts it through impact. That creates a crisper strike, more control, and far less fear over the ball.
Table of Contents
- Step 1: Understand why your golf chipping breaks down
- Step 2: Stop chasing positions and fix the pattern instead
- Step 3: Use your most lofted wedge for most chip shots
- Step 4: Create the right problem by opening the clubface
- Step 5: Learn the thumbs-down move that improves contact
- Step 6: Set up for crisp golf chipping contact
- Step 7: Make the same motion for lower and slightly higher chips
- Step 8: Add an easy fix if your chips tend to slice
- Step 9: Use the same golf chipping technique from rough lies
- Step 10: Practice the pattern, not a dozen different short game moves
- Step 11: Know when to use another club
- Step 12: Build confidence by trusting the strike
- FAQ
Step 1: Understand why your golf chipping breaks down
Most poor chip shots come from the same pattern. You set up next to the green, get anxious about how far the ball has to fly, and instinctively try to add loft. The club starts moving too much around your body, gets too shallow, and arrives at the ball in a weak, inconsistent way.
That pattern leads to the two misses every golfer hates:
- Fat chips, where the club hits the ground before the ball
- Thin chips, where the leading edge catches the ball cleanly but without proper contact
In both cases, the real problem is usually not effort or practice. It is the movement pattern. If the club is traveling too much around you and you are trying to scoop the ball into the air, solid contact becomes hard to repeat.
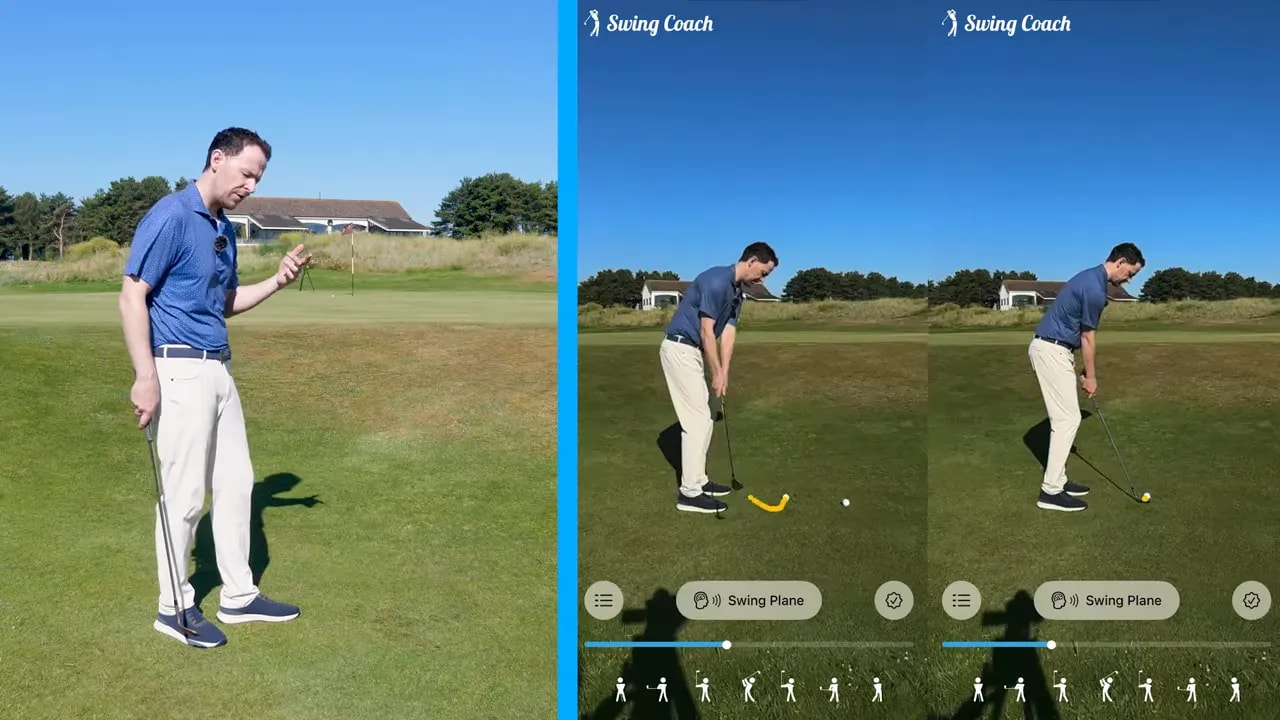
Stronger chippers do almost the opposite. Their club works more directly into the ball. The shaft leans forward, the strike is ball first, and the shot comes out lower with more check.
Step 2: Stop chasing positions and fix the pattern instead
When your golf chipping struggles, it is tempting to search for the perfect position. You might try to place the club in a certain spot on the backswing or force your hands forward at impact. That often creates a rigid, wooden motion.
A better approach is to change the problem your body is trying to solve.
Your body is smart. Give it the right challenge, and it often creates a better movement naturally. Give it the wrong challenge, and it invents compensations that ruin contact.
This is why simply telling yourself to “get the club here” is often less effective than setting up the club and your body in a way that encourages the correct motion. For golf chipping technique, patterns beat positions.
Step 3: Use your most lofted wedge for most chip shots
This may sound backwards, especially if you have always been told to chip with a pitching wedge or 9 iron. But for many golfers, the most lofted wedge in the bag is the best training club for learning better golf chipping.
A 60 degree wedge gives you something important: built-in loft. That means you no longer need to manufacture loft by flicking the wrists or trying to lift the ball.
Better players often use a lob wedge around the green, and they do not just leave it square. They frequently open the face even more. Then they produce a low flight anyway by delivering the club with reduced loft through impact.
That is the key idea.
You start with plenty of loft, even an open face, and then you create a movement that de-lofts the club. The result is a low, checking chip rather than a floaty, unstable one.
Why does this help? Because when golfers chip with too little loft, they often feel they must help the ball into the air. That is what creates the flick, the shallow swing, and the inconsistent strike. Starting with a lofted wedge removes that urge.
Step 4: Create the right problem by opening the clubface
Here is the clever part of this golf chipping technique. Instead of making the shot easier by starting with the face square, you intentionally give yourself a problem to solve.
Open the clubface slightly, even toward 70 degrees of loft. Now the face points a little to the right and presents more loft than you want to deliver. Your body has to respond by moving in a way that squares and de-lofts the club through impact.
That changes the motion dramatically.
When the face is already open, it becomes less likely that you will swing too far inside and try to flick the ball up. Instead, the club tends to work more down and through the strike.
This is one reason strong short game players often look so stable and controlled through impact. They are not scooping the ball. They are solving the problem created by the lofted, open face.
Step 5: Learn the thumbs-down move that improves contact
If there is one feel to take to the practice area, it is this: turn the thumbs down through impact.
That does not mean jamming the club steeply into the turf. It means allowing the lead hand and trail hand to work in a way that tips the shaft forward and squares the face while reducing loft.
Think of these simple feels:
- Your lead thumb works down toward the ground
- Your trail wrist keeps a natural hinge instead of flicking
- The clubhead falls under control rather than being thrown at the ball
- The face squares up through impact without adding loft
This creates the type of impact you want in golf chipping: stable, forward leaning, and crisp.

Once you feel this correctly, the strike usually improves right away. The ball comes out lower, lands predictably, and releases in a more controlled way.
Step 6: Set up for crisp golf chipping contact
The setup for this golf chipping technique is straightforward, but each detail supports the pattern.
Use these checkpoints:
- Open the face slightly before you grip the club
- Play the ball a little back in your stance for your stock chip
- Lean your body forward so your weight favors the lead side
- Stay forward through the strike instead of falling back
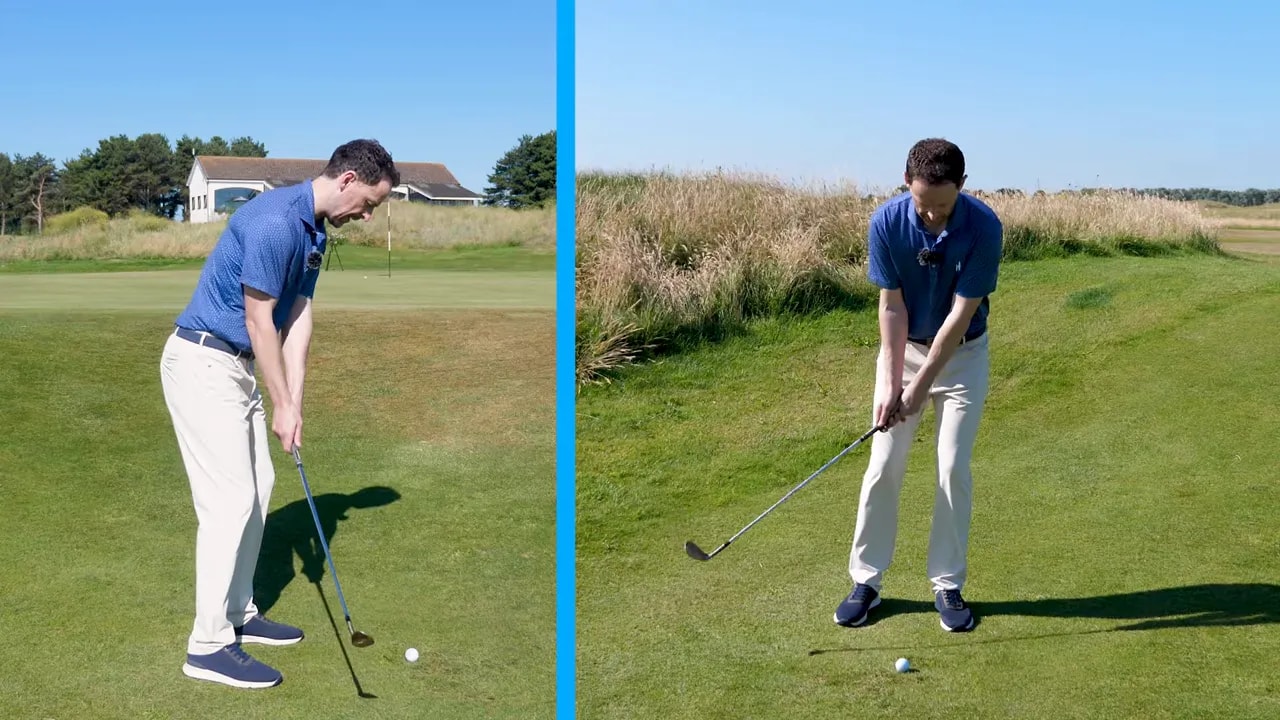
The forward lean matters a lot. If you stay centered or drift backward, it becomes easier to add loft and flick. By keeping your body slightly forward, you encourage the de-lofting motion you want.
A useful image is to feel as though your body leans slightly toward the target side, almost like a subtle tilted tower shape. That setup makes it easier to strike the ball first and the turf after.
Step 7: Make the same motion for lower and slightly higher chips
One of the best parts of this golf chipping technique is that you do not need a brand new motion for every shot.
For your standard low checker, use the setup above with the ball slightly back. Keep the open face, keep your weight forward, and turn the thumbs down through impact.
If you need a slightly higher shot, do not switch to a scooping motion. Instead, move the ball a bit more forward in your stance and keep the same overall action.
That is an important point. The trajectory changes because of the ball position, not because you suddenly throw loft at the ball.
So your basic options become:
- Lower chip: ball slightly back
- Higher chip: ball slightly forward
- Same motion: open face, forward lean, thumbs down through impact
This keeps your short game much simpler under pressure.
Step 8: Add an easy fix if your chips tend to slice
Some golfers will start using this move and still leave the face open through impact, especially if they already fight a slice pattern in the full swing.
If that sounds like you, there is a simple adjustment. Pull your right foot back slightly so your stance is a little closed.
That creates a new problem for your body to solve. Because your stance now aims a touch to the right, your motion naturally organizes itself to deliver the club more effectively into the ball instead of cutting across it.
This is not about manipulating the hands at the last second. It is another example of changing the setup so the correct motion becomes easier.
Step 9: Use the same golf chipping technique from rough lies
This pattern is not only for perfect fairway-style lies. It also carries over extremely well into rough around the green.
From rough, many golfers make the same mistake they make from short grass, only worse. They think the ball needs extra help to get out, so they try to keep loft on the club and slide under it. That usually leads to weak contact or a complete guess.
A better plan is to keep the same core intention:
- Open the face
- Stay stable
- Feel the club de-lofting and squaring through impact
- Let the clubhead fall under control
- Avoid the flick
In rough, a slightly wider stance can help you feel more stable, especially on an uneven bank or a gnarly lie. But the movement pattern remains the same.
You are still not trying to scoop the ball out. You are still allowing the club to tip forward and work through the strike.
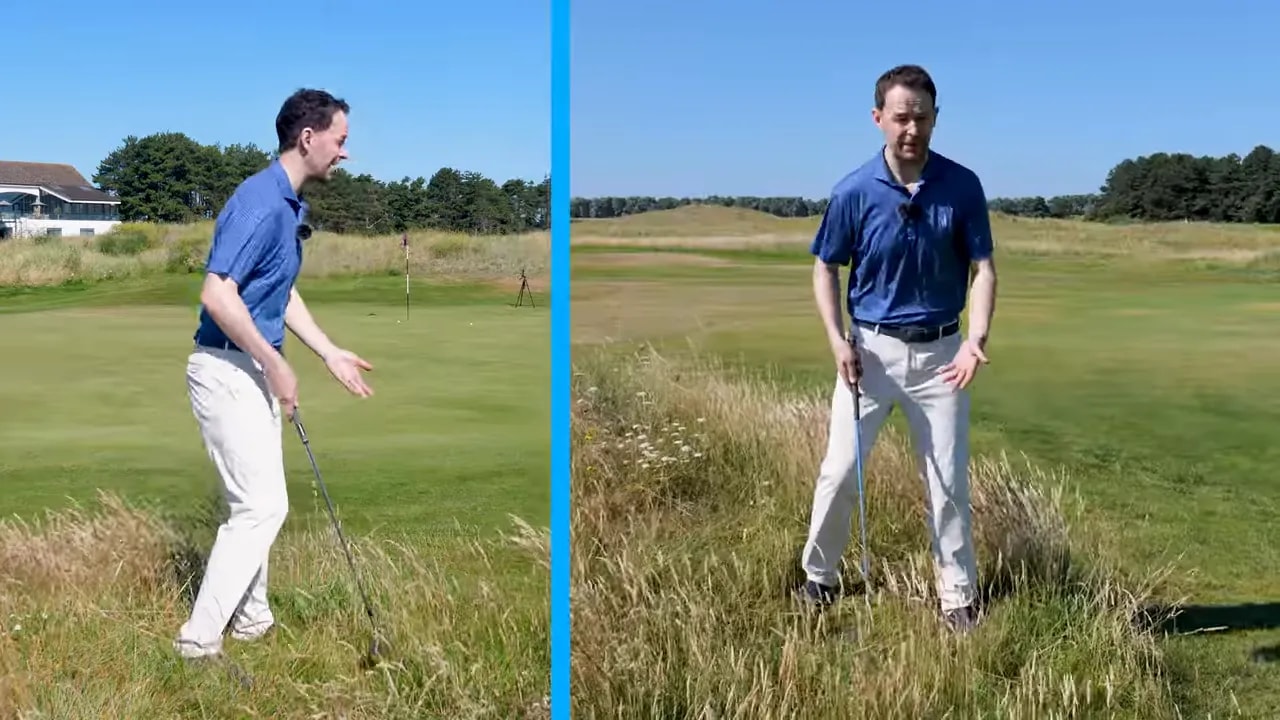
This is why the technique can cover so many shots around the green. Once you learn the pattern, you can apply it from tight lies, standard fringe lies, and rough with only minor setup changes.
Step 10: Practice the pattern, not a dozen different short game moves
One reason golf chipping becomes so confusing is that many players collect too many techniques. They try one motion for bump and runs, another for soft chips, another for rough, and yet another when nerves kick in.
This approach gives you one reliable pattern for the majority of shots around the green. That does not mean every situation is identical. It means your motion stays familiar while your setup changes slightly to match the shot.
When you practice, focus on these priorities:
- Choose your lofted wedge
- Open the face a little before gripping it
- Set your weight slightly forward
- Use ball position to adjust height
- Feel the thumbs move down through impact
- Keep the club de-lofting instead of adding loft
If you can repeat that pattern, your contact becomes more dependable and your confidence around the green starts to return.
Step 11: Know when to use another club
This does not mean you should throw away your pitching wedge or 9 iron. There is still a place for those clubs.
If you want a true bump and run that lands early and releases a long way, a less lofted club can still be a smart choice. But for a large percentage of greenside shots where you need a little loft, a soft landing, and decent stopping power, the lofted wedge with a de-lofting strike is a powerful option.
The mistake is not owning those other clubs. The mistake is using them for shots that make you instinctively try to help the ball into the air.
If your current golf chipping habit produces fats, thins, or panic around the greens, simplify your decisions. Start with the lofted wedge more often, then learn how to deliver it correctly.
Step 12: Build confidence by trusting the strike
Confidence in golf chipping rarely comes from positive thinking alone. It comes from knowing the strike is reliable.
Once you stop trying to lift the ball and start learning how to de-loft the club through impact, the shot begins to feel less delicate and more athletic. You no longer need perfect timing to save the strike. The setup and the pattern do more of the work for you.
That is the real value of this technique. It simplifies your motion, sharpens contact, and gives you a dependable stock chip you can use on most shots around the green.
If your short game has felt nervous or inconsistent, this is a golfer-friendly place to start. Open the face, lean forward, turn the thumbs down, and let the lofted wedge work the way it was meant to work.
FAQ
Why use a 60 degree wedge for golf chipping instead of a pitching wedge?
A 60 degree wedge gives you enough loft from the start, so you do not feel the need to scoop the ball into the air. That makes it easier to produce a crisp, de-lofted strike. A pitching wedge still has a place for bump and runs, but it can encourage the wrong motion if you need the ball to fly and stop.
Will this golf chipping technique work from tight lies?
Yes. Tight lies are one of the best places to use it because the technique encourages ball first contact, forward shaft lean, and a stable strike. Those are exactly the ingredients you need when the margin for error is small.
How do you hit a higher chip with the same motion?
Move the ball a little farther forward in your stance while keeping the same overall action. Do not switch to a flicking or scooping motion. The ball position changes the launch, while the movement pattern stays largely the same.
What if your chip shots keep coming out to the right?
If the face stays too open and the ball leaks right, try pulling your right foot back slightly. That closed stance can help your body organize a better delivery without forcing a last-second hand action.
Does this golf chipping technique work from rough?
Yes. The same idea applies from rough. Open the face, stay stable, and feel the club de-lofting and squaring through impact rather than trying to slide under the ball with extra loft. A slightly wider stance can help you stay balanced from awkward lies.
0 Comments