
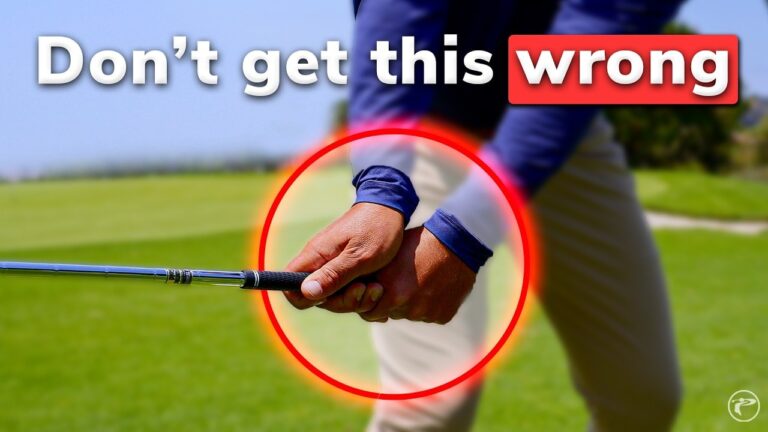

If your ball striking feels inconsistent, your golf wrist hinge may be breaking down before the swing really even gets started. The first 12 inches of the takeaway often decide whether the club stays on plane or whether you spend the rest of the swing making last second compensations.
The good news is that this part of the motion is trainable. If you learn the right golf wrist hinge, the correct direction of that hinge, and how it blends with your turn, you can build a more repeatable swing with less manipulation.
Table of Contents
- Step 1: Understand why the first 12 inches matter so much for golf wrist hinge
- Step 2: Learn the checkpoint that tells you if your golf wrist hinge is correct
- Step 3: Put your hands on the right takeaway path
- Step 4: Hinge the club in the correct direction
- Step 5: Use the right amount of golf wrist hinge by the time the club is parallel
- Step 6: Blend the golf wrist hinge with your body turn
- Step 7: Fix the inside takeaway without overcorrecting your golf wrist hinge
- Step 8: Fix the outside takeaway by keeping your hands connected
- Step 9: Build a simple drill station for golf wrist hinge practice
- Step 10: Rehearse checkpoint one before you hit balls
- Step 11: Know the ball flight and swing problems this golf wrist hinge can prevent
- Step 12: Avoid the most common golf wrist hinge mistakes
- Step 13: Use a simple feel that works on the course
- Step 14: Turn this golf wrist hinge lesson into a weekly practice plan
- FAQ
- Final takeaway
Step 1: Understand why the first 12 inches matter so much for golf wrist hinge
The takeaway sets the route for everything that follows. If the club gets too far inside early, too far outside early, or the wrists hinge in the wrong direction, your body and hands usually have to rescue the swing later.
That is why so many golfers hit shots that feel unpredictable. The strike may still come out decent sometimes, but only because you made a compensation on the way down.
A better goal is simple: create a takeaway that needs the least amount of manipulation from there to impact.
For most golfers, that starts with two pieces working together:
Your hand path
Your golf wrist hinge direction
When those two match up early, the club is much easier to return to the ball.
Step 2: Learn the checkpoint that tells you if your golf wrist hinge is correct
A useful early checkpoint happens when the club is parallel to the ground during the takeaway.
At that moment:
Your hands should be roughly down the line of your feet
The club should line up with your hands
The clubface should appear square to the path
The leading edge of the club should match your spine angle
This is a strong checkpoint because it tells you several things at once. Your hands have not drifted badly inward or outward, the club has enough hinge, and the face is not wildly open or shut.
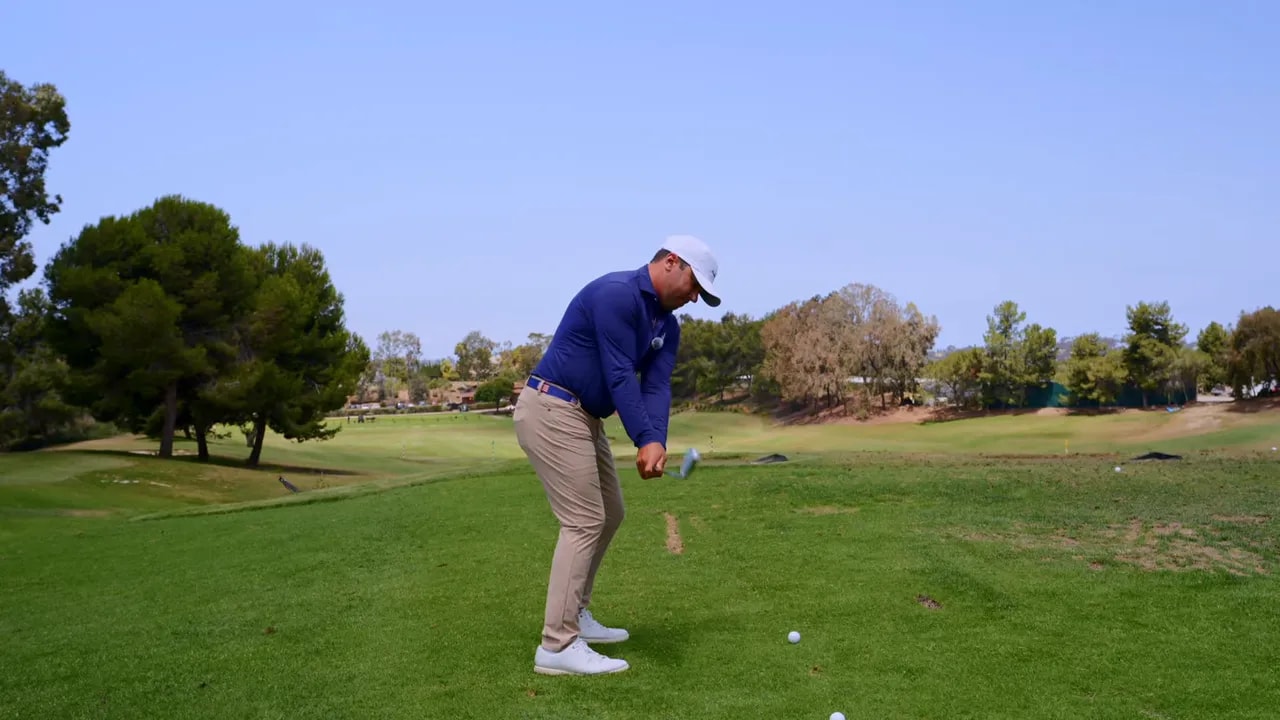
If you can repeatedly arrive here, you give yourself a much easier route back to impact.
Step 3: Put your hands on the right takeaway path
One of the clearest ways to think about hand path is this: your hands should travel more down the line of your feet in the early takeaway before the club works upward.
A simple image is:
Down the hallway first
Up the escalator second
That means the hands are not immediately yanking inward with body turn, and they are not being shoved outward in an effort to force the club outside.
If your hands stay on that more neutral track, the wrists can hinge correctly without throwing the club off plane.
This matters because many golfers confuse clubhead movement with hand movement. They try to place the clubhead somewhere, but they forget that the hands still need a clean, connected path.
Step 4: Hinge the club in the correct direction
This is where many golfers lose the swing. It is not only about how much wrist hinge you have. It is also about which direction the club hinges.
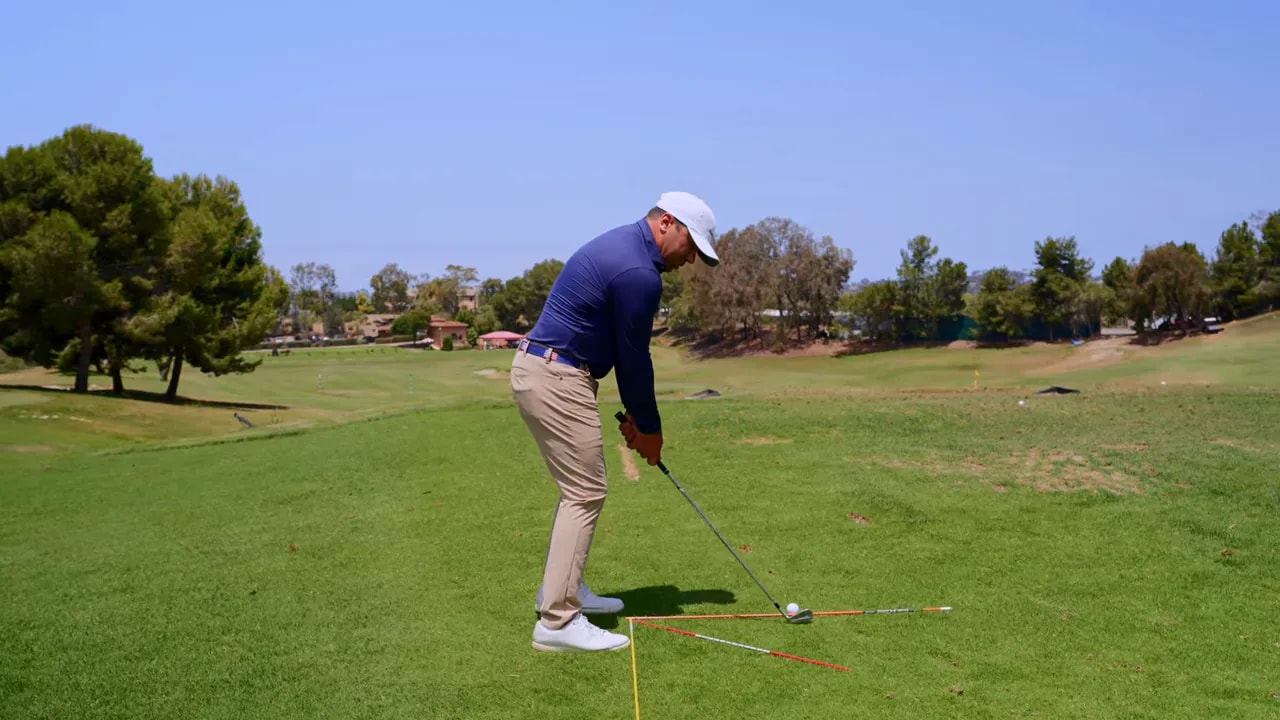
The useful model here is a hinge that works on roughly a 45 degree direction relative to the lines formed by ball position and foot line.
Why that direction matters:
If the hinge works too much out in front of you, the lead wrist can cup too much
If the hinge works too much behind you, the lead wrist can bow too much
A balanced hinge direction helps keep the lead wrist flatter
That flatter lead wrist supports a more stable clubface and a club that is easier to deliver on plane.
If you have ever felt like your takeaway gets either rolled open or snatched behind you, the hinge direction is a likely cause.
Step 5: Use the right amount of golf wrist hinge by the time the club is parallel
Many players think their problem is only that they take the club inside. In reality, a big cause of an inside takeaway is often not enough hinge early enough.
Here is what happens:
You move the club back
Your hands may look fairly neutral
But if the wrists do not hinge enough, the club does not rise into position
Instead, it starts sliding under the forearms and behind you
So if your club keeps getting trapped behind your body early, the answer may not be to drag your hands outward. It may be to add the proper amount of hinge while keeping the hands on the correct path.
That is a key distinction. More hinge is not always better, but insufficient hinge is a common reason the club disappears inside.
Step 6: Blend the golf wrist hinge with your body turn
One of the biggest mistakes in learning golf wrist hinge is treating it as a separate action.
It is not:
Hinge first, then turn
Turn first, then hinge
Instead, the two should happen together.
As your lead shoulder begins to turn, the hinge should develop at that same pace. By the time you reach the early takeaway checkpoint, the hinge and the turn should already be blended.
This is important because sequencing affects feel. If you hinge without turn, the club can feel picked up. If you turn without hinge, the club often gets dragged inside.
The cleanest motion is a synchronized one.
A practical swing thought is:
Let the hinge happen at the pace of your turn
That thought tends to simplify the move and improve rhythm.
Step 7: Fix the inside takeaway without overcorrecting your golf wrist hinge
The inside takeaway is extremely common. It usually happens because the club follows body turn too much, the wrists do not hinge enough, or the hinge goes in the wrong direction.
If that sounds like your swing, avoid these overcorrections:
Pushing the hands way out
Trying to force the clubhead outside
Locking the wrists to stop the club from moving inward
Those fixes often create a different problem. Now the swing can feel disconnected, steep, or off plane in the other direction.
Instead, focus on this combination:
Hands travel down the foot line
Wrists hinge in the proper direction
Hinge develops enough by the time the club is parallel
That gives you a neutral takeaway rather than a forced one.
Step 8: Fix the outside takeaway by keeping your hands connected
Golfers who have been told to “take it outside” often create a different fault. They shove the hands too far away from the body trying to place the clubhead out there.
The result:
The hands leave their natural track
The swing feels disconnected
The club can get above plane early
If you tend to do this, the key is remembering that the hand path still matters most. The clubhead should not be independently forced. The club should appear in the right place because the hands and hinge are working correctly together.
This is one of the easiest ways to clean up a takeaway without feeling overly mechanical.
Step 9: Build a simple drill station for golf wrist hinge practice
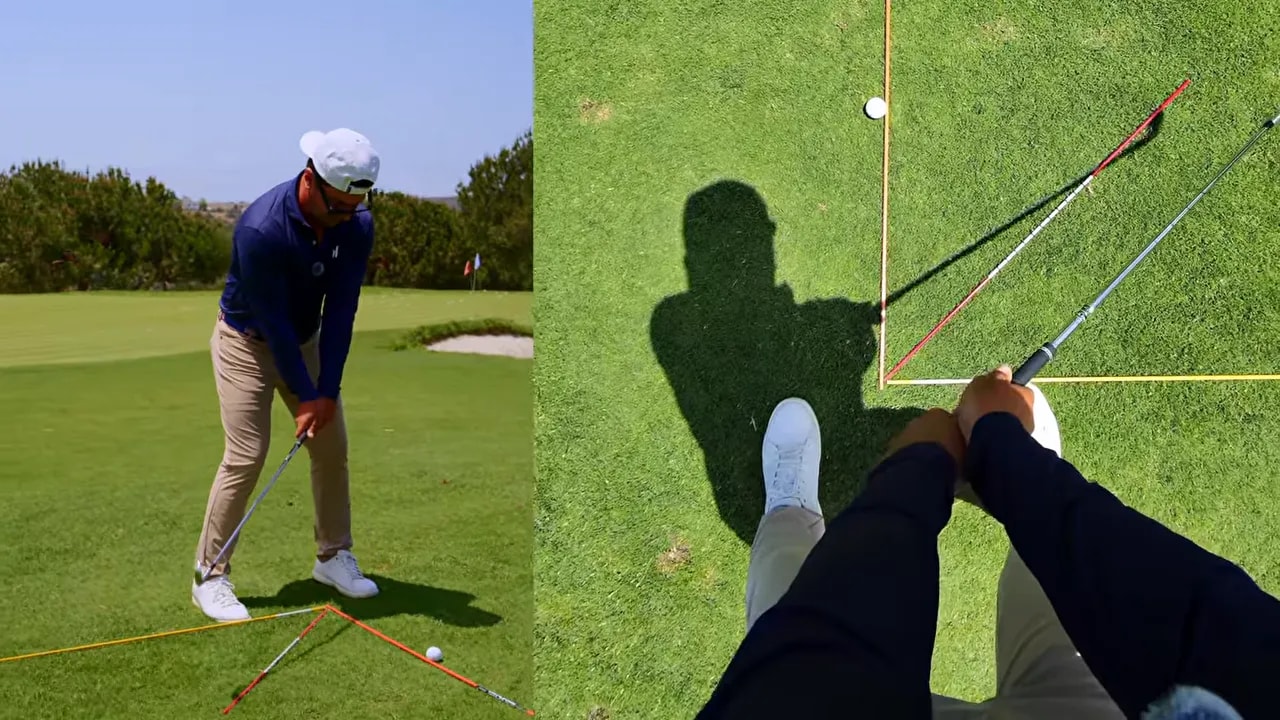
You can train this with a basic alignment rod station on the ground.
Set it up like this:
One rod marks the back of the ball position line
One rod marks the line of your feet
A third guide line splits the angle between them, creating the hinge direction reference
This gives you three visuals:
Ball line
Hand path line
Hinge direction line
From there, rehearse slowly until the club is parallel to the ground and check whether:
Your hands are still traveling along the foot line
The club has hinged up enough
The hinge has worked on the intended diagonal direction
This kind of station is useful because it helps both types of players:
The golfer who takes it too far inside
The golfer who forces it too far outside
Step 10: Rehearse checkpoint one before you hit balls
If you want to turn this lesson into better ball striking, add a short rehearsal before each practice swing.
Try this routine:
Address the ball normally
Take the club back slowly until it is parallel to the ground
Check that your hands are down the foot line
Check that the club lines up with your hands
Confirm the face looks square and the lead wrist feels flat
Return to address
Then hit the shot with the same feel
This works especially well with short irons first, since the motion is easier to monitor at a controlled speed.
Step 11: Know the ball flight and swing problems this golf wrist hinge can prevent
When the takeaway is poor, later compensations usually follow.
If the club gets too far outside early, you may have to:
Drop it under on the way down
If the club gets too far inside early, you may have to:
Flip the club through impact
Come over the top to recover
Those recovery moves are a big reason golfers struggle with:
Inconsistent contact
Random curvature
Unexplained loss of distance
Timing dependent ball striking
Improving your early golf wrist hinge does not guarantee a perfect swing, but it removes a major source of compensation.
Step 12: Avoid the most common golf wrist hinge mistakes
When you practice this move, keep an eye on these common errors.
Mistake 1: Turning the body and dragging the club inside
This often happens when the club simply follows torso rotation without enough hinge.
Mistake 2: Trying to “pick the club up”
Too much independent wrist action can make the takeaway look lifted and disconnected.
Mistake 3: Shoving the hands outward
This is a common overcorrection for golfers trying to avoid an inside takeaway.
Mistake 4: Waiting too long to hinge
If the club is parallel and still too low or behind you, you probably delayed the hinge.
Mistake 5: Practicing too fast
This move is easiest to learn with slow rehearsals and brief pauses at checkpoint one.
Step 13: Use a simple feel that works on the course
On the course, you do not want five technical thoughts. You want one clear feel.
A practical feel is:
Hands go down the line of the feet while the club hinges up on a diagonal
Another simple option is:
Take it down the hallway, then let it ride up
Both ideas help you keep the hands and club working together without forcing the motion.
Step 14: Turn this golf wrist hinge lesson into a weekly practice plan
If you want this to stick, train it in short, focused blocks.
Try this 15 minute plan:
5 minutes: slow rehearsal swings to checkpoint one
5 minutes: half swings with an 8 iron, pausing briefly at takeaway
5 minutes: normal swings while keeping only one takeaway feel
During that session, ask yourself:
Did my hands stay on track?
Did I hinge enough?
Did the hinge blend with my turn?
That is enough to create improvement without cluttering your swing thoughts.
FAQ
What is the correct golf wrist hinge in the takeaway?
The correct golf wrist hinge adds enough angle by the time the club is parallel to the ground while the hands stay on a neutral path down the line of your feet. The hinge should work in a balanced diagonal direction rather than straight up, straight behind, or rolled inside.
Can poor golf wrist hinge cause an inside takeaway?
Yes. A common cause of an inside takeaway is too little hinge early in the backswing. When the club does not hinge enough, it can fall under the forearms and move behind you even if your hands started fairly well.
Should you hinge first or turn first in the golf swing?
Neither should happen alone. The best move is a blend of hinge and turn happening together. The wrists should hinge at the same pace your lead shoulder and body begin to turn.
How can you check your golf wrist hinge at home?
Use slow rehearsals in front of a mirror or with alignment rods on the ground. Stop when the club is parallel to the ground and check your hand path, hinge amount, lead wrist condition, and clubface orientation.
What happens if you hinge the club too much in the takeaway?
Too much hinge can move the club off plane and make the swing feel disconnected. It can also create a takeaway that is too far outside, leading to compensations later in the downswing.
Final takeaway
If your swing feels like it needs saving halfway down, the real problem may have started in the first 12 inches. Cleaning up your golf wrist hinge gives you a better hand path, a more stable clubface, and a swing that asks for fewer compensations.
Focus on one checkpoint: when the club is parallel to the ground, your hands should be on track, the club should line up with them, and the hinge should already be present.
Get that right, and the rest of the swing gets a lot easier.
0 Comments