
Unlock effortless power in your golf swing by mastering the art of ball striking. Forget brute force; it’s all about mastering movement through the ball to create compression, speed, and power. Follow this easy guide with practical steps and drills for immediate improvement.
Table of Contents
- Step 1: Understand the impact position every great golf player shares
- Step 2: Create the correct sensation with the tour stick drill
- Step 3: Wall drill for shoulder stability and correct pivot
- Step 4: Learn the tilt — shoulders on different planes
- Step 5: Use the “looking out the window” swing thought
- Step 6: Combine the drills into a simple practice routine
- Step 7: Measure progress and make it consistent
- Common checkpoints and troubleshooting for the golf swing
- Putting it on the course: a simple 3-shot routine
- Drill summary: checkpoints to memorize
- How often to practice these moves for real improvement in golf
- Resources and next steps for continued improvement
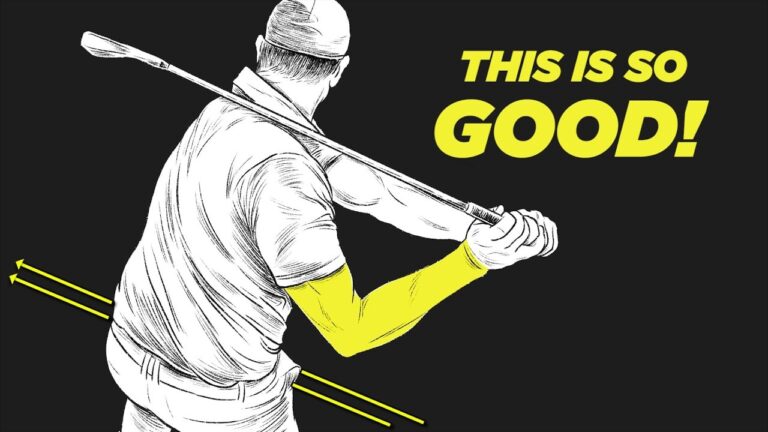
Step 1: Understand the impact position every great golf player shares
Great ball strikers share strikingly similar positions at impact. This includes a tilted lead chest and a tucked trail elbow, creating compression and an inside-to-out club delivery.
- High lead pec — the chest rotates up towards the target so the left pec (for right-handed players) is higher at impact.
- Trail shoulder back and rotated — the right shoulder is behind the ball as it rotates through impact.
- Tucked trail elbow — the elbow is tight to the side, aiding a steeper, more compressive strike.
- Slight tilt and inside delivery — shoulders tilt slightly for an inside swing approach.
Aiming for this impact feeling maximizes compression and speed, essential for consistent golf performance.
Step 2: Create the correct sensation with the tour stick drill
The tour stick drill is a game-changer for teaching your body the feel of moving through the ball. Follow these steps:
- Insert an alignment or tour stick into the ground, pointing along your target line.
- Stand a foot length from the stick, aligning your toes with the line.
- Grip your club with your lead hand and touch the stick as low as possible, promoting lead shoulder extension.
- Adopt your normal address position. Recall the low touch, then execute a slow practice swing.
- On the follow-through, push pressure inside the trail foot and feel the knees close.
The tour stick drill enhances lead shoulder extension, leg and hip coordination, and affords a clear sensation to carry onto the course.
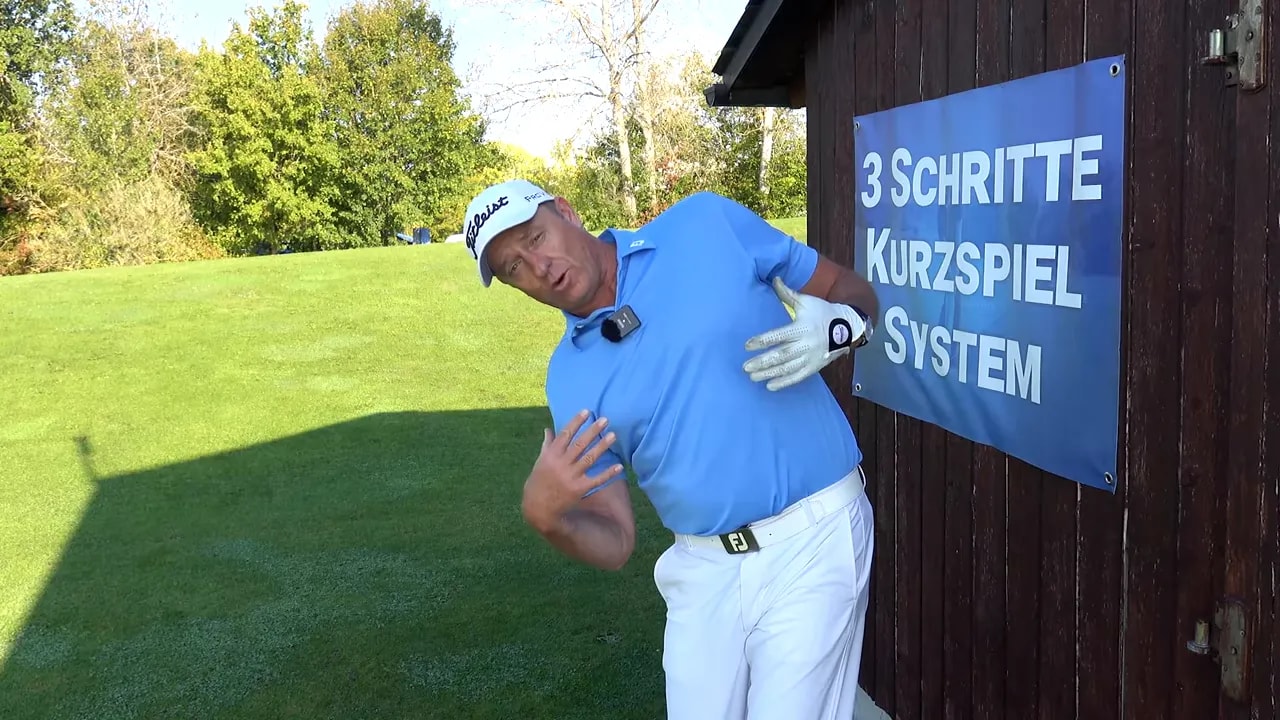
Step 3: Wall drill for shoulder stability and correct pivot
Ensure your shoulders move correctly with this wall drill:
- Stand near a wall wearing a cap, holding the club with palms down on the shaft.
- Position your arms about 45 degrees from the body.
- Maintain the club without touching the wall as you turn from the backswing.
- Focus on keeping the left shoulder in and avoiding outward movement.
This drill allows you to emulate a reverse pivot, enhancing pivot stability and shoulder alignment, fostering impact compression.
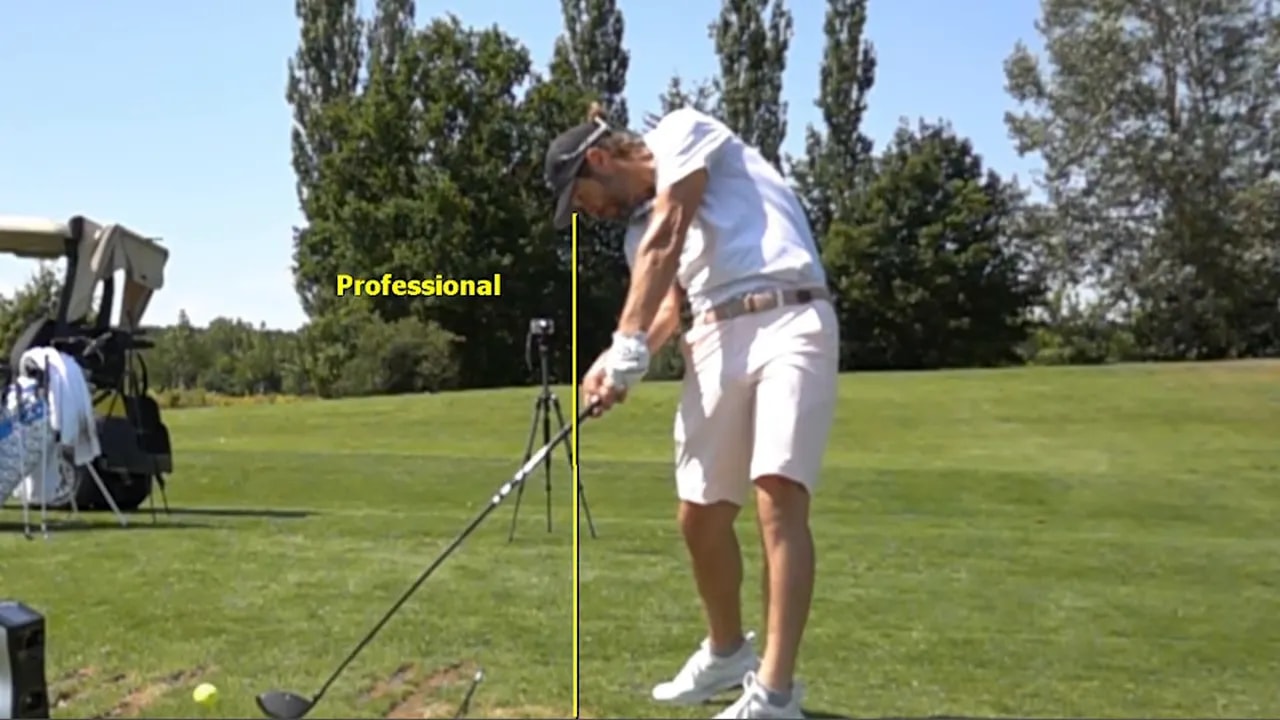
Step 4: Learn the tilt — shoulders on different planes
A flat shoulder plane is a common error. Successful golfers tilt shoulders with the lead shoulder rising and trail shoulder dipping slightly. This tilt supports an inside swing and boosts impact acceleration.
- Backswing shoulder turn: approx. 40 degrees.
- Follow-through chest rotation: about 55 degrees.
- Shoulder line adjustment reflects subtle tilt for effective delivery.
Mirror or video app practice can ensure correct tilt, enhancing your swing dynamics effectively.
Step 5: Use the “looking out the window” swing thought
Adopt this mental picture to refine your swing:
- Visualize opening a window and peering around to spot your target.
- Slightly tilt your neck as though water could flow from your back ear. This incline supports a high lead pec and proper rotation.
- Execute your swing with the head tilted, avoiding a rigid downward gaze.
This strategy stops the right side from lifting prematurely, effectively transferring energy for a cleaner strike.
Step 6: Combine the drills into a simple practice routine
Create a seamless practice flow:
- Begin with half swings focusing on shoulder tilt and chest height.
- Engage in the tour stick drill for shoulder extension and knee closure.
- Apply the wall drill to verify shoulder stability.
- Finish full swings using the “looking out the window” swing thought with a tucked trail elbow.
Reinforce each station with 6 to 12 swings, emphasizing fluid movement over speed. Refining your turn leads to speed naturally.
Step 7: Measure progress and make it consistent
Utilize technology to enhance your practice:
- Capture videos with smartphones or apps to track changes in shoulder rotation and elbow positioning.
- Note enhancements in short iron and mid-iron compression and ball flight consistency.
Small adjustments yield significant improvements in power and consistency.
Common checkpoints and troubleshooting for the golf swing
Be vigilant of these issues and correct them:
- Wild slices or fades — correct by revisiting the wall drill and adjusting neck tilt.
- Inconsistent shots — stabilize with tour stick and wall drills.
- Forced arm pull-through — focus on tucking your trail elbow and chest rotation.
- Right side rises when swinging hard — practice the “looking out the window” strategy.

Putting it on the course: a simple 3-shot routine
Seamlessly transition to game conditions with this routine:
- Take a deep breath, incorporate the “looking out the window” neck tilt.
- Rehearse with a motion reflecting the tour stick feeling — involve low left shoulder, knees closure.
- Commit and swing with clear targeting, harnessing your new learned sensations.
This reduces overthinking and harnesses drilled sensations for practical performance.
Drill summary: checkpoints to memorize
- Lead shoulder extension — Rotate the chest up and towards the target.
- Tucked trail elbow — Keep the elbow close to the hip upon impact.
- Shoulder tilt — Execute different shoulder planes for inside delivery.
- Leg drive — Propel with the trail foot’s inside, escalating speed.
- Viewing room — Employ the neck tilt and head angle for unhindered rotation.

How often to practice these moves for real improvement in golf
Consistency pays off. Engage in short, focused sessions 3-5 times a week:
- Warm-up focusing on mobility and half swings
- Practice two to three sets of the tour stick drill
- Include two sets of the wall drill
- Conduct 15 to 30 full swings with the “looking out the window” thought
Regular practice enhances ball compression, speed, and accuracy.
Resources and next steps for continued improvement
Enhance your progress with consistent feedback. Record your swing from multiple angles to monitor shoulder tilt and elbow positioning.
If structured learning appeals to you, explore digital platforms offering tour benchmarks and comparisons. Tracking shoulder and chest dynamics propels your improvement.
What is the single most important feel to create more compression in my golf swing?
Combining a high lead pec with a tucked trail elbow is paramount. The drills provided increase this essential sensation.
How can I stop my right side from rising when I try to hit the ball hard?
Embrace the “looking out the window” neck tilt, enhancing rotation over lifting. Engage your lower body to stabilize.
Will these drills help older golfers reduce joint stress?
Yes, shifting load from joints to muscles reduces stress. The tour stick drill enhances leg drive and body coordination.
How quickly should I expect to see results in my golf ball striking?
Improvements can be visible after a few sessions. However, sustained practice over 4-8 weeks turns improvements into second nature.
Are there any common mistakes when practicing these drills?
Avoid forcing arm positions, over-rotating the head, or rushing. Focus on slow, sensation-driven drills for best results.
0 Comments