

Coming over the top is the single most common driver fault in golf. It steals distance, creates inconsistent contact and produces those frustrating pulls and slices. The fix is not mystery or magic. It is a sequence: prepare the backswing, control the transition and match the clubface to your new path. Follow the three steps below and you will give yourself the best chance to hit straighter, longer drives.
Table of Contents
- Step 1: Priming the Backswing for better golf drives
- Step 2: Controlling the Transition — stop throwing the club across
- Step 3: Matching the Clubface to your new golf path
- Practice plan example: 30-minute session for better golf drives
Step 1: Priming the Backswing for better golf drives
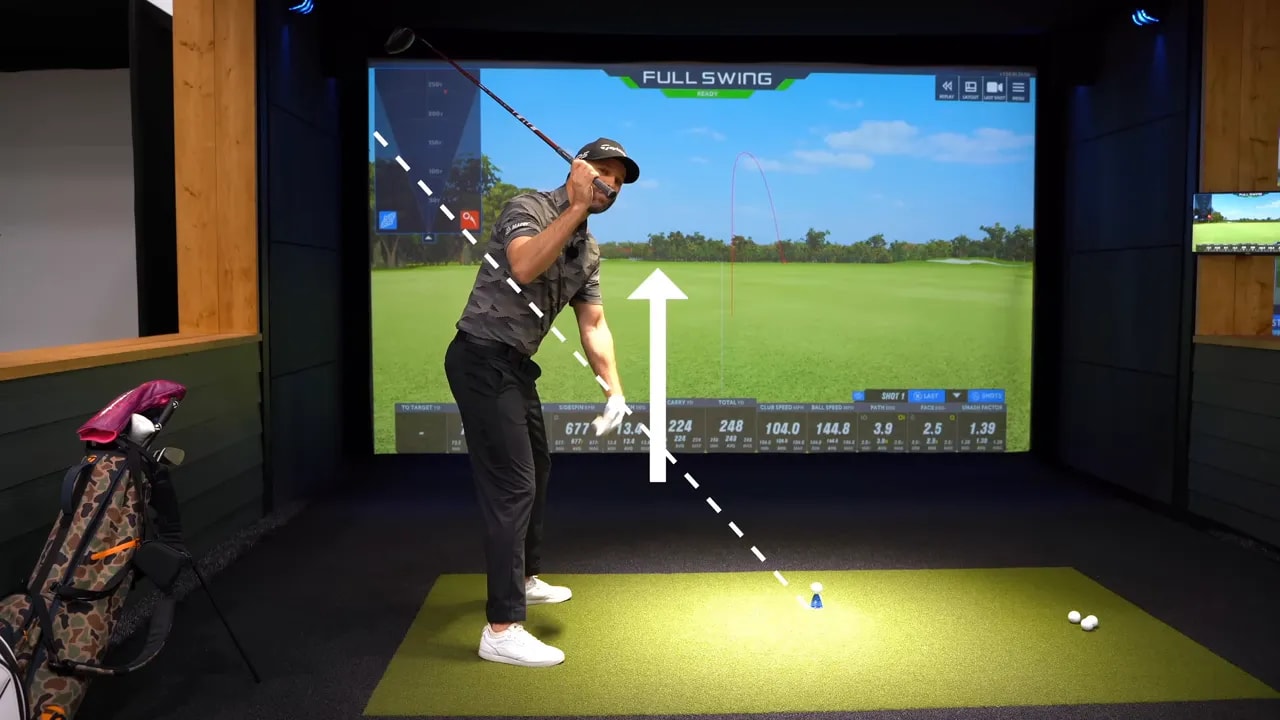
The first stage starts before you move the club on the downswing. If the top of your backswing lacks depth — meaning the grip has not moved sufficiently behind the ball — the downswing will almost always push the club outside the target line and produce an out-to-in path.
Two movements make the backswing: an arm lift and a body turn. The arm lift alone typically moves the grip upward but not behind you. The depth comes from rotation. The more your torso turns, the more the grip moves behind your heels and the easier it becomes to return the club from the inside.
Visual cue: imagine a line drawn from where the shaft meets the head up through the bottom of your trail elbow and extended back. At delivery you want the club head on that line or slightly behind it. If the club head arrives in front of that line you are likely coming over the top.

Quick drill to create depth:
- Setup: Address the ball as normal with your driver and note where your heels are.
- Lift the arms: Raise the hands and arms up slightly over the trail shoulder while keeping the lead arm fairly straight.
- Rotate: Add a deliberate body turn. Keep adding rotation until the grip feels near or over your heels.
- Check the line: With a camera or mirror, confirm the club head sits on or slightly behind the imaginary line through your trail elbow.
Practical cue: think “grip above heels.” If you get that feeling, the path will naturally start to move more in-to-out and produce straighter shots or slight draws rather than a slice.
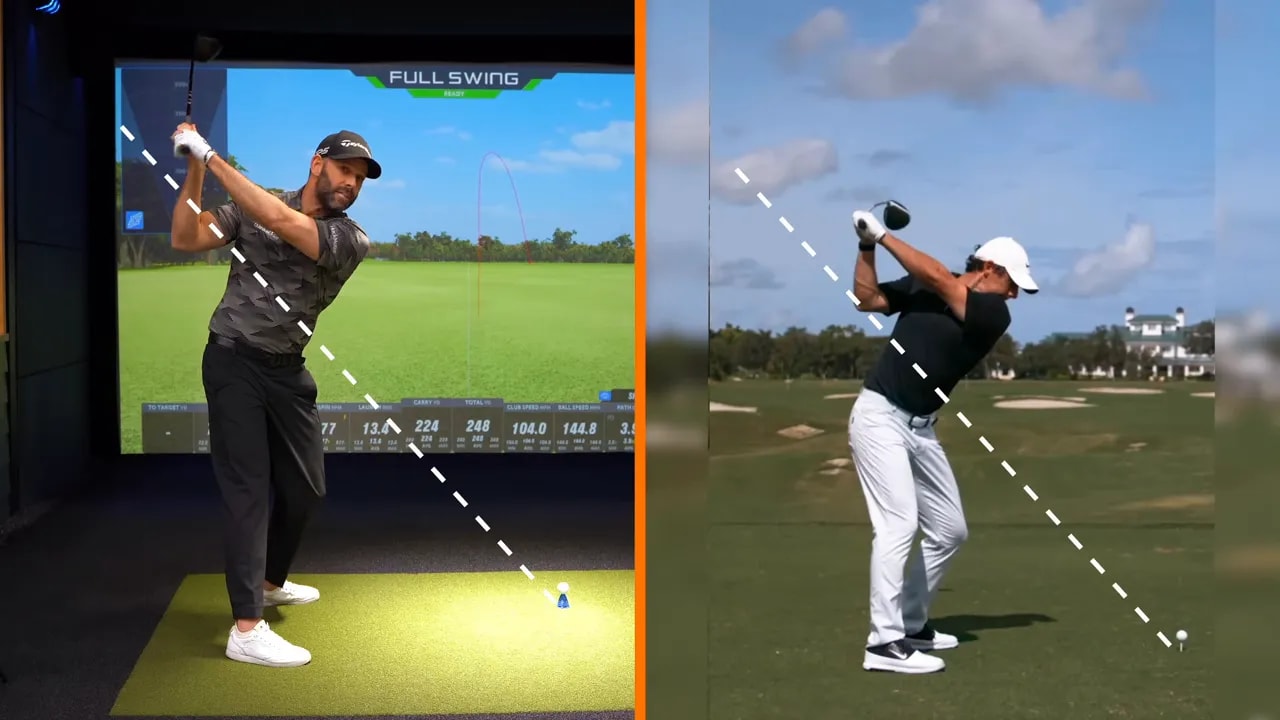
Example pros: players who draw the ball typically show plenty of depth at the top. That depth makes it far easier to return the club along an inside path.
Numbers to understand why depth matters:
- A shallow top with little rotation often creates an out-to-in path (for example, 6 degrees out-to-in).
- A deeper top with more rotation can reverse that to an in-to-out path (for example, into-out by roughly 12.9 degrees).
Practice tip: spend a portion of your range session only building the top of the swing. Use half swings that exaggerate rotation, feel the grip move behind you and back the club down into a controlled finish. Don’t rush the downswing yet.
Step 2: Controlling the Transition — stop throwing the club across
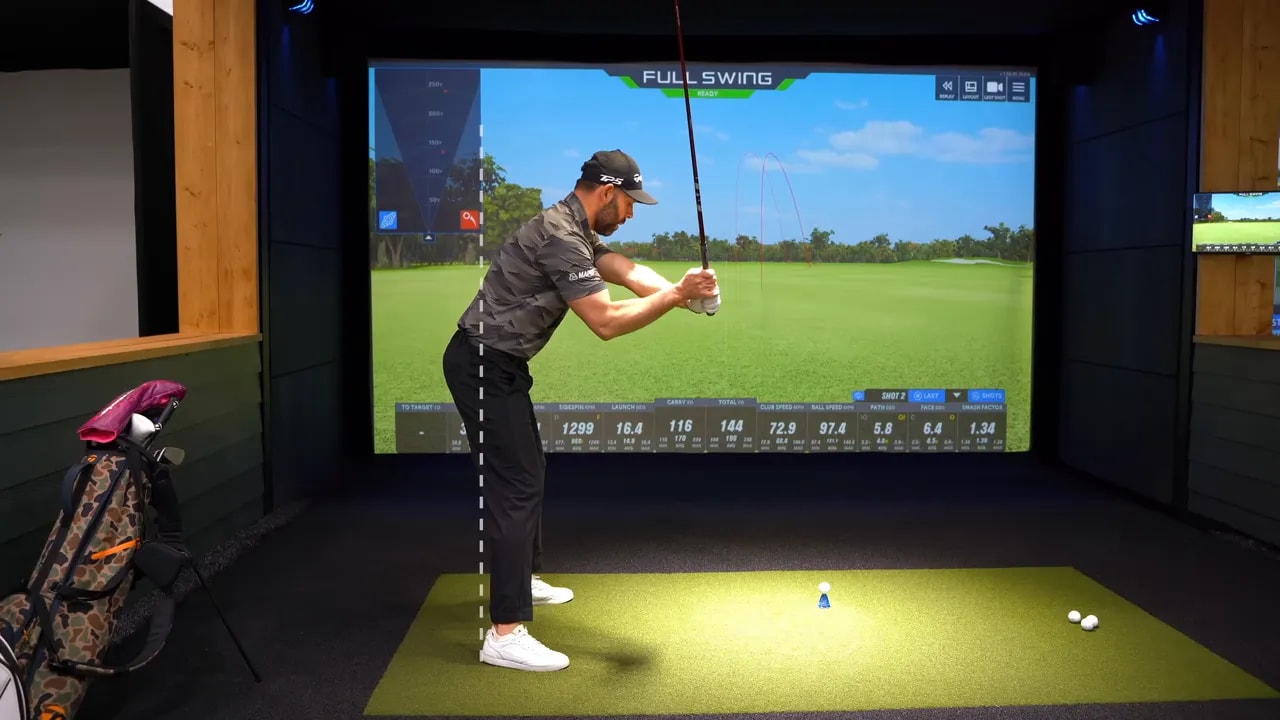
Getting into the correct top-of-swing position is necessary but not sufficient. Many golfers achieve good depth and then, at the transition, rotate the torso first and fling the arms afterward. That sequence sends the club outside and creates the classic over-the-top path.
The feeling you want in the transition is counterintuitive for many: keep your back to the target and allow your arms to drop relative to your torso as you start to shift weight toward the lead foot. This lowers the clubshaft and places the club more underneath the reference line described earlier. The result is an approach from the inside.
Drill: the pump drill for the transition
- Get to the top with good depth and the “grip above heels” feeling.
- Small bump of weight toward your lead side — a deliberate but compact move, not a full shift.
- Pump the arms down while keeping the chest away from the target. Think “arms lower, chest back.”
- Repeat this bump-and-pump motion two or three times, then swing through normally from that position.
Execution notes:
- Do not throw the club away. The pump is not a cast; it is a controlled lowering of the arms while your rotation remains moderate.
- There should be a small amount of body rotation during the pump, but the key is the order — arms lowering while the torso slightly resists rotating aggressively.
- Visualize the club head moving from outside the line to inside that line as your arms drop.
The pump drill trains the new relationship between body rotation and arm swing so the club approaches more from the inside on the way down. After a few repetitions you will start to feel a direct, higher-launching shot that lands closer to target.
Step 3: Matching the Clubface to your new golf path
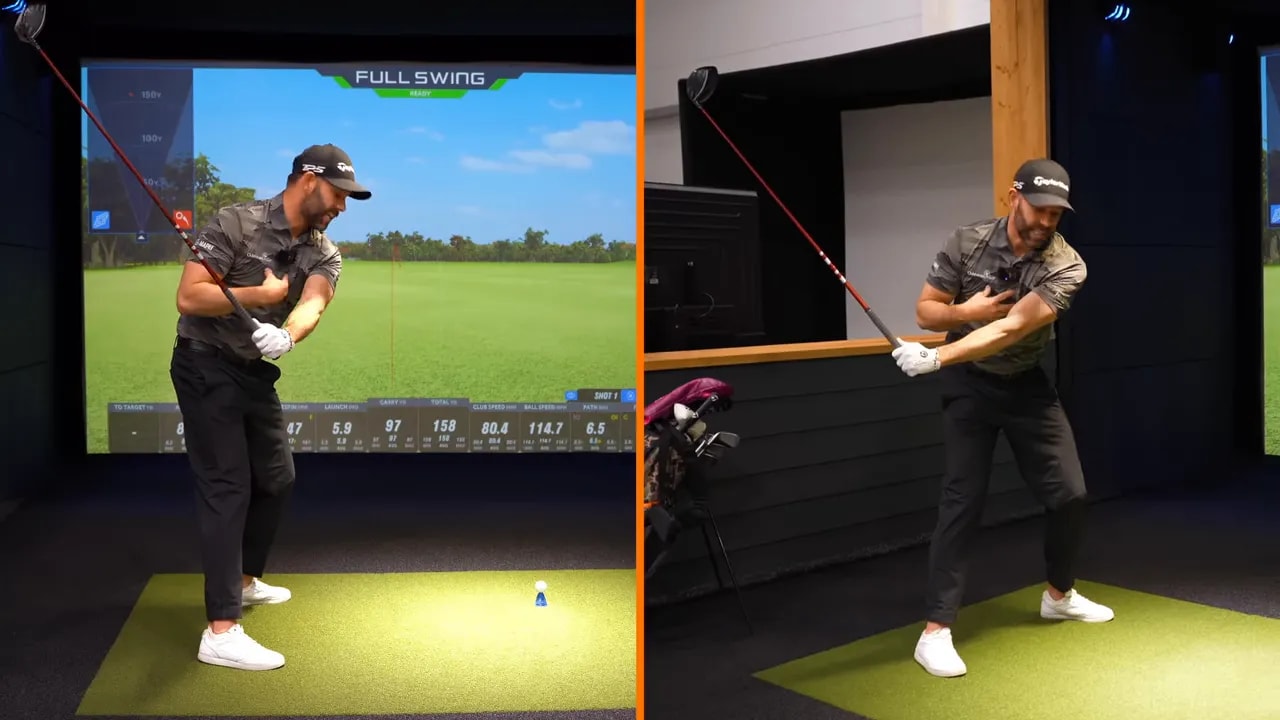
Changing the path is only half the battle. If your clubface remains open to the new in-to-out path, the ball will start to finish farther right than before. To turn the inside path into usable shots you must also rotate the clubface so it sits more closed to the path at impact.
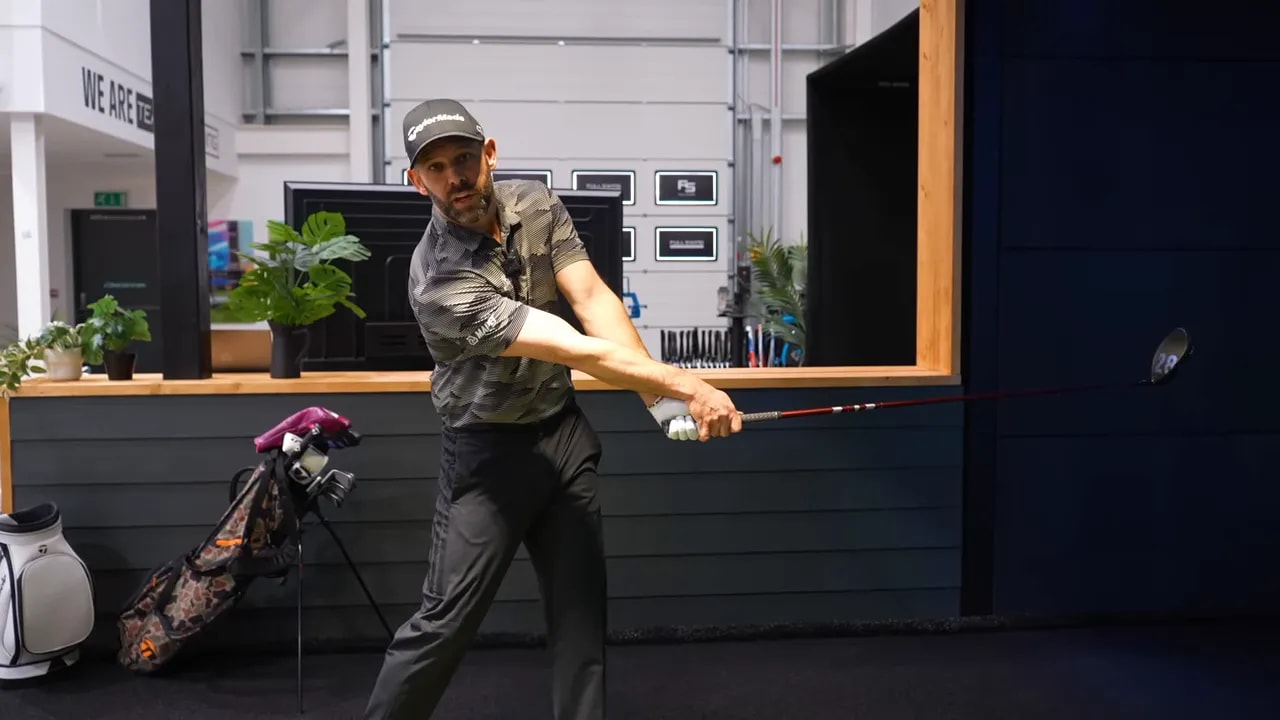
Look at the lead wrist and hand position just after impact. Great drivers of the ball often show the three fingers on the glove hand visible from a face-on view when the shaft is roughly level to the ground. That indicates a correctly rotating left forearm and a face that is closing relative to the path.
Simple hand rotation drill:
- Left-hand swings: Take the club in your left (lead) hand only. Open the palm so it faces away from you behind your body, then rotate the palm so it faces toward the target in front of you.
- Repeat that “palm behind to palm in front” motion with small, controlled swings.
- Add the club with a very light grip. Let your hands rotate and feel the toe of the club move from behind the heel to in front of the heel as the palm turns.
Tips for the hand drill:
- Keep grip pressure light. Tension prevents natural rotation.
- Work just above the elbow to feel how the forearm rotation frees the club face.
- Do not try to forcibly flip the hands at impact. The rotation should be a natural result of proper arm and forearm sequencing.
When you combine the primed backswing, the controlled transition and the correct hand rotation, the result should be a high draw that finishes on or near your intended line rather than a pull or a slice.
How to combine the three steps in a practice session
- Warm-up with mobility and slow swings — 8 to 10 swings focusing on relaxed rotation and arm movement.
- Step 1 drill (priming backswing): 10 to 15 half and three-quarter swings focused on creating depth. Use a camera or mirror for feedback.
- Step 2 drill (pump drill): 2 sets of 10 repetitions from the top — bump and pump twice, then swing through. Start with wedges or short irons before adding the driver.
- Step 3 drill (hand rotation): 2 sets of 10 single-hand swings, then 10 swings with both hands using light pressure.
- Full swings: Hit 20 driver shots. First 5 focus only on the top and transition, next 10 blend all elements and last 5 take normal swings trusting the new sequence.
- Record and review if possible. Look for the club head position relative to the trail elbow at delivery and the visible three fingers on the lead hand after impact.
Practice frequency: repeat this routine 2 to 3 times per week in dedicated practice sessions. Short, focused practice beats long, aimless hitting.
What to expect and common mistakes
- It will feel strange at first. Players often over-rotate or under-rotate when trying to add depth. Use video feedback and small increments of change.
- Do not rush the transition. The pump drill is a tempo and sequencing exercise. Speed will come as the new pattern becomes automatic.
- Keep grip pressure light. Tight hands prevent natural forearm rotation and encourage flipping or early release.
- Face control matters. If you only change the path and not the face, you will often miss further right than before.
Practice plan example: 30-minute session for better golf drives
- 5 minutes: Mobility and relaxed half swings
- 8 minutes: Step 1 priming backswing drill (camera feedback every 5 swings)
- 8 minutes: Step 2 pump drill using a mid-iron, progressing to the driver
- 6 minutes: Step 3 hand rotation and light full swings
- 3 minutes: 3 to 5 full driver swings focusing on sequence and relaxed release
How can I tell if I come over the top?
Look for an out-to-in club path and a face that is open to that path at impact, producing pulls or slices. On video, draw an imaginary line through the bottom of your trail elbow; if your club head reaches delivery in front of that line you are likely over the top.
How long will it take to fix over-the-top?
It varies. With focused, consistent practice using these drills you should see measurable improvement within a few weeks. Muscle memory and course pressure take longer, so keep practicing the sequence under different speeds and lies.
Will fixing over-the-top add distance?
Yes. An inside path and correct clubface rotation allow you to compress the ball better and square the face at impact. You will usually gain both distance and consistency once the new sequence becomes reliable.
Can I use these drills on the course?
Use the pump drill and a simplified feeling on the course. Save detailed single-hand or mirror drills for the range. On the course focus on the top position, a small bump, and a controlled lowering of the arms while maintaining light grip pressure.
Should I change equipment to fix over-the-top?
No equipment change is required to fix the sequence. However, ensure your driver has an appropriate shaft flex and loft for your swing. The mechanical fixes described here are primary; equipment can be a secondary optimization.
Final checklist before you tee off
- Grip pressure relaxed and consistent
- Top of backswing shows depth: grip near or above heels
- Transition feeling: chest away from the target while arms lower
- Lead-hand rotation through the ball so the face closes relative to the path
- Trust the sequence and maintain tempo
These three steps address the root causes that create an over-the-top driver move. By priming the backswing to create depth, controlling the transition with the pump drill and matching the clubface with simple hand rotation work, you will give yourself consistent, straighter golf drives that start and finish closer to your intended line.
Practice with intent, use the visual cues and drills, and record yourself occasionally to monitor progress. Over time the new sequence will become automatic and deliver better results on the course.
0 Comments