

Unlock Your Golf Potential by Mastering the PGA Wrist Motion
Are you ready to elevate your golf game and achieve consistent swings? Mastering the optimal wrist motion can transform your performance from average to extraordinary. This comprehensive guide will lead you through the exact techniques PGA professionals use to enhance ball speed, direction, and delivery, making your approach on the green seamless and effective.
Table of Contents
- Step 1: Understand the PGA wrist position for better golf
- Step 2: Create the trail-wrist load—practical golf drills
- Step 3: Slot the backswing for consistent delivery
- Step 4: Deliver and release—achieve golf compression
- Step 5: Accelerate progress with measurement and feedback
- Common mistakes and corrections for amateur golfers
- Practice plan: ingraining the PGA wrist motion
- Step 6: Transfer skills with on-course cues
- Why this approach boosts your golf performance
- Tools and resources for measuring progress
- Step 7: Troubleshoot wrist motion issues
- FAQ
- Final checklist for applying the wrist motion
Step 1: Understand the PGA Wrist Position for Better Golf
Emulate the best by mastering the trail wrist setup that elite golfers perfect. Visualize the top of your backswing with the club’s toe at 1 o’clock, transitioning to 12:15 as you move through the swing. This subtle adjustment ensures impressive lag and power delivery through the ball.
- Trail wrist angle: Keep the trail wrist pointed down between the ball and feet at top transition.
- Right palm orientation: Direct the trail palm away and down, maintaining a square face through the swing.
Hitting this position with consistency facilitates compressed, precise shots with enhanced speed.
Step 2: Create the Trail-Wrist Load—Practical Golf Drills
Improve your trail wrist dynamics with simplified drills. Start a yard ahead of the ball, focusing on the wrist angles rather than aggressive swings.
- Softly grip the club in front of the ball, ensuring a square face.
- Initiate the takeaway with increased shaft lean to engage the trail wrist.
- Drive the elbow rather than the hands, emulating a towel flick motion.
- Keep the grip’s logo pointing down, avoiding the heel’s presentation.
Establish a sensation of the trail palm pointing downwards to guide the club accurately.
Step 3: Slot the Backswing for Consistent Golf Delivery
Integrate trail wrist loading to streamline your backswing, aligning your arms with effective pivoting for enhanced control.
- Position the trail elbow snugly under your armpit to connect your arms with the torso.
- Align the lead shoulder under your chin to maintain a solid shoulder plane.
- Accent the trail wrist’s angle to achieve accurate arm positioning.
Effortless transitions result from arm-torso connectivity, fostering a controlled club path.
Step 4: Deliver and Release—Achieve Golf Compression
Harness the stored wrist angle to enhance your swing’s power, focusing on compressing the ball effectively.
- Maintain a square face through transition to avoid misdirected shots.
- Elbow lead your downswing for optimal lag creation.
- Commit to a full follow-through, facilitating a seamless club head release.
This precision results in increased distance and accuracy.
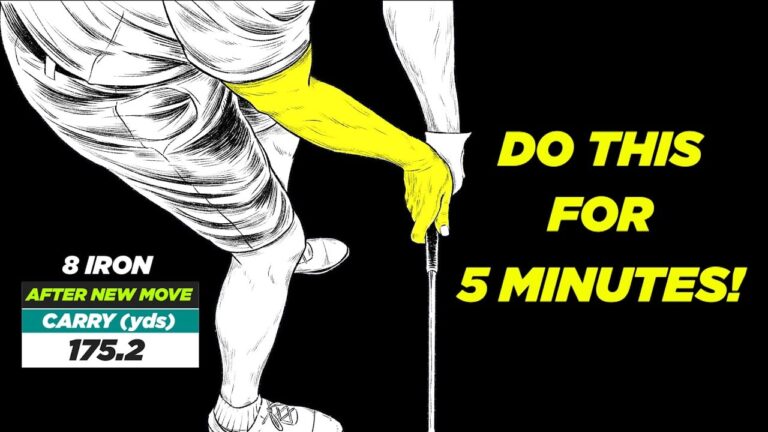
Step 5: Accelerate Progress with Measurement and Feedback
Quantify your wrist angles using specialized sensors and software, crucial in identifying performance trends and areas for improvement.
- HackMotion sensors provide real-time feedback on wrist orientation.
- Swing plane apps aid in evaluating arm alignment.
- Video analysis facilitates direct comparison to professional benchmarks.
Track your metrics to make informed adjustments, propelling your progress.
Common Mistakes and Corrections for Amateur Golfers
Sidestep pitfalls like flat club faces or disconnected swings by implementing these corrections:
- Externally pointing trail wrist: Utilize the phone visualization to correct alignment.
- Open club face issues: Maintain a square outcome at the top of your swing.
- Flat shoulder plane: Ensure connectivity under the chin for an aligned pivot.
- Erroneous hand transitions: Preserve an elbow-led approach for maximum lag.
Practice Plan: Ingraining the PGA Wrist Motion
Develop mastery over these techniques with a structured practice regimen:
- Warm up with incremental one-yard drills, concentrating on palm precedence.
- Engage in repetition sets emphasizing grip and elbow-led movements.
- Utilize sensors or video to validate alignment consistency.
- Gradually transition from short to longer clubs in practice, observing wrist dynamics.
- Conclude with balanced swing finishes for comprehensive follow-through.
Focus on functional precision over duration for impactful advancement.
Step 6: Transfer Skills with On-Course Cues
Maintain practice gains during play with these essential reminders:
- Visualize the phone aligning downward in your trail hand before each shot.
- Commence your downswing focusing on elbow trajectory rather than manual manipulation.
- Ensure a complete pivot for enhanced follow-through.
These cues streamline mental focus, reducing pre-swing anxiety.
Why This Approach Boosts Your Golf Performance
Solid wrist angles, strategic loading, and controlled pivoting eradicate inefficiencies, stabilizing ball trajectories and augmenting striking efficacy.
Nurture an instinctive, powerful swing that yields measurable upgrades in scoring potential.
Tools and Resources for Measuring Progress
Augment practice insights using advanced evaluation mechanisms:
- Wrist sensors for ongoing positional feedback.
- Swing plane applications that facilitate alignment forecasting.
- Video consultations to benchmark physiological swing angles against elite models.
Systematic recording bolsters ongoing improvements.
Step 7: Troubleshoot Wrist Motion Issues
Resolve swing complications efficiently with targeted solutions:
- Impact flips: Reexamine square face maintenance and drill techniques.
- Shot inconsistency: Test stability and retain pre-impact lean.
- Wayward shots: Assess rotational synchrony and arm-torso alignment.
Refining joint positioning amplifies consistent shotmaking potential.
FAQ
How important is the exact degree of wrist angle for golf?
Can beginners use this wrist motion safely in their golf swing?
Will this technique increase my golf distance?
How long before I see improvement in my golf scores?
What practice frequency gives the best results for golf?
Final Checklist for Applying the Wrist Motion
- Phone visual: Ensure the right palm points down and away.
- Shaft lean: Preserve increased lean throughout the swing.
- Elbow engagement: Guide the transition with elbow motion.
- Face control: Retain square club alignment.
- Shoulder connectivity: Sustain positioning under the chin.
- Regular measuring: Validate within the optimal wrist angle range using resources.
Commit these routine elements to daily preparation, achieving superior swing precision and accelerated developments.
0 Comments