
This article breaks down a single, powerful insight that changes how you think about your golf driver. The difference between weekend golfers and the top touring players often comes down to two things: hand travel into a deep “pocket” at the top of the swing and a purposeful wrist and finger release through impact. When you combine the right setup, a consistent slot, and a repeatable hand rotation, you make hitting high, powerful draws with your driver far easier.
Table of Contents
- Step 1: Set up so your body can turn — the foundation for better golf
- Step 2: Build depth and travel — get your hands into the pocket
- Step 3: Slot the backswing — match tour player geometry for better golf
- Step 4: The magic move through impact — head position, fingers, and rotation
- Step 5: Finger and wrist drills — feel the rotation without overusing the shoulders
- Step 6: Common problems and simple corrections for golf practice
- Step 7: Putting it together — practice sequence for better driver golf
- Step 8: What to measure and when to ask for help
- FAQ
- Final notes: make golf simpler by changing where your hands do the work
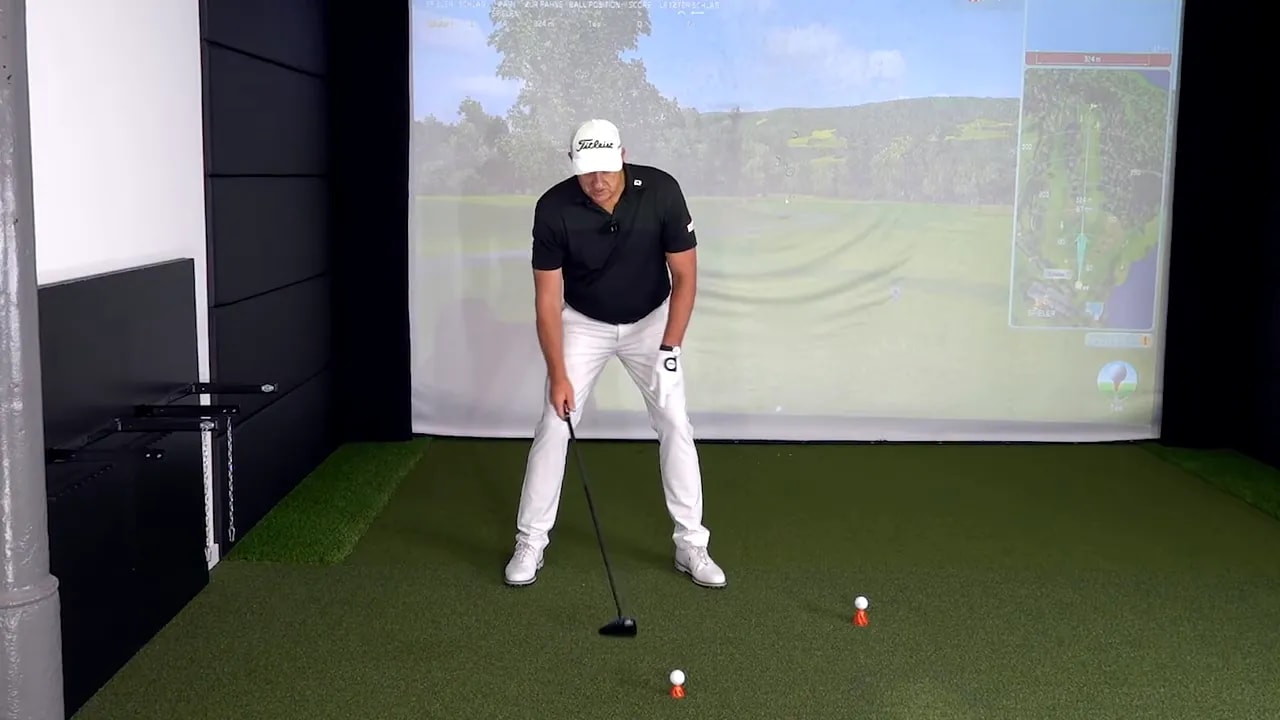
Step 1: Set up so your body can turn — the foundation for better golf
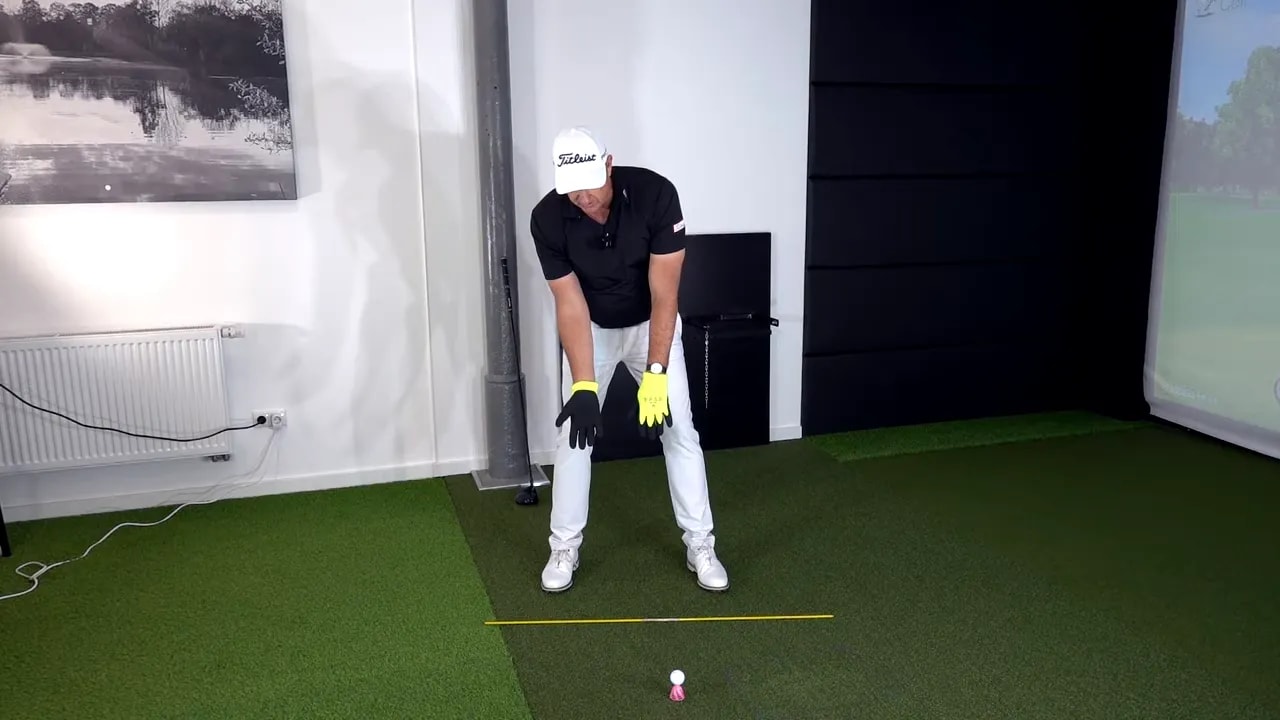
The setup establishes the range of motion your body can create. If your hands are stuck too close to the clubhead at address, your shoulders and hips will also be constrained. That limits travel, reduces potential clubhead speed, and forces compensations that lead to inconsistent ball flight.
Key setup details to create freedom and preserve your joints:
- Shoulder-to-heel alignment — imagine a line dropped from your left shoulder landing inside your left heel. A line from the side of your head should fall near the zipper area. These references help center your posture over the ball.
- Feet flare slightly — opening both feet a little allows your knees and hips to move more freely during the turn.
- Lift the lead heel a little — raising your left heel a touch at setup helps your left knee and hip turn under the body, reducing pressure on the joints and letting you rotate more smoothly. This is especially valuable for aging golfers who need to protect their bodies while keeping power.
- Tuck the right elbow and consider a three-knuckle grip — tucking the right elbow helps keep the club on the plane, and a three-knuckle grip often creates more wrist mobility and speed for many golfers.
- Drop the right foot back slightly — a classic tip from Ben Hogan: this helps your turn and encourages a strike from the inside even when you hit up on the driver.
When your setup allows early and full rotation, you create a physical pathway for the club to travel deeply behind you. That travel is the first big advantage touring players exploit.
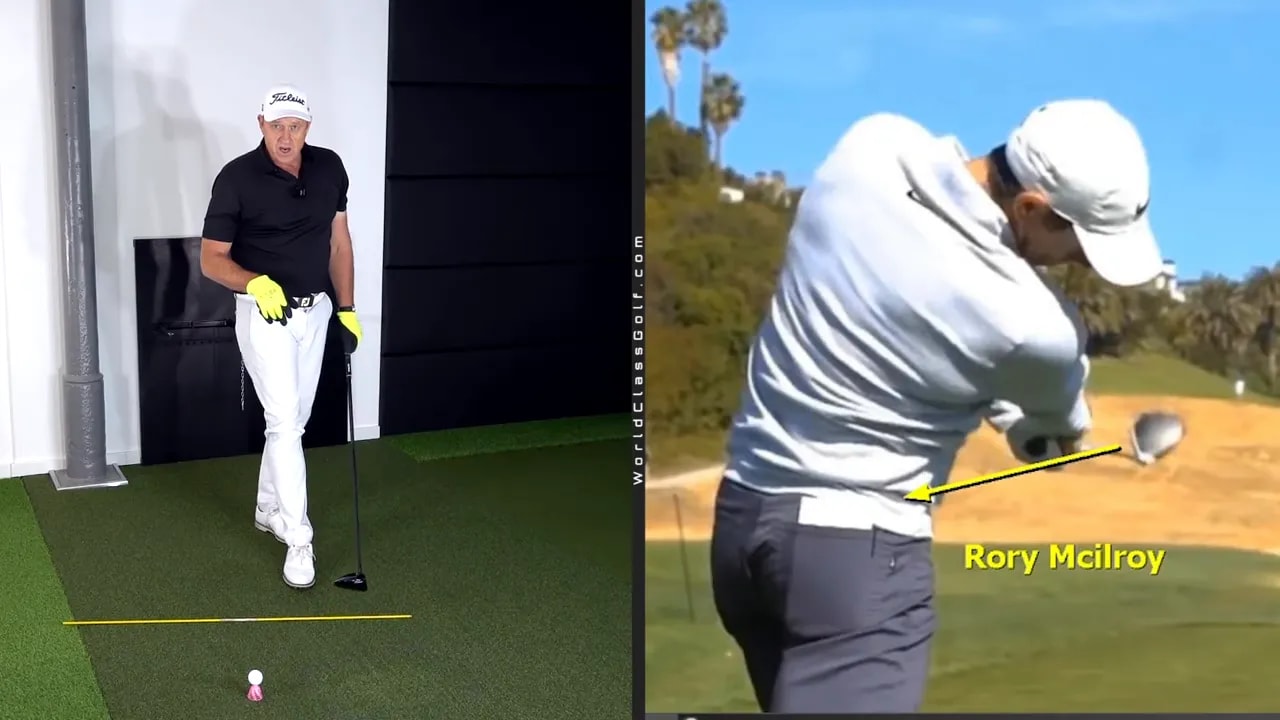
Step 2: Build depth and travel — get your hands into the pocket
The best drivers of the ball have wide, traveling clubheads. Their hands create depth behind the ball at the top of the swing. This creates two benefits: easier inside-to-out clubhead delivery and more potential clubhead speed due to increased travel.
Symptoms of insufficient depth:
- Your hands feel crowded or too close to the head at the top.
- Your shoulders and hips appear frozen or fail to rotate fully in the backswing.
- You often hit weak or pushed shots because you cannot swing from the inside.
A simple drill that forces the feeling of depth and travel:
- Stand up and place your right hand in front of your left, palms together as if mimicking the club grip.
- Turn everything early — ankles, knees, hips, stomach and chest — away from the ball while keeping your head still.
- Lift the lead heel slightly while you turn; maintain a centered head and let the hands travel into the pocket behind you.
This drill emphasizes an early, full turn. It helps you feel where the hands need to be at the top so you can slot the club into a position that makes an inside strike natural.
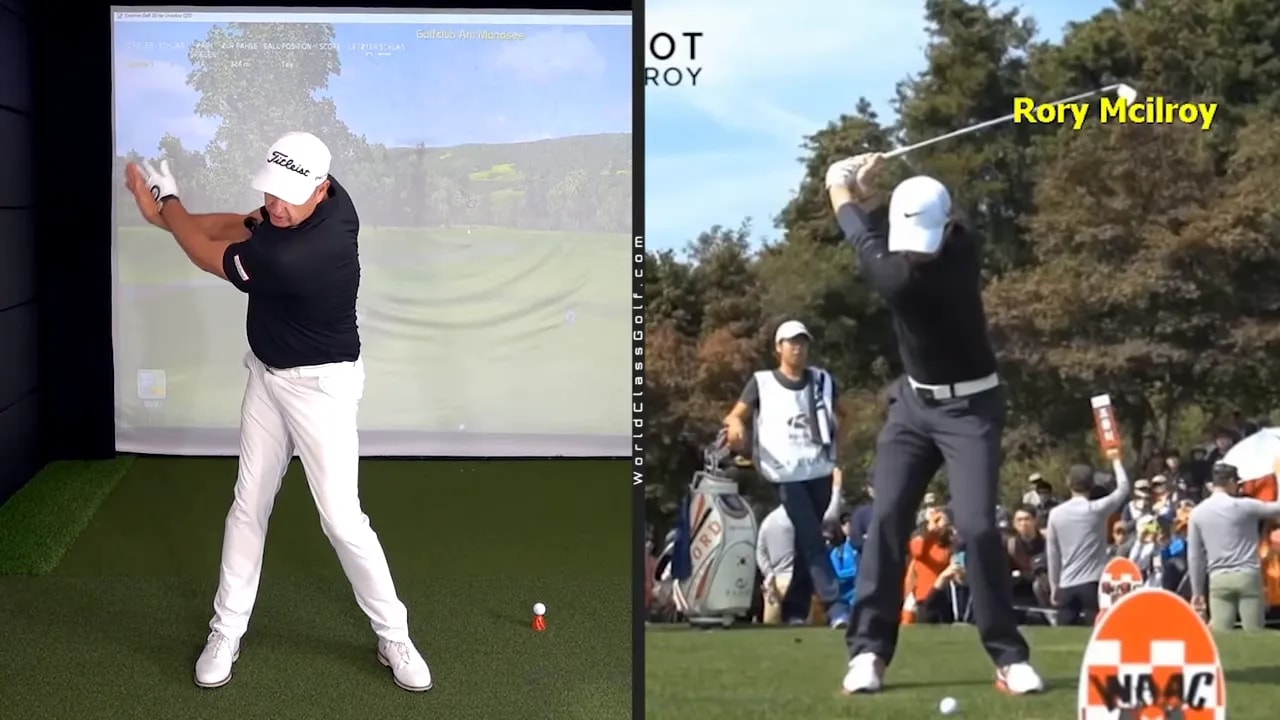
Step 3: Slot the backswing — match tour player geometry for better golf
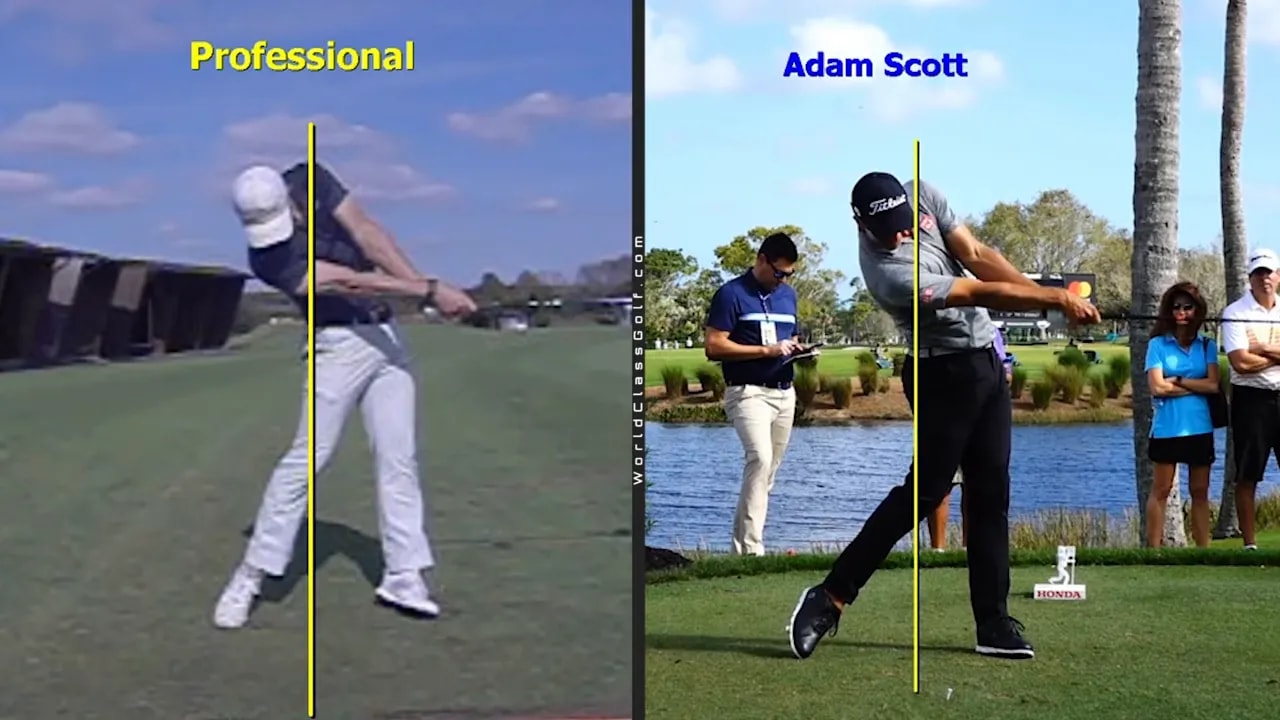
Slotting is about getting the club into a consistent place where the hands provide width and the clubhead can travel freely. Tour players consistently show a specific geometry at the top: wide arms, a deep hand position, and lead-arm angles that fall into a predictable range.
Two measured examples: legendary players show about 40 degrees in the lead-arm angle at the top. Matching that zone is a reliable target for most golfers because it creates the pocket needed to swing from the inside and deliver powerful, controlled shots.
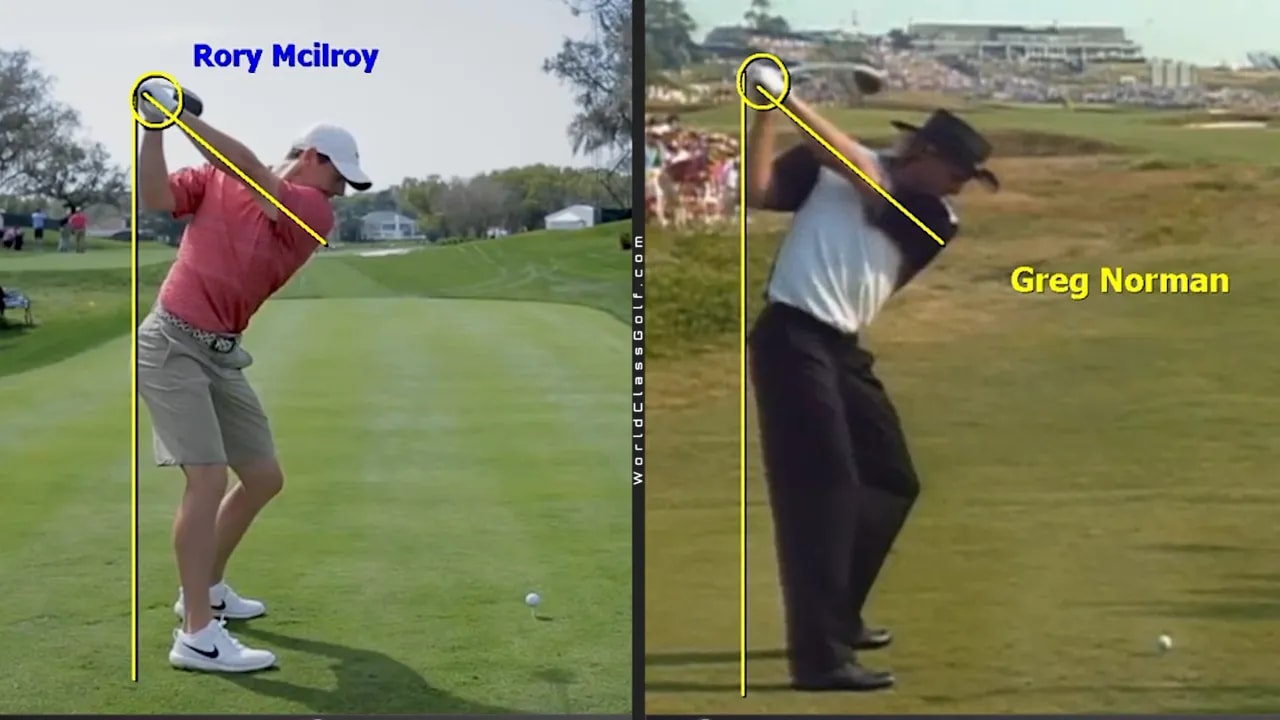
You can test this with your phone camera or use a tool that compares your swing to tour averages. The goal is not identical mimicry but moving your swing closer to proven, repeatable standards.
Step 4: The magic move through impact — head position, fingers, and rotation
The critical moment is the release through impact. Even when your head and shoulders are in the right place, many amateurs still push shots right because they do not have the correct hand and wrist pattern through the ball. The magic move has three simple components:
- Keep your head back and right of the ball through impact so the lead arm stays extended and you have something to release against.
- Square the clubface with your wrists, hands, and fingers as the clubhead comes through. Think of the hands doing the final squaring rather than over-rotating the shoulders.
- Allow a small crossing of the hands — the lead hand slightly crosses over the trail hand — which encourages the face to close enough for a draw without an exaggerated over-rotation.
When the head stays behind the ball and the fingers do the work, the club can rotate more naturally. The result is high, controlled draws and more forgiveness.
Step 5: Finger and wrist drills — feel the rotation without overusing the shoulders
Hands and fingers are often overlooked despite being decisive at impact. You need to develop separation: your hips and body move, and your forearms and hands create the final rotation without the larger shoulder or tricep taking over.
Try these practice feels:
- Funky glove rotation — imagine your right palm facing away and left palm facing you. Rotate the hands from the elbow down without engaging the tricep or shoulder. This isolates forearm rotation and finger release.
- Thumb-pointing drill — on the follow-through, get your lead thumb to point toward the target or camera. At impact it should point toward the ball, then toward the target as you finish. This helps you feel the crossing and squaring motion.
- Left-hand-on-right-bicep drill — place the left hand on the right bicep and swing through. This forces the lead arm to stay connected while the hands rotate through, reinforcing the correct release path.
These drills train the exact fingers, wrists, and forearms behavior used by top tour golfers when they produce consistent, high-power driver strikes.
Step 6: Common problems and simple corrections for golf practice
Here are frequent issues you will see when you start working on depth, slotting, and rotation — and how to correct them quickly.
- Hands stay too close at the top: Emphasize the early full turn in the backswing drill and lift the lead heel slightly at setup.
- Head moves forward during rotation: Keep your head back and feel the lead arm stay long so you have a solid release surface.
- Clubface stays open through impact: Practice the thumb-point drill and glove rotation to get the fingers to actively square the face.
- You create steep, inside-out steepness: If you over-steepen, you will hit the wrong side of the ball. Return to the slotting drill and focus on a wider, traveling clubhead.
A measurable target for many golfers: at impact with the driver, the shoulder line should be between 30 and 35 degrees. You can record a few swings on your phone and compare. Moving closer to that tour average often brings immediate improvement.
Step 7: Putting it together — practice sequence for better driver golf
Use this structured practice sequence to ingrain the setup, slot and release:
- Warm up with mobility and short swings focusing on the left heel lift at setup.
- Do five repetitions of the standing hands-behind-drill (right hand over left) turning early to establish the travel feeling.
- Hit 10 half-swings with a mid-iron emphasizing the slot and deep hand position.
- Practice three sets of 10 glove-rotation drills to train finger and wrist release.
- Finish with 15 driver swings focusing on head-back positioning and thumb-pointing through impact. Use a phone camera every few swings to check shoulder angle and release.
Consistency matters more than speed in early stages. Build the correct pattern slowly, then increase intensity as the motion becomes reliable.
Step 8: What to measure and when to ask for help
Measure these simple metrics to track progress:
- Shoulder angle at impact — aim for around 30 to 35 degrees.
- Lead arm angle at the top — target the tour-like depth, roughly 40 degrees of lead-arm orientation in many top examples.
- Where the clubhead travels — are you getting width and travel behind you?
If you struggle to achieve slot and release, working with an evidence-based instructor or using an analysis platform that compares your swing to tour averages can speed up progress. Tools that show tour corridors and provide quantified feedback remove guesswork and keep your practice efficient.
FAQ
How does creating hand depth increase clubhead speed for my golf driver?
When your hands travel deeper into the pocket, the club has a longer path to accelerate. That increased travel, combined with a wider arc, allows for more clubhead speed at impact without forcing your body to overswing. In addition, a correct slot lets you strike from the inside more consistently, which transfers energy efficiently into the golf ball.
Will lifting my left heel hurt my balance or reduce my consistency?
A small lift of the lead heel at setup is a stability aid, not a balance breaker. It helps your left hip and knee turn underneath you so you can rotate more effectively and reduces joint strain. Keep the lift modest and practice with short swings first. Most golfers find it increases consistency once they adapt to the feeling.
Why do my shots still push to the right when I get my shoulders in the right place?
Pushing to the right often means the clubface is not closing enough through impact. If your shoulders are positioned correctly but your hands and fingers are not actively squaring the face, you will push or fade. Focus on the glove rotation and thumb-point drills to bring your hands and fingers into the release.
How often should I practice these drills to see real improvement in my golf?
Quality practices three times per week, each 20 to 40 minutes long, will produce meaningful change over a month. Use the structured practice sequence in this article and record yourself periodically. Consistent, focused reps of the slot and release drills are more effective than long, unfocused range sessions.
Is this approach suitable for older golfers or those with limited mobility?
Yes. The setup adjustments—feet flare, slight left heel lift, and reduced joint pressure—are especially helpful for older golfers. They allow the body to rotate more efficiently while minimizing joint stress. Emphasize drills that isolate hand and wrist rotation so you can generate better results without extra strain on larger joints.
Final notes: make golf simpler by changing where your hands do the work
Top tour players create two consistent advantages: width and travel in the backswing and a deliberate hand and finger release through impact. By adjusting your setup, practicing the slotting drills, and training your hands to rotate correctly, you can simplify your golf swing and unlock more distance, straighter draws, and greater consistency.
Track your shoulder angle, practice the drill sequence, and use targeted hand-release feels. Those small changes add up to a big difference in how you strike the ball and the quality of your golf shots.
0 Comments