
Focus keyphrase: punch and twist move
If you are battling a slice, topping the ball, and you feel unsure about your setup, you are not alone. Most high-handicap golfers have a small set of root problems that create big, frustrating swing results. The good news is that you can fix them using simple changes in setup, grip, and impact timing.
This guide breaks down a complete, step-by-step approach using the punch and twist move. You will learn how to square the clubface, strike the ball on the turf (so you stop topping), and close the face through impact so your misses improve immediately.
Table of Contents
- Step 1: Identify the three problems behind your slice and topped shots
- Step 2: Fix your clubface by closing it more at the source (grip)
- Step 3: Build a better setup with feet flared and hips forward
- Step 4: Use the weight-shift drill to stop topping the ball
- Step 5: Learn the punch down and away move to fix tops
- Step 6: Add the key layer, the punch and twist move, to close the clubface
- Step 7: Add a shoulder turn drill to lengthen the swing and get the club working inside
- Step 8: Put it all together as your “80% improvement” practice plan
- FAQ
- Final takeaway
Step 1: Identify the three problems behind your slice and topped shots
When your ball slices left (for a left-handed golfer) and you top the ball, it usually comes from the same chain reaction. In practice, the instructor in the lesson focused on three big areas:
- Clubface too open near impact, which sends the ball off to the side.
- Weak grip at setup, which makes it harder to close the face through the swing.
- Incorrect setup and weight shift, especially hips that stay too far back. That creates tops and prevents proper sequencing.
Before you try to “swing better,” you want a clear system to control face position and strike location. That system starts with your setup.
Step 2: Fix your clubface by closing it more at the source (grip)
A lefty slice and an open clubface near the ball are tightly connected. The most direct way to reduce an open clubface is to strengthen your grip slightly so the club naturally sits better at address.
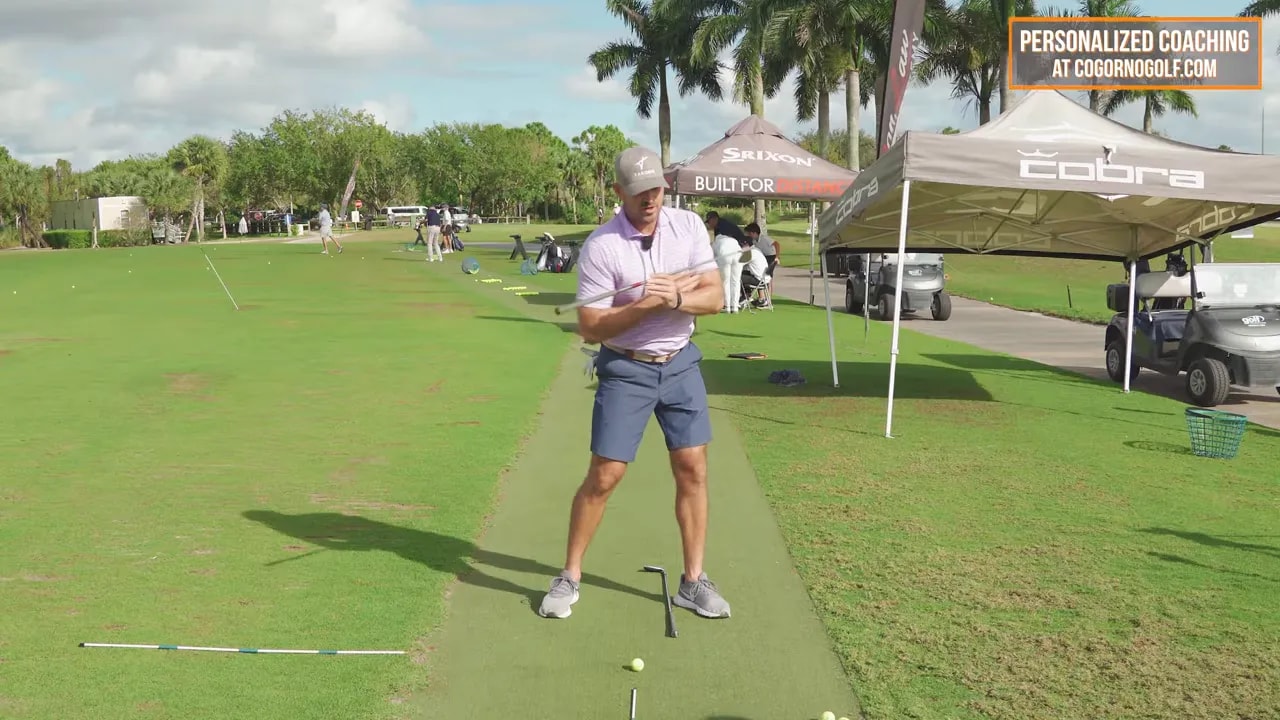
Step 2a: Use the glove-logo reference
One helpful checkpoint is how your hand positioning changes what you see when you look down.
- Start with your normal grip and notice where the glove logo points.
- Then strengthen so the glove logo and knuckle visibility shift to a more “closed” setup.
The instructor’s key idea was simple: if your grip is too weak, you usually have a clubface that approaches the ball too open. When you strengthen, your face has a better chance to square.
Step 2b: Strengthen just enough to square the face
You do not need to overhaul your grip forever. Grip changes are a high leverage tool. If you slice significantly, strengthen the grip so the clubface can close more reliably through impact.
In the lesson, the new grip was treated as a “face solution.” But the takeaway is important: grip alone often reduces the severity of the miss, but it does not fix everything. You still need the right strike and the right move into impact.
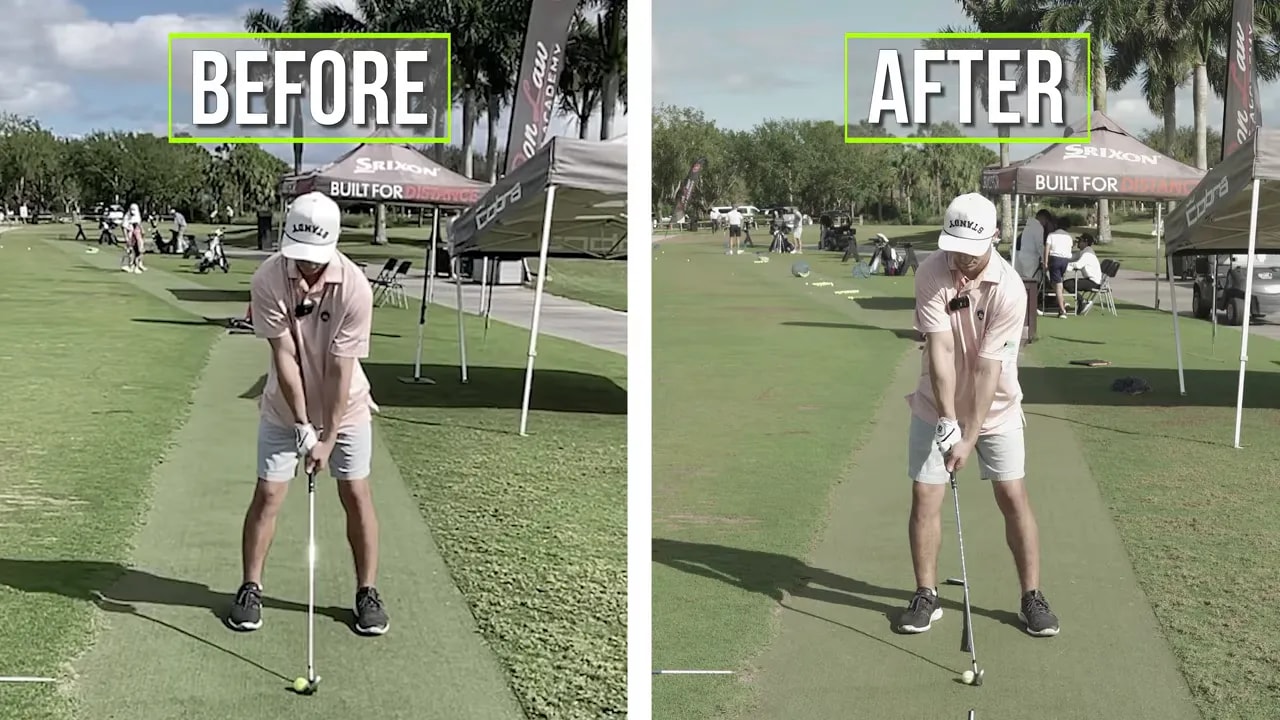
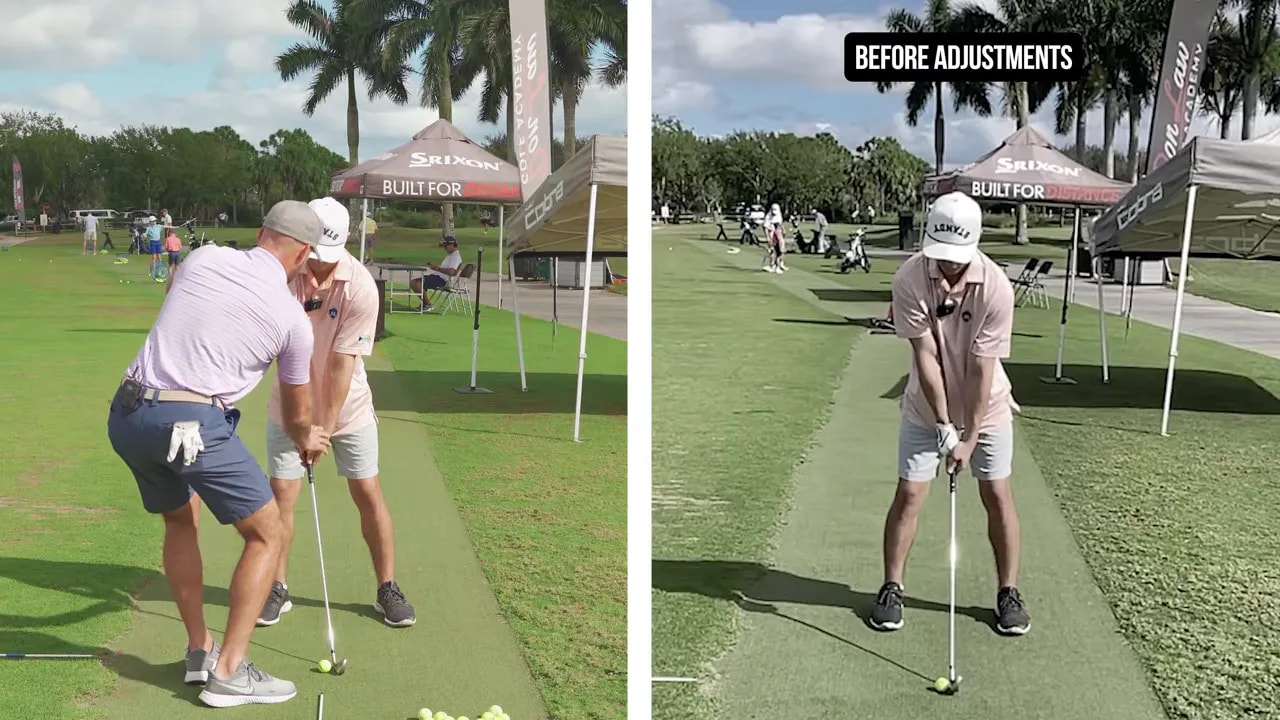
Step 3: Build a better setup with feet flared and hips forward
If your setup feels weird at first, that does not mean it is wrong. It means you are changing something your body is not used to.
Step 3a: Flare your feet to recruit hip rotation
Many amateur golfers have “no hip turn.” When you start with square feet and limited hip motion, your swing often compensates by going off plane or coming over the top. The setup fix is to flare your feet.
A practical reference from the lesson:
- Your left foot around 11 o’clock
- Your right foot around 1 o’clock
This flaring helps you turn your hips more naturally.
Step 3b: Move your belt buckle slightly forward
Next, set your lower body so your torso does not fall into a forward-tilting pattern.
- At address, your belt buckle should be slightly in front of your shirt buttons.
- That usually feels like pushing your hips 1 to 2 inches forward toward your right ankle.
When you push hips forward, your upper body can tilt back a bit. The lesson highlighted the common contrast:
- If hips go away from target, upper body goes forward, which often leads to an over-the-top move.
- If hips go forward, upper body tilts back appropriately, helping you swing more from the inside.
Step 3c: Place hands and grip forward
The same setup included “hands and hips forward.” That means you do not start with hands trapped behind your body. Your strike should feel more connected to your lower body moving through.
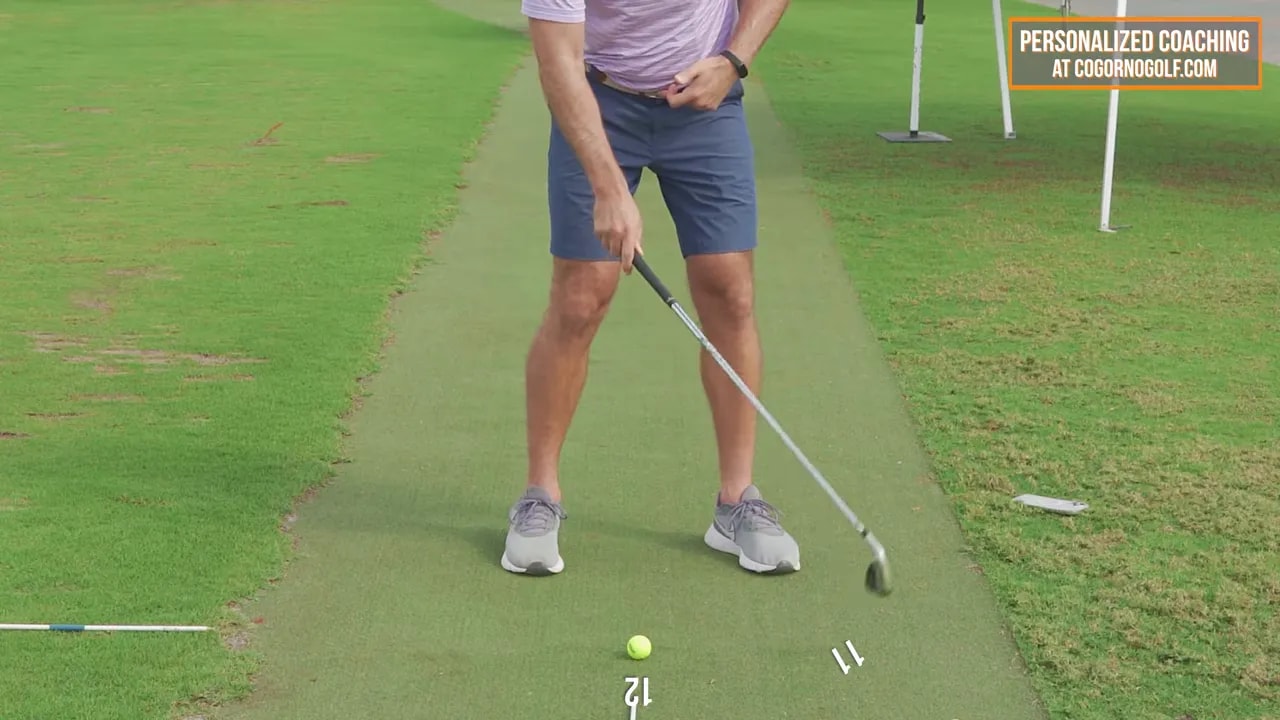
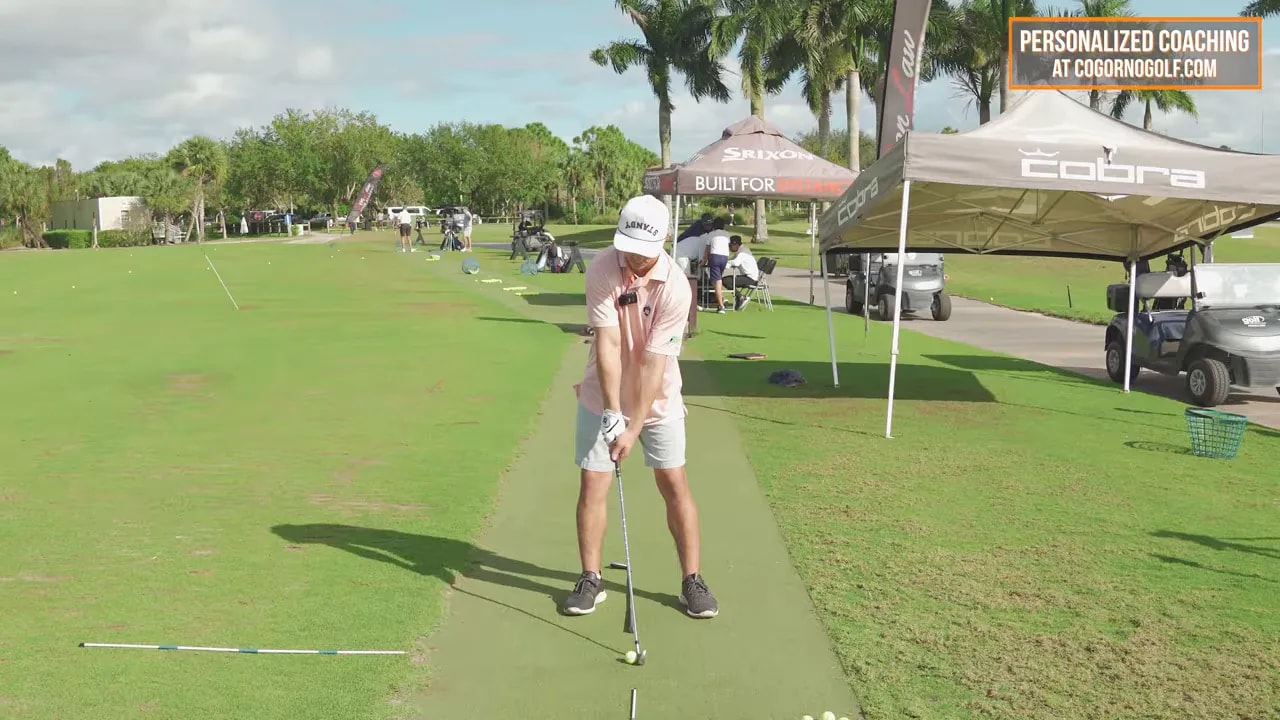
Step 4: Use the weight-shift drill to stop topping the ball
Topping is not only a timing issue. Often, it is a sequence and weight shift issue. If your hips do not go far enough forward, your arms and club do not hit the turf properly and you end up contacting too high on the ball.
Step 4a: Create a “ball line” and practice getting your hips past it
The drill uses a reference line drawn upward from where the ball sits. A good ball striker gets the hips past that line as the club descends and strikes.
In contrast, many golfers keep hips back and let the upper body move forward. That makes it easy to top, because your club approaches the ball without the right forward lean from the lower body.
Step 4b: Keep your head back while hips go forward
A key concept from the lesson:
- Hips go forward past the ball line.
- Your head stays back relative to your body movement.
This helps prevent the “head-chest fly forward” pattern that often triggers thin or topped contact.

Step 4c: Make turf contact on purpose
During the drill, focus on having the club clip and hit the ground as you push hips forward. The lesson used a mat-like setup and coached:
- If you finish with hips far forward and the club hits the turf, you are training the correct delivery.
- If you do not take a divot, you are not committing to forward strike position yet.
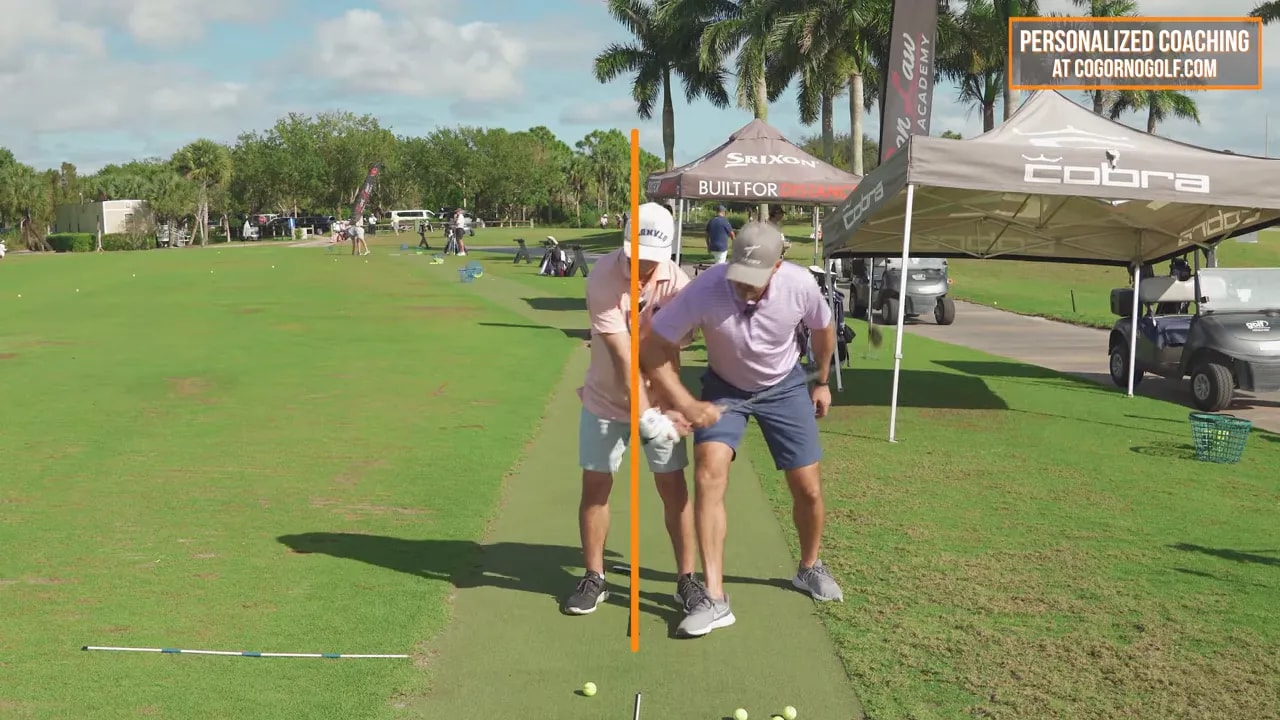
Step 5: Learn the punch down and away move to fix tops
This is where the fix becomes physical and memorable.
To stop topped shots, you need a delivery that sends the clubhead down to the turf instead of “floating” above it. The instructor’s core feel was:
- Punch in the ground
- with arms and hands extended away
- and traveling down and away
Step 5a: Repeat a simple mantra for impact
The lesson reduced the swing thought into a repeatable command. Use this in your own practice:
- Punch down and away (focus on hitting the turf)
The moment you can hit the turf consistently, topped shots usually improve rapidly because the clubface has better contact conditions and the strike location becomes correct.
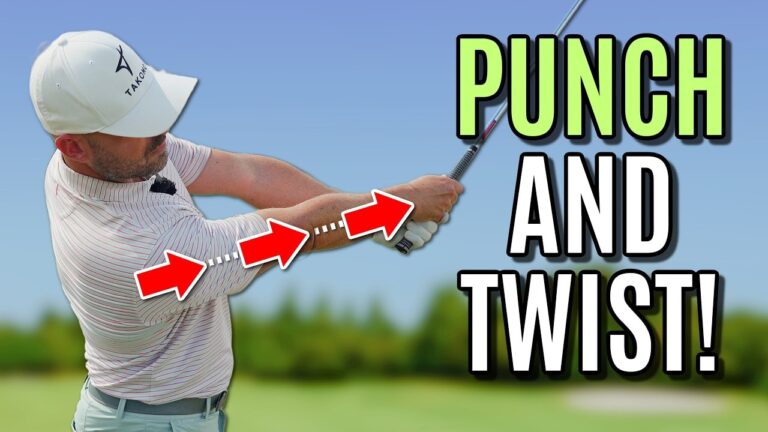
Step 6: Add the key layer, the punch and twist move, to close the clubface
Now you solve the slice side of the equation. Topping and slicing are different problems, but the same delivery mechanics influence both. After improving strike quality with the punch, you must ensure the clubface is closing rather than staying open.
That is the heart of the punch and twist move.
Step 6a: Understand why the face stays open
When a player hits two “practice” shots with good contact but still sends the ball left, the lesson pointed out a conceptual error: the golfer was holding the face open through the strike. It might feel square from one angle, but the face was not actually closing as required.
The takeaway for you:
- If the ball still starts too far left (for a lefty slice pattern), you likely need more closure of the clubface.
- It does not automatically “close itself.” You must deliver with the correct rotation while impact is happening.
Step 6b: Punch in the ground and twist the face shut
The lesson’s mantra for the complete move combined strike and face rotation:
- Punch in the ground
- Twist in the face
- Close the toe past the heel (as the club turns through impact)
A practical way to visualize it is with the glove logo reference again:
- At delivery, the glove logo is often angled away from you.
- As you punch and the body turns, you “twist” that logo toward a more square condition.
- At finish, the logo direction reflects a normal amount of face rotation and closure.
Step 6c: Use “punch, twist” as one continuous action
Do not treat impact as two separate tasks. The face closure is timed with the turf contact.
When you do it correctly, the ball flight should show improvements in direction and contact because you are striking down and closing the face through impact.
Step 7: Add a shoulder turn drill to lengthen the swing and get the club working inside
Once the face and strike delivery are improving, you can unlock more power and better path. The lesson added a backswing turn drill attributed to JT Thomas.
Step 7a: Use two-club alignment to measure turn depth
The drill uses a reference club placed across the shoulders, and another reference aligned with the trail foot. The goal is to feel a bigger turn so your club gets “room” to come down from the inside.
Coaching cues included:
- Get about a 90-degree turn feeling.
- Let the front knee and front quad turn in a little.
- Let the belt buckle turn back slightly while shoulders rotate.
Step 7b: Avoid “no man’s land” by finding home through the ground
The instructor noted that adding turn can temporarily make golfers feel lost. The solution was to return to impact intent: “find the ground.” In other words, the moment you transition, you want to thud the turf with the correct delivery mechanics.
So your combination becomes:
- Big turn in the backswing
- Thud the ground
- Twist the face
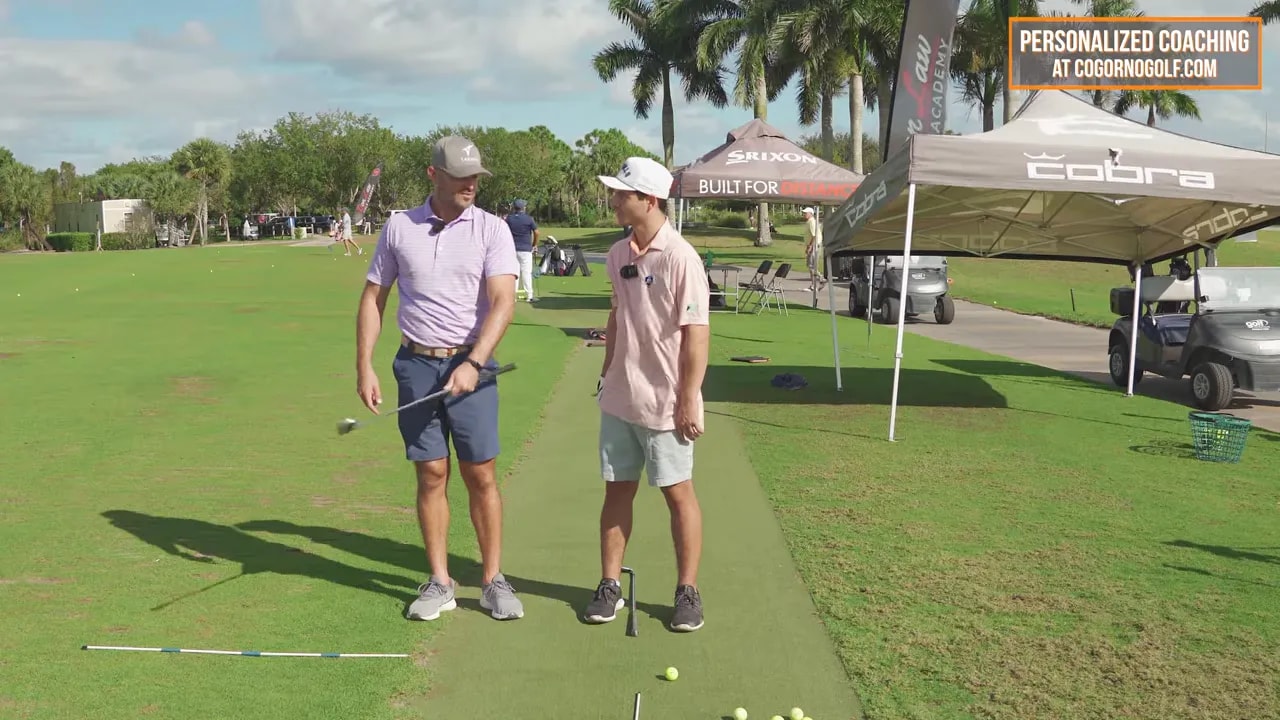
Step 8: Put it all together as your “80% improvement” practice plan
You do not need twenty new swing thoughts. The lesson intentionally grouped everything into manageable pieces. The recommended progression was:
- Setup: feet flared, hips forward, hands forward, stronger grip
- Impact strike: punch down and away to hit the turf and stop topped shots
- Face closure: punch and twist to close the clubface through impact
If you can get these three pieces solid, you typically earn most of the performance benefits you are looking for. Power and polish come after you are consistently striking the ball correctly.
FAQ
What is the punch and twist move?
The punch and twist move combines two actions through impact: you punch the club into the ground (down and away) to fix topped shots, while simultaneously twisting the face closed so the toe passes the heel and you stop leaving the face open, which causes slices.
How does a stronger grip help with a slice?
A slice often happens because your clubface is too open as it approaches the ball. A stronger grip turns your hands to help the clubface square more easily, giving you better face control through the downswing and impact.
Why do feet flared and hips forward matter?
Flared feet help you recruit hip rotation, especially if you have limited hip turn. Hips forward at setup supports a better upper-body position and improves weight shift so you can strike the ball on the turf instead of topping.
How do I stop topping the ball quickly?
Train forward hip movement and turf contact using the “ball line” drill: get your hips past the line while keeping your head relatively back. Then add the feel of punch down and away so your clubhead hits the mat consistently.
If my shots still go left, what should I change?
Assume the clubface may still be open through impact. Go back to the punch and twist move and focus on closing the face as you punch down. The clubface must rotate; it usually does not close itself.
Final takeaway
If you want one clear path to better ball striking, use this sequence: build a correct setup, strengthen the grip to help square the face, shift your hips forward to hit the turf, then deliver the punch and twist move to close the clubface through impact.
When your contact improves and your face closure improves at the same time, you get the most noticeable improvement in both direction and consistency.
Practice tip: When you change multiple variables, it may feel “weird” at first. That is normal. Give yourself a few sets of simple reps focused only on setup and the punch-and-twist feel before you judge results.
0 Comments