Are you struggling to achieve consistency and power in your golf swing? Discover how mastering the trail arm move can revolutionize your technique, improve your accuracy, and enhance your golfing enjoyment.
Golfers often find themselves stuck in a rut when it comes to their swing, grappling with inconsistent ball striking, weak contact, and a lack of power control. The essential component here is the trail arm and wrist movement during the golf swing. Without proper mechanics in this area, your shots will suffer, no matter your practice routine. As a seasoned golf instructor, I’ve observed this trend and am keen to guide you through mastering this skill.
In this comprehensive guide, you’ll learn the crucial trail arm move that empowers your golf swing, enhancing power, accuracy, and consistency. Discover how to effectively load your wrist during the backswing and properly fold and set your trail arm. Finally, unlock your potential with an efficient downswing for maximum control.
Table of Contents
- Step 1: Understanding the Importance of the Trail Arm and Wrist
- Step 2: Loading the Trail Wrist in the Backswing
- Step 3: Folding and Setting the Trail Arm
- Step 4: Blending Wrist and Arm Movements
- Step 5: Practicing with Both Hands
- Step 6: Trail Arm and Wrist Delivery in Downswing
- Step 7: A Drill to Master the Trail Arm Move
- Frequently Asked Questions (FAQ)
- Conclusion
Step 1: Understanding the Importance of the Trail Arm and Wrist
The trail arm and wrist are crucial in both backswing and downswing. Missteps here often lead to power loss and poor clubface control. Mastering these movements enhances ball striking and consistency, making a significant difference in your game.
Correctly loading the wrist is pivotal in generating power, also aiding in precise clubface control. If errant shots and lackluster distance plague you, honing in on your trail wrist might solve these issues.
Step 2: Loading the Trail Wrist in the Backswing
Let’s start with the wrist, the basis of your trail arm’s movement. Correctly loading the wrist entails setting a bend during your backswing, storing energy for release in the downswing.
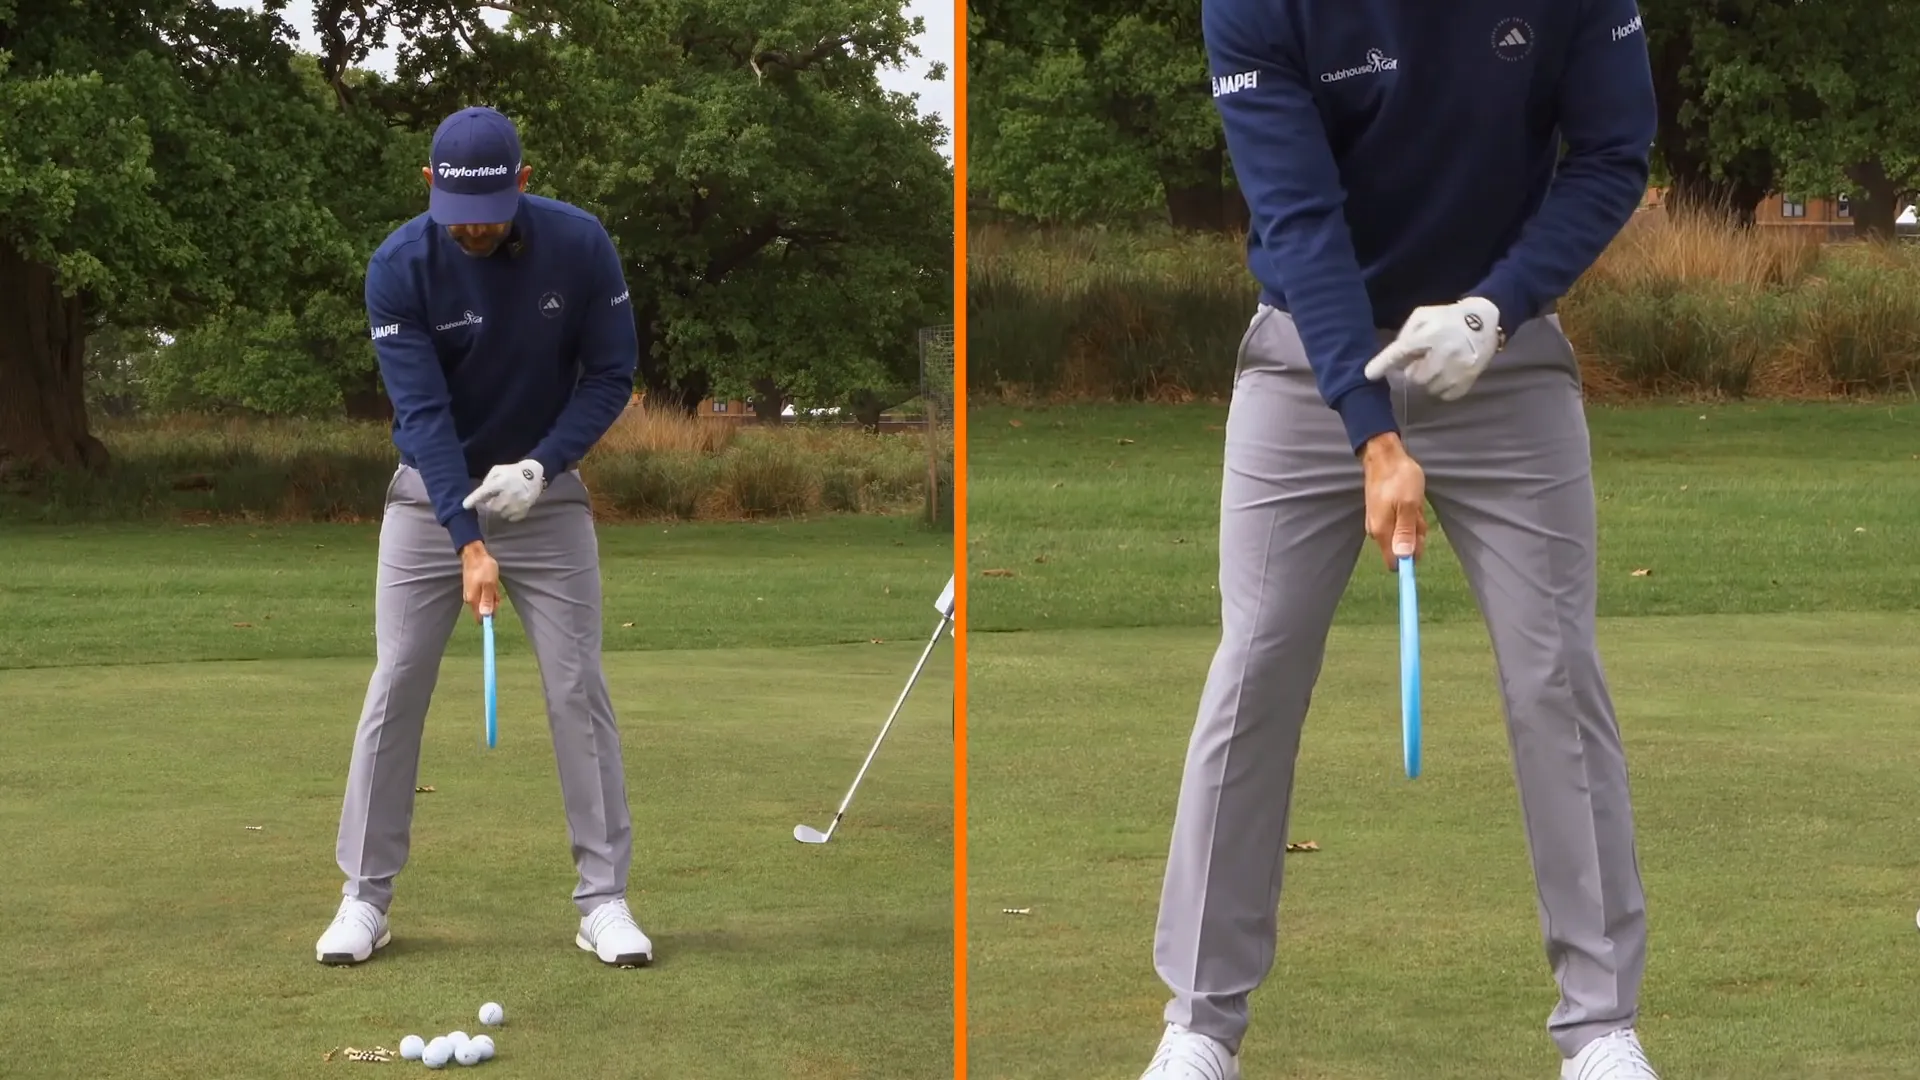
Visualize holding a golf club. At the setup, your trail wrist should maintain a slight bend. As you lift your thumb slightly, your wrist undergoes radial and ulnar deviation. The true wrist bend forms as you pull your knuckles back toward the forearm.
Executing these movements right points the club face down in preparation for a powerful downswing. Many golfers mistakenly rotate the wrist, causing less effective strikes. Practice getting the wrist movement right by concentrating on bending the wrist so the face points downward.
Step 3: Folding and Setting the Trail Arm
Once your wrist is loaded, it’s time to focus on folding the trail arm. This involves bending the elbow and externally rotating the arm so it points down toward your hip.
A common error is allowing the elbow to bend behind the body, leading to inconsistent swings. Instead, make sure the arm folds correctly by blocking elbow movement with your lead hand, ensuring it rotates and faces the appropriate direction.
Step 4: Blending Wrist and Arm Movements
To effectively blend wrist and arm movements together, follow these steps:
- Set and load the trail wrist with the correct bend and rotation.
- Fold and externally rotate the trail arm, ensuring the elbow points down.
- Rotate through the backswing, keeping these positions intact.
Focus on the clubface position, preventing rolling or elbow drift that causes poor impact.
Step 5: Practicing with Both Hands
When practicing with a golf club, use both hands. The club’s weight can be challenging to manage single-handedly, so using both helps cement the correct positions.
Address your stance by setting the trail wrist bend and loading it. Then, fold and externally rotate the trail arm while rotating your body. These positions should feel natural on full swings.
Step 6: Trail Arm and Wrist Delivery in Downswing
Improving your downswing starts with a strong backswing setup. As the downswing begins, make sure your trail elbow leads and stays ahead of the wrist, maintaining the bend.
Common errors include letting the wrist drift ahead of the elbow, causing early release and less impact force. By keeping the elbow forward, maintain power and control through impact.
Step 7: A Drill to Master the Trail Arm Move
Integrate your new skills with a simple drill:
- Set up with your club for a standard address.
- Begin by loading your trail wrist with the right bend and rotation.
- Fold and rotate your trail arm, observing the elbow and clubface.
- Begin your downswing with the trail arm position intact.
- Move through the ball and let the wrist release naturally.
Start slowly, focus on precision over speed, and feel the difference in your swing quality.
Frequently Asked Questions (FAQ)
Q: Why is loading the trail wrist important?
A: Loading the trail wrist stores energy for increased power and aids in controlling the clubface, minimizing common shot errors like slices and hooks.
Q: What does folding the trail arm mean?
A: Folding involves bending the elbow and externally rotating the arm, creating a powerful position for an efficient backswing.
Q: How can I tell if I’m holding my trail arm incorrectly?
A: Signs include an elbow that bends behind the body or a clubface pointing upwards. These are indicators that adjustments are needed.
Q: When should my trail elbow be closer to the target than my wrist?
A: This should occur during the downswing to ensure a solid strike while maintaining energy and control at impact.
Q: Can I practice these movements without a golf club?
A: Yes, use your palm or a similar object to practice the fundamentals, but a golf club with both hands provides the best practice.
Conclusion
Mastering trail arm and wrist movements is key to a better golf swing. By nailing the backswing and downswing positions, you’ll achieve greater power and clubface control, leading to consistent ball striking.
Embark on this journey with us and unlock your full potential. Consider exploring instructional programs or apps designed for smart training and game improvement. Your best game may be just a tweak away!


0 Comments