Understanding the Problem
Bob’s issue was significant; he had a swing direction of minus 12.9, which indicated his swing circle was heading far across the line of the golf ball. Despite trying to adjust his swing, he was unsuccessful. The core problem was that his club face did not match his forearms. While his club face was square, his forearms were misaligned, leading to consistent slices.
To illustrate, consider this: if your lead forearm is lower than your trail forearm at impact, the club face will aim left, causing a slice. Bob was attempting to compensate by swinging outwards, which only exacerbated the issue. The solution was to align everything correctly right from the setup.
Step 1: Set Up for Success
The first step to fixing Bob’s slice was to adjust his setup. I instructed him to square the club face and close it slightly to about 11 o’clock before gripping it. This adjustment aimed to align his forearms with the club face, ensuring a more direct path into the ball.
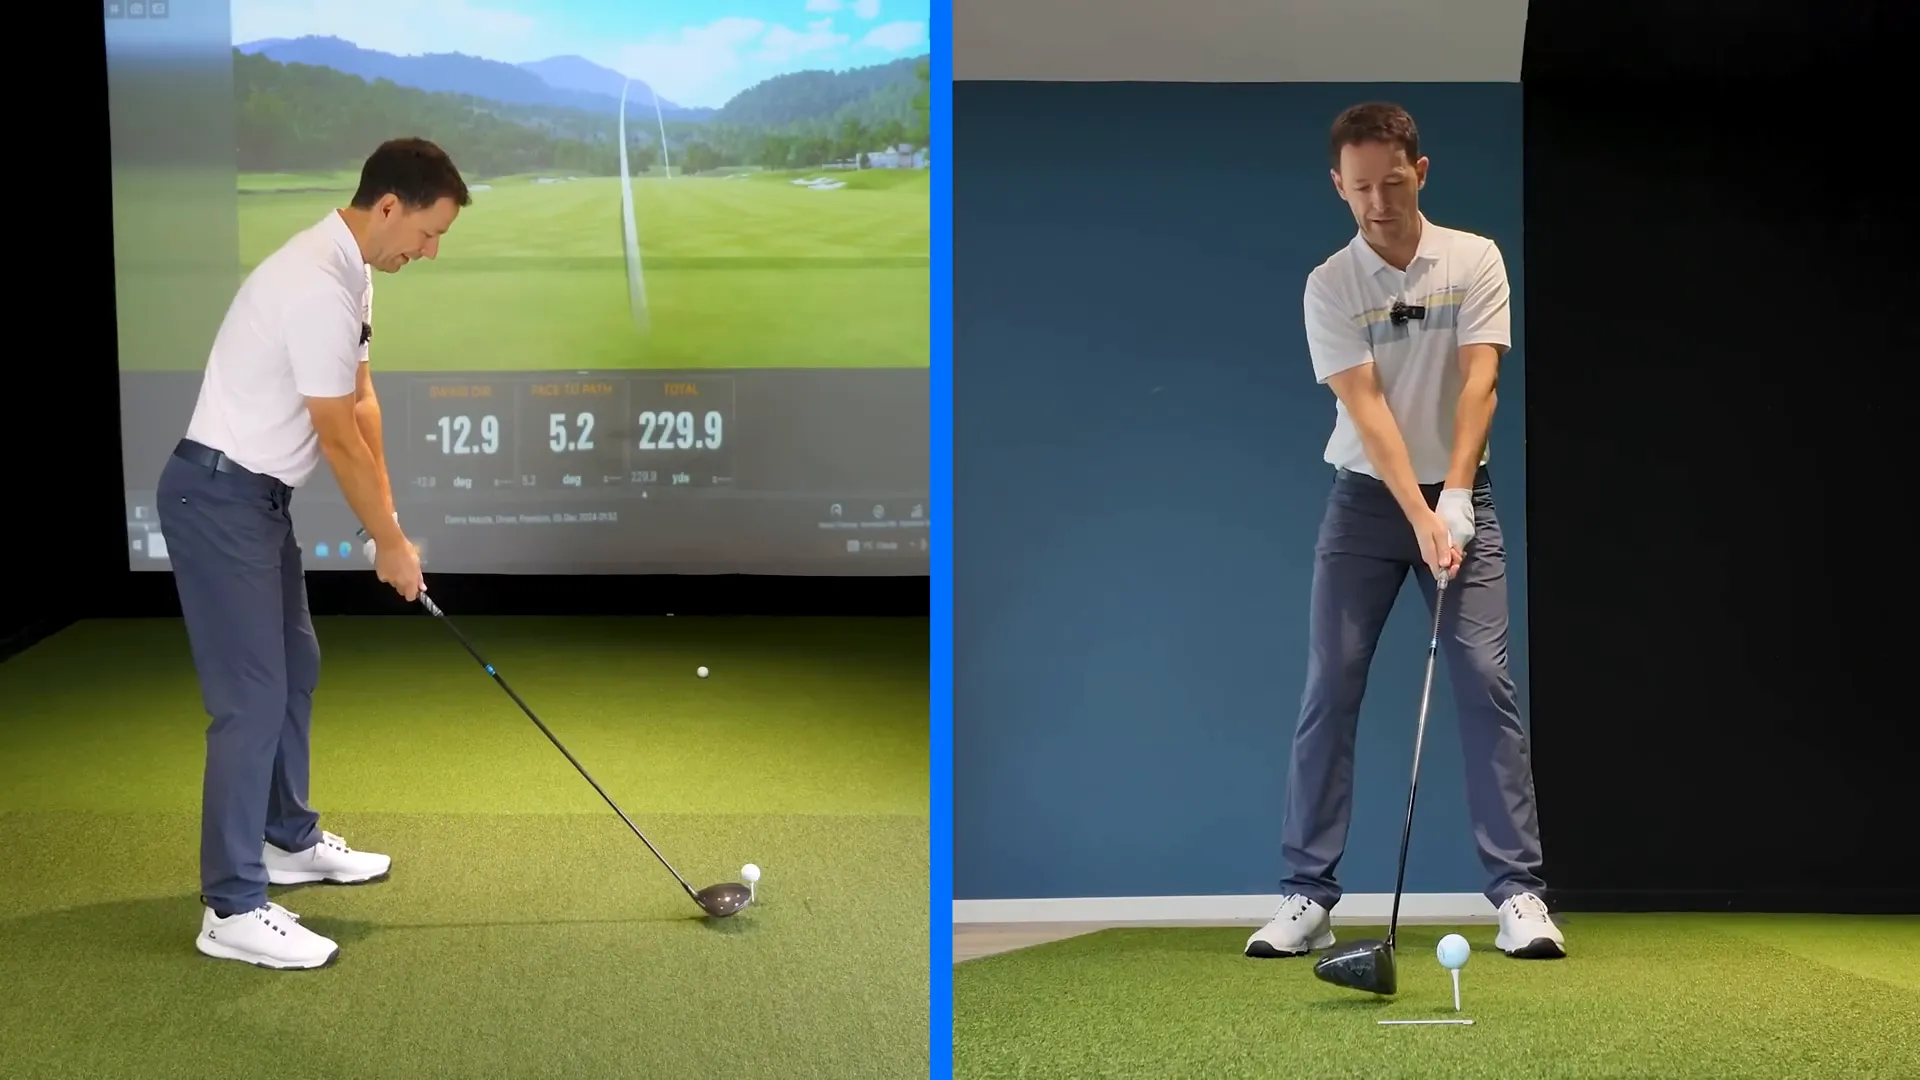
With this change, we saw an immediate improvement. When Bob hit the ball after adjusting his grip, his swing direction improved to 2.6, indicating a much straighter shot. The key takeaway here is that proper alignment at setup can drastically change the outcome of your shot.
Step 2: Body Alignment and Movement
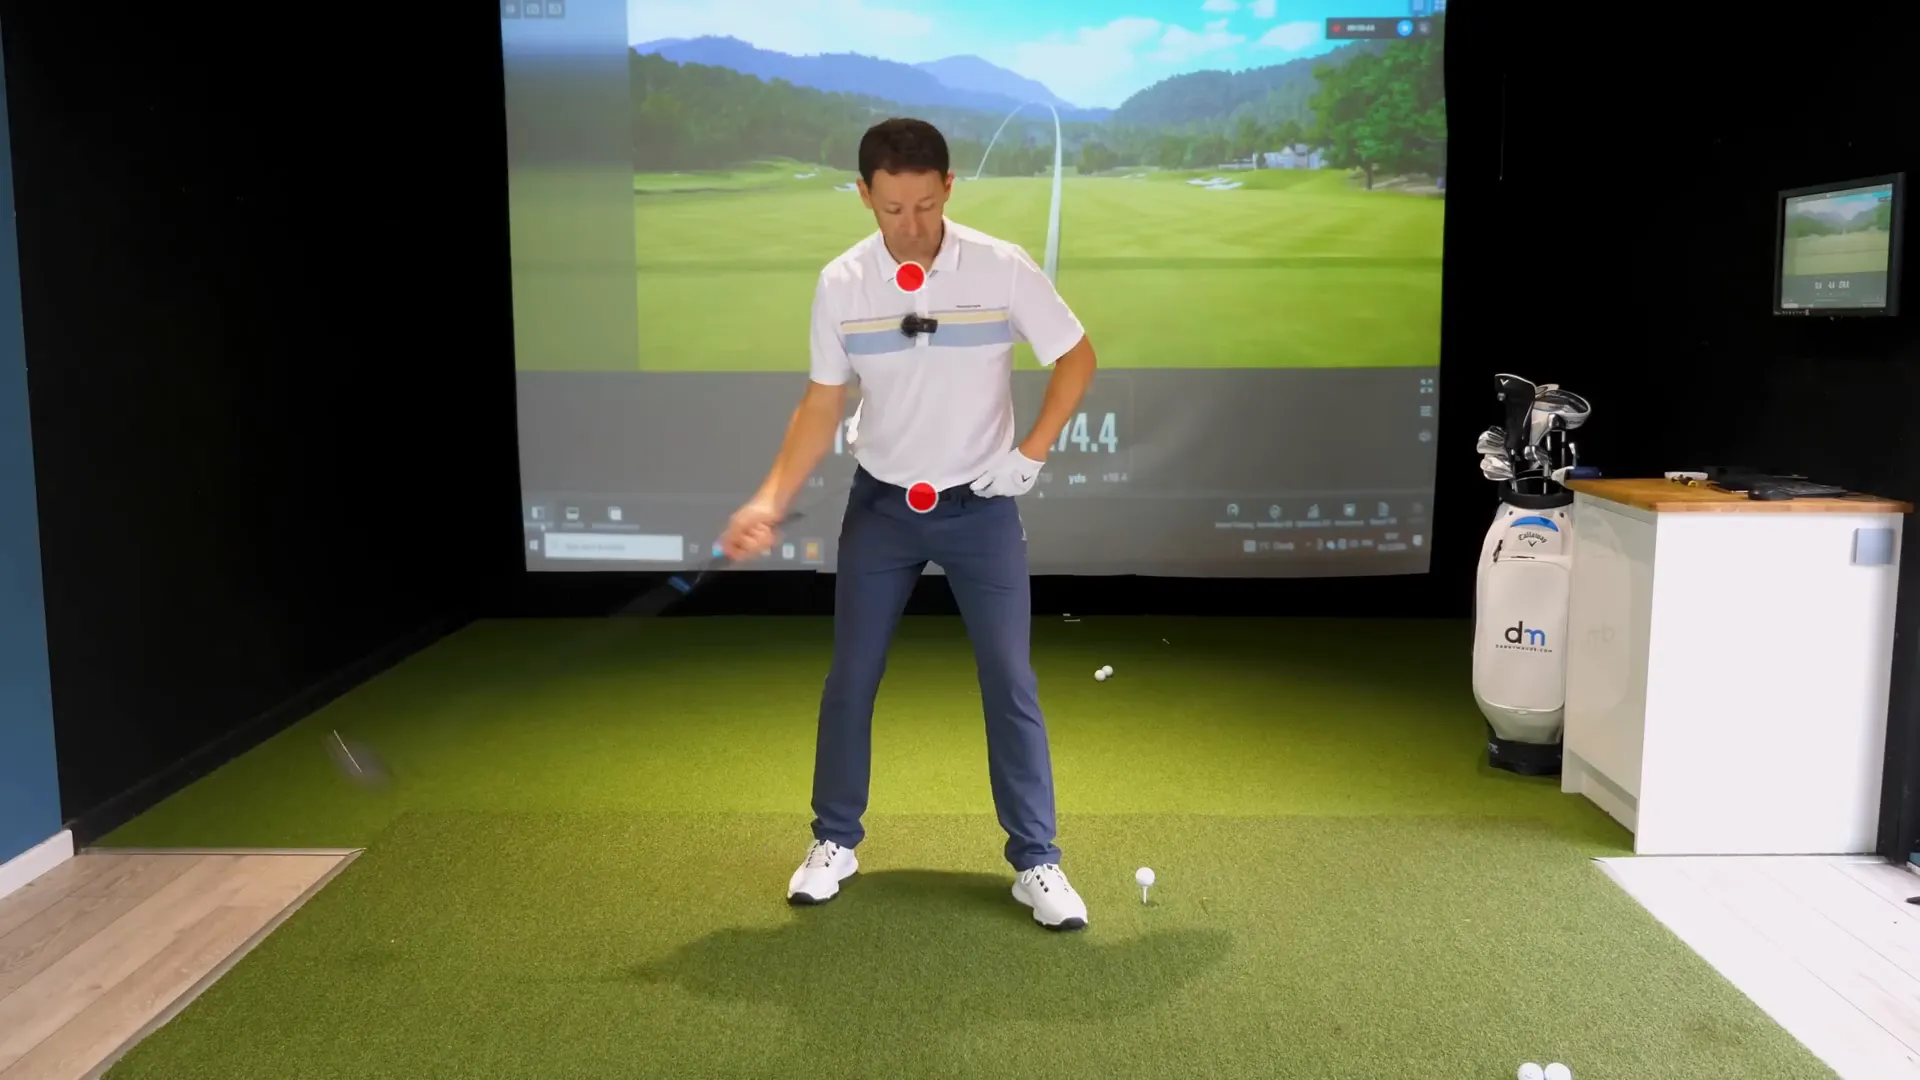
Next, we had to address Bob’s body alignment and movement during the swing. Many golfers, especially those who slice, allow their head to move ahead of their hips during the downswing. This movement creates a steep angle of attack, leading to more slices. Instead, I encouraged Bob to keep his hips leading through the swing.
Imagine a dot on your chest and another on your hips. If the dot on your chest moves ahead of the hip dot, you’re likely to slice. However, if the hip dot leads, you’ll swing more online or even slightly to the right, promoting a draw rather than a slice.

Bob had a physical limitation due to a back issue, which made completing a full follow-through difficult. Instead of forcing a full finish, we adjusted his swing to ensure his lead hip was slightly ahead at impact, which helped him maintain a proper swing path without discomfort.
Step 3: The Swing Mechanics
After establishing a solid setup and alignment, we focused on the actual mechanics of the swing. Bob needed to feel that his lead side was higher than his trail side during the swing. This positioning naturally encouraged a more upward strike on the ball, improving his chances of hitting it straighter.
As he practiced this, we monitored the ball’s flight. The adjustments led to a noticeable improvement, transitioning from slices to beautifully straight shots. The goal was to create a swing that felt natural and fluid, rather than forced.

Addressing Paul’s Hooking Problem
While Bob was making strides, Paul was dealing with the opposite issue—hooking the ball. His forearms were aimed incorrectly, causing his club face to close prematurely. To correct this, we reversed the setup process that had worked for Bob.
I encouraged Paul to open his club face slightly and ensure his forearms were aligned correctly. This adjustment helped him swing more in line with his target rather than across it, reducing the hook tendency.
Final Thoughts and Practice Tips
These straightforward adjustments can lead to significant improvements in your driving accuracy. The key is to focus on your setup, ensure your body movements support your swing path, and practice consistently. Remember to be patient with yourself as you incorporate these changes into your game.
If you’re looking to improve your driver, consider practicing these steps at the range. Consistent practice will help solidify these adjustments into your routine, leading to straighter drives on the course.


0 Comments