

Want to hit your driver longer and straighter? Focus on your body, not just your arms. This step-by-step guide helps you adjust your swing, grip, and tee height for better performance off the tee.
Step 1: Understand the Core Difference Between Driver and Irons
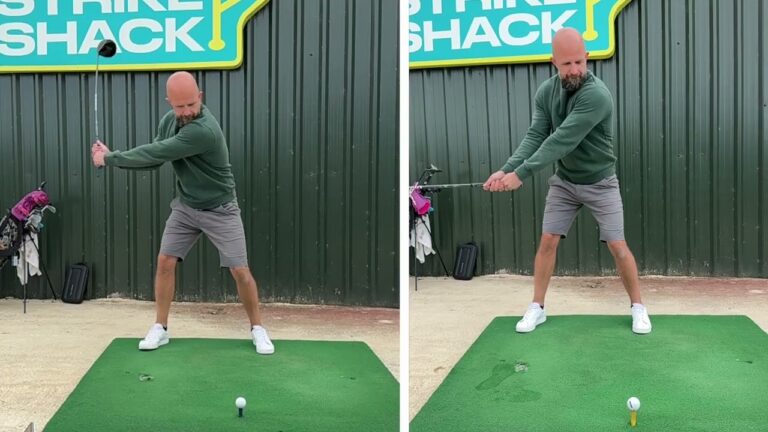
The driver swing is distinct from the iron swing. Drivers require more time to square the clubface at impact, necessitating greater body rotation. A common mistake is using excessive arm action instead of shoulder rotation.
- Primary keyword: driver swing
- Long-tail keywords: driver vs iron swing, golf driver technique
- LSI Keywords: body rotation in golf, clubface control, shoulder alignment in golf
Step 2: Perfect Your Setup With a Priority on Shoulder Turn
Your setup is important, but prioritize a bigger shoulder turn to avoid overworking the arms. This movement allows the club to release timely.
- Adopt the mindset to “turn more” with your torso.
- Keep the right shoulder rotating under and back.
Key Cues
- “Keep looking at the ball” to focus your eyes.
- “Turn these more” to encourage shoulder rotation.
Step 3: Preserve Right-Arm Length for a Wider Swing
Maintaining a long right arm allows for a wider swing arc, enhancing clubface alignment at impact.
- Think of keeping your right armpit open to lengthen the arm.
Step 4: Prevent Hip Drift and Harness Lower Body Power
To enhance swing stability, prevent your hips from drifting during your swing.
- Use a hip-stop to practice stable rotation.
- Focus on turning the left hip forward during the downswing.
Step 5: Optimize Attack Angle and Tee Height
For a higher ball launch, allow your driver to rise at impact.
- Raise the tee if you’re turning more and creating a wider arc.
Impact Tips
- Contact should be in front of the clubhead for better flight.
Step 6: Adjust Your Grip for a Controlled Club Face
A neutral grip helps prevent the clubface from closing too much on impact.
- Use a more finger-based grip.
- Keep the right hand slightly rotated.
Step 7: Train the Opposite Feel for Control
By experimenting with the opposite of your usual swing errors, find a balance.
- Hit shots that finish with the club pointing right of target.
Step 8: Combine a Weaker Grip with Freer Rotation
- A weaker right-hand grip reduces the tendency to close the face while freer rotation helps align your swing.
Step 9: Focused Drills for Driver Mastery
Use a structured practice regimen to reinforce new habits.
- Warm-up with mobility exercises.
- Practice wide, full shoulder turns for ten minutes.
- Check your grip and face control.
Step 10: Apply Changes on Course
Simplify these concepts when you transition from the range to the course.
- Use reminders like “more turn, keep the right arm wide, leave the face a little open.”
“Keep looking at the ball” serves as a focal point to maintain body movement.
Step 11: Self-Check to Measure Progress
Monitor your progress using these indicators:
- Are you impacting on a rising arc?
- Do you notice more height and less left curve in your shots?
Step 12: Correct Common Mistakes
Identify recurring errors and apply quick solutions.
- Problem: Hands too active. Solution: Weaken grip; practice finishing shots rightward to achieve neutrality.
Frequently Asked Questions
What are the main changes to improve driver shots?
Increase shoulder rotation to allow for a natural club release. This enhances both contact and directional consistency.
0 Comments