
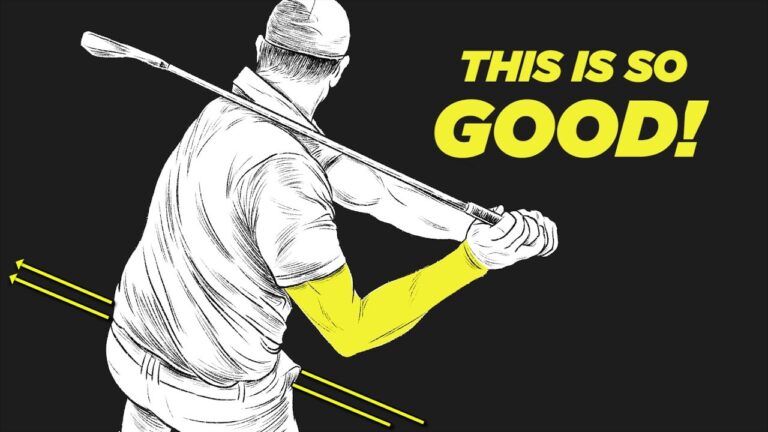
Golf ball striking is less about brute force and more about the way you move through the ball. When you learn the correct movement pattern, you create compression, speed, and effortless power. This guide breaks that movement into simple, repeatable steps you can practice on the range and take onto the course.
Table of Contents
- Step 1: Understand the impact position every great golf player shares
- Step 2: Create the correct sensation with the tour stick drill
- Step 3: Wall drill for shoulder stability and correct pivot
- Step 4: Learn the tilt — shoulders on different planes
- Step 5: Use the “looking out the window” swing thought
- Step 6: Combine the drills into a simple practice routine
- Step 7: Measure progress and make it consistent
- Common checkpoints and troubleshooting for the golf swing
- Putting it on the course: a simple 3-shot routine
- Drill summary: checkpoints to memorize
- How often to practice these moves for real improvement in golf
- Resources and next steps for continued improvement
Step 1: Understand the impact position every great golf player shares
Great ball strikers share strikingly similar positions at impact. When you study them, you see two consistent themes: a tilted, high lead chest and a tucked trail elbow drawing the club into the body like a battering ram. Those elements produce compression and inside-to-out club delivery.
Key visual checkpoints to aim for at impact:
- High lead pec — your chest rotates up toward the target so the left pec (for right-handed players) is higher at impact.
- Trail shoulder back and rotated — the right shoulder is behind the ball as it rotates through impact.
- Tucked trail elbow — the right elbow is tight to the side, near the hip, helping deliver a steeper, more compressive strike.
- Slight tilt and inside delivery — the shoulders don’t work on the exact same horizontal plane; they tilt so the swing approaches from slightly inside.
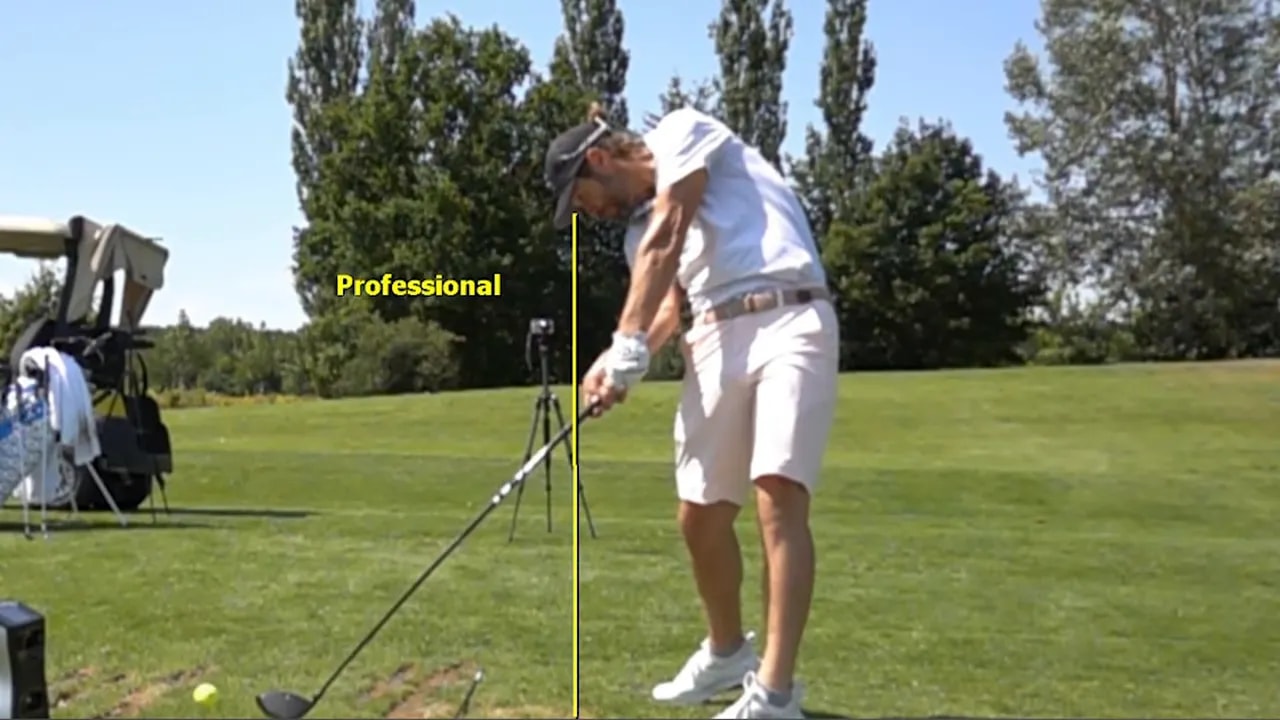
Hit the ball with that feeling and you will create the compression and speed that amateurs often chase but rarely find. This is the target position you will build toward in the drills below.
Step 2: Create the correct sensation with the tour stick drill
The tour stick drill is simple, portable, and extremely effective for teaching the body how to move through the ball. It trains both the extension of the lead shoulder and the closing of the knees to produce a strong through-swing.
How to set it up and perform it:
- Place an alignment or tour stick in the ground so it points along your target line.
- Stand one foot length away from the stick and set your toes on the line. This establishes a consistent starting distance.
- Hold the club in your lead hand and reach down to touch the stick as low as you can comfortably manage. The lower you can touch, the more extension you are creating in the lead shoulder.
- Take your normal address. Reconnect to the feeling of that low touch, then make a slow rehearsal swing.
- On your through-swing, push the pressure to the inside of the trail foot and feel the knees “close up” as your body moves through the ball.
This drill does three important things for your golf swing:
- Trains lead shoulder extension so the chest can rotate up and left (for right-hand players).
- Encourages a coordinated leg and hip drive that removes stress from the joints and creates effortless power.
- Provides a clear visual and physical sensation you can carry to the course.
Step 3: Wall drill for shoulder stability and correct pivot
Use a wall to test whether your shoulders are working on the right path through impact. This is the quickest way to feel whether your lead shoulder is staying in and your pivot is stable instead of buckling.
Drill steps:
- Stand close to a wall with a cap on and hold the club with the palms down along the shaft. This grip forces a neutral forearm position.
- Set your arms so they are roughly 45 degrees from the body (not 90 degrees).
- From the top of your backswing, turn through while keeping the shaft from touching the wall in front of you.
- Focus on keeping the left shoulder moving in rather than flaring out. If the left shoulder moves out, your pivot will buckle and you will lose compression.
The feeling you want is almost like a reverse pivot — not actually lifting the hips but feeling the upper body rotate more behind the ball. Watch how tour players show chest extension at the top. That extension is what allows the left shoulder to stay in and the right shoulder to move back and rotate through impact.
Step 4: Learn the tilt — shoulders on different planes
A common mistake in golf is trying to rotate the shoulders on a single flat plane. The best ball strikers use a subtle shoulder tilt: the lead shoulder rises while the trail shoulder drops slightly. That tilt helps you swing from the inside and accelerate through impact.
Data-based numbers to guide your practice:
- Backswing shoulder turn roughly 40 degrees.
- Halfway through the follow through the chest has rotated to about 55 degrees.
- Shoulder line at address tends to sit a yard outside the ball and halfway through sits roughly half a yard outside. Those small distances represent the shoulder tilt and inside delivery.
Those measurements are a simple way to visualize the difference between a flat turn that pulls left and a tilted, athletic turn that creates power and accuracy. Use a mirror or a video app to confirm the tilt as you practice.
Step 5: Use the “looking out the window” swing thought
Coachable swing thoughts should be simple, transferable to the course, and nondisruptive. The “looking out the window” thought meets all those requirements and produces the neck tilt and viewing angle that helps you turn to the high lead pec at impact.
How to create the feeling:
- Imagine you open a window beside you and stick your head out to look around a corner at your target.
- Apply a slight neck tilt so water would drip from your back ear. That neck tilt is the “viewing room” that keeps the lead chest high as you rotate.
- Turn through the ball with the head feeling slightly turned and tilted, not forced to look down rigidly.
This mental picture prevents the common tendency to lift up on the right side when trying to hit the ball hard. Instead of standing up and lifting the right side, you rotate into the tilted position and accelerate the clubhead into impact.
Step 6: Combine the drills into a simple practice routine
Practice these drills in a logical sequence to build motor patterns rather than thinking points:
- Warm up with half swings focusing on shoulder tilt and chest height.
- Use the tour stick drill to reinforce lead shoulder extension and knee closure.
- Move to the wall drill to check shoulder stability and pivot quality.
- Finish with full swings using the “looking out the window” swing thought and the feeling of a tucked trail elbow.
Repeat each station with 6 to 12 swings. Keep the tempo smooth. The goal is to train the sensation of turning through, not to create violent motion. Speed will come from a correct coordinated turn.
Step 7: Measure progress and make it consistent
Use a smartphone or a simple swing analysis app to record your practice. Look for these markers over time:
- Increased chest rotation to the high lead side at impact.
- Tighter trail elbow at impact.
- Greater compression on short irons and mid-irons.
- More consistent inside-to-out club travel and straighter ball flight.
Small improvements in shoulder tilt and the timing of leg drive produce measurable gains in distance and consistency. Use a consistent routine on the range so these new sensations become second nature on the course.
Common checkpoints and troubleshooting for the golf swing
Watch these symptoms as you practice and how to fix them:
- Ball slices or fades wildly — you might be rotating flat and coming over the top. Revisit the wall drill and the viewing-room neck tilt to promote inside delivery.
- You hit fat or thin shots — the pivot is likely buckling. Use the tour stick and wall drills to stabilize the shoulders and close the knees.
- You feel like you have to yank the arms through — focus on the trail elbow tucking into the side and turning the chest to the high lead pec.
- Your right side lifts when you try to swing hard — apply the “looking out the window” feel to keep the right side from rising prematurely.

Putting it on the course: a simple 3-shot routine
Once you have the movement, use this micro-routine to carry it to the round:
- Take a single deep breath and rehearse the “looking out the window” neck tilt.
- Make one practice motion mimicking the tour stick feeling — low left shoulder, knees closing.
- Commit to your target and make the swing with intent to turn through and accelerate the clubhead into the ball.
Keeping it simple prevents overthinking and helps you use the physical sensations you drilled rather than technical instructions that break down under pressure.
Drill summary: checkpoints to memorize
- Lead shoulder extended — chest rotates up and left toward the target.
- Trail elbow tucked — right elbow close to the hip at impact.
- Shoulder tilt — shoulders on different planes to promote inside delivery.
- Leg drive — push off the inside of the trail foot to drive hips and create speed.
- Viewing room — neck tilt and head angle that allow rotation without rising.

How often to practice these moves for real improvement in golf
Consistency beats intensity. Schedule short, focused sessions three to five times per week rather than one long session. Each session should include:
- Warm-up with mobility and half swings
- Two to three sets of the tour stick drill
- Two sets of the wall drill
- 15 to 30 full swings with the “looking out the window” thought
Within a few weeks you will notice better compression, more ball speed, and improved accuracy. Keep the process deliberate — you are reshaping a motor pattern, so repetition matters.
Resources and next steps for continued improvement
To accelerate progress, combine these drills with regular feedback. Record your swing from down-the-line and face-on angles to confirm shoulder tilt and elbow position. Use slow-motion playback to check whether your shoulders are tilting and if your trail elbow is tucking at impact.
If you want a structured program, use platforms and apps that provide tour benchmarks and side-by-side comparisons. Measuring how far your shoulders rotate and how your chest tilts helps you track improvement objectively.
What is the single most important feel to create more compression in my golf swing?
The most important feel is turning to a high lead pec while keeping the trail elbow tucked to the side. That combination produces a steep inside delivery and a compressive strike. Use the tour stick and wall drills to train those sensations.
How can I stop my right side from rising when I try to hit the ball hard?
Adopt the “looking out the window” neck tilt. This creates a viewing angle that encourages rotation rather than vertical lifting. Also practice pushing through with the inside of the trail foot to engage the lower body instead of lifting the upper body.
Will these drills help older golfers reduce joint stress?
Yes. Learning to extend the lead shoulder and use coordinated leg drive shifts load away from the joints and into larger muscles. The tour stick drill specifically encourages a leg-driven turn that reduces torque on hips and knees.
How quickly should I expect to see results in my golf ball striking?
Some players feel better compression and more consistent strikes within a few practice sessions. For lasting change, expect 4 to 8 weeks of regular, focused practice to turn the new movement into muscle memory.
Are there any common mistakes when practicing these drills?
Common mistakes include trying to force the position with the arms, over-rotating the head, and rushing the leg drive. Keep drills slow and focused on sensations. Speed and distance will follow once the pattern is correct.
0 Comments