
Focus keyphrase: hips forward head back
Consistent, powerful ball striking comes down to two linked movements: getting your hips forward at impact and keeping your head back over the ball line. When you master the combination of hips forward head back you compress the ball, shallow out the club path, and create more distance and better direction control. The drill below is a practical, step-by-step routine you can practice at the range or on grass to train these exact sensations and positions.
Table of Contents
- Step 1: Setup and the core idea — hips forward, head back
- Step 2: The beginner drill — alignment rod under the ball line
- Step 3: Add a front visual — make the line three-dimensional
- Step 4: Advanced layer — object above your lead shoulder
- Step 5: Adapting the drill to driver and longer clubs
- How to practice this routine — weekly and daily structure
- Common mistakes and how to fix them
- How technology can accelerate progress
- Key cues to repeat every practice session
- Summary — why hips forward head back changes everything
- Frequently asked questions
- Next steps
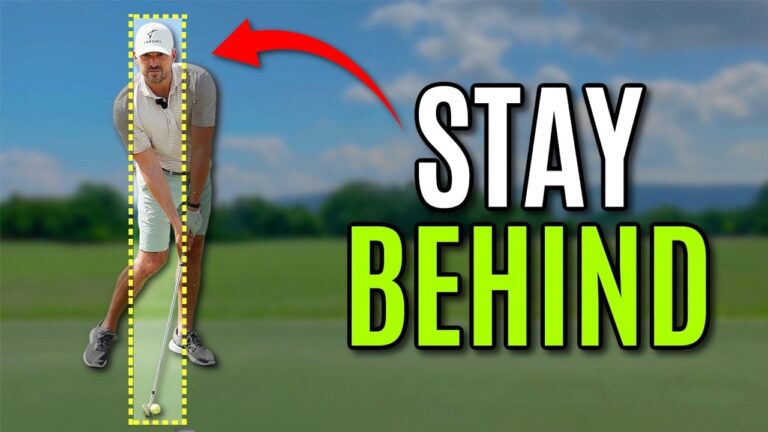
Step 1: Setup and the core idea — hips forward, head back
The primary goal on the downswing is twofold. First, get your lower body moving forward so the club hits the turf at or slightly in front of the ball. Second, keep your head and upper body back over the ball line as your hips move forward. That combination forces the club to approach from inside-to-out on the downswing, producing solid contact, more distance, and improved directional control.
Think of the lower body as the engine that guides the low point of the swing while the upper body holds a stable riding platform that lets the club shallow naturally. If your head moves forward with your hips, the club will swing too steep and across the ball. That creates thin shots, pulls, weak fades, and lost distance. The simple cue you should repeat to yourself while practicing is: hips forward, head back.
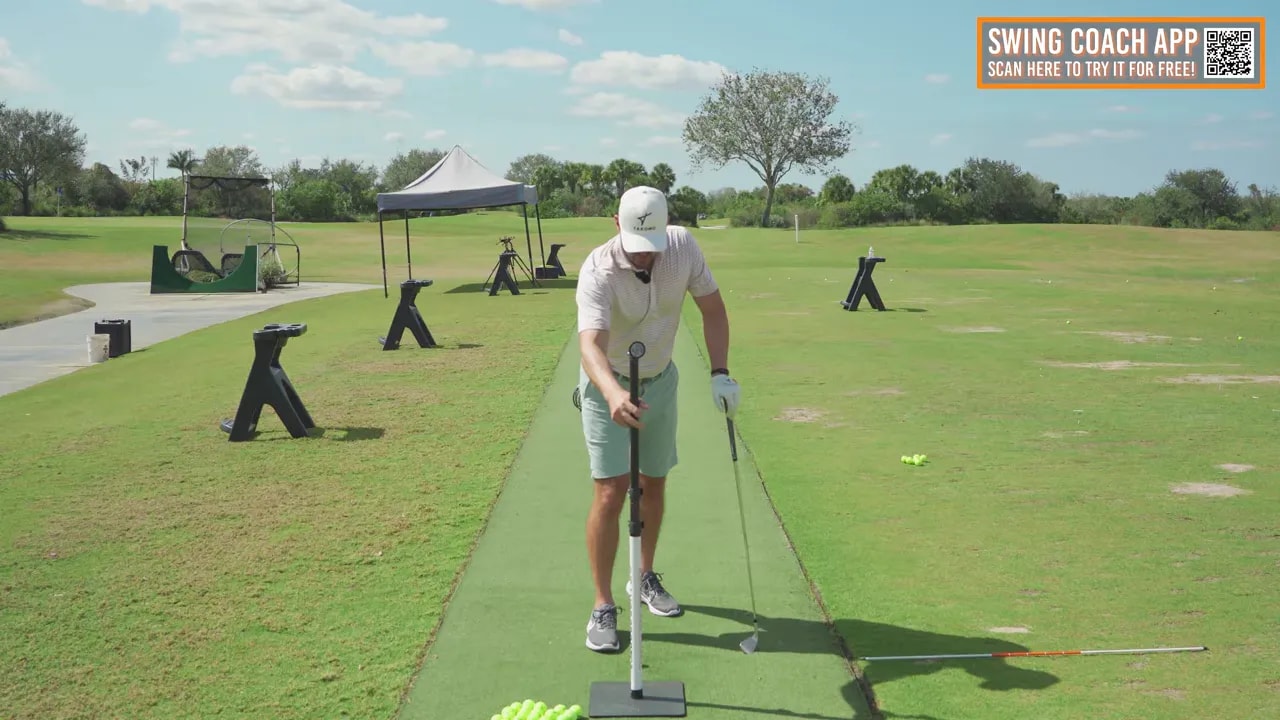
Step 2: The beginner drill — alignment rod under the ball line
What you need: an 8-iron or 9-iron, an alignment rod or spare club, and a mat or flat patch of ground.
- Place the alignment rod on the ground in line with the golf ball and between your feet. For a short iron, the ball position is just forward of center, so the rod should sit roughly under your left ear or left eye when you address the ball.
- Take a half or three-quarter swing — aim for a position where your arms are roughly parallel at impact. Do two rehearsal swings and one hit. On every swing, make sure you strike the mat or turf.
- Drive your belt buckle forward so that by impact it is up over your left ankle. That indicates your hips have moved forward and your weight is on your front foot.
- At the same time, keep your head back over the rod line. Use an internal feel: rotate your chest up slightly and let your right shoulder drop down. That combination creates side bend and extension so your head stays behind the ball line.
When done correctly:
- Your hips are the closest thing to the target at impact — not your head or chest.
- You have very little weight on the back foot and nearly all weight on the front foot.
- The shaft and clubhead will shallow through impact and travel from inside the target line to slightly out through impact.
Practice three-ball sets. Two rehearsals, one hit. Use the rod as the reference for both where your hips should pass and where your head should stay relative to the ball line.
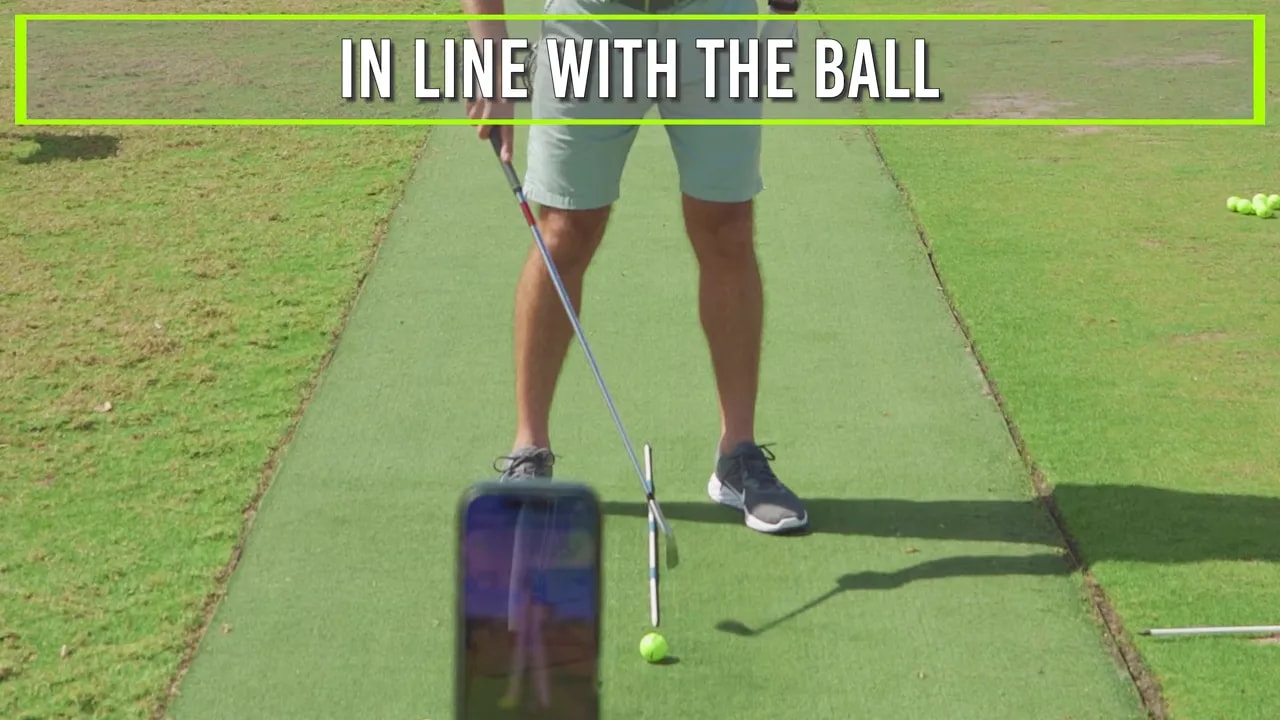
Step 3: Add a front visual — make the line three-dimensional
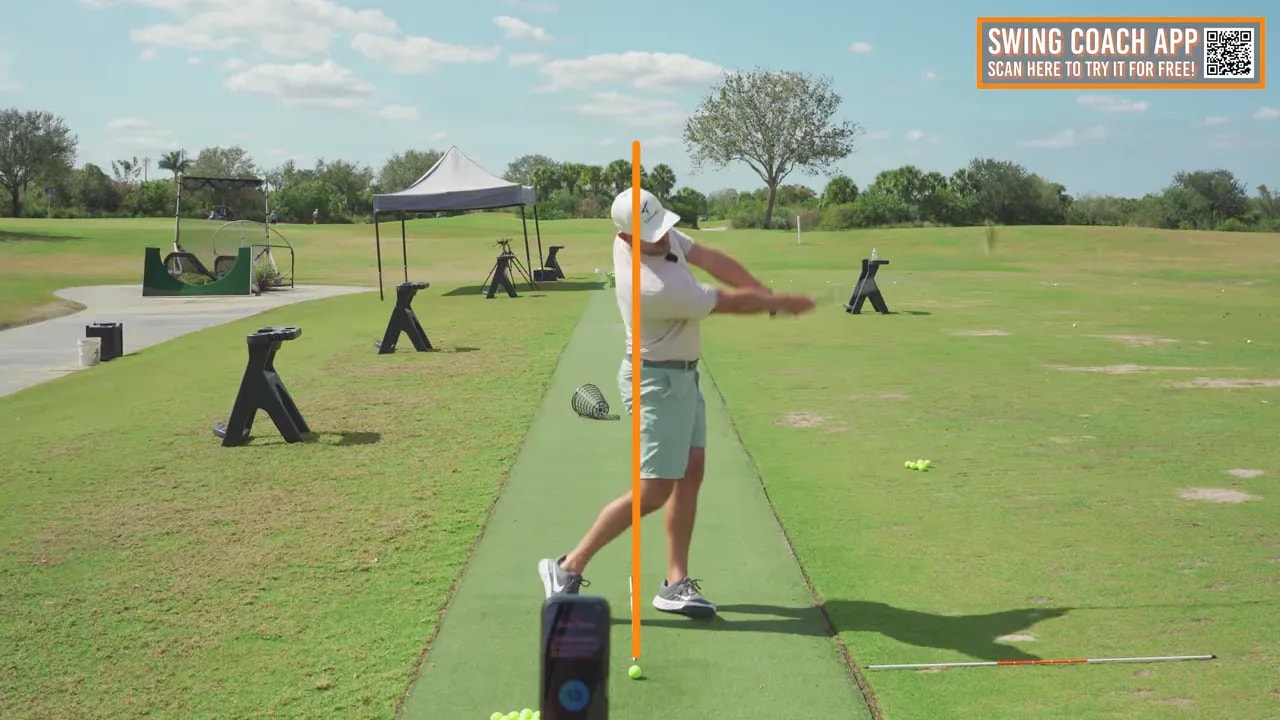
Once you can repeatedly get your hips forward of the ground line while keeping your head back, add a visual object in line with the ball at chest or shoulder height. This converts the ground rod to a 3D target and helps reinforce the head-stay sensation.
How to set it up:
- Place a small object (phone holder, stick, or alignment aid) directly in front of the ball, roughly at chest or shoulder height.
- Address the ball and swing with the same two rehearsal swings, one hit pattern.
- Feel your belt buckle drive forward of the ground rod while your head remains behind the front object until your arms reach roughly parallel to the ground on the way through.
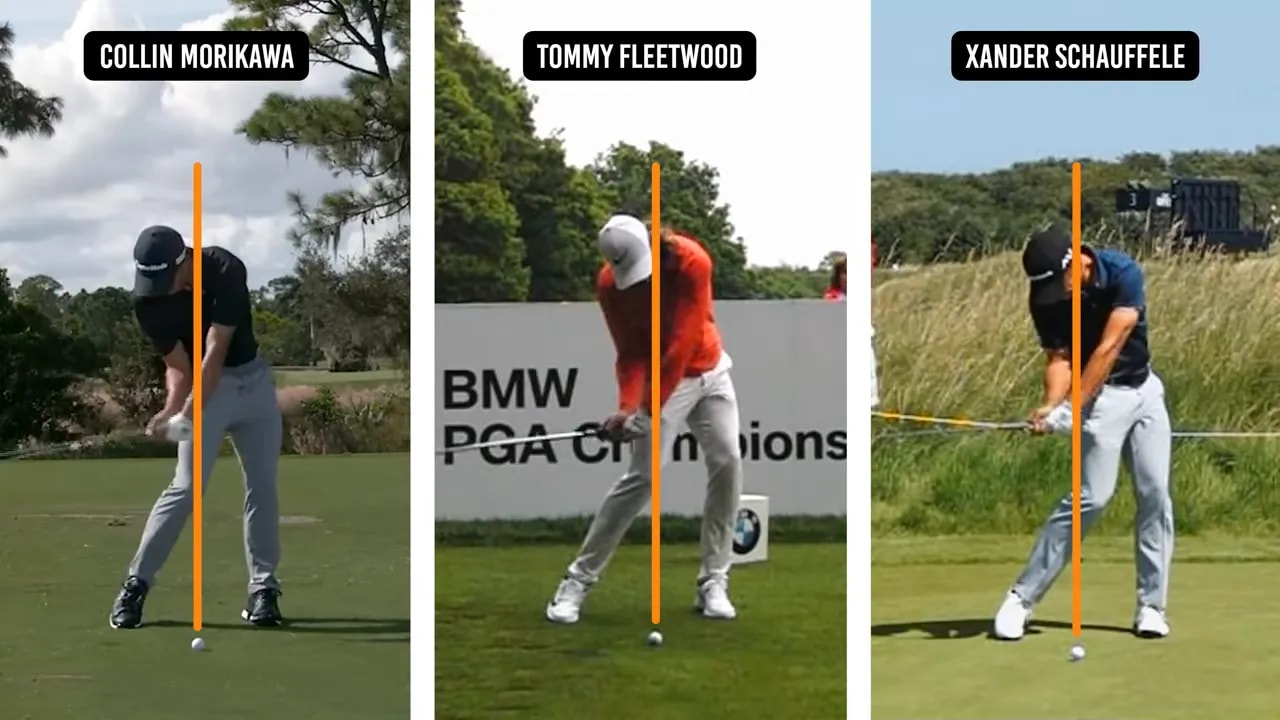
This front object acts like a “wall” your head must stay behind. Many tour pros show this pattern: their head remains back over the ball line through the point where the arms reach parallel and then they allow the release. That delay of head motion encourages an inside club path and better contact.
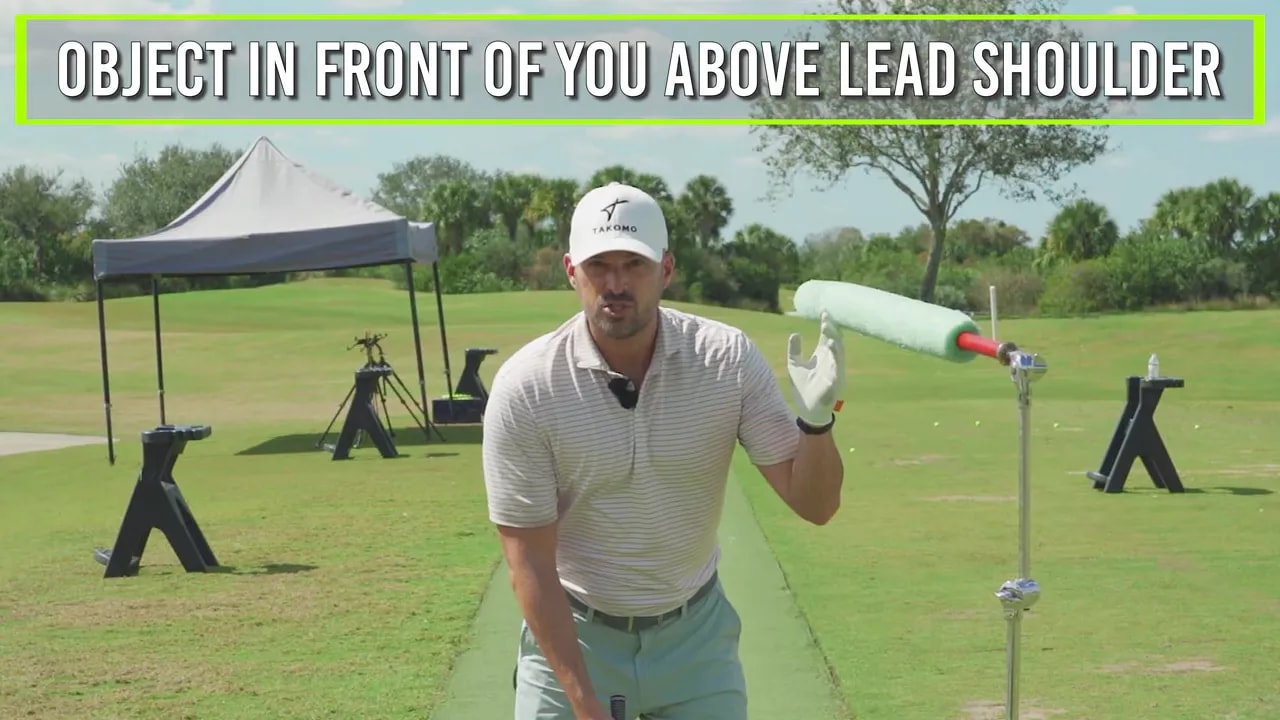
Step 4: Advanced layer — object above your lead shoulder
When you are comfortable with the ground rod and front visual, progress to an object positioned above or just in front of your lead shoulder. This is the most specific drill stage and helps you groove the final sequence of lower-body drive and upper-body restraint.
- Place a small stand or elevated object above or slightly in front of your lead shoulder. If you do not have a stand, you can hold a club or put a pole in the ground at shoulder height.
- Take two rehearsals and one hit at full or 3/4 speed. Drive your belt buckle forward and rotate the hips toward the target.
- Make sure the object stays in front of your head as you rotate through. If it moves behind your head, you have allowed your upper body to travel forward too early.
Benefits of this stage:
- Trains the chest up and right shoulder down feeling that preserves a backward head position.
- Encourages a shallower angle of attack and more inside-to-out club path through impact.
- Builds transfer and rotation into the front side while keeping the upper body in a stable position to deliver the club.
Step 5: Adapting the drill to driver and longer clubs
The same fundamental sequence applies to driver and longer clubs. The difference is that you often need a slightly fuller rotation and a more pronounced shallow angle of attack. Use the same object setups but practice with a driver at reduced speed first to feel how the head stays back while the hips drive forward.
Options for driver practice:
- Place the front object slightly further forward to account for the ball being further forward in your stance.
- Keep the chest up and shoulder down feel so the club can shallow and sweep through rather than hit down sharply.
- If you want a stricter stimulus, place the object behind your head and practice keeping your head on it through impact. That forces you to resist thrusting the head forward.
These adaptations help you hit the ball higher and farther while maintaining the same reliable low-point control you practice with short irons.
How to practice this routine — weekly and daily structure
Consistency matters more than volume. Use focused, structured practice rather than mindless hitting.
- Warm-up (10 minutes): Start with light stretching and some easy wedges. Reinforce the chest-up cue and hip movement during warm-up swings.
- Focused drill sets (20–30 minutes): Do three-ball sets (two rehearsals, one hit) at each level: ground rod, front visual, and advanced shoulder object. Spend 10–12 minutes per level when you first start, then reduce as it becomes more automatic.
- Transfer to full shots (15 minutes): Move through the bag. Start with short irons and progress to hybrids and driver, maintaining the same hips forward head back feel.
- Cool down (5–10 minutes): Finish with a few half swings emphasizing rhythm, balance, and the final position where the belt buckle is nearest the target.
Record your swings if possible. Reviewing the sequence slow-motion helps you see if your head is drifting forward and whether the hips are actually up and through at impact.
Common mistakes and how to fix them
Rushing the hips and head moving together
If your head comes forward with your hips you will still hit behind the ball or contact thin. Fix it by exaggerating the chest-up cue and feel your right shoulder drop. Practice with the front object so you have a visual to keep the head back.
Not getting the hips far enough forward
If the belt buckle stays behind the ankle at impact you will struggle to hit the turf properly. Focus on initiating the downswing with a forward shift and a strong hip turn toward the target. Use the ground rod to give immediate feedback.
Over-rotating the upper body
A common compensation is to try to “help” the ball with the upper body. This ruins sequencing. Instead, keep tension in your core and allow the hips to lead. The chest-up, shoulder-down cue will prevent the upper body from collapsing forward early.
Inconsistent low point
If your low point varies, alternate between the simpler and more advanced layers in practice. The ground rod is ideal to immediately see if your low point is forward of the ball. Keep sets short and measurable.
How technology can accelerate progress
Instant feedback accelerates learning. Apps and simple video analysis can show whether your hips actually pass the ball line and whether your head remains behind. Use slow motion and frame-by-frame review to verify belt buckle position relative to the ankle and to check head position against the ball line.
When you pair the drills above with measurable feedback you remove guesswork. You can quantify improvement in low point control, club path, and impact position instead of relying solely on feel.
Key cues to repeat every practice session
- Hips forward — feel the belt buckle drive past the ankle toward the target.
- Head back — keep your head over the ball line until your arms are roughly parallel on the way through.
- Chest up, right shoulder down — extension and side bend that preserve head position and shallow the club path.
- Two rehearsals, one hit — a reliable rhythm pattern for training proper sequencing.
<video></video>The empty video tag above represents where a visual demonstration would sit within this lesson. Use recorded swings or slow-motion capture to compare your positions against the cues described.
Summary — why hips forward head back changes everything
Learning to move your lower body forward at impact while holding your head back over the ball line trains the correct low-point and club path. That combination produces cleaner, fuller strikes, improved launch, more distance, and better directional control across every club in the bag.
Start simple with a rod on the ground. Progress to a front object and then to an elevated shoulder-level target. Practice short, focused sets and use video or measurement tools to confirm your positions. Over time the sequence will feel natural and transfer to full swings and driver play.
Frequently asked questions
How soon will I see results if I practice this drill?
Many players notice improved contact within one practice session because the drill directly trains low-point control. Noticeable changes in ball flight and distance often appear within a few sessions if you practice with focused sets and use video feedback to confirm positions.
Can this drill fix thin shots and fat shots?
Yes. Both thin and fat shots stem from inconsistent low point. Training hips forward head back forces the low point to move forward of the ball, reducing fat shots and encouraging a compressing strike that prevents thin shots.
Will this work for beginners and high-handicap players?
Absolutely. The drills are scalable. Start with half swings and the ground rod. As you improve, add the front visual and the shoulder-level object. The cues are simple and easy to repeat, making them ideal for players at any level.
How do I maintain balance while getting my hips forward?
Focus on rotating your hips toward the target rather than lunging. Drive the belt buckle forward and rotate your hips so the weight transfers smoothly to the front foot. Finish with balance and nearly all weight on the front side.
Should I change my grip, stance, or backswing to make this work?
No fundamental changes to grip or stance are required. The sequence addresses downswing sequencing and impact position. Different top-of-swing styles can still produce the correct impact positions if the hips lead and the head stays back.
Next steps
Implement the three-layer drill progressively. Start with the ground rod, add a front visual, then move to the elevated shoulder object. Use short, focused practice blocks and record swings to confirm the hips forward head back positions. Over weeks you will see improved contact, consistent ball flight, and more reliable distance across the bag.
Train with purpose and measure progress. The combination of sound feel cues and immediate feedback will accelerate your improvement and help you hit every club longer and straighter.
0 Comments