
Unleash Your Potential: Transform Your Golf Swing with George Knudson’s Techniques
Enhancing your golf swing can revolutionize your game, especially when focusing on ball striking. The legendary George Knudson is a prime example of exceptional ball striking, boasting a smooth, consistent swing. His technique offers valuable insights that can help amateur golfers correct their swing flaws and enhance their game immediately.
This comprehensive guide delves into Knudson’s swing mechanics and compares them with other golfing legends like Ben Hogan. Embrace drills and tips to boost your efficiency, power, and consistency. Whether you’re a beginner or refining your skills, this step-by-step guide will equip you with essential elements that make the “deep to shallow” swing style so effective.
Table of Contents
- Step 1: Understand the Importance of the Trail Elbow Position
- Step 2: Master the Lead Wrist and Right Hand Alignment
- Step 3: Use a Drill to Lower Your Lead Shoulder
- Step 4: Learn from the Deep to Shallow Swing Style
- Step 5: Use Visual Aids to Reinforce Wrist Angles
- Step 6: Optimize Your Grip and Leading Edge
- Step 7: Keep the Clubhead Connected to Your Arm
- Step 8: Understand Tour Averages
- Step 9: Film and Analyze Your Swing
- Step 10: Practice with Evidence-Based Instruction
- Frequently Asked Questions (FAQ)
- Conclusion
Step 1: Understand the Importance of the Trail Elbow Position
The trail elbow position at the top of the backswing is a critical component for a great golf swing. For right-handed golfers, keeping the right elbow on the “original sharp plane” is key to a fluid downswing and powerful impact, as demonstrated by Knudson and other greats like Ben Hogan.
Key Action:
- At the top of your backswing, ensure your right elbow is tucked and aligns with your body, allowing for an effective downswing path.
- Use an alignment stick to visualize the correct elbow position and club angle.
Getting this position right helps maintain balance and leads to better swing control.
Step 2: Master the Lead Wrist and Right Hand Alignment
Aligning your lead wrist and right hand correctly at the top of the swing is another game-changer. The right hand should angle slightly towards the back right-hand corner, positioning the lead wrist perfectly for consistent impact.
Practice Tips:
- Visualize pointing your right hand into the back right corner, which helps maintain wrist angles.
- Use a light or torch to reinforce the correct angle, promoting a square clubface through impact.
This subtle adjustment enhances both power and accuracy in your ball striking.
Step 3: Use a Drill to Lower Your Lead Shoulder
One effective drill for arm and body positioning involves lowering your lead shoulder while maintaining wrist angles.
Execute the Drill:
- Adopt your address position with a grip ensuring a strong trail wrist angle.
- As you initiate the backswing, tuck your left shoulder under, keeping it low, while extending your right leg slightly back.
- Focus on the connection between your body and correct wrist angles.
Such practice helps cultivate the muscle memory needed for a powerful, repeatable swing.
Step 4: Learn from the Deep to Shallow Swing Style
The “deep to shallow” swing style, exemplified by Knudson, involves an inside backswing path transitioning to a shallow downswing, generating speed and accuracy.
Highlights:
- Move the club inside slightly on the takeaway and shallow on downswing.
- This arc allows for better ball compression and consistent control.
Embrace the natural swing arc for improved ball striking and compression.
Step 5: Use Visual Aids to Reinforce Wrist Angles
Using visual tools such as a torch can aid in achieving proper wrist angles and muscle memory.
Techniques:
- Shine the torch towards a designated spot, aligning your thumb and wrist accordingly.
- This exercise enhances understanding and execution of ideal wrist positions, reducing common swing errors.
Visual aids are practical methods for ingraining effective swing mechanics.
Step 6: Optimize Your Grip and Leading Edge
A precise grip and clubface position at the top of your swing is key to control and maintaining swing angles.
Focus Areas:
- Utilize a three-knuckle grip on the lead hand with a flat wrist position.
- Ensure the club’s leading edge points slightly upwards for consistency through impact.
Correct positioning prevents errors like flipping, ensuring a powerful strike.
Step 7: Keep the Clubhead Connected to Your Arm
Maintaining the connection between your lead arm and the clubhead through the backswing is essential for control and power.
Steps to Practice:
- Set the club a few finger widths from your lead arm, keeping it in contact during the swing.
- This connection limits wrist breaks and supports a solid swing structure, which is vital for both full and short game shots.
This practice fosters a powerful and repeatable swing.
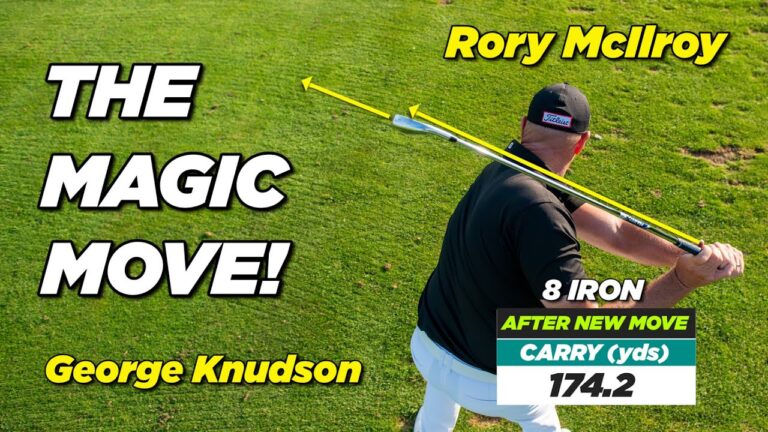
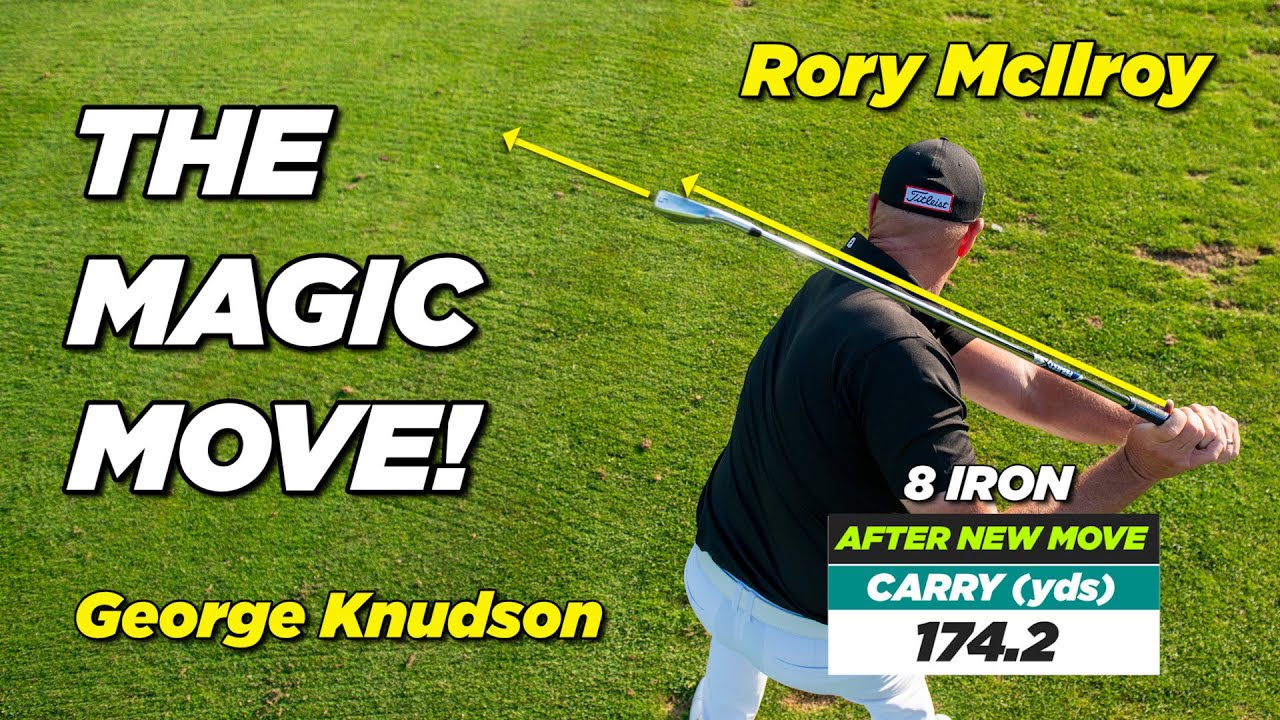
Step 8: Understand Tour Averages
Tour averages provide essential metrics to strive for, offering a benchmark to improve your technique:
- 12 degrees of shaft lean at impact, 3 inches of head lowering, and foot stance with 60% weight on the lead foot are typical of top pros.
Adopting these parameters can guide swing improvements, making it beneficial even for amateur golfers to understand these principles.
Step 9: Film and Analyze Your Swing
Regularly filming your swing offers valuable insights for self-assessment and comparison with professional techniques.
Recommended Actions:
- Capture various angles of your swing and compare them with professional standards.
- Utilize online platforms for in-depth analysis, correcting mistakes and honing skills regularly.
Visual feedback is crucial for tracking progress and identifying areas for improvement.
Step 10: Practice with Evidence-Based Instruction
Combining consistent practice with evidence-based coaching is vital for significant improvements in your swing.
Key Strategies:
- Utilize biomechanics, camera analysis, and expert feedback to quicken progress.
- Implementing the “deep to shallow” technique with focus on wrist and elbow positioning can drive substantial enhancements in ball striking.
Structured, reliable learning methods can transform your golf experience.
Frequently Asked Questions (FAQ)
Q1: Why is the trail elbow position so important in the golf swing?
The trail elbow’s position influences swing plane control, facilitating a smooth and consistent downswing path.
Q2: How does the lead wrist position affect ball striking?
Lead wrist positioning significantly impacts clubface angle through impact, enhancing both power and accuracy.
Q3: What is the “deep to shallow” swing style?
A swing sequence where the club takes an inside path on the backswing, shallowing during the downswing for optimized compression and ball control.
Q4: What drills can improve my swing plane and wrist angles?
Drills focusing on shoulder lowering and maintaining lead arm connection help develop the correct wrist angles and swing plane.
Q5: Is filming my swing really necessary?
Yes, filming delivers visual feedback crucial for fault identification and progress tracking, essential for improvement.
Q6: How can I check my grip and clubface position at the top?
A three-knuckle lead hand grip and a slightly upwards clubface help in maintaining a square impact position.
Conclusion
Improving your golf swing can be uncomplicated by integrating the exceptional techniques of George Knudson. Focus on perfecting the trail elbow position, lead wrist alignment, and adopting the “deep to shallow” swing style. Use drills and visual cues to reinforce these techniques, and regularly film your progress. With consistent effort and expert instruction, you can unlock your golf potential and enjoy more consistent and powerful shots. Ready to elevate your game? Start applying these expert strategies today!
0 Comments