

Table of Contents
- Step 1: Diagnose the problem — Early Extension Golf Fix
- Step 2: Start with setup — Why pushing your hips back too early hurts
- Step 3: Timing is everything — The late hip push that fixes early extension
- Step 4: The mechanical feel — “Hips back, core down”
- Step 5: Add rotation — The belt buckle finish
- Step 6: The simple at-home drill — Bag behind the butt
- Step 7: Reps, feels and progression
- Step 8: Common mistakes and how to avoid them
- Step 9: Measuring progress — what good looks and feels like
- Step 10: Tools and assistance
- FAQ
- Quick checklist — Early Extension Golf Fix
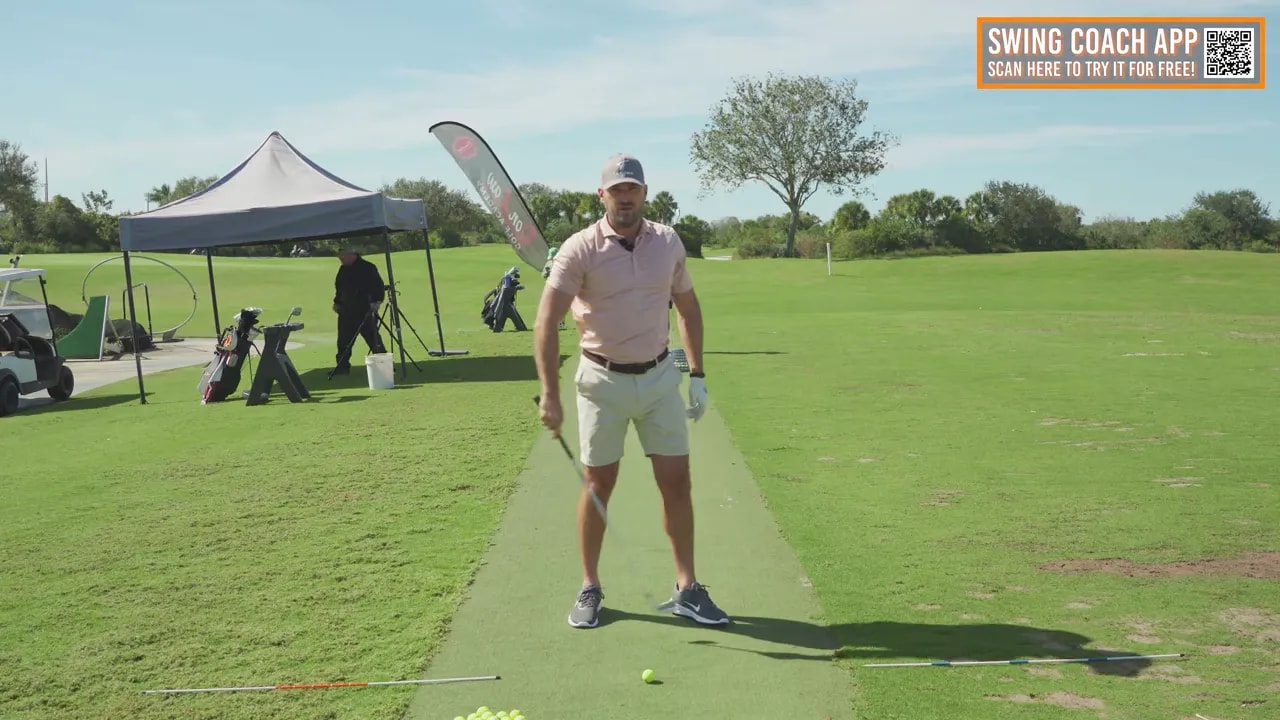
Step 1: Diagnose the problem — Early Extension Golf Fix
If your ball striking is inconsistent, chances are early extension is part of the problem. Early extension occurs when your hips move forward toward the ball during the downswing. That forward hip motion forces your upper body away from the ball, which changes spine angle and makes you compensate with your arms and wrists. The result is inconsistent contact, loss of distance and poor clubface control.
Look for two common patterns: either you do not realize you have early extension, or you know about it and have tried to fix it but nothing sticks. Both root causes can be addressed with the same approach, but the key difference is timing. Most golfers try to fix extension in the wrong place in the swing or by exaggerating the wrong feeling.
Step 2: Start with setup — Why pushing your hips back too early hurts
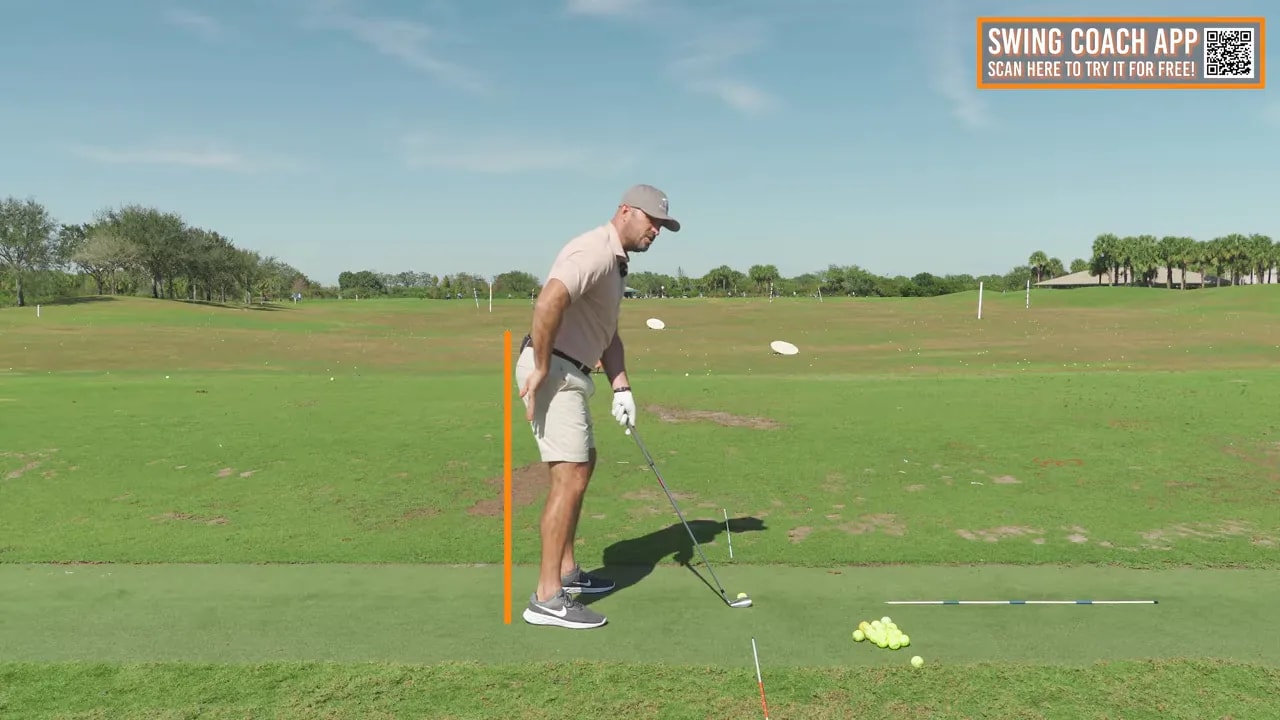
Many attempts to fix early extension involve pushing the hips back at setup or in the early takeaway. That intention makes sense, but it usually backfires. If your hips are set too far behind you at address, they inevitably travel forward during the swing to find balance. That forward travel is exactly early extension.
Instead, set up with your hips a little more under you. Feel pressure on the balls of your feet or the edge of the shoelaces. If your weight sits on your heels at address, your hips are likely too far back. Starting a little more forward gives you space to create hip depth later in the swing instead of eliminating it before you ever begin.
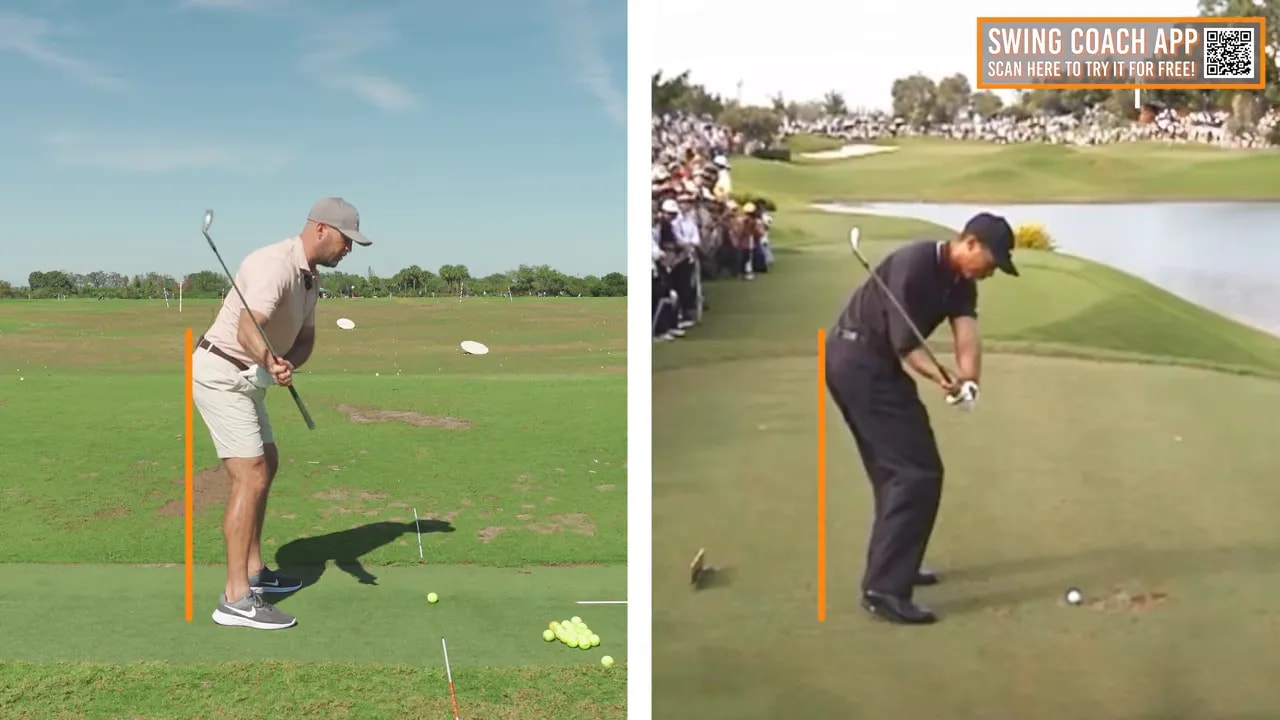
Step 3: Timing is everything — The late hip push that fixes early extension
The single biggest discovery for eliminating early extension is timing. Do not push the hips back at setup or early in the takeaway. Wait until the very end of the backswing and initiate a controlled hip push back into the early downswing. That late “hip back, core down” feeling allows your torso to stay tilted and maintain spine angle through impact.
To feel it correctly:
- Start with hips slightly forward and weight on the balls of your feet.
- Takeaway while keeping hips under you; avoid pushing your butt back early.
- At the top and into transition, feel the hips push back a small amount while the core drops.
- Through impact the torso remains down and the arms can stay passive, producing consistent contact.
This timing is easier to describe than to execute, which is why a simple drill and consistent practice reps are essential.
Step 4: The mechanical feel — “Hips back, core down”
It helps to break the movement into two complementary feels. First, when the hips move back they also create a slight increase in hip flexion and let the core region drop lower over the ball. Think of the combination as “hips back, core down.” That contrasts with the early extension feeling where hips travel forward and the core lifts away from the ground.
Practicing the “hips back, core down” feel teaches your body to maintain spine angle and prevents compensations such as early release of the wrists or over-extension of the arms.
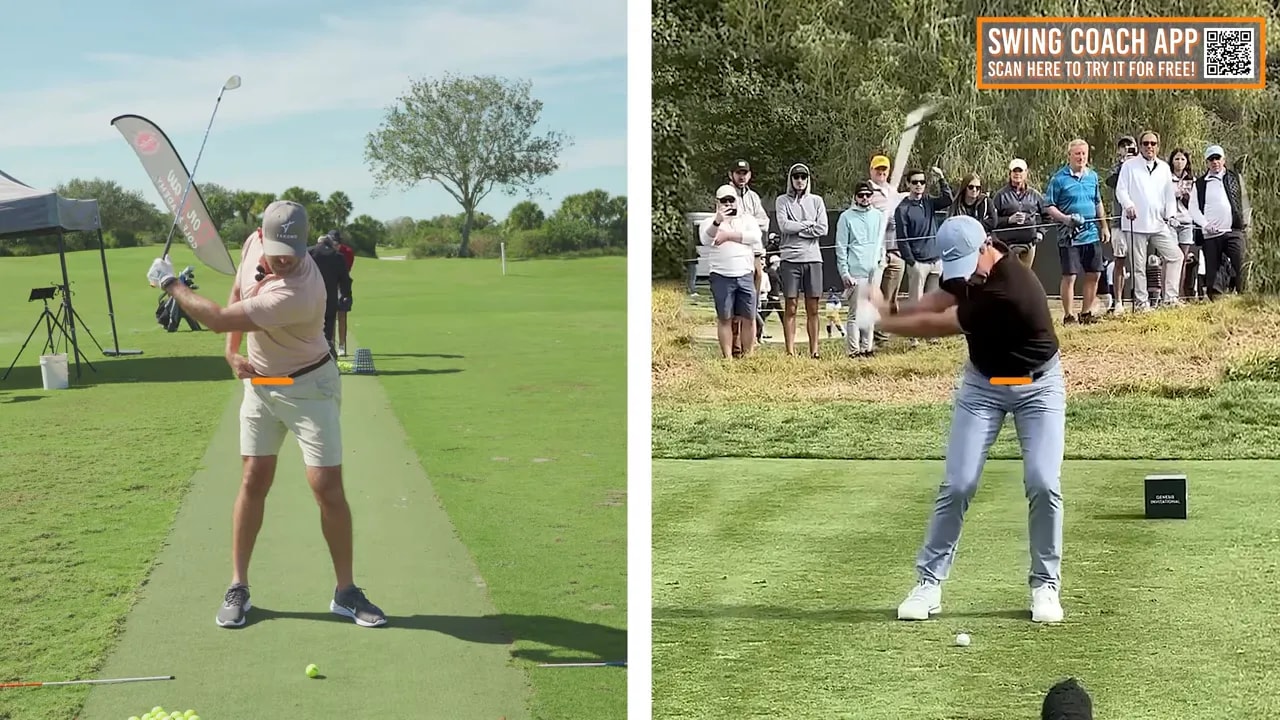
Step 5: Add rotation — The belt buckle finish
Creating hip depth is only the first piece. Once you get the depth late in transition, you must then rotate and extend correctly to complete the swing. The physical cue to train is to move your belt buckle up and toward the target after the initial hip back. That motion combines a slight slide and rotation so your left hip becomes deep and your belt buckle finishes pointing left of the target (about 10 to 11 o’clock if target is 12 o’clock).
The sequence looks like this:
- Hips under at setup, pressure toward the balls of your feet.
- Keep hips under through the first part of the backswing.
- Late in the backswing and into early downswing, feel the tailbone or hips push back and the core drop.
- Immediately after, rotate and slide the hips up and forward toward the target so the left hip becomes deep at the finish.
Step 6: The simple at-home drill — Bag behind the butt
The fastest way to train the timing and the feels is with an everyday object: your golf bag and the driver headcover. The drill gives instant feedback on whether you are creating hip depth late and whether your belt-buckle rotation follows.
Drill setup:
- Place a driver headcover on the ground directly behind your butt line about one fist or one club-head width back from your normal setup. That is a very small distance; the cue is intentional and minimal.
- Address the ball with your hips slightly forward and pressure on the balls of your feet. Knees should be bent and your upper body rounded down to the ball.
- Take a few practice swings without a ball to feel the sequence: keep hips under in the takeaway, feel a slight hip push back just at transition, then rotate the belt buckle up and left toward the target.
When you swing with the bag behind your butt, the bag provides tactile feedback. If you push the hips back too early the bag will fall away from or lose contact with your butt prematurely. If you create depth late and move into rotation correctly, the bag will only lightly be contacted at the precise transition moment. That instant feedback speeds motor learning and makes the new timing stick.
Step 7: Reps, feels and progression
Follow a progressive practice plan to convert the drill feel into reliable on-course motion:
- Start with slow, deliberate swings without a ball. Focus entirely on setup, balls-of-feet pressure, and the late hip push back into transition.
- Add the bag drill and take 20 slow swings while monitoring the bag contact point. Video a few reps face-on if possible.
- Transition to half swings with a ball, maintaining the same timing and hip sequence.
- Gradually increase swing length while preserving the timing cues: hips under early, late hip push back, then belt-buckle rotate up and left.
- Finish with full swings, using video or an app to confirm hip depth and the left-hip finish.
Expect immediate feedback in the quality of strikes. Many golfers report tighter dispersion and more solid contact within a short practice session when they actually change the timing rather than just forcing position.
Step 8: Common mistakes and how to avoid them
- Setting hips too far back at address — This reduces the space needed to create hip depth late. Keep hips slightly under and pressure forward.
- Pushing hips back early in the takeaway — If you push the butt back during the initial takeaway you will almost always return forward later. Maintain hips under until the end of the backswing.
- Staying stuck back after the hip push — After creating depth you must rotate and slide the hips up and forward toward the target so the left hip becomes deep at the finish.
- Using excessive dramatic movements — The hip push back is small. Overdoing it creates other timing problems. The cue is subtle and late.
Step 9: Measuring progress — what good looks and feels like
You will know the Early Extension Golf Fix is working when:
- Shots feel more solid and consistent from the same setup.
- Your torso maintains spine angle through impact and you see less early arm roll or early wrist release.
- The left hip feels deeper at the finish and the belt buckle points left of the target.
- There is a measurable improvement in dispersion and clubface control.
Video is a valuable tool. Recording both face-on and down-the-line allows you to check hip depth, spine angle and whether your belt buckle rotates up and toward the target at the right time.
Step 10: Tools and assistance
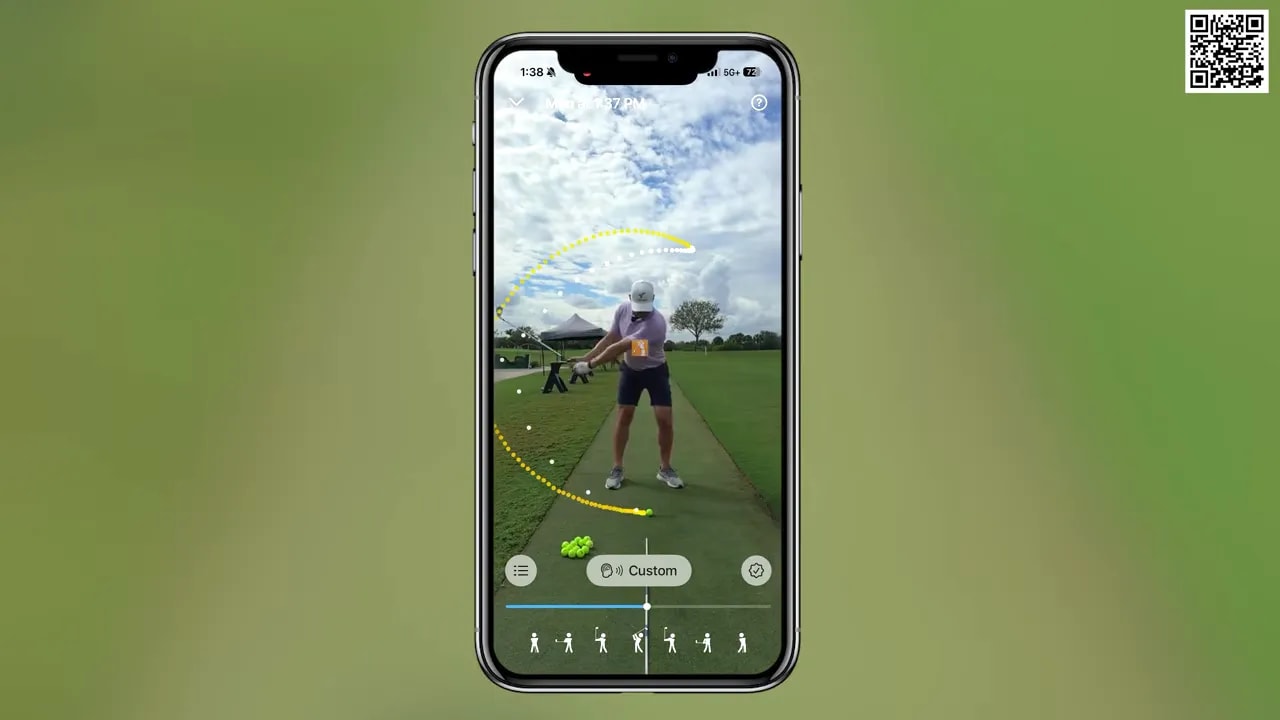
If you want automated, immediate feedback on hip depth and other body positions, use a swing-analysis tool or an app that provides face-on and down-the-line breakdowns. These tools often flag whether you are too early or too late with your lower-body actions and offer targeted drills for correction.
Practicing with a coach or in a short in-person session will accelerate the fix because a trained eye can identify subtle timing problems and adjust feel cues more precisely. But a structured self-practice routine using the bag drill will give you a strong start.
FAQ
How do I know if I have early extension?
Look for your hips moving toward the target during the downswing and a corresponding lift of your upper body away from the ball. Other signs include thin shots, fat contact inconsistently, or reliance on your hands to get the club into the ball. Video from a down-the-line angle often reveals early extension clearly.
Why is starting with hips back at setup a bad fix?
Setting hips too far back reduces the range to create depth later. Your body will naturally travel forward to balance, which recreates the early extension you were trying to eliminate. Starting slightly forward gives you the room to create hip depth late in the backswing.
How much should I push my hips back in the transition?
The movement is small and specific. Think of a club head width or a fist of butt travel in the bag drill. It is a subtle push back combined with a small drop of the core region. Over-exaggeration creates other timing issues; focus on timing rather than size.
What if I push my hips back and get stuck?
If you feel stuck, you are likely missing the second piece: rotation and sliding. After creating depth, push the belt buckle up and toward the target so your left hip becomes deep. That rotation and extension prevent the hips from remaining stuck behind you.
Can I practice this without a coach or training aid?
Yes. The bag and headcover drill provides tactile feedback and is an excellent solo practice tool. Video recording and an analysis app that provides face-on and down-the-line feedback will also help you monitor progress and keep the timing consistent.
Quick checklist — Early Extension Golf Fix
- Hips slightly under at address, pressure on balls of feet.
- Keep hips under through the early backswing.
- Create hip depth late at the top into early transition with a slight hips-back, core-down feel.
- Rotate and slide hips up and forward so belt buckle finishes left of the target.
- Use the bag drill for tactile feedback and video for verification.
Fixing early extension is about sequencing and timing more than dramatic positional changes. Train the late hip push back and immediate rotation that follows, and the quality of contact and consistency will follow. Keep your practice deliberate, use simple feedback tools, and focus on the subtle feels described here.
0 Comments