

Pure iron strikes come down to controlling a few simple actions. If you want more consistent contact and cleaner shots, focus on where the club meets the turf and how your body creates and releases that motion. This guide gives a clear, step by step practice plan so you can diagnose poor ball striking, correct it, and build repeatable iron play for your golf game.
Use the short practice drill described below to get immediate feedback on your strike. Then work through the four steps to understand the mechanics that determine whether you hit fat shots, thin shots, or crisp, tour-caliber iron strikes. Everything is golf-centered and practical — no complicated swing rebuilds, just reliable fundamentals.
Table of Contents
- Step 1: Drill — The Tape Feedback Method to Improve Ball Striking for Golf
- Step 2: How to Hit the Ground — Use Your Arms to Find the Turf
- Step 3: Where to Hit the Ground — Blend Arms, Lateral Shift, and Rotation in Golf
- Step 4: How to Get the Club Out of the Ground — Use Extension Through Impact in Golf
- Common Mistakes and Simple Fixes for Golf Ball Striking
- Putting the Practice Session Together for Better Golf
- Quick Cues to Use on the Course for Better Golf Strikes
- Video Embed Example
- FAQ
- Final Notes on Improving Your Golf Ball Striking
Step 1: Drill — The Tape Feedback Method to Improve Ball Striking for Golf
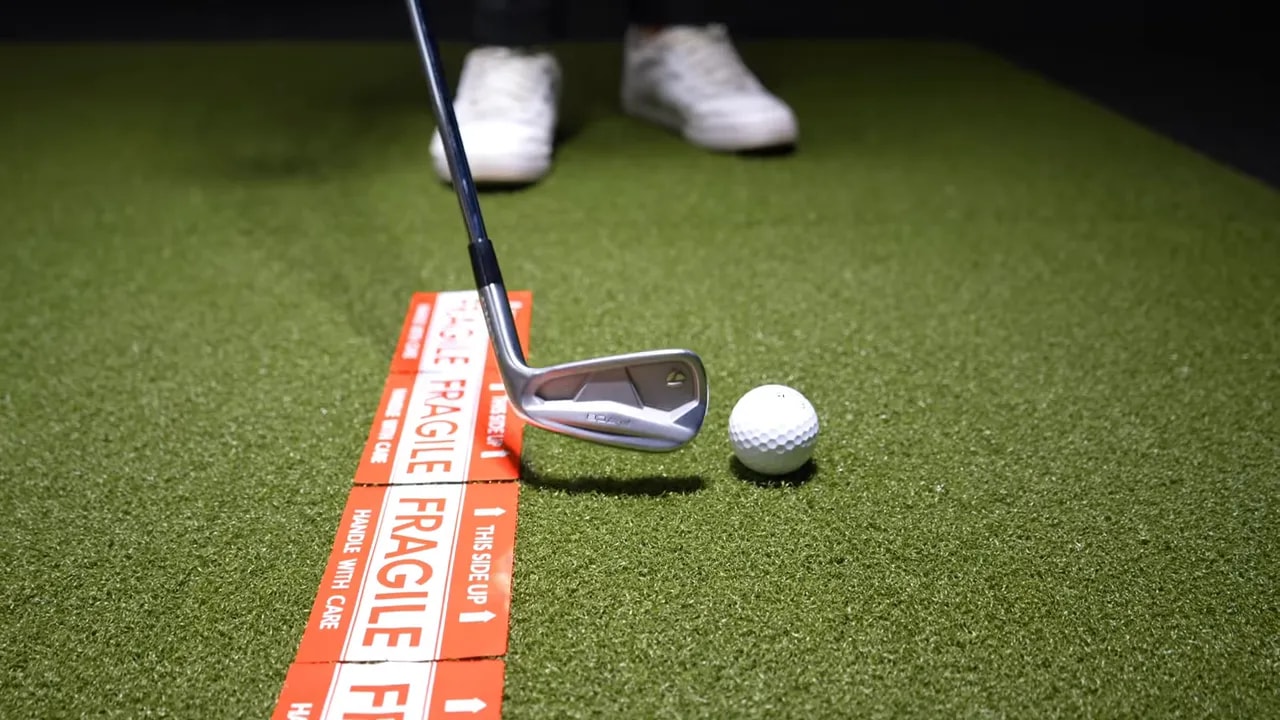
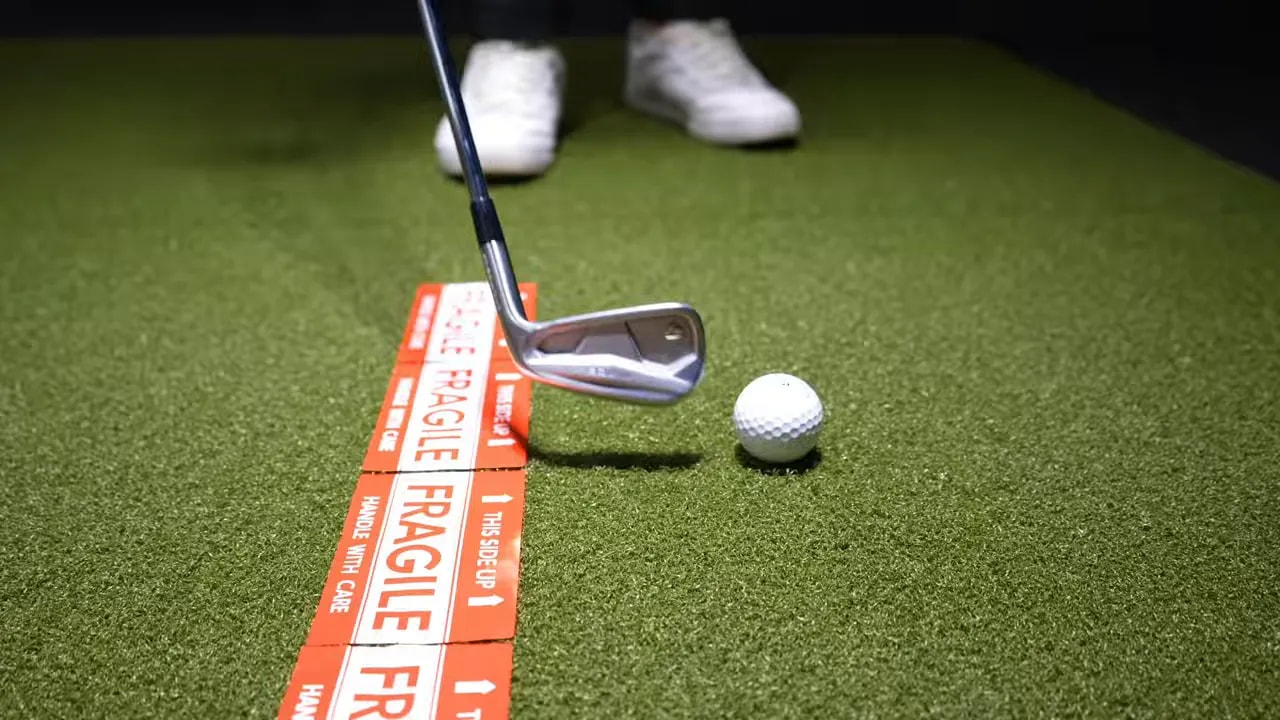
Set a piece of tape, masking tape, or any visible line on the ground. Place a golf ball about one clubhead width in front of the tape. The idea is simple: your club should hit the ground target side of the ball and leave the tape undisturbed.
Why this works:
- Immediate feedback — If you clip the tape, your contact is too far back. If you top the ball, the club never reached the ground in the correct place.
- Simple setup — No launch monitors required. This is a low-tech drill that reveals whether you are striking the turf in front of, behind, or under the ball.
Practice routine:
- Place the tape and ball as described.
- Hit easy, controlled half swings and try to leave the tape intact.
- Repeat in sets of 10. Note whether shots are cleaning the ball or catching the tape.
This drill is a quick tool to practice on a range or at home. It’s also the baseline for the steps below. If you consistently remove the tape, the rest of these steps will show you which motion to add or refine in your golf swing.
Step 2: How to Hit the Ground — Use Your Arms to Find the Turf
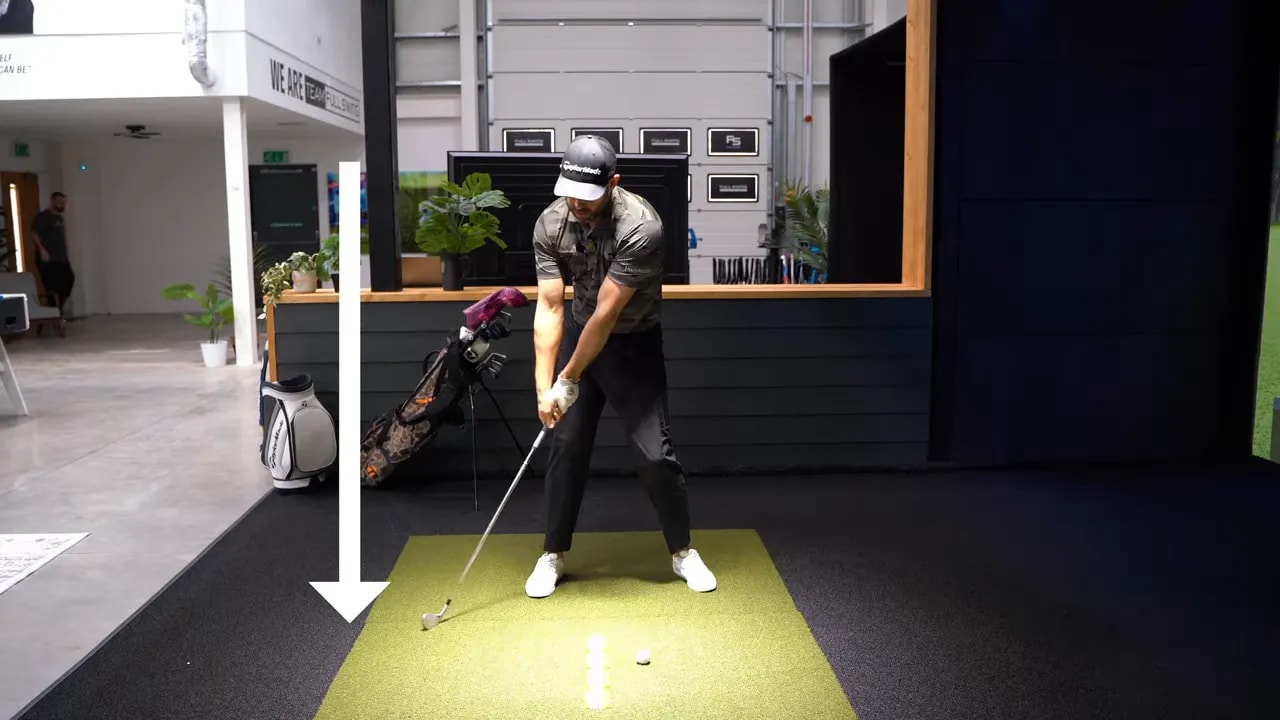
Many golfers fear hitting the ground and, as a result, thin or top shots appear. The simplest movement to guarantee contact with the turf is to let your arms swing down from the top of the backswing. If you keep the body steady and just swing the arms down, the club will make contact with the ground. That’s the first truth about iron play.
Key coaching points:
- Arms lead the descent — Imagine the clubhead traveling down and slightly forward. If your arms do the work, you will hit the ground rather than arriving too high over the ball.
- No panic about turf contact — Hitting the ground is normal and necessary with irons. The goal is to control where on the ground the club strikes relative to the ball.
Common problem: If you frequently top the ball, your arms and club are arriving too high and too shallow. The fix is to practice the pure arm-swing motion from the top while keeping the body stable. Use the tape drill to confirm the club is reaching the turf.
Step 3: Where to Hit the Ground — Blend Arms, Lateral Shift, and Rotation in Golf
Hitting the ground is one thing; hitting it in the correct place is the next. The location where your club hits the ground is controlled primarily by three elements in your downswing:
- Arms swinging down
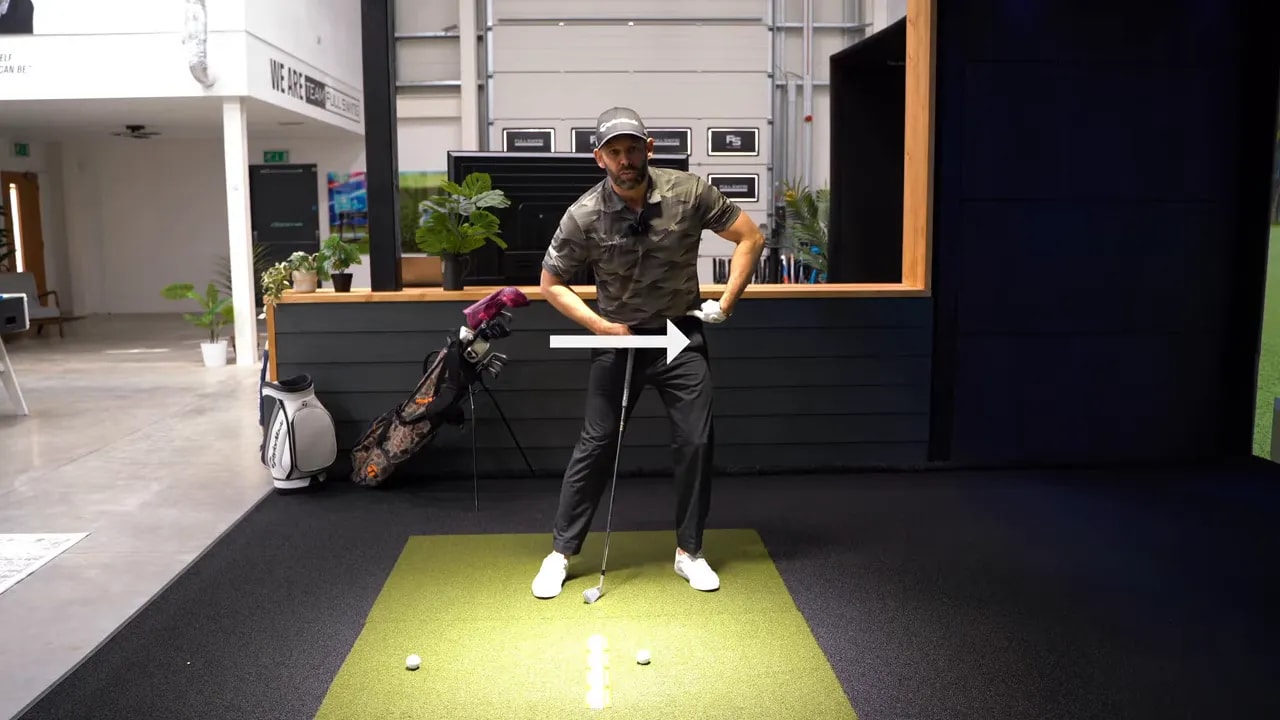
- Lateral hip shift toward the target
- Body rotation through the shot
Visualize your swing as a large circle. When you shift that circle forward and rotate, the point of impact moves target side of the original turf contact. You want the club to strike the ground slightly in front of the ball, taking a shallow divot that begins after the ball.
How to practice the three elements:
- Arms only — From the top of the swing, keep the body still and swing the arms down. Observe where the club contacts the turf relative to the tape.
- Add lateral shift — Take a small, controlled move of your hips toward the target during the downswing. For many good players this is roughly six to eight inches, but it varies by body type. The shift moves the impact point forward.
- Add rotation — As you rotate the torso toward the target, the impact point moves even later. Combine rotation with the shift for the correct, target-side contact.
Practice progression:
- Start with left-hand-only swings (or lead hand for left-handers). This isolates the arm path and prevents early body compensation.
- Do sets of 10 swings: arms only, arms plus shift, then arms plus shift and rotation.
- Use the tape to confirm the club is landing target side of the ball every time.
The single-arm practice is powerful. If you can blend these three elements consistently with one hand, you will be able to reproduce similar contact with two hands under normal conditions. If something fails, this routine helps you self-diagnose which element is missing.
Step 4: How to Get the Club Out of the Ground — Use Extension Through Impact in Golf
Once you can locate the correct turf contact, the final challenge is getting the club out of the ground smoothly. Heavy divots and steep swings happen when the club enters turf aggressively but lacks an efficient exit. The key to an easy exit is body extension through the shot.
Understand the two body positions:
- Setup — You start with a forward bend at address. That creates the angle you need to deliver the clubhead into the ball.
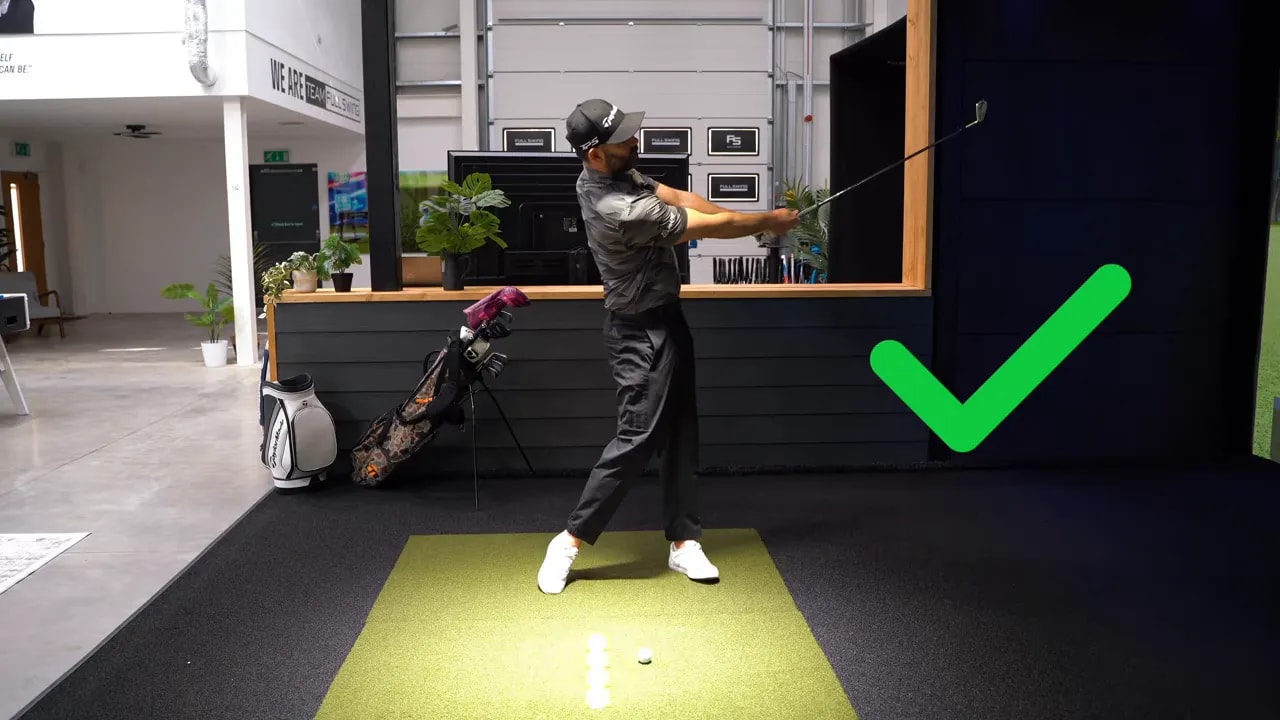
- Follow-through — After impact, great players are less bent forward. They rotate and extend the torso so the chest faces the target and the body appears to be leaning slightly backward relative to the initial posture.
How extension helps:
- As you rotate and extend, the handle and clubhead rise away from the turf naturally. This motion lifts the club out of the ground without forcing the hands or flipping the wrists.
- If you rotate but remain bent forward, the club stays low and tends to dig. Extension is the exit mechanism.
Drills to train extension:
- Hit small pitch shots or half wedges and hold the finish. Feel the chest rotate to face the target while the body rises and extends.
- Practice swings where you focus on moving from forward bend to an extended posture in the follow-through. Don’t force the arms to lift; let the body create the exit.
- Repeat the tape drill while emphasizing extension after impact. The tape will stay intact while your clubhead clears the turf cleanly.
When you combine the arm path, lateral shift, rotation, and extension, the club will consistently strike the turf at the correct spot and exit cleanly. That is the recipe for pure iron play in your golf game.
Common Mistakes and Simple Fixes for Golf Ball Striking
- Topping the ball — Cause: club arrives too high, too shallow. Fix: practice arms-down swings to feel the club reach the turf.
- Fat shots — Cause: impact point too far back. Fix: add lateral hip shift and rotate into impact so the club meets the turf target side of the ball.
- Steep, heavy divots — Cause: poor extension after impact. Fix: train body extension so the club exits the ground naturally.
- Inconsistent strike — Cause: missing one of the three downswing elements. Fix: one-hand swings to isolate and blend arms, shift, and turn.
Putting the Practice Session Together for Better Golf
A suggested 20-minute practice block to build reliable iron contact:
- Warm up with light swings and short chips for five minutes.
- Set tape and do three sets of 10 left-hand-only swings: arms only, arms plus shift, arms plus shift and rotation. Rest 60 seconds between sets.
- Switch to two-handed swings with the tape, 3 sets of 10 focusing on the three elements and leaving the tape untouched.
- Finish with 10 full swings concentrating on extension through impact and holding the finish.
Track your progress by noting how often the tape remains in place and how the divots look. Small, shallow divots that begin after the ball indicate correct strike. Over time, this will translate to better distance control, improved ball flight, and more confidence across the course.
Quick Cues to Use on the Course for Better Golf Strikes
- “Arms down” — Helps if you feel too shallow or keep topping.
- “Shift left” — Encourages a small lateral movement to move impact forward.
- “Turn and extend” — Drives the club out of the ground naturally.
- “Finish chest to target” — Confirms good rotation and extension.
Use one cue at a time and keep it simple. Too many thoughts lead to paralysis. Pick the cue that addresses your main miss and test it on the practice tee before taking it to the course.
Video Embed Example
Review the drill visually and try to match the feels described here when you practice. The empty video tag below is ready to be embedded on the page.
FAQ
Why must my iron hit the ground when playing golf?
Hitting the ground allows the club to compress the ball and create consistent launch and spin. Irons are designed to take a shallow divot after the ball. If the club never reaches the turf or contacts behind the ball, you get thin or fat shots. Controlled turf contact is central to consistent iron play.
How much lateral shift should I use in my golf swing?
For many players the lateral hip shift toward the target is approximately six to eight inches, but this varies with height, flexibility, and swing style. The goal is a controlled shift that moves pressure onto the front foot and allows the impact point to move slightly forward. Practice with the tape drill to find your optimal shift.
What should I do if I keep topping the ball in golf?
Focus on letting the arms swing down from the top of the swing and avoid fearing turf contact. One-hand drills from the top can retrain the feeling of reaching the ground. Also check that you are not reversing extension too early; maintain posture long enough for the club to reach the ball.
How do I stop digging big divots with my irons during golf?
Train body extension through impact. Rotate and rise slightly so the chest faces the target and the club naturally lifts away from the turf. Avoid forcing the arms to lift; let the body create the exit. Smaller, more forward divots indicate the correct change.
Can I practice these steps without a driving range?
Yes. Use the tape drill and single-arm swings in a backyard or on short grass where allowed. Practice extension and rotation with slow swings and short chips. Be mindful of safety and local rules when hitting real shots outside a range.
Final Notes on Improving Your Golf Ball Striking
Pure iron strikes result from a few controllable elements: a downward arm path, a small lateral shift of the hips, rotation through impact, and extension to lift the club out of the turf. Use the tape feedback drill, practice each element in isolation, then blend them together with one-hand swings before moving to full swings.
The changes are straightforward and repeatable. Focus on this simple framework during practice and your golf ball striking will become more consistent, predictable, and enjoyable.
Good practice and better golf.
0 Comments