
If your iron strikes feel thin, inconsistent, or lacking compression, the problem often appears just before the club reaches the ball. Small changes in the position of your hands and body in the moments leading into impact determine whether you hit a pure, controlled iron shot or thin, fat, and unpredictable contact. This guide explains what to look for in your golf swing, why it matters, and how to fix it using simple checks and a practical drill that promotes the correct levels and body action.
The focus keyphrase for this article is golf. You will see it used naturally throughout the steps and explanations to keep the guidance search friendly and relevant.
Table of Contents
- Step 1: Record a face-on slow-motion check of your grip
- Step 2: Understand why the grip needs to be lower pre-impact
- Step 3: Check shoulder angle during the backswing
- Step 4: Recognize the wrong way amateurs shallow the club
- Step 5: Use the Justin Rose drill to lower the hands correctly
- Step 6: Practice the change in levels—down then up through impact
- Quick checklist to use on the range
- Common mistakes and how to avoid them
- How to measure progress
- Putting it into play on the course
- FAQ
- Final notes
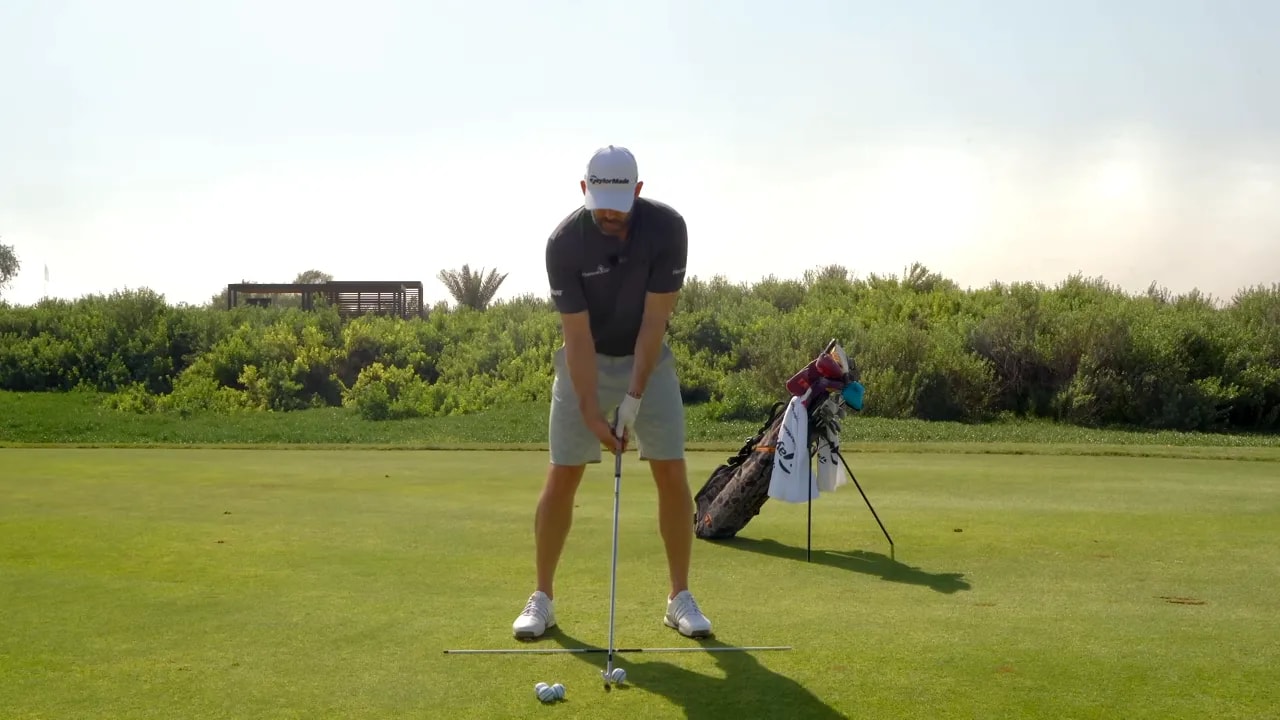
Step 1: Record a face-on slow-motion check of your grip
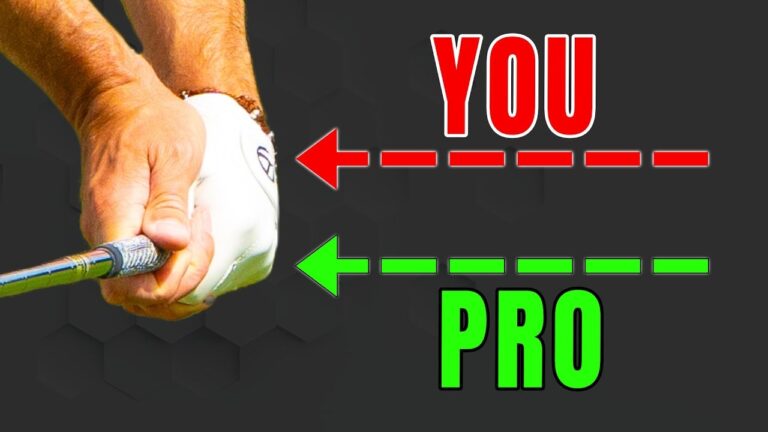
Start by filming your golf swing face-on in slow motion. The visual you need to reference is the top of the grip from address through the delivery position just before impact. Look for whether the top of the grip is lower, the same, or higher than it was at your setup.
- Lower at delivery — what elite ball strikers show and what you want.
- Higher at delivery — a common amateur fault that causes thin shots, missed centers, and poor divots.
If you can, draw a line on your footage aligned with the top of the grip at address. That line gives you a clear reference to compare the position at delivery.
Use the frame where you first reach the delivery position and check whether the handle has dropped relative to address. Many golfers believe the club should simply approach level, but the key is the handle position relative to the original setup.
Step 2: Understand why the grip needs to be lower pre-impact
When the grip drops lower than address during the downswing, the low point of the swing shifts forward and allows the clubhead to come into the ball from a slightly descending angle while the hands are rising through impact. That rising motion of the hands at impact is crucial for compression. If the grip is lower at delivery and then remains low, the clubhead would hit the ground before the ball. Therefore the grip must start to move upward through contact.
The upward movement of the grip is driven by your lead side. Specifically:
- The lead shoulder moves up away from the ground.
- The lead hip rises slightly.
- The lead knee begins to straighten.
- You push away from the ground to create upward force.
These coordinated actions let the clubhead continue into the ball while the grip moves upward. Both the hands and the body play their roles: the hands lower into the delivery position and then the lead side drives the handle upward through impact while the clubhead compresses the ball against the turf.
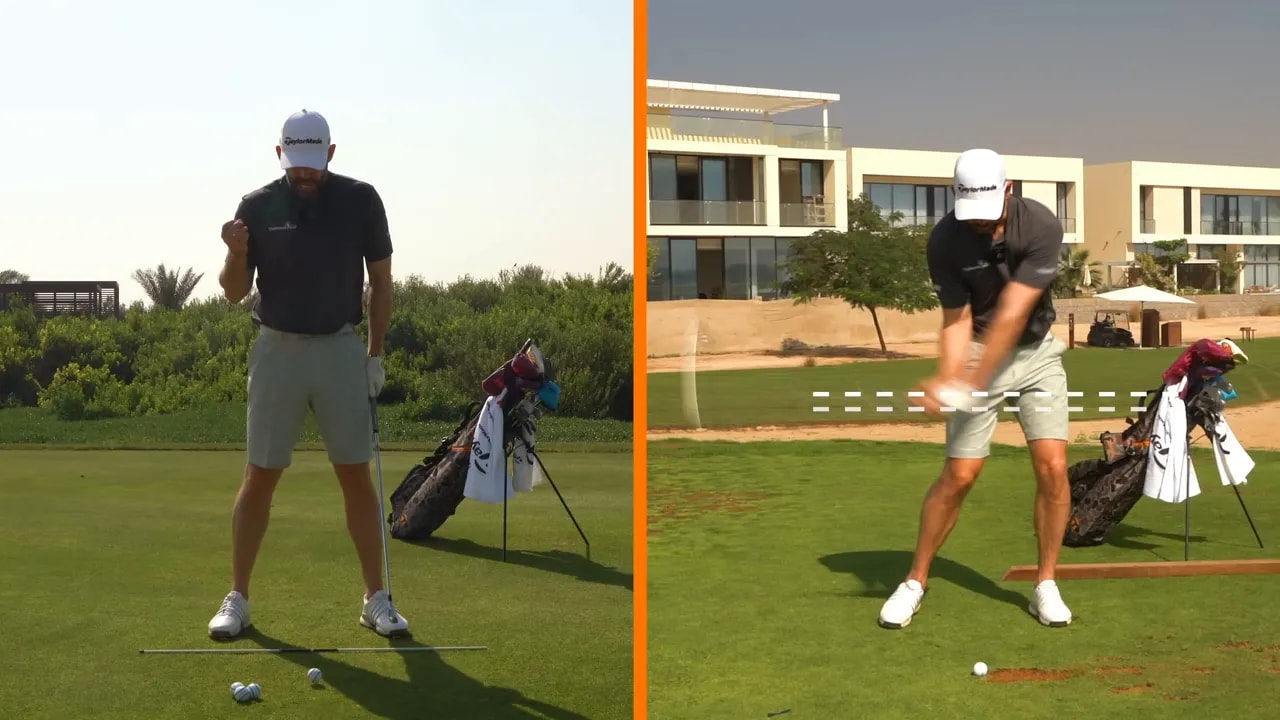
Step 3: Check shoulder angle during the backswing
One reason the grip ends up too high at delivery is an overly flat shoulder turn in the backswing. Many amateurs turn their shoulders so they become level with the ground. That flattening often causes the head to move up and the body to gain height through the backswing. When you gain height early, it becomes difficult to get the hands low enough on the way down.
To check your shoulder angle:
- Take a look at your top of backswing frame from the same face-on video.
- Place a club across your shoulders and feel whether your lead shoulder is tilted down toward the ball and your right hip or pocket has moved back behind you.
- Compare that to a level shoulder turn and see whether your head has risen.
Elite golfers tend to rotate their shoulders on a steeper angle than most amateurs. That steeper, tilted turn keeps the head more stable and set up a better platform for getting the hands lower in the downswing.

Step 4: Recognize the wrong way amateurs shallow the club
Shallowing the club in the downswing is a widely discussed goal, but many golfers attempt to shallow the club by standing up and using their body to flatten the shaft. That body-led shallowing can make the club more horizontal, but it does so at the expense of body tilt, head stability, and the ability to get the hands low.
When you stand up and move your hips toward the ball to shallow the shaft, your shoulders often rise, your head moves up, and the whole body becomes higher. As a result:
- The handle stays higher than it should be at delivery.
- Your rotation stalls because you have lost the ability to push off and pivot.
- You resort to flicking with the hands and producing inconsistent clubface control.
That flicking leads to shots that miss left or right, thin shots, fat shots, or poor compression. The paradox is that shallow feels like it should help, but the wrong method of shallowing kills rotation and control.

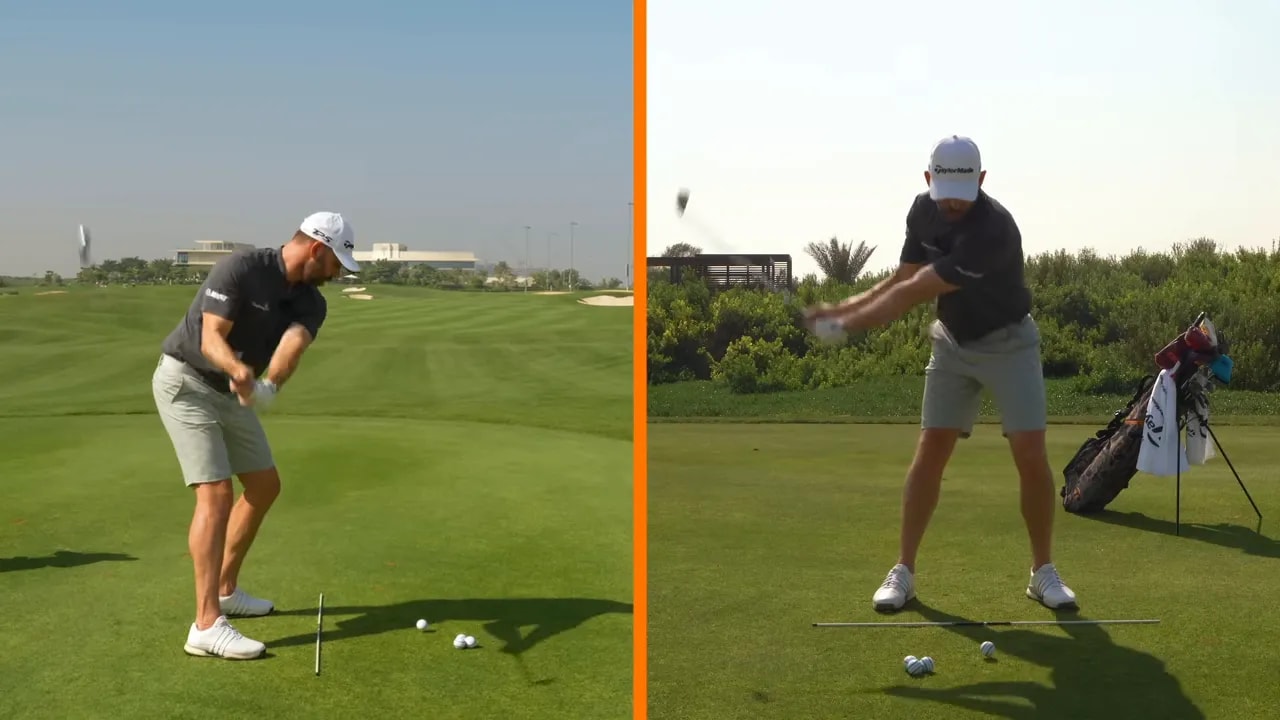
Step 5: Use the Justin Rose drill to lower the hands correctly
The Justin Rose drill teaches a different way to get the handle lower without losing body tilt or rotation. Instead of using the body to shallow the shaft, the drill asks you to keep or slightly increase your tilt in transition and produce shallowing by pushing the arms down.
Key mechanics of the drill:
- At the top of your backswing feel the right pocket move behind you and the lead shoulder tilt down toward the ball.
- Start the downswing by increasing the flex slightly in your body—work a little closer to the ground instead of standing up.
- Push the hands and arms down toward the ball so the handle drops below its original address height in the delivery position.
- From that loaded delivery, pivot the lead side through and allow the handle to rise through impact while the clubhead compresses the ball.
The combination of increased tilt and a downward arm action lowers the hands without using the body to flatten the shaft. That keeps you loaded and able to rotate through impact with power and control.
Practicing this should feel different from the standing-up shallowing. You should feel more loaded, shorter in posture at transition, and able to pivot freely rather than getting blocked off.
How to drill it on the practice tee
- Set up with a normal ball position for your iron.
- Take your normal backswing, but move into that steeper shoulder tilt at the top.
- On the downswing focus on pushing the hands down as you maintain tilt and initiate the pivot.
- Mark the ball with tees or small markers to check divot location and low point.
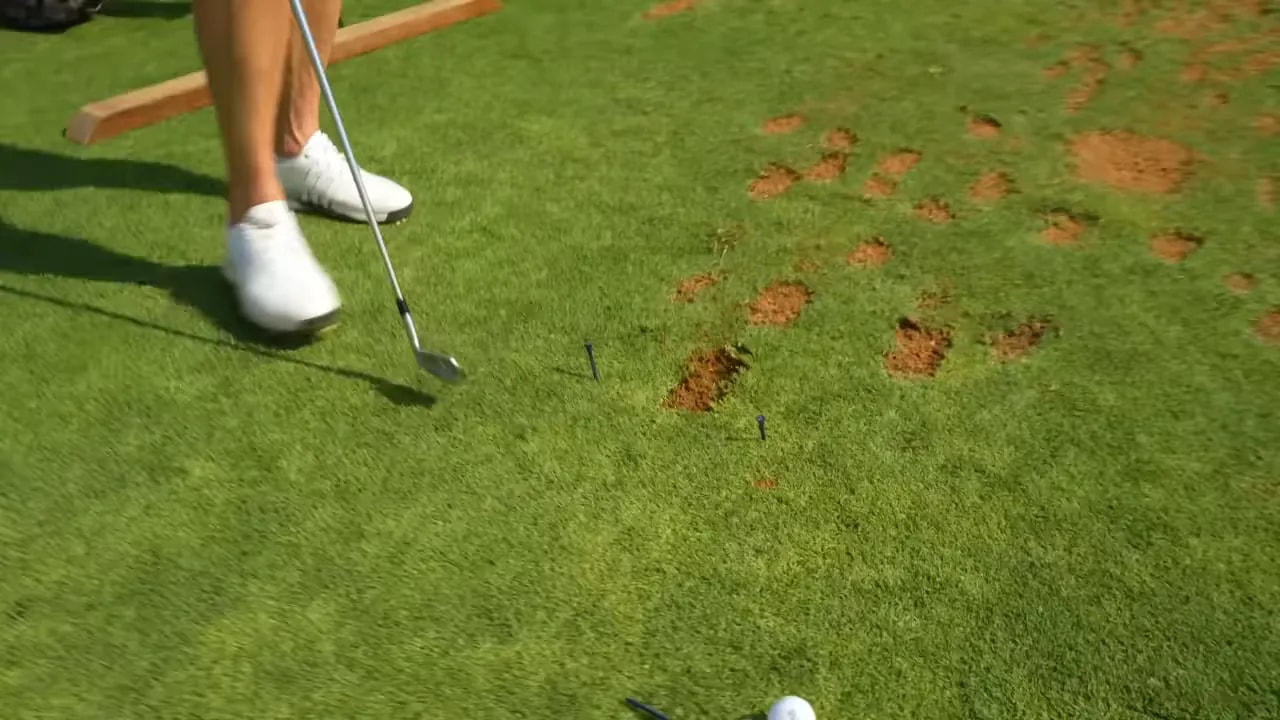
If executed correctly the divot and low point will shift target side of the ball and you will feel strong compression. The drill can also help with club path issues, because it encourages rotation rather than a hand-dominated flick.
Step 6: Practice the change in levels—down then up through impact
The movement great players make is a change of levels. Hands and body go down into the delivery, then the lead side pushes up through impact so the hands rise as the clubhead compresses the ball. Practicing that level change is essential.
Simple practice routine:
- Warm up with slow practice swings focusing only on posture and shoulder tilt at the top.
- Start half swings where you exaggerate pushing the hands down into the delivery position while staying tilted.
- Progress to three-quarter swings concentrating on pivoting the lead side through while allowing the handle to rise through impact.
- Finish with full swings, using the same sensations but with real golf shots aimed at a specific target.

When you feel the correct sequence, your strikes should improve noticeably. You will compress the ball better, take a more consistent divot, and your clubface will be more stable through impact.
Quick checklist to use on the range
- Recording: Film face-on slow motion to review handle height at delivery.
- Shoulder angle: Ensure the lead shoulder is tilted down at the top; right pocket slightly behind.
- Transition: Do not stand up—if anything, increase flex slightly and move closer to the ground.
- Arms: Push the hands down into the delivery to lower the handle.
- Pivot: Rotate the lead side through and allow the handle to rise through impact.
- Divot: Aim for a divot that starts target side of the ball for proper compression.
Common mistakes and how to avoid them
- Trying to shallow by standing up: Avoid using the body to flatten the shaft. That kills rotation.
- Backswing shoulder level: If your shoulders become level at the top, the head will rise and the hands struggle to drop.
- No video feedback: Without footage you cannot accurately judge handle height or shoulder tilt.
- Rushing the drill: Move slowly at first until the sensations are ingrained, then increase speed.
How to measure progress
Use simple, repeatable metrics on the range:
- Compare the top-of-grip height at address and at delivery in your face-on video.
- Note the divot position relative to the ball after each swing.
- Track ball flight consistency and distance for identical club selection.
- Measure clubface control by observing how many shots start left or right versus online.
Improvement in these areas is a clear sign the new movement pattern is working.
Putting it into play on the course
Once you establish the feeling on the range, test it on the course with one or two short irons on the practice hole. Focus on:
- Maintaining shoulder tilt at the top.
- Initiating the downswing with a slight increase in flex and pushing the hands down.
- Rotating through and allowing the handle to rise through impact.
Avoid making wholesale changes during a competitive round. Integrate the new feel in practice sessions and then apply it gradually in play.
FAQ
How do I know if my hands are too high at delivery?
Record a face-on slow-motion video and draw an imaginary line at the top of the grip at address. If the top of the grip at delivery sits higher than that line, your hands are too high. Also look for thin strikes, shallow divots, and a tendency to flick the wrists—these are symptoms of a high handle at delivery.
Won’t lowering the hands cause me to hit fat shots?
Lowering the hands incorrectly can cause fat shots if you simply stand up or stall your rotation. The key is to lower the hands by pushing the arms down while keeping or increasing body tilt and pivoting the lead side through impact. That sequence produces compression and shifts the low point target side of the ball, avoiding heavy contact.
How often should I film my swing to check this?
Film periodically—start with a session every practice day while you learn the sensation, then reduce to weekly checks as the movement becomes consistent. Slow-motion footage face-on provides the clearest feedback for handle height and shoulder tilt.
Can this help with ball flight and direction control?
Yes. Getting the handle lower in the correct way encourages better rotation through impact and a more stable clubface. That reduces flicking, which in turn improves directional control and reduces left-right dispersion.
Is this useful for woods and driver?
The principle of level change and proper sequencing applies broadly, but the specific handle height and divot goals are primarily relevant to iron play. Woods and drivers have different low-point and attack-angle targets. Focus on iron work with this drill and adapt the sequencing sense to other clubs gradually.
Final notes
Small, deliberate changes to your levels and the way you shallow the club can transform your iron play. Record your swing, check your shoulder angle, avoid standing up to shallow the shaft, and use the Justin Rose style drill to push your hands down while staying tilted. Over time the new movement will become automatic and deliver better compression, more consistent divots, and improved control across your golf bag.
Keep the practice focused and repeatable. Use the checklist and the face-on video as your primary tools for feedback. With patience and precise practice, you can move from inconsistent iron play to solid, compressed strikes that feel and look like the shots you want.
0 Comments