

A poor impact is one of the most common reasons your golf shots feel thin, weak, or inconsistent.
Two simple, practical changes to how you place your hands at address and how you start your downswing will
dramatically improve compression, launch angle, and overall strike.
This step-by-step guide teaches those two changes so you can practice them on the range and transfer them to the course.
Table of Contents
- Step 1: Set your wrist at address — the single most important golf grip detail
- Step 2: The float-loading drill — sequence the swing so the club lags naturally
- Putting the two steps together in a practice session (golf practice plan)
- Troubleshooting common issues while practicing golf impact
- Practice progressions and variations for different clubs
- How to measure improvement
- FAQ
- Final checklist before you hit the range (golf checklist)
Step 1: Set your wrist at address — the single most important golf grip detail
The relationship between your fingers and forearm at address determines whether the club can be stored with
lag and delivered with the handle forward at impact. Many golfers place the grip too deep in the palm or
with the fingers aligned to the forearm. That looks natural standing still, but it removes the wrist set you
need to create compression through impact.
The correct setup gives you a small stored angle between the forearm and the wrist while still allowing the
hand to move back into a neutral position during the swing. Think of this as establishing potential. You
don’t create lag in the downswing — you unlock it because you set the wrist angle correctly at address.

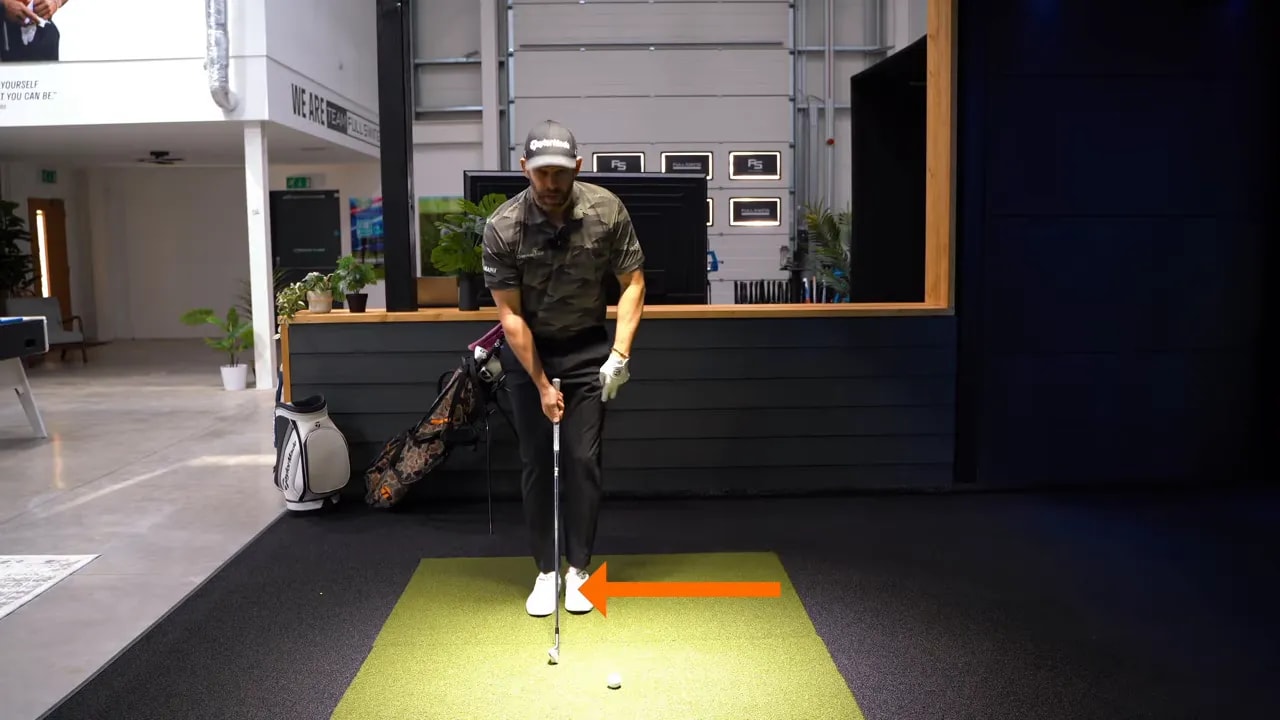
How to place your hands for the right wrist set
-
Take your lead hand (left hand for right-handed golfers) and hold it in its natural position so fingers are
roughly in line with the forearm. -
Point your fingers back toward your heels as much as you comfortably can — not fully, but close to that
direction. This rotates the grip into the base of the fingers. -
Let the pad of your hand sit on the handle and let the thumb rest on top of the grip. The club should feel
supported at the base of the fingers, not buried into the palm.
If you have a wrist sensor or other wrist-angle tool you will see a big change when you do this. If you do not,
use a simple home test.
Simple test you can do without gadgets
-
Hold your forearm rigid and place the club in your lead hand as described. Can you raise the grip to
approximately horizontal without twisting your forearm? If yes, your hand is set correctly. -
If the club is forced too deep into your palm you will not be able to rotate the grip and the clubhead will be
limited in its ability to “store” behind your hands in the backswing.
When the grip sits in the base of the fingers your wrist naturally sits in a position that allows the hand to
move back to neutral during the backswing while still preserving the stored angle. That stored angle is the
potential for lag and for handle-forward impact.
Common mistakes at address and their effects
- Grip too deep in the palm: prevents wrist angle, leads to scooping and thin shots.
-
Fingers too aligned with forearm (no rotation back toward heels): reduces ability to store the club, so you
end up with early release or a flat shaft through impact. -
Excessive pressure: tight hands reduce sensitivity and make it hard to achieve the subtle timing needed to
create lag.
Fixing the grip placement at address solves more problems than you might expect. You will immediately
increase the chances of compressing the ball and producing a lower, more penetrating launch when you want it.

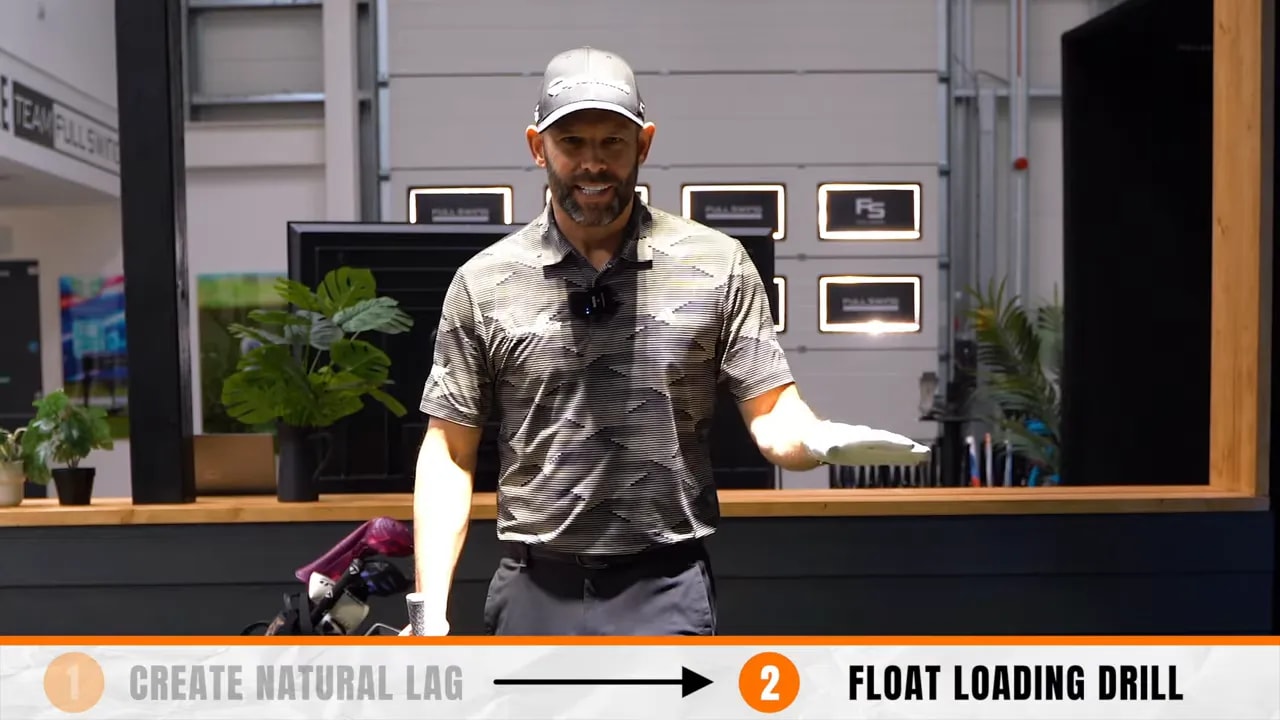
Step 2: The float-loading drill — sequence the swing so the club lags naturally
Lag is not an attitude you hold. It is a consequence of proper sequencing. Trying to clamp the wrists in the
downswing or forcing the clubhead to stay behind your hands is a losing battle. The float-loading drill trains
the sequence that produces lag naturally.
Why so many golfers fail to get lag
Many golfers overload their wrists in the backswing then immediately unload them in the downswing. That
quick unload forces a “throwing” action that can push you back and up through impact, producing a high
launch, thin strike, and weak distance.
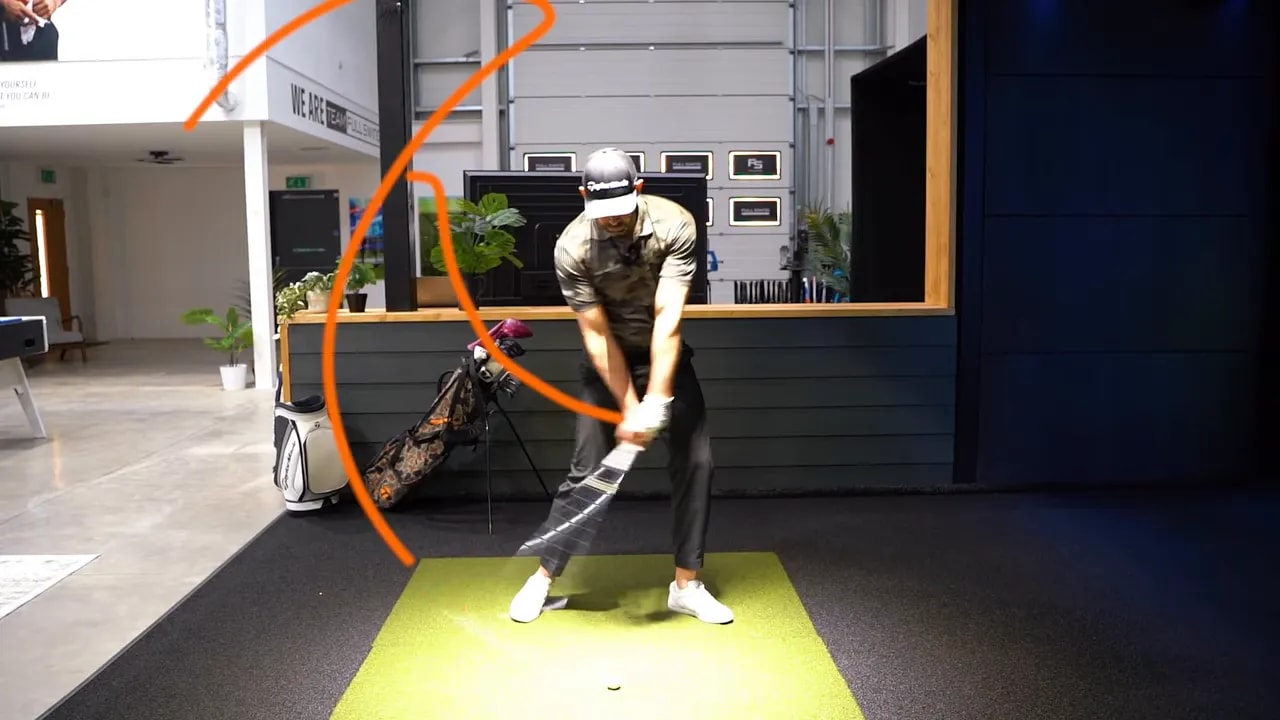
How the float-loading drill works
- Set up just inside a ball with a normal stance and a light grip pressure.
-
Step your lead foot across toward your trail foot so you feel slightly closed in your lower body. This limits
early lateral movement and helps you create the right sequence. -
Start the backswing by moving the grip away from the ball while keeping the clubhead lightly on the ground.
The grip initiates the move while the clubhead lags behind. -
When your hands reach about chest height, step your lead foot back toward the target (or shift your weight
into the target direction). That step starts your downswing sequence. -
As you step into the ball, allow the club to “switch places” with the hands — the clubhead will naturally lag
behind if you have the right grip and a light touch.
The drill emphasizes unloading the wrists during the backswing and loading them during the transition.
The clubhead is allowed to float behind the hands until body sequence naturally causes the club to move into
the impact window with shaft lean and compression.
Coaching cues and feelings
-
Light grip, active grip: hold the club lightly enough that the clubhead can lag behind, but firmly enough to
stay connected. - Grip starts, clubhead follows: begin the backswing by moving the handle; allow the head to lag.
-
Step into the ball in transition: the small step or weight shift toward the target is the trigger that causes the
club to swap positions with the hands. - Do not try to hold the lag. Feel the sequence and let the body deliver the club.
Practiced correctly, the drill produces a lower ball flight, more shaft lean at impact, and a noticeably more
compressed strike. Those changes are measurable: launch angles drop and ball speeds increase because the
club delivers with a downward, powerful strike.
Putting the two steps together in a practice session (golf practice plan)
This 30 to 40 minute session focuses on repeating the right hand position and the float-loading sequence until
it becomes automatic.
- Warm-up (5 minutes): gentle full swings with a wedge, focusing on loose hands and good posture.
-
Grip and wrist set drill (10 minutes): without a ball, practice the grip placement and the horizontal forearm
test. Do 20 repetitions per hand position until it feels consistent. -
Float-loading drill with no ball (10 minutes): step across and back while making half swings to chest height.
Focus on the sequence: grip initiates, head lags, step into the ball motion in transition. -
On-ball practice (10 to 15 minutes): hit 30 to 40 balls using the drill, starting half-swing then progressing to
three-quarter and full swings. Monitor strike quality and ball flight. -
Reflection and on-course transfer (5 minutes): review how the strike improved. On the course, use a reduced
backswing and feel the same sequence.
Keep reps focused on quality rather than quantity. When your strike improves, take note of the feel and reduce
the drill exaggeration as you move to full swings.
Troubleshooting common issues while practicing golf impact
Problem: Still scooping or hitting thin shots
Check your grip placement. If the club is too deep in the palm you will be fighting a mechanical disadvantage.
Revisit the horizontal forearm test and make sure you can rotate the grip to horizontal with the forearm still
steady.
Problem: Clubhead is not lagging despite the drill
Reduce grip pressure and exaggerate the initial grip movement while keeping the clubhead on the ground for the
first few reps. Make the lead-foot step more deliberate at chest-high transition. The timing of the step is the
key that flips the sequence.
Problem: Ball flight is too low after applying the drill
A lower, more penetrating launch typically indicates better compression. If the ball is excessively low, shorten
your backswing or slightly open your body a touch more through impact to increase launch while keeping the
handle forward.
Problem: Tension and loss of rhythm
If you tighten up, go back to slow reps without a ball. Breathe out on the backswing and maintain a light grip.
The sequence must feel smooth; tension kills the floating action that creates lag.
Practice progressions and variations for different clubs
-
Wedges: practice short swings to ingrain the feel of handle forward compression. Wedges clearly show strike
improvements. - Mid-irons: once wedges feel good, make the drill with mid-irons and monitor ball flight and launch.
- Long irons and woods: reduce the exaggeration of the drill. Feel a wider takeaway but a narrower transition.
- Driver: focus on sequencing rather than steepness. The same grip set helps, but the swing arc will be flatter.
The concept is universal across clubs: correct grip placement at address plus a sequencing pattern that lets the
clubhead lag produces better impact and more consistent yardage.
How to measure improvement
- Visual feedback: improved divots, deeper compression, and a lower launch angle when using irons.
-
Numbers: if you track launch angle and ball speed you should see lower launch and higher ball speed for the
same club when impact improves. -
Feel: the clubface should feel more connected, and you should feel a short, aggressive release rather than a
flip or scoop through impact.
FAQ
How long before I see improvement in my golf strike?
practice the float-loading drill. Consolidating the change to full swings on the course typically takes several practice
sessions over a few weeks.
Do I need any special equipment to check wrist angle?
alternative. Watching clubhead position during slow-motion swings or recording practice swings on video is also useful.
Will this make my ball flight too low?
ball position, add a little loft with setup posture, or slightly alter your release without losing the handle-forward impact.
Is the step required for every golfer?
grip. For many amateur golfers, the step provides a clear, repeatable cue to produce the right body action in transition.
How often should I practice these drills during a training week?
swing practice to maintain the feel.
Final checklist before you hit the range (golf checklist)
- Grip placement: grip in the base of the fingers, thumb on top, fingers pointing toward heels.
- Forearm test: can you raise the grip to horizontal while holding the forearm steady?
- Drill setup: light grip pressure, lead foot stepped across, grip starts while head lags.
- Transition cue: step into the ball at chest-high to flip the sequence and allow natural lag.
- Practice smart: focus on quality reps and on the feel of compression rather than forcing a position.
These two changes — the correct wrist set at setup and a consistent float-loading sequence — will transform your
golf strike. They simplify a complex problem into practical, repeatable actions you can train
on the range and take to the course.

0 Comments